
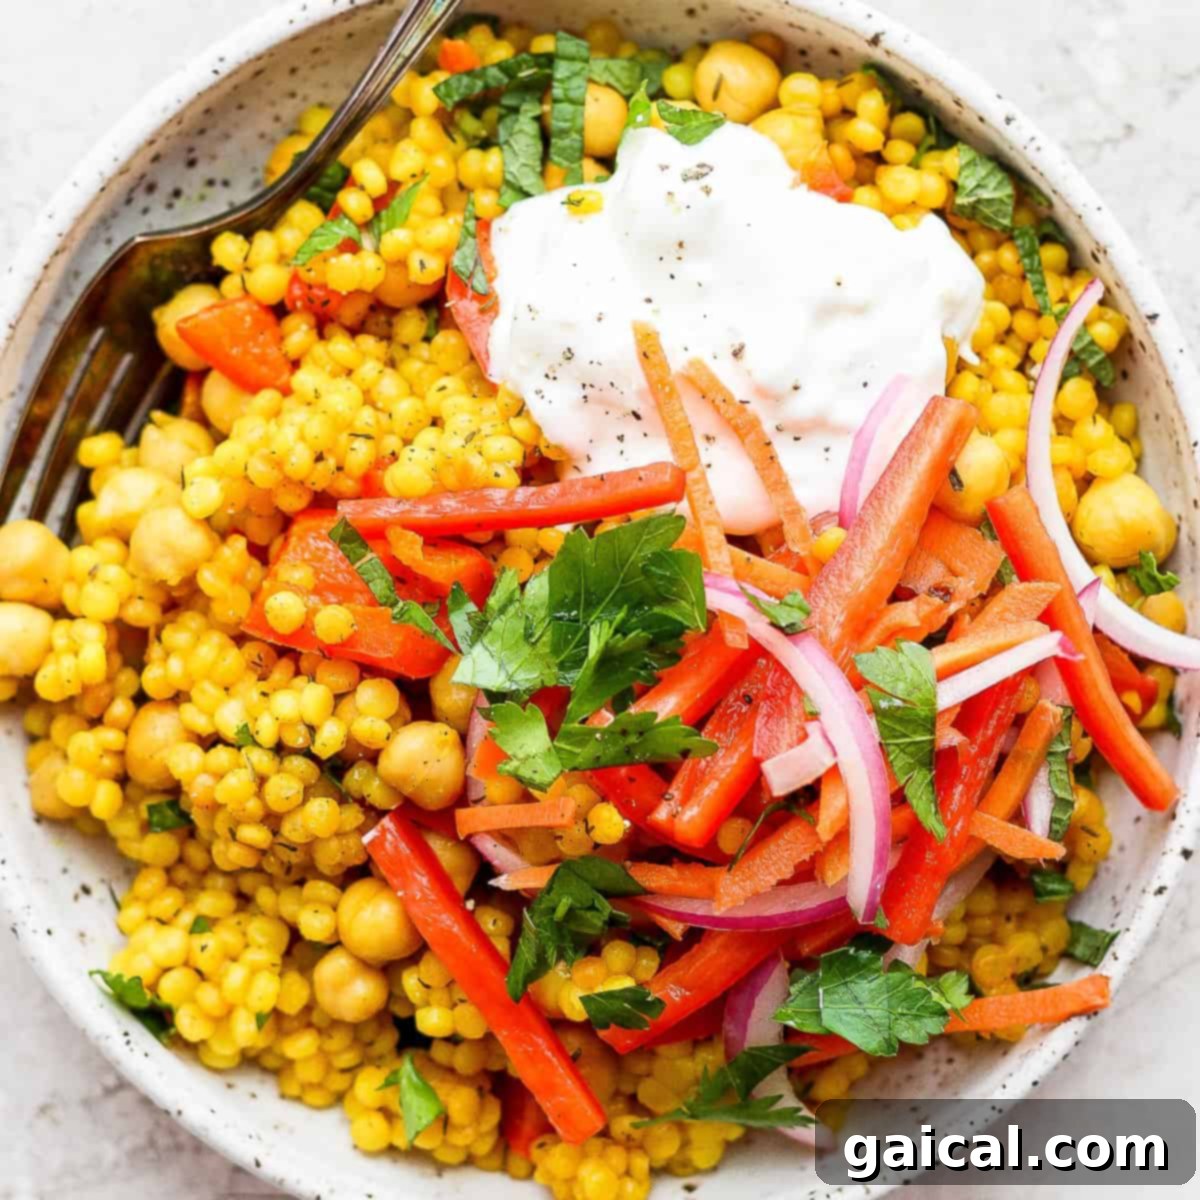
Get ready to add a new favorite to your recipe rotation! This Lemon Garlic Israeli Couscous isn’t just a meal; it’s a vibrant, wholesome experience that comes together effortlessly in a single pot. Bursting with fresh flavors, colorful vegetables, and a delightful creamy whipped feta topping, it’s designed to become a beloved staple in your home.
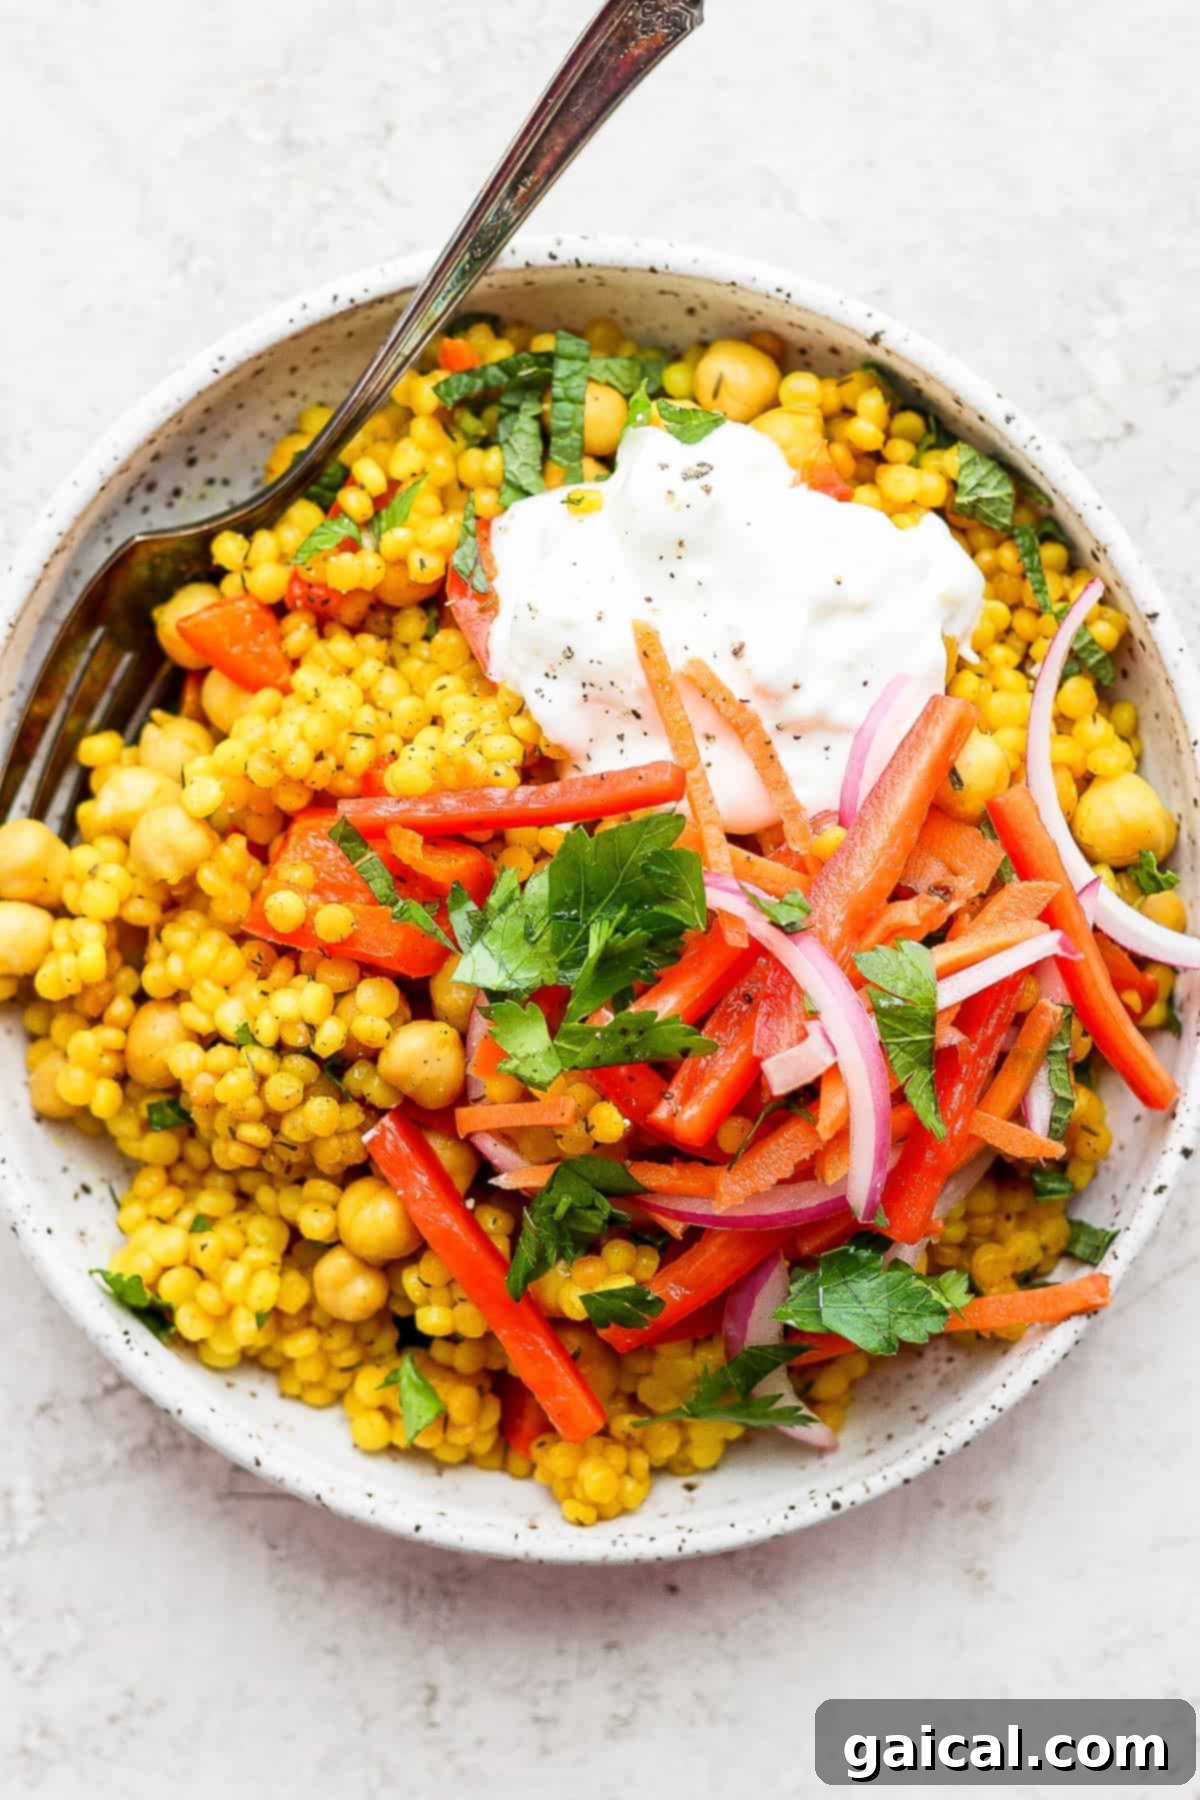
Lemon Garlic Israeli Couscous: A Vibrant, Veggie-Packed One-Pot Delight
Hello, fellow food enthusiasts and veggie lovers! Prepare to be amazed by this Lemon Garlic Israeli Couscous recipe – a dish that perfectly balances health with incredible flavor. If you’re looking for a meal that’s not only delicious but also brimming with goodness, you’ve found it. This isn’t just a side dish; it’s a complete, satisfying meal crafted to delight your taste buds and nourish your body. From the moment you take your first bite, you’ll taste the freshness of lemon, the warmth of garlic, and the rich textures of pearl couscous, all complemented by an array of colorful, nutrient-rich vegetables.
This recipe celebrates the harmony of ingredients, bringing together a rainbow of fresh produce, protein-packed chickpeas, zesty lemon, aromatic garlic, and of course, fluffy Israeli couscous. But what truly elevates this dish is the addition of a luxurious, salty whipped feta sauce, which adds a creamy, tangy dimension that you won’t want to skip. It’s an ideal choice for busy weeknights, offering a gourmet experience with minimal cleanup.
Why You’ll Adore This One-Pot Israeli Couscous Recipe
Effortless One-Pot Cooking: Say goodbye to stacks of dirty dishes! This entire meal comes to life in just one pot, making cleanup a breeze and allowing you more time to savor your culinary creation. It’s the ultimate convenience for a delicious and nutritious dinner, proving that healthy eating doesn’t have to be complicated or time-consuming.
Protein-Packed Powerhouse: Fuel your body with a substantial 9g of protein per serving, primarily from the wholesome chickpeas. This makes the Israeli couscous a truly satisfying meal that keeps you feeling full and energized throughout your day, perfect for a post-workout refuel or a hearty lunch.
Bursting with Vegetables: Craving more greens and vibrant produce? This recipe delivers! It’s loaded with wholesome ingredients like chickpeas, sweet red bell pepper, crisp carrots, pungent red onion, spicy jalapeño, and a generous medley of fresh herbs, ensuring every bite is packed with essential vitamins, minerals, and fiber.
Explosion of Flavor: The combination of perfectly toasted couscous, aromatic spices (turmeric for earthiness, thyme for herbaceous notes, coriander for warmth), bright lemon, sharp garlic, and the unique tang of quick-pickled vegetables creates a truly unforgettable flavor profile. The creamy whipped feta acts as the perfect counterpoint, adding a rich, savory depth that balances the zesty elements.
Customizable & Versatile: This recipe is incredibly adaptable to your preferences and what you have on hand. Feel free to swap out vegetables based on what’s in season or what needs to be used up. Add extra protein like grilled chicken, pan-seared shrimp, or crispy baked tofu for an even heartier meal, or adjust the spice levels to suit your palate.
Quick & Easy Weeknight Solution: With a total preparation and cook time of under an hour, this Lemon Garlic Israeli Couscous is your go-to solution for busy weeknights when you need a wholesome, home-cooked meal without spending hours in the kitchen.
Essential Ingredients for Your Lemon Garlic Israeli Couscous Adventure
Crafting this flavorful Israeli couscous dish is simpler than you might think, thanks to its four distinct yet harmonious components: a bright and zesty quick-pickled veggie mix, the perfectly cooked couscous base infused with rich spices, a smooth and tangy whipped feta dressing, and a final flourish of fresh, chopped herbs. Each element plays a crucial role in building the incredible depth and complexity of this recipe, contributing to a truly memorable meal.
For the Quick Pickled Veggies
These quick-pickled vegetables are a game-changer, adding a delightful crunch and a vibrant tang that cuts through the richness of the couscous and feta. They’re incredibly easy to prepare and elevate the entire dish, providing a refreshing burst of acidity and a textural contrast that you’ll absolutely love.
- Apple Cider Vinegar: This is the essential base for our pickling liquid, providing the necessary acidity that tenderizes the vegetables and infuses them with a sharp, tangy flavor.
- Kosher Salt: Used to balance the flavors in the pickling brine and to help draw out moisture from the vegetables, contributing to their crisp texture.
- Honey: A small amount of honey introduces a touch of natural sweetness, perfectly counteracting the vinegar’s sharpness and creating a well-rounded flavor profile for the pickled mix.
- Red Jalapeño: Adds a beautiful pop of color and a subtle, fresh heat. You can adjust the quantity or remove the seeds for a milder experience, or leave them in for extra spice.
- Red Onion: Offers a distinct sharp, zesty bite that mellows beautifully with the pickling process, becoming slightly sweet and incredibly flavorful.
- Matchstick Carrots: Provides a pleasant sweetness and a satisfying, vibrant crunch. Their thin cut allows them to pickle quickly and absorb the flavors readily.
For the Flavorful Couscous Base
The heart of our dish, this Israeli couscous is cooked to perfection with a blend of warming spices and hearty chickpeas, creating a robust and satisfying foundation that is both nourishing and incredibly tasty. The process of toasting the couscous before simmering is key to developing its rich, nutty character.
- Ground Turmeric: This golden spice not only imparts a beautiful, inviting yellow hue to the couscous but also adds a subtle, earthy, and warm flavor that is characteristic of many Mediterranean dishes.
- Dried Thyme: Contributes lovely herbaceous and slightly floral notes, complementing the savory elements and enhancing the overall aroma of the dish.
- Salt: Absolutely essential for seasoning the couscous and ensuring every pearl is bursting with flavor. It brings out the natural taste of all the ingredients.
- Ground Coriander: Delivers a warm, citrusy, and slightly sweet undertone that pairs wonderfully with the lemon and other spices, adding complexity to the flavor profile.
- Olive Oil: Used to toast the Israeli couscous, a crucial step that enhances its natural nutty flavor and gives it a desirable texture before simmering.
- Israeli Couscous (Pearl Couscous): The star of the show! These larger, pearl-shaped pasta grains have a satisfying chew and a remarkable ability to absorb all the wonderful flavors from the broth and spices.
- Canned Chickpeas: A fantastic source of plant-based protein and fiber, chickpeas add a delightful creaminess and heartiness to the dish. Remember to drain and rinse them thoroughly before adding.
- Red Bell Pepper: Contributes a burst of natural sweetness, vibrant color, and a pleasant, tender-crisp texture to the cooked couscous mixture.
- Fresh Lemon Juice: This is where the “lemon” in Lemon Garlic Israeli Couscous comes from! It brightens the entire dish with its zesty acidity, adding a refreshing tang that cuts through the richness.
- Broth (Any Kind Will Work!): Whether you opt for chicken broth, vegetable broth, or even a light beef broth, this liquid is vital for cooking the couscous and infusing it with deep, savory flavor.
For the Creamy Whipped Feta Topping
Do not underestimate the power of this simple yet incredibly flavorful topping! The whipped feta adds a creamy, salty, and tangy element that truly ties the entire dish together. It’s a quick four-ingredient wonder that you won’t want to skip, as it provides a perfect contrast to the warm couscous and pickled vegetables.
- Plain Greek Yogurt: Provides the creamy, luscious base for our topping, adding a subtle tang and a wonderfully light texture without being too heavy.
- Feta Cheese Crumbles: The star ingredient, offering its distinctive salty, briny, and tangy flavor. Its crumbly texture will smooth out beautifully when whipped with the yogurt.
- Garlic: A single grated clove adds a punch of savory aroma and a subtle sharpness that enhances the overall flavor profile of the topping.
- Lemon Zest: Enhances the citrus notes present in the main dish and provides a fresh, aromatic lift to the creamy feta, making it even more vibrant.
For the Fresh Garnish
A simple sprinkle of fresh herbs at the end brightens the flavors and adds a professional, appealing touch to your plate. They provide a final burst of freshness, aroma, and color, making the dish visually appealing and even more delicious.
- Chopped Fresh Parsley: For a clean, herbaceous finish and a vibrant green color that contrasts beautifully with the golden couscous.
- Chopped Fresh Mint: Adds a refreshing, cooling element that pairs exceptionally well with the lemon, garlic, and feta, elevating the overall taste experience.
All About Israeli Couscous: Your Guide to Pearl Pasta
If you’re new to Israeli couscous, there’s no need to feel intimidated! This delightful ingredient is incredibly versatile and easy to cook. Often referred to as pearl couscous, it’s a staple in many Mediterranean and Middle Eastern kitchens, known for its unique texture and remarkable ability to absorb flavors beautifully. Let’s delve into some common questions and fascinating facts about this “grain-like” pasta, helping you understand why it’s such a fantastic choice for this recipe and many others.
What is Couscous, and How Does Israeli Couscous Differ?
Traditional couscous, widely recognized in North African cuisine, is a small, granular pasta typically made from steamed and dried semolina (durum wheat). It’s very fine and light, much smaller than a grain of rice, and often prepared by steaming it over a stew or broth to absorb moisture and flavor. Israeli couscous, on the other hand, also known as pearl couscous (and “ptitim” in Hebrew), is quite different both in appearance and texture. It consists of much larger, spherical pasta grains, roughly the size of a peppercorn. These pearls are also made from semolina wheat, but they are typically toasted during their production, which gives them a slightly nutty flavor and a chewier, more substantial texture compared to their smaller counterpart. This makes pearl couscous an excellent choice for heartier dishes, robust salads, and as a satisfying base that can stand up to powerful flavors, much like a traditional pasta would.
Is Couscous a Grain or a Pasta?
Despite its appearance, which often leads people to mistake it for a grain or a cereal, couscous – both traditional and Israeli varieties – is technically a type of pasta. It is crafted from semolina flour (granulated durum wheat) and water, much like many other familiar pasta shapes. This classification is important because it influences how you cook it and how it behaves in recipes. Its remarkable ability to absorb liquids and flavors, along with its satisfying al dente chew, are all characteristic properties of pasta, rather than whole grains like quinoa or rice.
Why Choose Israeli Couscous for This Recipe?
Israeli couscous is the perfect foundation for this lemon garlic dish for several reasons. Its larger, pearl-like shape and slightly chewy texture provide a wonderful mouthfeel, making the meal much more substantial and satisfying. When toasted, as we do in this recipe, it develops a deeper, nuttier flavor that truly enhances the overall profile of the dish, creating a fantastic base for the vibrant vegetables, tangy pickled elements, and creamy feta. It holds up well to mixing and simmering, ensuring a delightful texture in every bite.
Where Can I Find Israeli Couscous?
Israeli couscous has gained significant popularity worldwide and is generally easy to find in most major grocery stores. Look for it in the pasta aisle, often shelved alongside other grains like rice and quinoa, or in the international foods section. It is commonly available in white semolina, whole wheat, or even tri-color varieties, all of which would work wonderfully in this recipe, offering slightly different nutritional benefits or visual appeal.
Smart Substitutions and Creative Variations for Israeli Couscous
Life happens, and sometimes you don’t have exactly what a recipe calls for, or you simply want to experiment! Don’t let a missing ingredient deter you from trying this delicious meal. Israeli couscous is wonderfully versatile, and there are several excellent substitutes you can use, each bringing its own unique twist to the dish. Plus, exploring creative variations can keep your meals exciting, fresh, and perfectly tailored to your dietary needs or preferences!
Top Substitutions for Israeli Couscous:
- Smaller Couscous: If you only have traditional, smaller couscous (Moroccan or fine couscous) on hand, it will certainly work! Just be mindful that it cooks much faster and will yield a lighter, fluffier texture. Adjust cooking time accordingly, likely reducing it by half or more, and use a little less liquid.
- Orzo Pasta: This small, rice-shaped pasta is an excellent and readily available substitute for Israeli couscous. It has a similar chewy texture and size, and will absorb flavors just as beautifully. The cooking method and liquid ratios will remain very similar to those for Israeli couscous.
- Quinoa: For a gluten-free and higher-protein alternative, quinoa is a fantastic choice. It will give the dish a slightly different, earthier texture and a distinct bite but will still absorb the delicious lemon-garlic flavors from the broth. Ensure to rinse quinoa thoroughly before cooking to remove any bitter saponins.
- Rice (Arborio or Basmati): While rice will offer a noticeably different texture, a medium-grain rice like Arborio (often used for risotto) can be used for a creamier, starchier consistency, or Basmati (for a lighter, more separate grain) can provide a good base. Adjust cooking liquid and time significantly, as rice varieties differ greatly from couscous.
- Farro or Wheat Berries: For an even chewier, heartier grain-like texture, cooked farro or wheat berries can be used as a wholesome substitute. These will require pre-cooking separately before being added to the sauce and vegetables, as their cooking times are much longer than couscous.
Creative Variations to Try:
This recipe is a canvas for your culinary creativity! Feel free to customize it with other vegetables, different protein sources, or adjust the flavor profile to make it uniquely yours:
- Add More Veggies: Enhance the nutritional value and color by stirring in fresh spinach or kale at the very end, allowing it to wilt from the residual heat. Roasted zucchini, cherry tomatoes (added in the last few minutes of simmering), sautéed mushrooms, or blanched asparagus spears would also be wonderful additions.
- Boost Protein: For an even more protein-rich meal, consider incorporating grilled chicken breast, pan-seared shrimp, flaky baked salmon, or crumbled cooked tofu directly into the couscous mixture after it’s cooked, or serving it alongside.
- Spice It Up: For those who love a bit of heat, add a pinch of red pepper flakes along with the other spices during the toasting stage, or use a spicier chili like serrano in your pickled veggies for an extra kick.
- Herb Swaps: Experiment with different fresh herbs to alter the aromatic profile. Fresh dill offers a distinct Mediterranean flavor, while fresh oregano or marjoram can add a more rustic, earthy note.
- Citrus Twist: While lemon is classic, try lime juice instead for a distinct, slightly brighter zing, or add a touch of orange zest to the couscous mixture for a sweeter, more aromatic undertone.
- Nutty Crunch: Toasted pine nuts or slivered almonds can add a lovely textural contrast and a rich, nutty flavor to the finished dish when sprinkled on top just before serving.
- Cheesy Additions: Beyond feta, a sprinkle of grated Parmesan or crumbled goat cheese can add another layer of savory richness.
Mastering Your One-Pot Lemon Garlic Israeli Couscous: Step-by-Step
Creating this delicious and healthy meal is a straightforward process, designed for efficiency and maximum flavor. With a few simple steps, you’ll have a delightful, veggie-packed Israeli couscous dish on your table in under an hour, perfect for a satisfying weeknight dinner or a flavorful meal prep option.
Step 1: Prepare the Quick Pickled Vegetables for Tangy Perfection
Begin by preparing your vibrant pickled vegetables. In a clean mason jar or a small mixing bowl, combine the apple cider vinegar, kosher salt, and honey. Secure the lid on the jar (or whisk if using a bowl) and shake vigorously until the honey is fully dissolved into the liquid. This ensures a uniform pickling brine. Once dissolved, remove the lid and add the sliced red jalapeño (removing seeds if you prefer less heat), thinly sliced red onion, and matchstick carrots. Make sure the vegetables are submerged in the pickling liquid. Place the jar in the refrigerator to allow the flavors to meld and the vegetables to lightly pickle while you prepare the rest of the meal. The longer they sit, the more pronounced their tangy flavor will become, typically at least 15-20 minutes is ideal.
Step 2: Craft Your Aromatic Spice Blend for the Couscous
In a small, separate bowl, combine the ground turmeric, dried thyme, a half teaspoon of salt, and ground coriander. Use a fork or a small whisk to mix these spices thoroughly. This pre-mixed blend is crucial as it ensures that your Israeli couscous will be evenly seasoned and infused with a rich, aromatic profile from the very beginning of the cooking process. Set this fragrant spice mixture aside; it will be added to toast with the couscous in the next step.
Step 3: Toast the Israeli Couscous to Unlock Nutty Flavors
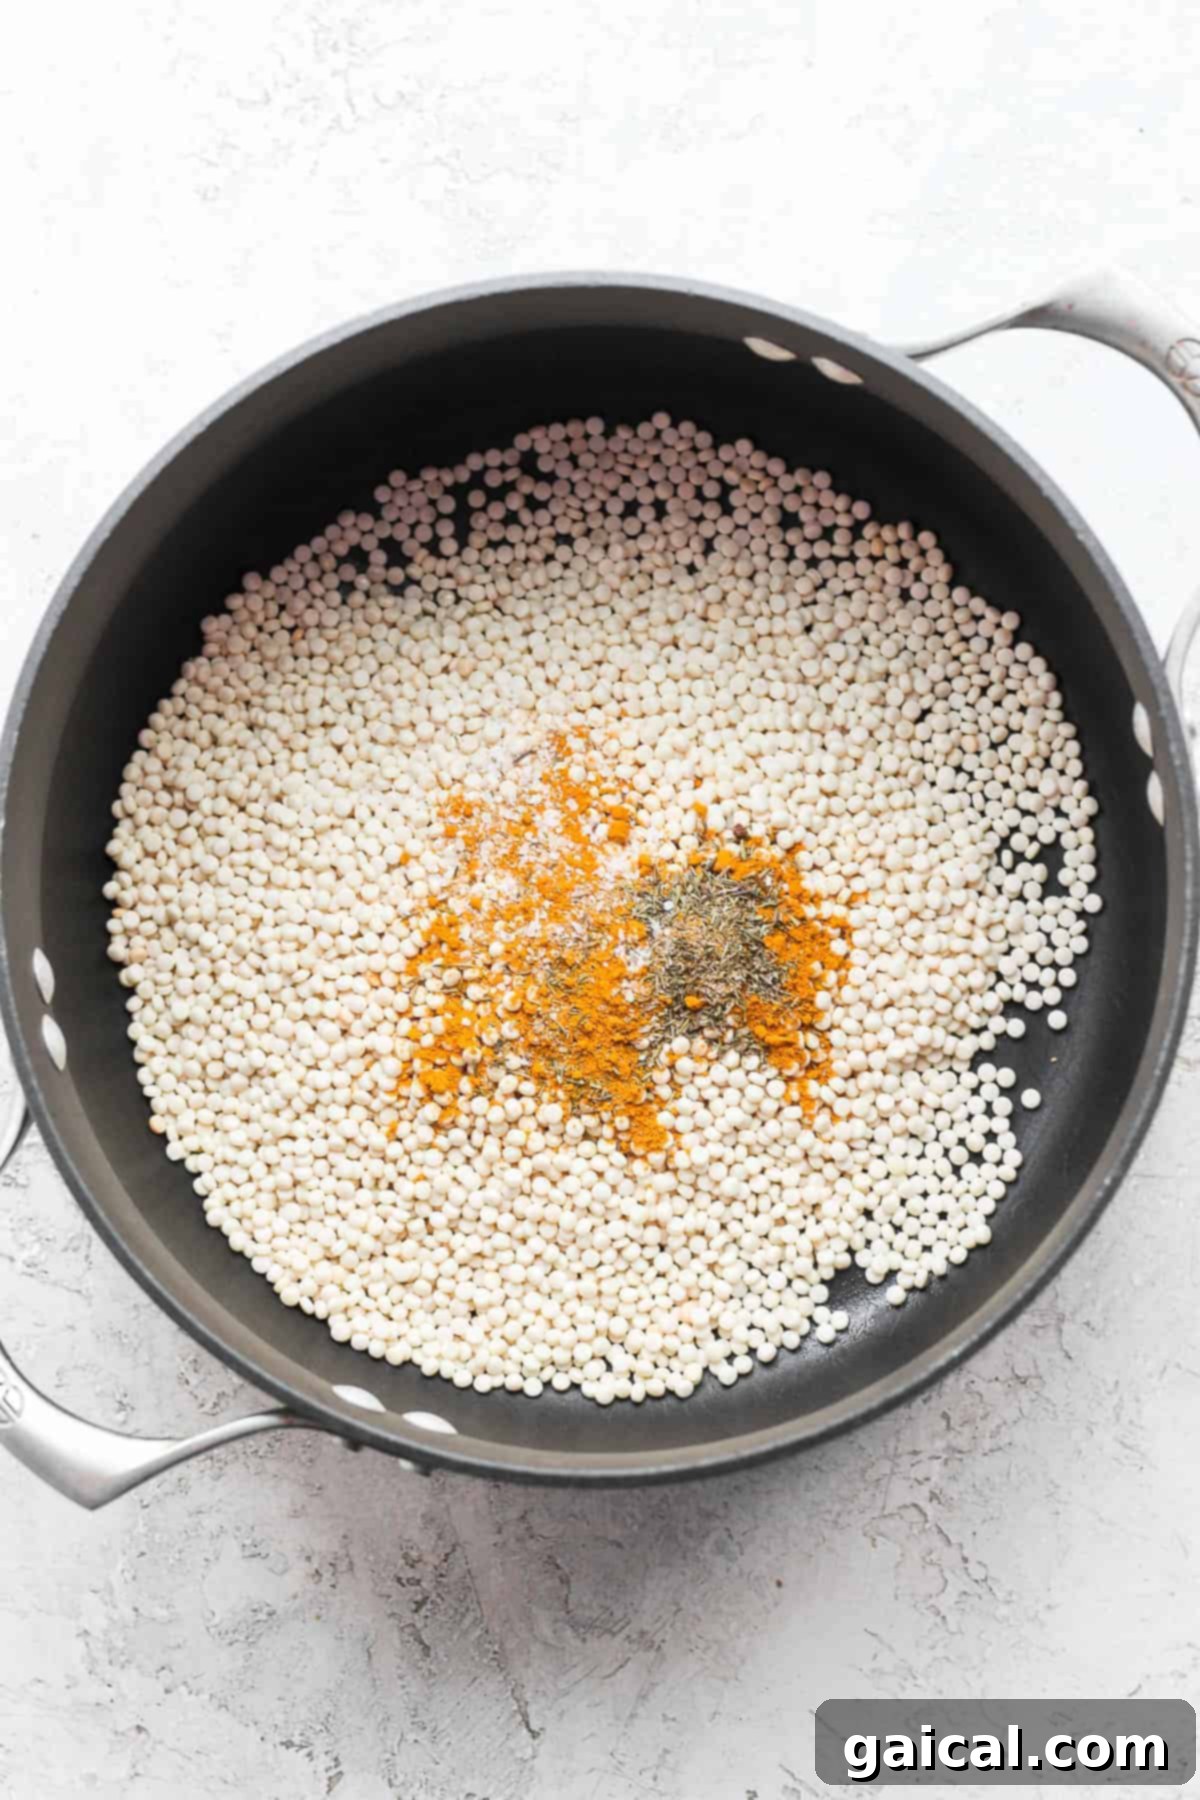
Heat a large Dutch oven or a heavy-bottomed pot over medium-high heat. Add one tablespoon of olive oil. Once the olive oil is shimmering and slightly fragrant (you might see faint wisps of smoke), add the uncooked Israeli couscous to the pot. Stir continuously with a wooden spoon or spatula for 2-3 minutes, allowing the couscous pearls to lightly toast. This crucial step deepens the flavor of the couscous, giving it a delightful nutty undertone and a more complex taste. Immediately sprinkle your prepared spice blend over the toasting couscous, stirring well to ensure every pearl is coated with the fragrant spices. Continue toasting for another minute, being careful not to burn the spices.
Step 4: Add Remaining Ingredients and Let Simmer to Perfection
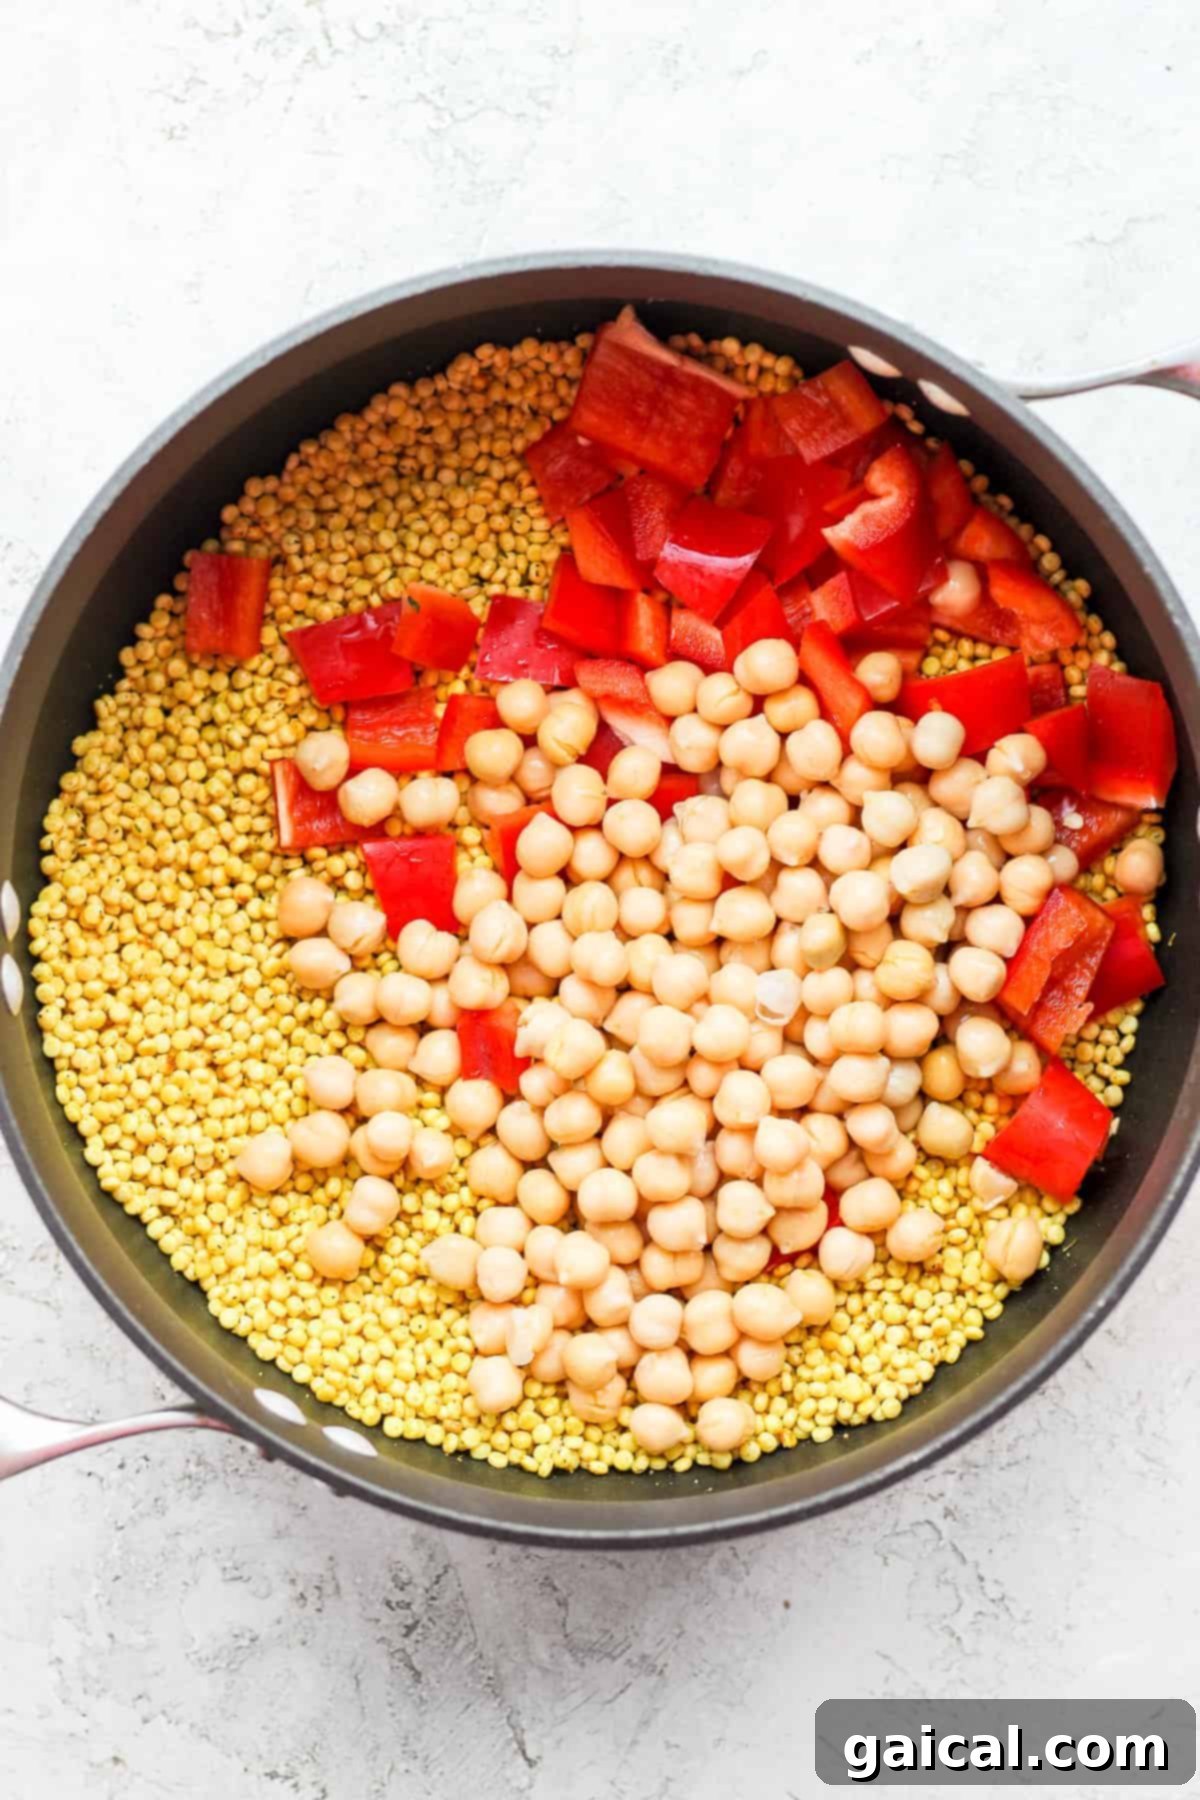
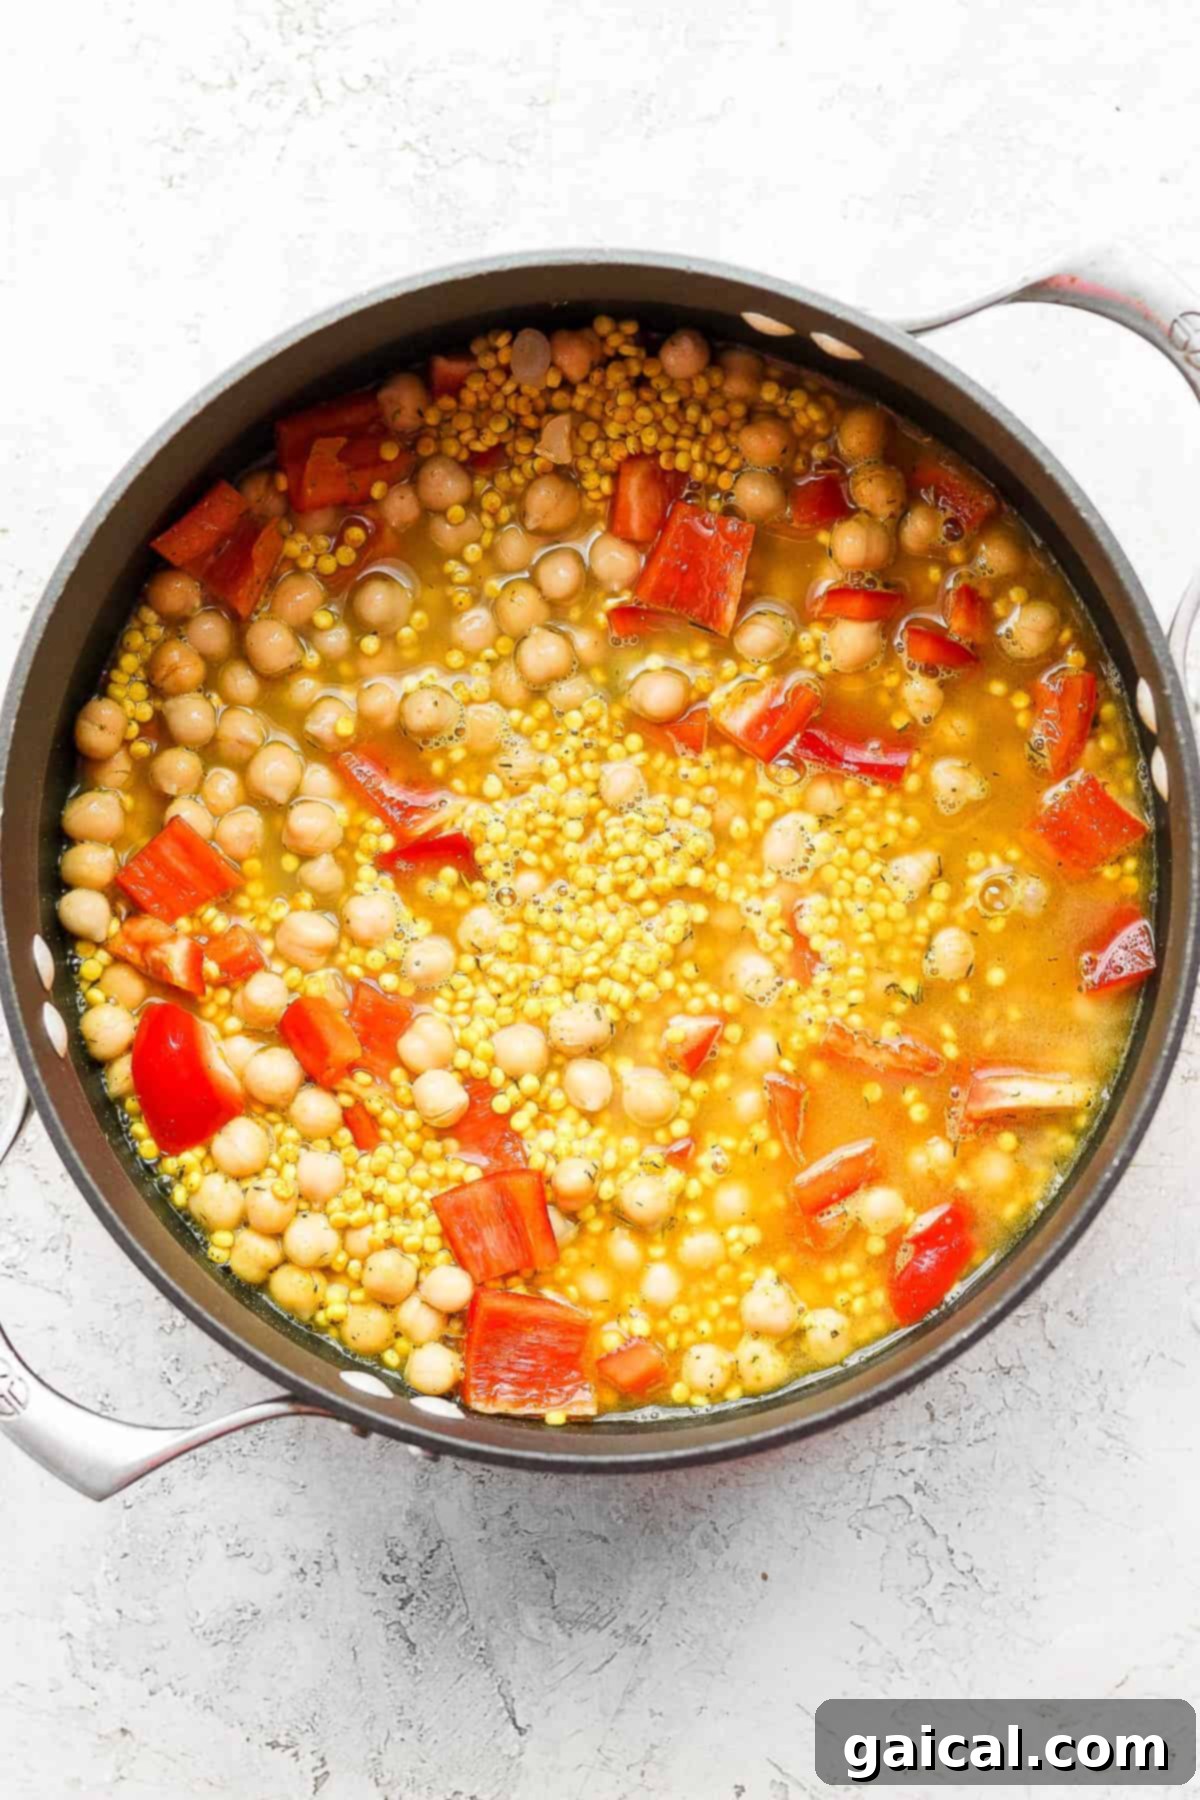
To the toasted couscous and spices in the Dutch oven, add the drained and rinsed chickpeas along with the chopped red bell pepper chunks. Stir everything together to combine the ingredients evenly. Next, pour in the fresh lemon juice and one and a quarter cups of your chosen broth (chicken or vegetable). Stir gently once more, ensuring all ingredients are well-distributed and the couscous is submerged. Bring the mixture to a rolling boil over medium-high heat. Once boiling, reduce the heat to low, cover the Dutch oven tightly with its lid, and let the mixture simmer undisturbed for 12-14 minutes. During this time, the Israeli couscous will absorb all the flavorful liquid, becoming plump, tender, and perfectly cooked.
Step 5: Whip Up the Creamy Feta Topping
While the couscous is simmering, prepare your irresistible whipped feta topping. In a medium bowl, combine the half cup of plain Greek yogurt, a quarter cup of feta cheese crumbles, one finely grated clove of garlic (using a microplane for the best results), and one teaspoon of fresh lemon zest. Use a fork or a small whisk to thoroughly mix these ingredients until well combined and relatively smooth. If you prefer an even creamier, fluffier consistency, you can use a hand mixer or a food processor for a minute or two, scraping down the sides as needed. Set aside until ready to serve, allowing the flavors to meld.
Step 6: Fluff, Garnish, Serve & Enjoy Your Culinary Creation
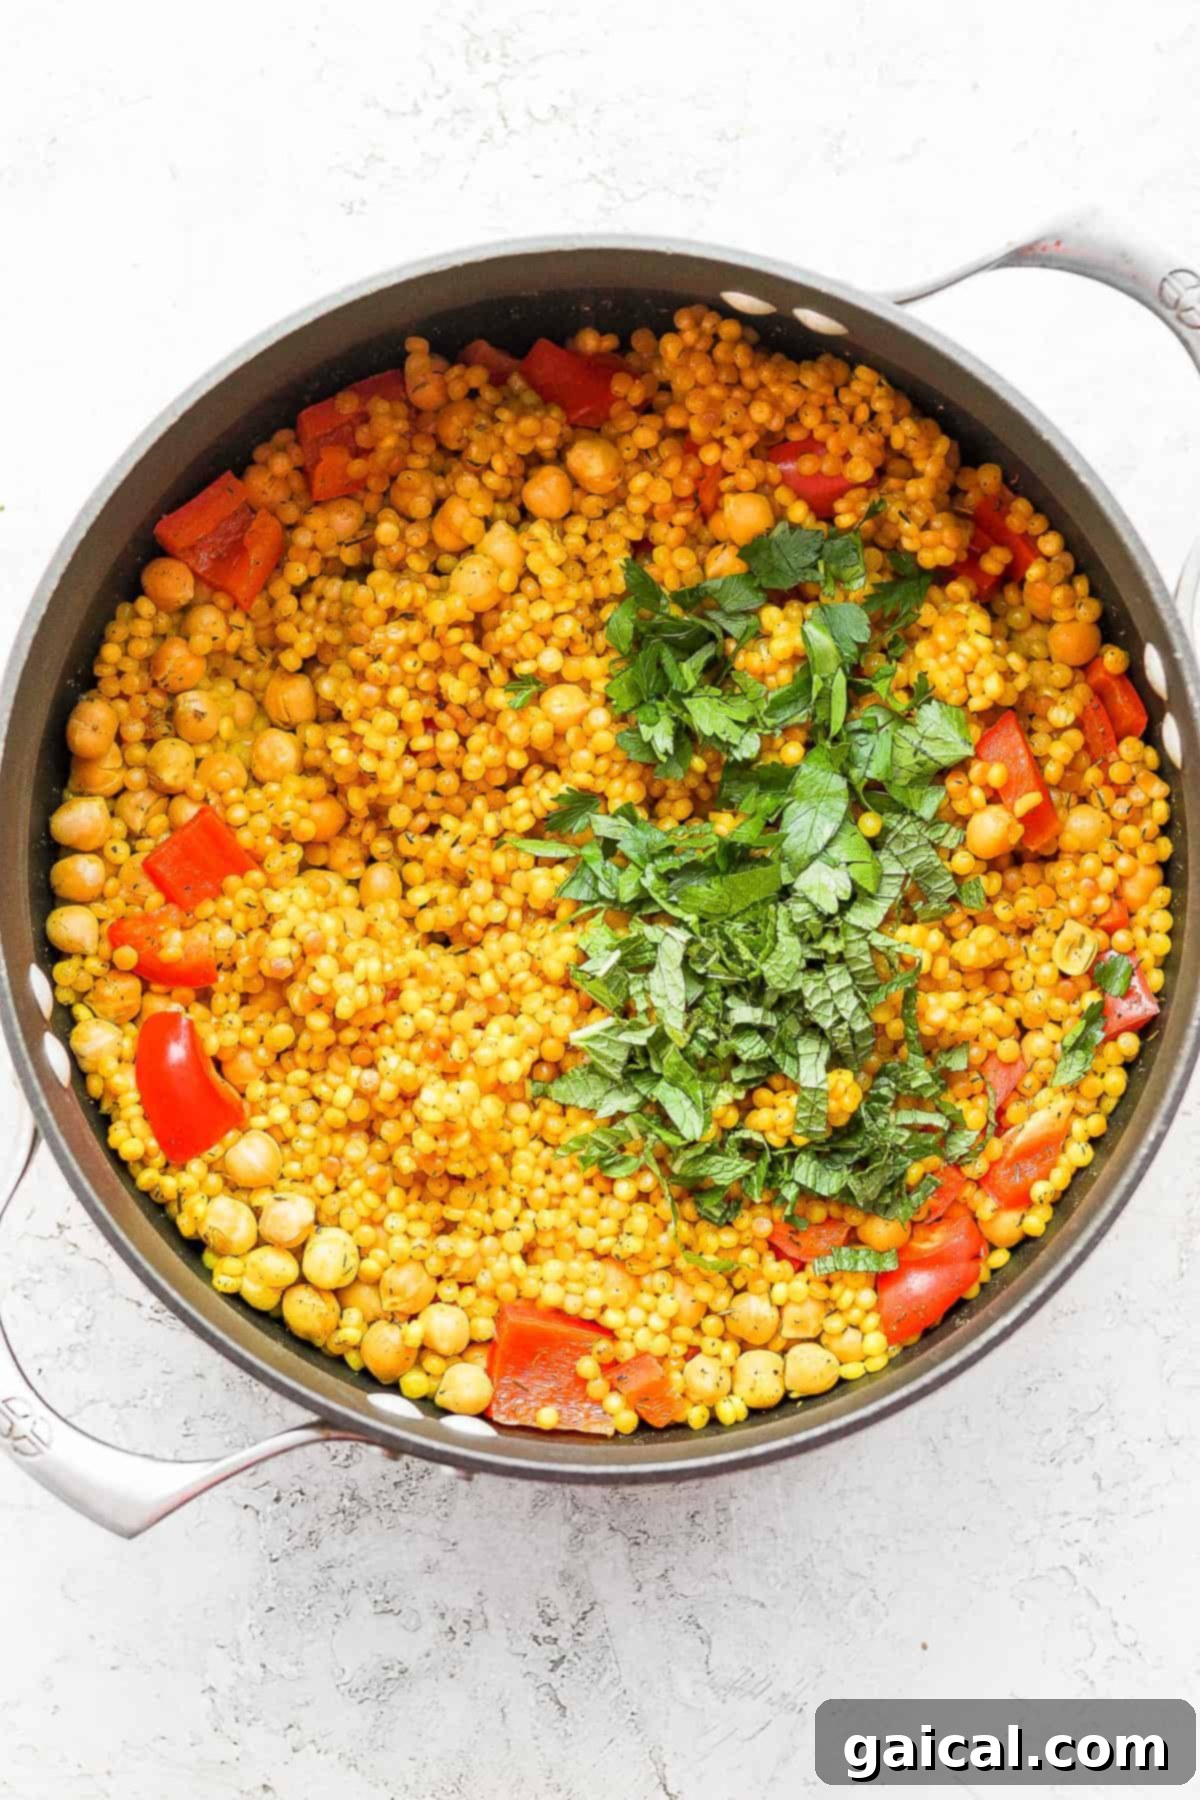
Once the simmering time for the couscous is complete, carefully remove the Dutch oven from the heat. Lift the lid, and with a fork, gently fluff the cooked couscous. You should find that all the liquid has been absorbed, and the pearls are perfectly tender and separated. Stir in the freshly chopped parsley and mint, mixing them gently throughout the couscous to distribute their vibrant freshness and appealing aroma. To serve, spoon generous portions of the warm Lemon Garlic Israeli Couscous into individual bowls. Top each serving with a dollop of the creamy whipped feta sauce and a spoonful of the tangy, quick-pickled vegetables you prepared earlier. Garnish with a little extra fresh mint or parsley if desired for an extra touch of beauty and freshness. Serve immediately and savor the incredible layers of flavor!
Storage and Meal Prep Tips
This Lemon Garlic Israeli Couscous is not just a delicious dinner; it’s also fantastic for meal prep, making healthy eating convenient and enjoyable throughout your busy week. To ensure maximum freshness and flavor, proper storage is key, helping you savor every bite even days after cooking.
Store the main couscous dish in an airtight container in the refrigerator for up to 3-5 days. It reheats beautifully and makes for a perfect grab-and-go lunch or a quick dinner on subsequent days. For the best experience and to maintain their distinct textures and vibrant flavors, we highly recommend storing the quick-pickled vegetables and the whipped feta sauce separately in their own airtight containers. This prevents the feta from becoming too watery or dense, and ensures the pickled veggies retain their satisfying crunch and tangy zing.
When you’re ready to enjoy a serving, simply reheat the couscous gently on the stovetop over low heat with a splash of water or broth, or in the microwave until warmed through. Then, add a fresh spoonful of the chilled whipped feta and a portion of the tangy pickled vegetables on top. This method ensures that each component retains its optimal texture and taste, providing a fresh-tasting and incredibly satisfying meal every single time, making your meal prep efforts truly rewarding.
Discover More of Our Favorite Couscous Creations:
Explore Delicious Couscous Recipes
- Moroccan Chickpea Couscous: Dive into the rich, aromatic spices and hearty chickpeas of this North African-inspired couscous dish, perfect for a comforting and flavorful meal.
- Mediterranean Couscous Salad: A refreshing and vibrant salad bursting with fresh ingredients like cucumbers, tomatoes, and herbs, all tossed in a zesty lemon-herb dressing. Ideal for picnics or light lunches.
- Southwestern Black Bean Couscous Salad: Experience a delicious fusion of Southwestern spices, wholesome black beans, corn, and bell peppers in this lively and satisfying couscous salad.
Lemon Garlic Israeli Couscous with Whipped Feta
Print Recipe
Ingredients
Pickled Veggies
- ½ cup apple cider vinegar
- 1 teaspoon kosher salt
- 1 teaspoon honey
- 1 red jalapeno, seeded and sliced
- ¼ medium red onion, sliced
- ¼ cup matchstick carrots
Couscous
- 1 teaspoon ground turmeric
- 1 teaspoon dried thyme
- ½ teaspoon salt
- ¼ teaspoon ground coriander
- 1 tablespoon olive oil
- 1 ¾ cup uncooked Israeli couscous
- 1 15- oz. can chickpeas, drained and rinsed
- 1 large red bell pepper, chopped into ½ inch chunks
- ¼ cup fresh lemon juice
- 1 ¼ cup broth, any kind (we used chicken broth)
Feta Yogurt Sauce
- ½ cup plain Greek yogurt
- ¼ cup feta cheese crumbles
- 1 clove garlic, grated
- 1 teaspoon lemon zest
Garnish
- 2 tablespoons chopped parsley
- 2 tablespoons chopped mint
Instructions
-
Prepare the pickled vegetables. Add the apple cider vinegar, salt, and honey to a mason jar. Cover the mason jar and shake the ingredients until the honey is dissolved.
-
Open the jar and add the sliced jalapeno, red onion, and matchstick carrots. Ensure the vegetables are fully covered by the apple cider vinegar mixture. Place the jar in the refrigerator to pickle while you continue with the recipe.
-
Prepare the spice mix for the couscous. In a small bowl, combine the ground turmeric, dried thyme, salt, and ground coriander. Mix thoroughly and set aside.
-
Toast the Israeli couscous. Heat a large Dutch oven over medium-high heat. Add olive oil.
-
Once the olive oil is fragrant, add the Israeli couscous to the Dutch oven and stir. Sprinkle the prepared spice mix over the couscous. Stir continuously and toast for 2-3 minutes until lightly golden and aromatic.
-
Add the drained and rinsed chickpeas and the red bell pepper chunks to the Dutch oven. Mix everything together gently.
-
Finally, add the fresh lemon juice and broth to the Dutch oven. Stir the ingredients together and bring the mixture to a boil.
-
Let simmer. Reduce the heat to low, cover the Dutch oven tightly, and let the mixture simmer for 12-14 minutes. The couscous will absorb the liquid and become tender during this time.
-
Meanwhile, prepare the whipped feta. In a separate bowl, add the Greek yogurt, feta crumbles, grated garlic, and lemon zest. Mix well until combined and creamy.
-
Once the couscous has finished simmering, uncover the Dutch oven and fluff the couscous gently with a fork. Ensure all the liquid has been absorbed.
-
Remove the Dutch oven from the heat. Add the fresh chopped parsley and mint to the pot and mix them into the couscous.
-
Serve the warm Israeli couscous topped with generous dollops of the whipped feta sauce and a spoonful of the tangy pickled vegetables. Enjoy!
Nutrition Information
Calories: 192 kcal
,
Carbohydrates: 27 g
,
Protein: 9 g
,
Fat: 6 g
,
Fiber: 4 g
,
Sugar: 6 g
Nutrition information is an estimate calculated automatically and should be used as an approximation only. Actual values may vary.
Love this recipe? Leave a comment below!
We’d love to see your creations! Don’t forget to tag your posts on social media with the hashtag #fitfoodiefinds.