
Mastering Homemade Date-Sweetened Almond Milk: A Comprehensive Guide
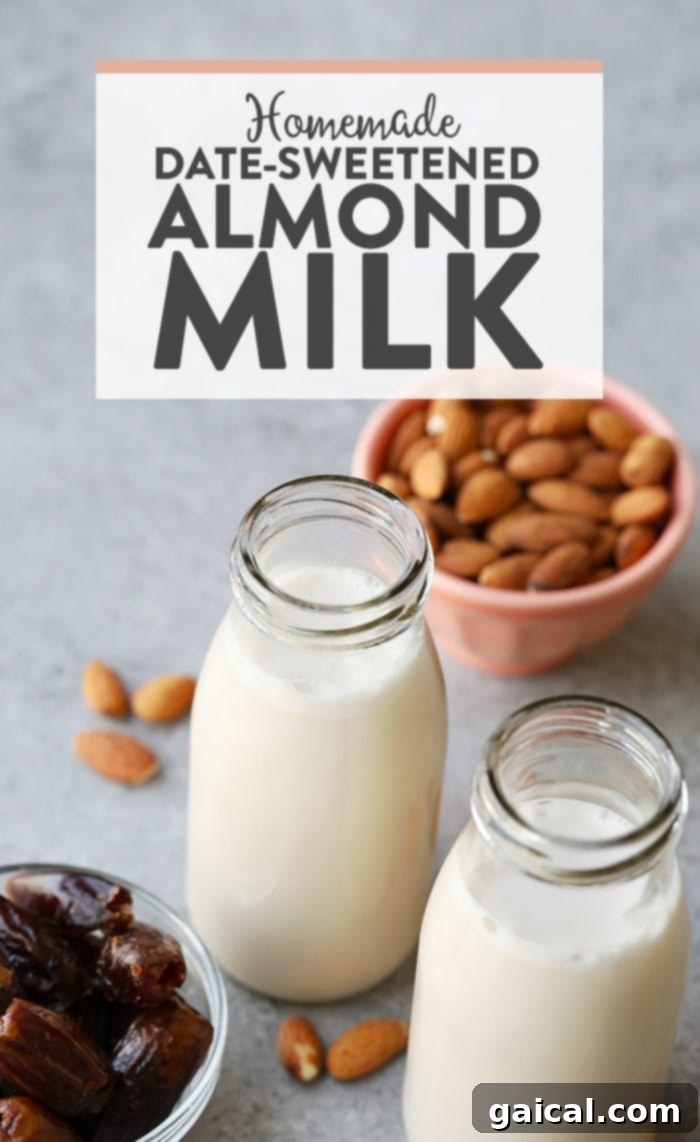
Making your own delicious, creamy almond milk at home is not just surprisingly simple; it’s a rewarding culinary experience that offers unparalleled freshness and control over ingredients. Forget store-bought alternatives laden with stabilizers and added sugars! This ultimate guide will walk you through crafting the finest date-sweetened almond milk – a vegan, gluten-free, and paleo-friendly delight that’s perfect for any lifestyle. Prepare to elevate your daily coffee, smoothies, and cereals with this pure, wholesome beverage.
Our journey to perfecting this recipe began with a memorable vanilla almond milk latte from a charming coffee shop in Minneapolis, Penny’s. Their unique, naturally sweetened almond milk left such an impression that when the café sadly closed its doors, we were determined to recreate that magic in our own kitchen. The result? This incredibly smooth, subtly sweet, and wonderfully aromatic almond milk recipe that we are thrilled to share with you, bringing that coffee shop quality right to your home.
Featured Comment
“The single best recipe for almond milk I’ve ever tried. Bravo and thank you!” – Annie
Why Make Your Own Almond Milk? The Abundant Benefits!
You might be wondering, “Why bother making almond milk when I can just pick up a carton at the store?” The answer lies in freshness, purity, and superior taste. Store-bought almond milk often contains gums, emulsifiers, and preservatives like carrageenan, guar gum, or unnecessary oils that can alter texture and even affect digestion for some individuals. By making your own, you gain complete control over ingredients, ensuring a product that is truly:
- Pure & Additive-Free: Say goodbye to artificial thickeners and questionable ingredients. You’re in charge, using only whole, natural components.
- Customizable to Your Taste: Adjust sweetness, vanilla intensity, or even add other flavors to suit your exact preference. Whether you like it subtly sweet or completely unsweetened, the choice is yours.
- Unrivaled Fresh Taste: The difference in taste and texture between homemade and store-bought is truly remarkable. Homemade almond milk boasts a richer, creamier texture and a much more pronounced, natural almond flavor that simply can’t be replicated by mass-produced versions.
- Naturally Dietary Friendly: This recipe is inherently vegan, gluten-free, dairy-free, and paleo-compliant, making it an excellent choice for a wide range of dietary needs, sensitivities, and healthy lifestyles.
- More Economical Over Time: While the initial cost of raw almonds might seem higher, in the long run, making your own can be more cost-effective, especially if you consume almond milk regularly.
A Quick Overview of the Homemade Almond Milk Process: The beauty of homemade almond milk lies in its straightforward simplicity. It involves just three core steps, making it an accessible project for any home cook:
- Soaking: Raw almonds are softened in water, typically overnight. This step is crucial as it makes the almonds easier to blend into a smooth consistency and enhances nutrient absorption.
- Blending: Soaked almonds are combined with fresh filtered water and your chosen flavorings (like sweet Medjool dates and aromatic vanilla bean) in a high-speed blender until creamy and thoroughly pulverized.
- Straining: The blended mixture is then strained through a fine-mesh nut milk bag, effectively separating the smooth, pure liquid milk from the residual almond pulp.
The general almond-to-water ratio we recommend for a rich, creamy milk is 1 part almonds to 2 parts water. For instance, if you use 3 cups of almonds, you’ll need 6 cups of water for blending.
Essential Ingredients for Your Homemade Almond Milk
Crafting the perfect batch of date-sweetened almond milk requires only a handful of high-quality, readily available ingredients. Each component plays a crucial role in achieving that desirable creamy texture and delightful flavor profile:
- Raw Almonds: We highly recommend using raw, unroasted, and unsalted almonds. Their mild, neutral flavor provides the perfect canvas for your almond milk, allowing the natural sweetness of dates and the rich aroma of vanilla to shine through without any interference from roasting oils or strong savory notes. For the best quality and flavor, seek out organic and unpasteurized almonds if possible.
- Medjool Dates: These are our star natural sweetener! Medjool dates are celebrated for their soft, chewy texture, large size, and deep, caramel-like sweetness. They blend beautifully into the milk, imparting a subtle, natural sweetness without the need for refined sugars or artificial sweeteners. It’s important to ensure your dates are fresh and soft; if they feel a bit dry, you can soak them in warm water for 10-15 minutes prior to blending to ensure they incorporate smoothly. Always remember to remove the pits before adding them to your blender!
- Vanilla Bean Paste or Extract: This ingredient is truly the “cherry on top” for our almond milk, adding a warm, aromatic depth that elevates the flavor from merely good to absolutely extraordinary. If you have a fresh vanilla bean, scraping out the paste will yield the most intense and complex flavor. Otherwise, a good quality pure vanilla extract will work wonderfully. Start with the recommended amount and feel free to adjust to your personal taste preference.
- A Pinch of Sea Salt: Never underestimate the power of a tiny pinch of salt in sweet recipes! It acts as a natural flavor enhancer, bringing out the inherent sweetness of the dates and the subtle nuttiness of the almonds, creating a more balanced, rounded, and nuanced taste profile that’s truly irresistible.
- Filtered Water: Since water constitutes the majority of your homemade almond milk, using high-quality filtered water is absolutely essential for the purest and best-tasting final product. Avoid tap water if it has any strong flavors or odors.
Essential Kitchen Tools You’ll Need
While making almond milk is surprisingly simple, having the right equipment will make the process much smoother, more efficient, and ultimately ensure a superior end product. You won’t need many specialized gadgets, but these are key:
- High-Speed Blender: A powerful, high-speed blender is the most crucial tool for achieving a truly creamy, smooth, and lump-free almond milk. It effectively pulverizes the almonds into incredibly fine particles, ensuring maximum flavor extraction and a silky texture. Blenders like Vitamix or Blendtec are ideal for this task, but any strong blender with a good motor should suffice.
- Nut Milk Bag: This specialized bag is ingeniously designed to efficiently separate the liquid milk from the almond pulp. Its fine mesh allows the creamy milk to pass through easily while meticulously retaining all the solid almond particles, resulting in a smooth, pulp-free beverage that rivals store-bought varieties.
- Large Bowl or Pitcher: You will need one spacious bowl for soaking the raw almonds (preferably with enough room for them to expand) and another large, clean vessel (such as a pitcher or a deep bowl with a spout) to collect your freshly strained almond milk.
- Airtight Storage Container(s): For optimal freshness and to prolong the shelf life of your homemade almond milk, invest in good quality airtight glass jars or bottles with tight-fitting lids. Glass is preferred as it doesn’t absorb odors or colors and is easy to sterilize.
Step-by-Step Guide: How to Make Homemade Almond Milk
Follow these simple, detailed steps to create your own luscious, date-sweetened almond milk at home. Patience in each stage will yield the best results!
Step One: Prepare the Almonds (Soaking)
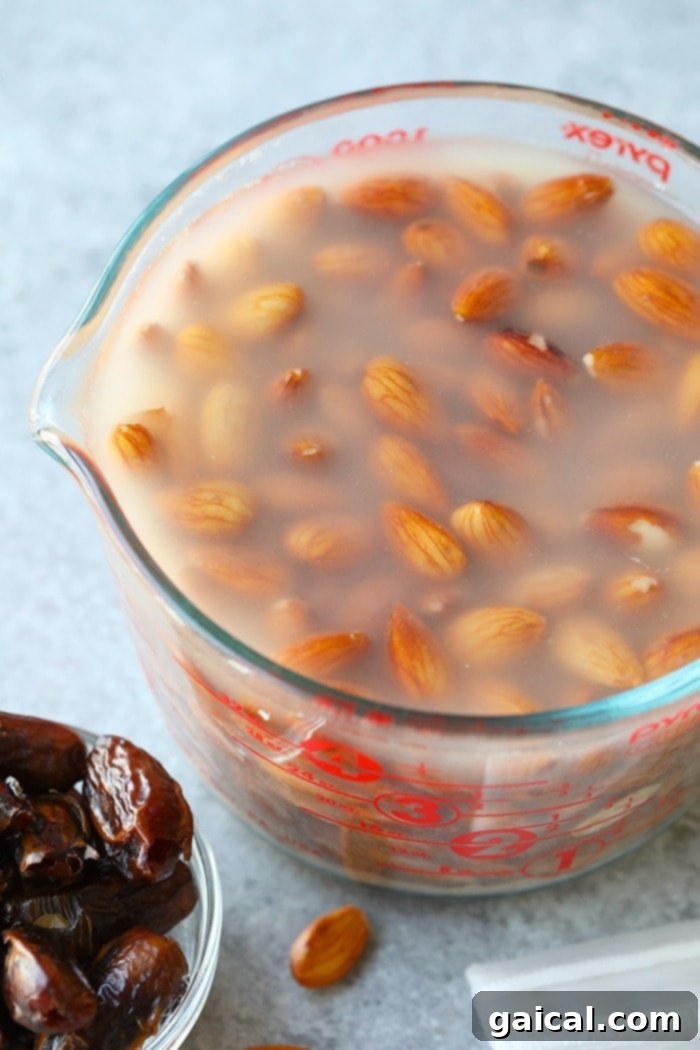
This initial step is absolutely crucial for two main reasons: it helps achieve that desirable creamy texture, and it also makes the almonds easier to digest by reducing phytic acid. Begin by placing 1 lb. (approximately 3 cups) of raw almonds into a large bowl. Cover them completely with filtered water, ensuring there’s at least an inch of water above the almonds to allow for expansion. Let them soak at room temperature for a minimum of 8 hours, but ideally for 24 hours. Soaking effectively softens the almonds, which is key for them to blend into a truly smooth consistency and enhances the release of their natural nutrients.
Pro Tip for a Quicker Soak: If you find yourself short on time and can’t wait for a full overnight soak, you can utilize a convenient quick-soak method. Bring a saucepan of water to a rolling boil. Once boiling, remove the saucepan from the heat and carefully add your raw almonds (ensure there’s enough water to fully submerge them). Allow the almonds to soak in the hot water for 1 to 2 hours, or until they have visibly softened. While this method works well in a pinch, the longer overnight soak is generally preferred for optimal creaminess and digestibility.
After the soaking period, meticulously drain the almonds and rinse them thoroughly under cold running water. This step helps remove any enzyme inhibitors that may have leached into the soaking water and ensures the freshest, cleanest taste for your almond milk.
Step Two: Blend for Creaminess
Once your almonds are perfectly softened and rinsed, transfer them into a high-speed blender. Now, add 6 cups of fresh filtered water. This is also the time to incorporate your chosen flavorings: the pitted Medjool dates (start with 6-8 for subtle sweetness, increase up to 15 for a sweeter milk, or omit entirely for an unsweetened version), the fragrant vanilla bean paste or extract, and that essential pinch of sea salt. Secure the lid tightly onto your blender.
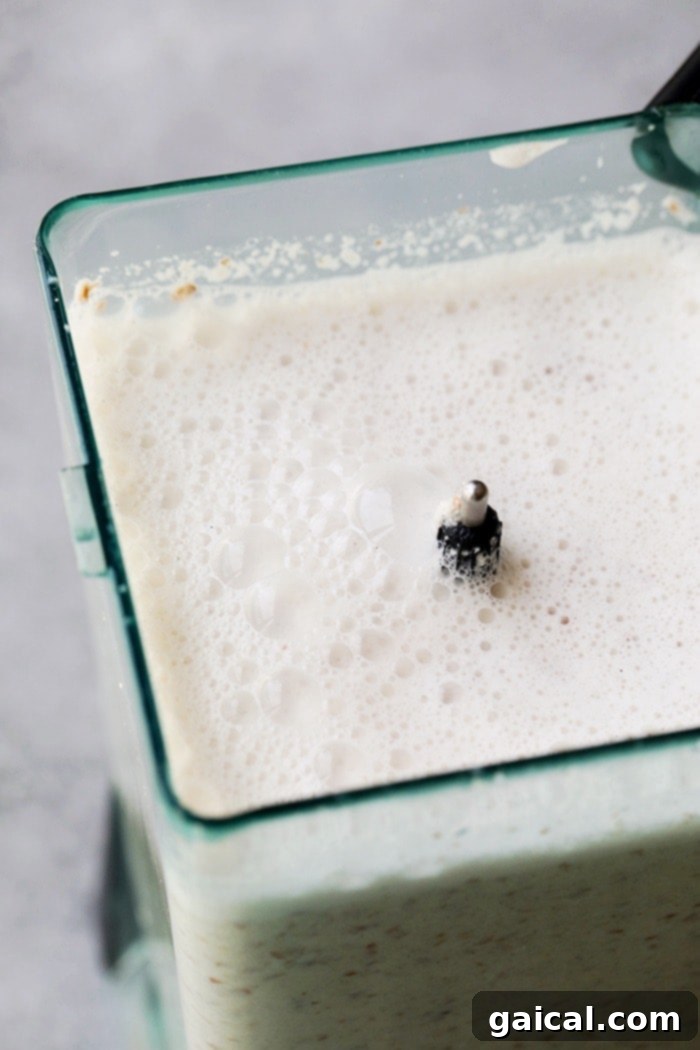
Begin blending on a low speed, gradually and smoothly increasing to the highest setting. Blend continuously for 1 to 2 minutes, or until the mixture appears completely smooth, creamy, and wonderfully opaque. You should observe that the almonds have been thoroughly pulverized, with no discernible large pieces remaining. The liquid will transform into a milky, slightly frothy consistency, indicating it’s ready for the next step.
Step Three: Strain for Smoothness
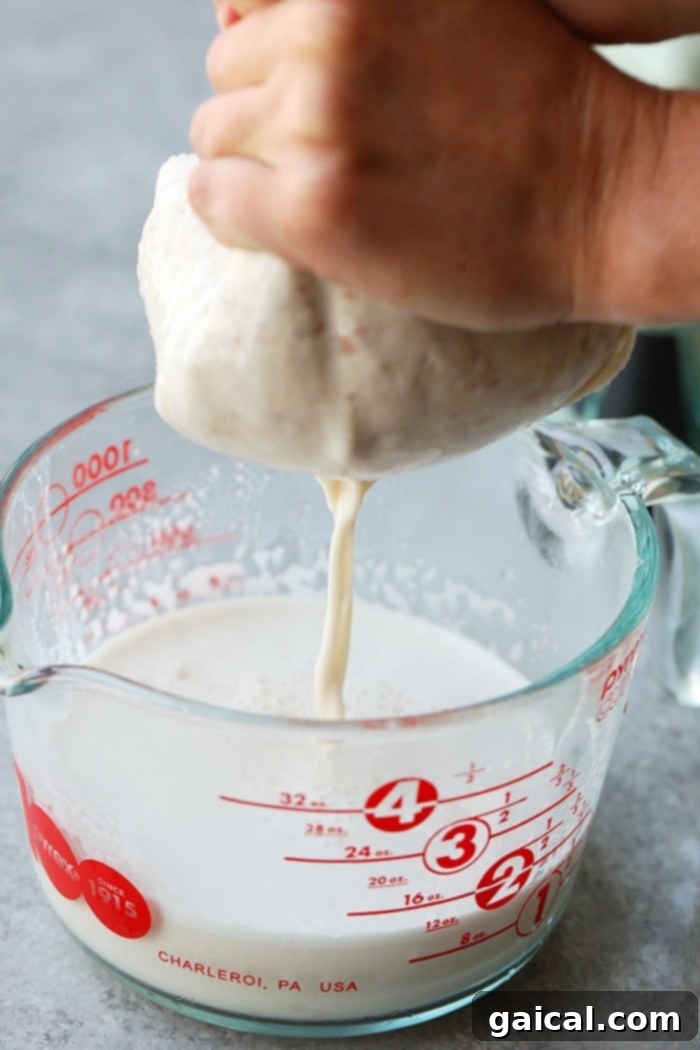
Carefully place your nut milk bag over a large, clean bowl or pitcher. Begin to pour the blended almond mixture into the bag. You may find it easier to work in batches, pouring about 1/2 or 1/3 of the liquid into your nut milk bag at a time to prevent spills and ensure a manageable process. Gather the top of the nut milk bag firmly, creating a secure pouch. Using clean hands, gently but consistently squeeze the liquid through the fine mesh. Continue squeezing until no more milk drips out and you are left with a relatively dry, compressed almond pulp inside the bag.
The objective here is to extract as much liquid as possible, as this will result in the richest, creamiest, and smoothest almond milk. Be patient and thorough with this step; it truly makes all the difference in the final texture and yield of your homemade milk.
No Nut Milk Bag? No Problem!
If you don’t have a specialized nut milk bag on hand, there’s no need to fret or delay your almond milk adventure! You can easily improvise with common kitchen items. A clean, thin kitchen towel (such as a flour sack towel or a clean dishcloth) or several layers of good quality cheesecloth can work as an excellent and effective substitute. Simply line a fine-mesh sieve with your chosen cloth, place it over a large bowl, and proceed with the straining process as described above. The key is to achieve a separation of the liquid milk from the solid almond pulp.
What to Do with Almond Pulp: A Zero-Waste Approach
Once you’ve strained your delicious almond milk, don’t be quick to discard that leftover almond pulp! It’s a versatile and valuable byproduct that can be repurposed in numerous creative ways, promoting a satisfying zero-waste approach in your kitchen. Here are a few fantastic ideas to make the most of your almond pulp:
- Almond Flour Substitute: Spread the pulp thinly on a baking sheet and dry it in a low oven (around 200°F or 95°C) or a dehydrator until completely dry and crumbly. Once dry, you can grind it in a food processor or spice grinder to create a coarse almond meal or flour, perfect for baking or adding to smoothies.
- Energy Balls & Bars: Incorporate the moist pulp directly into your favorite no-bake energy ball or granola bar recipes. It adds extra fiber, healthy fats, and a subtle almond flavor.
- Crackers or Granola: Blend the pulp with some seeds, herbs, and spices, then roll it out thinly and bake until crispy for delicious homemade almond pulp crackers. Alternatively, mix it into your homemade granola for added texture and nutrition.
- Smoothie Booster: Freeze small portions of the pulp (e.g., in ice cube trays) and add them to your morning smoothies for an extra nutritional boost, fiber, and creaminess.
- Oatmeal or Yogurt Topping: Mix the pulp with a little honey or maple syrup and a pinch of cinnamon, then sprinkle it over oatmeal, yogurt, or fruit for added crunch and flavor.
- Exfoliating Scrub: For a non-culinary use, dried almond pulp makes a fantastic, natural, and gentle exfoliant for your skin, particularly when mixed with a little coconut oil or honey.
Step Four: Enjoy Your Freshly Made Almond Milk!
Congratulations! You’ve successfully made your own batch of pure, creamy, and utterly delicious homemade almond milk. The possibilities for enjoying this versatile, date-sweetened beverage are truly endless. Its natural sweetness and rich texture make it a fantastic dairy-free alternative in countless applications. Here are some of our favorite ways to incorporate it into your daily life:
- Elevate Your Morning Brews: Transform your coffee experience! This almond milk is incredibly in a Chemex pour-over, a frothy latte (especially a comforting Chai Tea Latte or an indulgent Sugar Cookie Latte), or a revitalizing Matcha Latte. Its subtle sweetness from dates beautifully complements the flavors of coffee and tea.
- Perfect for Breakfast Staples: Pour it generously over your favorite cereal, granola, or muesli for a wholesome start to your day. It also serves as the ideal liquid base for creamy overnight oats, chia puddings, or grain bowls, adding a delightful richness to any morning meal.
- Smoothie Sensation: As a fantastic liquid base, homemade almond milk blends seamlessly into any healthy smoothie recipe. From a vibrant Blueberry Banana Smoothie to a nutrient-packed green detox blend, it provides creaminess and a subtle sweetness without overpowering other flavors.
- Versatile in Baking & Cooking: Use it as a direct dairy-free substitute in your favorite baking recipes for muffins (like these 6 Healthy Muffin Recipes), pancakes, waffles, or even in savory applications like creamy vegan sauces, soups, and curries where a touch of richness is desired.
- Simply On Its Own: Sometimes, the purest way to appreciate the fresh, clean taste of your homemade creation is the best. Enjoy a cold glass of homemade almond milk by itself as a wonderfully refreshing and nourishing drink.
We’d love to hear how you enjoy your homemade almond milk! Share your creative uses and favorite pairings in the comments section below.
Customizing Your Almond Milk: Beyond Dates and Vanilla
While dates and vanilla create a perfectly balanced and universally loved flavor profile, one of the greatest joys of homemade almond milk is the incredible flexibility and freedom it offers for customization. Feel free to experiment and tailor the flavor to your personal taste preferences or based on what ingredients you have readily available:
Sweetener Alternatives:
If Medjool dates aren’t available, or if you simply prefer a different kind of sweetness (or wish to go completely unsweetened!), here are some excellent alternatives:
- Maple Syrup: A popular natural sweetener, maple syrup imparts a distinct, warm, and earthy flavor that pairs beautifully with almonds. Start with 1-2 tablespoons and adjust to your desired sweetness.
- Honey: For those who don’t require a strict vegan option, honey offers a rich, complex, and subtly floral sweetness that adds another dimension to your milk.
- Agave Nectar: Known for its mild, relatively neutral taste, agave nectar blends easily into liquids and provides consistent sweetness.
- Coconut Sugar: This unrefined sugar option adds a subtle caramel note and a unique depth of flavor that complements the almonds wonderfully.
- Stevia or Monk Fruit: For a completely sugar-free or very low-calorie option, a few drops of liquid stevia or a pinch of monk fruit extract can be added to taste. Remember these are potent, so start with a tiny amount.
- Unsweetened: For a truly versatile base that can be used in both sweet and savory dishes, or if you prefer to add sweetness on a per-serving basis, simply omit all sweeteners from the blending process.
Additional Flavor Boosters:
Get creative and infuse your almond milk with exciting new dimensions by experimenting with these aromatic additions:
- Cinnamon or Nutmeg: A pinch of ground cinnamon or freshly grated nutmeg adds a comforting warmth, making your almond milk especially lovely in fall or winter beverages.
- Cardamom: A hint of ground cardamom can give your almond milk an exotic, aromatic twist, reminiscent of Middle Eastern or Indian spiced drinks.
- Cocoa Powder: For a delightful chocolate lover’s treat, add 1-2 tablespoons of unsweetened cocoa powder during blending for a homemade chocolate almond milk.
- Spices: Experiment with a tiny bit of ground ginger, a pinch of allspice, or even a very small dash of cayenne pepper for a subtle warming kick (especially delicious in a hot chocolate almond milk!).
- Other Extracts: Beyond vanilla, consider adding a few drops of almond extract (use sparingly, as it’s quite potent!), peppermint extract for festive holiday drinks, or even a touch of rose water or orange blossom water for a delicate, fragrant touch.
Storage Tips: Keeping Your Homemade Almond Milk Fresh
Unlike many commercially produced varieties that undergo ultra-pasteurization and contain various stabilizers and preservatives, homemade almond milk is a fresh, perishable product. Therefore, proper storage is paramount to maximizing its freshness, flavor, and preventing premature spoilage.
How Long Does Homemade Almond Milk Last?
When stored correctly in the refrigerator, your homemade almond milk will typically last for 5 to 7 days. Beyond this period, you may notice more pronounced separation of solids, a slight change in flavor, or an “off” smell, indicating that it’s beginning to spoil. Always give your milk a quick smell and visual check before using if you’re unsure of its freshness.
Best Practices for Optimal Storage:
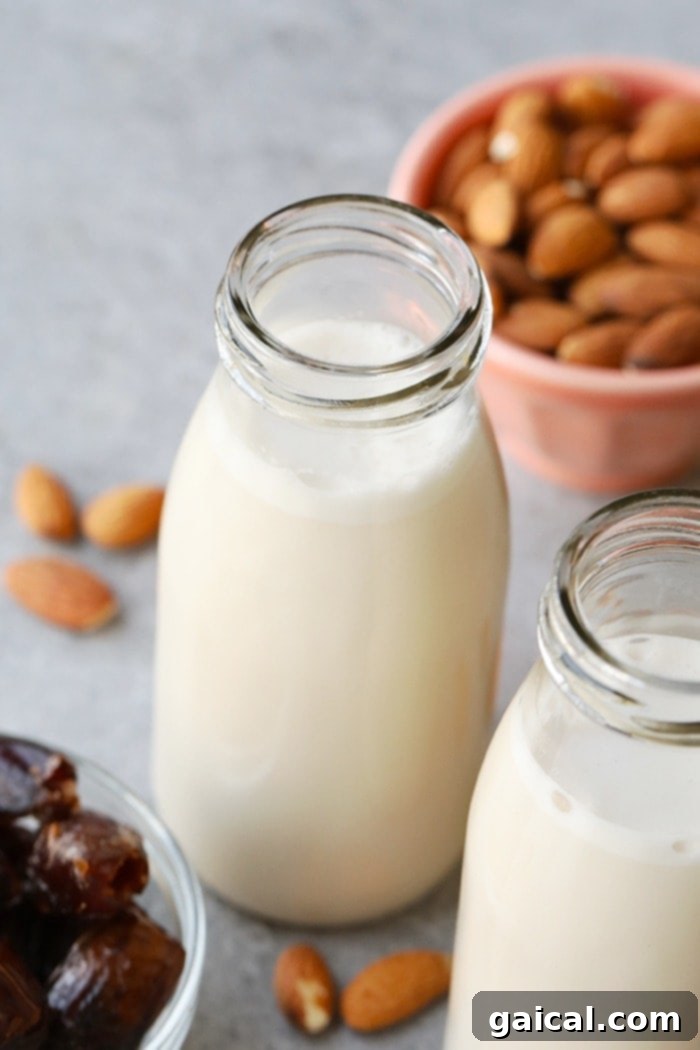
- Airtight Containers are Essential: Always store your freshly made almond milk in clean, airtight containers or bottles in the coldest part of your refrigerator. Glass jars with tight-fitting lids are highly recommended, as they do not absorb odors or colors, are non-reactive, and are easy to sterilize.
- Shake Well Before Each Use: Natural separation is a completely normal occurrence for homemade almond milk. The heavier almond solids and fats will naturally settle at the bottom of the container. Simply give your container a good, vigorous shake before each use to redistribute the creaminess and ensure a consistent texture.
- Maintain Impeccable Cleanliness: Ensure all your equipment – from the blender and nut milk bag to your storage containers – is thoroughly cleaned and preferably sterilized before use. This crucial step helps to minimize the introduction of bacteria, which can significantly extend the shelf life of your milk.
- Avoid Contamination: Always use a clean spoon if stirring, or pour directly from the container to avoid introducing contaminants from other foods, dirty utensils, or unwashed hands, which can accelerate spoilage.
While it is possible to freeze almond milk, be aware that it can sometimes alter the texture upon thawing, making it a bit grainy or less smooth. If you choose to freeze it, it’s best suited for applications where texture is less critical, such as in smoothies, baking, or soups. For convenience, freeze small portions in ice cube trays, then transfer the frozen cubes to a freezer-safe bag.
More delicious ways to enjoy plant-based goodness:
Recipes Featuring Almond Milk
Once you’ve mastered the art of homemade almond milk, you’ll discover countless delightful ways to incorporate it into your favorite dishes and drinks. Explore these other fantastic recipes from our collection that beautifully utilize the creamy goodness of almond milk, enhancing both flavor and texture:
- Creamy Almond Milk Chai Tea Latte: A comforting, spiced beverage perfect for a cozy afternoon, made wonderfully smooth with your homemade milk.
- 6 Healthy Muffin Recipes: Discover diverse and delicious muffin recipes where almond milk serves as an excellent dairy-free base, adding moisture and a subtle richness.
- Refreshing Blueberry Banana Smoothie: A classic, vibrant fruit smoothie made extra creamy and nutritious with the addition of fresh homemade almond milk.
- Indulgent Sugar Cookie Almond Milk Latte: A festive and utterly delicious treat for coffee lovers, featuring the sweet and creamy notes of almond milk.
- Revitalizing Matcha Latte: Experience the earthy, invigorating flavors of matcha tea perfectly balanced and mellowed with the smooth, plant-based creaminess of almond milk.
Homemade Date-Sweetened Almond Milk Recipe
Rated 4.67 out of 5 stars by 6 users.
A simple, pure, and delicious recipe for crafting the best date-sweetened almond milk right in your kitchen. This vegan, gluten-free, and paleo-friendly milk is perfect for coffees, smoothies, cereals, and more!
By: Lee Funke
Prep Time: 10 mins (plus 8-24 hours soaking)
Cook Time: 0 mins
Total Time: 10 mins (active time, plus soaking)
Yields: 12 servings (approximately 6 cups of milk)
Ingredients:
- 1 lb. (approx. 3 cups) raw almonds, plus extra water for soaking
- 6 cups filtered water (for blending)
- Pinch of sea salt
- 6-15 pitted Medjool dates, optional (adjust to desired sweetness)
- 1/2 vanilla bean paste or 1/2 teaspoon pure vanilla extract, optional
Instructions:
- Soak Almonds: First, place 3 cups of raw almonds in a large bowl. Then completely submerge them with water and let soak for at least 8 hours, and ideally 24 hours. This softens the almonds for optimal blending.
- Rinse: After the soaking period, your almonds should be noticeably soft. Drain them thoroughly and rinse under cold running water. Then, transfer the rinsed almonds into a high-speed blender.
- Add Blending Ingredients: To the blender, add the 6 cups of fresh filtered water, a pinch of sea salt, the pitted Medjool dates (if using, starting with 6-15 depending on sweetness preference), and the paste from 1/2 a vanilla bean or 1/2 teaspoon of vanilla extract (if using).
- Blend Thoroughly: Blend on high speed for 1 to 2 minutes, or until everything in the blender has been completely pulverized, resulting in a smooth, creamy, and opaque liquid.
- Strain the Milk: Using a nut milk bag (or a fine-mesh sieve lined with a clean thin kitchen towel), strain the almond milk from the almond pulp. Squeeze out as much milk as possible to maximize your yield. You may need to do this in a few rounds to avoid spilling. Then, transfer the finished almond milk into clean jars or bottles.
- Store & Enjoy: Store your homemade date-sweetened almond milk in an airtight container in the fridge for up to 5-7 days. Remember to shake well before each use, as natural separation will occur. Enjoy in your favorite drinks, cereals, or recipes!
Tips & Notes:
- Serving size: Approximately 1/2 cup per serving.
- For a quicker softening option: If you’re short on time, bring a pot of water to a boil, then remove it from heat and pour in raw almonds (enough water to cover them). Let the almonds soak for 1-2 hours, or until they are soft. Drain and rinse before blending.
- Sweetness Customization: Medjool dates and vanilla are optional flavorings for our homemade almond milk recipe. We recommend starting with 6 dates for a subtle sweetness and increasing the quantity up to 15 dates depending on how sweet you like your milk. You can also omit them entirely for unsweetened almond milk.
- Don’t Waste the Pulp: The leftover almond pulp is still useful! You can dry it and grind it into almond meal, add it to smoothies, use it in energy balls, or incorporate it into baking recipes for added fiber and flavor.
Nutrition Information (Approximate per 1/2 cup serving):
Calories: 282 kcal
Carbohydrates: 26 g
Protein: 8 g
Fat: 19 g
Fiber: 5 g
Sugar: 2 g
Nutrition information is automatically calculated and should only be used as an approximation. It can vary based on specific ingredients and quantities used.
Loved this recipe? Share your thoughts below!
Don’t forget to tag your posts on social media with the hashtag #fitfoodiefinds – we can’t wait to see your homemade creations!