

Say goodbye to bland, dense protein pancakes and hello to the most incredibly **fluffy and delicious protein waffles** you’ll ever make! If you’re looking to fuel your day with a substantial and satisfying breakfast, this recipe is your new best friend. Each generous waffle delivers a whopping 12 grams of protein, made with wholesome 100% whole grains and absolutely no added sugar. Get ready to revolutionize your morning routine with a meal that tastes indulgent but is packed with goodness.

These protein waffles are more than just a healthy breakfast idea; they’re a complete game-changer. Crafted with nourishing whole grains, rich eggs, and heart-healthy coconut oil, they offer a perfect balance of macronutrients to keep you feeling full and energized. Whether you’re a fitness enthusiast, a busy parent, or simply someone who appreciates a wholesome and tasty meal, these waffles are designed to fit seamlessly into your lifestyle.
The Ultimate Protein Waffle Recipe for a Nutritious Start
What makes this protein waffle recipe truly exceptional? It yields four generously sized waffles, guaranteeing a convenient and protein-packed breakfast for several days if you’re cooking for one. Imagine waking up knowing your first meal of the day is not only delicious but also provides a substantial 12 grams of protein per serving. It’s the ideal way to kickstart your metabolism and maintain stable energy levels throughout your morning activities.
For a long time, achieving truly fluffy baked goods with protein powder felt like an impossible feat. Whey protein, while excellent for muscle recovery, often leads to dense, rubbery textures in baked recipes due to its unique composition. This can be disappointing when you’re craving that light, airy waffle experience.
However, we’ve cracked the code! The secret lies in using a high-quality plant-based protein powder, as featured in this recipe. Plant-based proteins behave differently in baking, allowing the batter to rise beautifully and create an incredibly light and tender crumb. The result? Waffles that are perfectly golden, wonderfully soft on the inside, and crispy on the outside – everything you desire in a perfect waffle, but with a significant protein boost. You’ll be enjoying these delightful, fluffy protein waffles in no time, guilt-free and utterly satisfied.
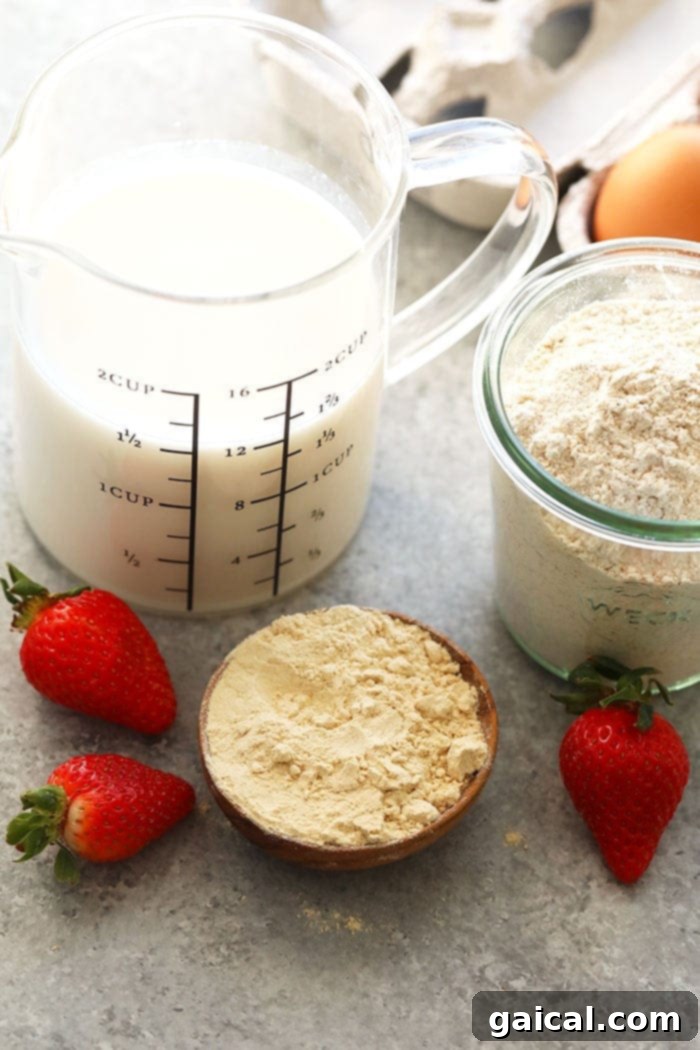
Choosing the Right Protein Powder for Your Protein Waffles
The type of protein powder you use can significantly influence the taste and texture of your waffles. While you ultimately choose what you prefer, the flavor is paramount. A delicious protein powder means delicious waffles! Here’s a closer look at the best options and considerations:
Understanding Different Protein Powder Types:
- Plant-Based Protein Powders: These are often a blend of pea, rice, and hemp proteins. They tend to be less dense than whey when baked, contributing to the desirable fluffy texture we’re aiming for in these waffles. Vanilla is a popular choice as it complements most waffle toppings.
- Whey Protein Powders: While great for shakes, whey protein can sometimes lead to a denser, chewier texture in baked goods. If you choose whey, opt for a high-quality isolate or concentrate and be prepared to potentially adjust the liquid content of the batter slightly. Unflavored or vanilla whey works best.
- Casein Protein Powders: Casein is a slow-digesting protein that often results in a very thick batter, making it less ideal for light and fluffy waffles. It might be better suited for recipes where a dense, cake-like texture is desired.
Our Top Protein Powder Recommendations for Baking:
For an optimal experience with this recipe, especially for achieving that perfect fluffy texture, we highly recommend plant-based vanilla protein powder. However, explore and find what suits your taste buds!
Curated List of Protein Powders
For a comprehensive guide, check out our top protein powder recommendations for baking, smoothies, and everything in between.
Garden of Life
Raw Organic Protein
Simply Tera’s
Pure Whey Protein
Sun Warrior
Protein Powder
Garden of Life
Organic Whey Protein
Aloha
Organic Protein Powder
How To Make Perfectly Fluffy Protein Waffles: A Step-by-Step Guide
Creating these protein-packed delights is surprisingly simple. Follow these steps for perfect waffles every time.
Step 1: Prepare Your Waffle Maker
The first crucial step for crispy waffles is proper preheating. Begin by setting your waffle iron to medium heat and allowing it to fully warm up. This ensures even cooking and helps achieve that desirable golden-brown exterior. A cold waffle iron can lead to soggy waffles that stick.
Step 2: Combine Your Ingredients
In a spacious mixing bowl, gently whisk together the wet ingredients: eggs, almond milk, and vanilla extract until well combined. In a separate bowl, you might want to whisk your dry ingredients first for better distribution. Then, gradually add the dry ingredients – whole wheat flour, protein powder (remember, a plant-based option like Garden Of Life works wonders for texture), baking powder, and baking soda – to the wet mixture. Mix just until the ingredients are moistened. Overmixing can develop the gluten in the flour, leading to tougher waffles, so stop as soon as no dry streaks remain.
Finally, incorporate the melted coconut oil into the batter, mixing until thoroughly combined. Coconut oil adds richness and a subtle flavor while contributing to a healthy fat profile. Depending on the specific plant-based protein powder you’re using, your batter’s consistency might vary. If it appears too thick, feel free to add an extra splash or two of almond milk until it reaches a pourable, yet still substantial, consistency.
Step 3: Cook Your Waffles to Golden Perfection
Once your waffle maker is fully heated, lightly coat both cooking surfaces with a non-stick cooking spray. We prefer coconut oil cooking spray for a natural, healthy option. Carefully pour about ½ cup of your prepared batter onto the center of the waffle maker. Close the lid and flip the waffle maker (if it’s a rotating model). Allow it to cook for approximately 1 and a half to 2 minutes. Cooking times can vary based on your waffle iron’s wattage and specific model.
After the initial cooking time, flip the waffle maker back and open it. Check for a golden-brown color and crisp edges. If your waffle needs a little more time to achieve that perfect crispness, close the lid, flip it over again, and let it cook for an additional 20-30 seconds. This quick extra burst of heat often makes all the difference.
Step 4: Top & Enjoy Your Wholesome Waffles
Once cooked, use non-stick tongs to carefully remove the hot waffle from the iron. Place it on a wire rack to cool slightly for a few minutes. Waffles fresh off the iron are extremely hot, so exercise caution!
Elevate Your Waffles with Creative Topping Ideas
We absolutely love topping our freshly made protein waffles with a drizzle of pure maple syrup and a handful of vibrant, fresh strawberries. The next morning, we often repurpose leftovers (yes, we’ll tell you how to reheat them below!) with a dollop of creamy almond butter and more fresh strawberries for a different flavor profile. But the possibilities don’t stop there! Get creative with these additional waffle topping ideas to customize your protein-packed breakfast:
- Nut Butters: Almond butter, peanut butter, cashew butter – provides extra protein and healthy fats.
- Natural Sweeteners: Pure maple syrup, local honey, agave nectar.
- Nuts & Seeds: Chopped walnuts, pecans, slivered almonds, hemp hearts, chia seeds for added texture, fiber, and omega-3s.
- Fresh Berries: Strawberries, blueberries, raspberries, blackberries – bursting with antioxidants and natural sweetness.
- Other Fruits: Sliced bananas, peaches, sautéed apples with cinnamon.
- Yogurt & Cream: A spoonful of Greek yogurt or a dollop of coconut whipped cream for a creamy tang.
- Chocolate: A sprinkle of dark chocolate chips or a drizzle of sugar-free chocolate sauce for a treat.

How to Freeze Protein Waffles for Easy Meal Prep
One of the best features of this protein waffle recipe is its incredible suitability for meal prepping. You can easily whip up a double or even triple batch and store them in the freezer, ensuring you always have a healthy, homemade breakfast on hand whenever the waffle craving strikes. This makes busy mornings a breeze and helps you stick to your healthy eating goals.
So, exactly how do you freeze waffles to maintain their freshness and flavor? Follow these simple steps for optimal results:
- Cool Completely: This is arguably the most critical step. After cooking, let your waffles cool completely on a wire rack. The reason behind this is to allow the waffles to reach room temperature and release all residual moisture (steam). This prevents ice crystals from forming, which can lead to freezer burn and a soggy texture once reheated.
- Individual Wrapping: To prevent waffles from sticking together and to provide an extra layer of protection against freezer burn, you can optionally wrap each waffle individually in plastic wrap or parchment paper before stacking. This also makes it easier to grab just one or two when needed.
- Airtight Storage: Once cooled, stack 1-2 servings of waffles (typically 2 waffles) together. Tightly wrap them in a piece of plastic wrap, place them in a freezer-safe ziploc bag, or store them in a reusable Stasher bag. The key here is to remove as much air as possible from the packaging, which is crucial for preventing freezer burn and helping your waffles stay nice and fresh.
- Freeze & Store: Place the well-wrapped waffles in the freezer. They will maintain their quality for up to 3 months. Clearly label your bags with the date to keep track of freshness.
Having a stash of frozen protein waffles means less morning stress and more time to enjoy a wholesome, satisfying meal. They’re perfect for quick breakfasts, snacks, or even a light dinner!
How Do You Reheat Frozen Protein Waffles for Crispy Perfection?
Reheating frozen waffles doesn’t have to result in a soggy mess. With the right technique, you can enjoy them just as crispy and delicious as when they were first made.
- Option 1: The Microwave & Fridge Method (Softer Texture)
If you prefer a softer waffle, thaw your frozen waffles in the refrigerator overnight. In the morning, simply microwave them for approximately 60 seconds, or until heated through. This method is quick but won’t give you the crisp exterior.
- Option 2 (Highly Recommended): The Toaster Method (Crispy Waffles!)
For the ultimate crispy waffle experience, we strongly recommend this method. Cut your frozen waffles in half (or quarters, depending on your toaster size) and place them directly into your toaster. Toast on a medium setting. The direct dry heat of the toaster works wonders to crisp up the edges and warm the interior evenly. Who doesn’t love a perfectly golden, crispy waffle that tastes freshly made?
- Option 3: Oven or Toaster Oven (For Multiple Waffles)
If you’re reheating several waffles at once, the oven or toaster oven is a great choice. Preheat your oven to 350°F (175°C). Place frozen waffles directly on a baking sheet and heat for about 5-10 minutes, or until warmed through and crispy. This method works well for maintaining a good texture across multiple servings.
- Option 4: Air Fryer (Quick & Crispy)
For an even quicker crispy reheat, an air fryer can be used. Place frozen waffles in a single layer in the air fryer basket. Air fry at 350°F (175°C) for 3-5 minutes, flipping halfway, until golden and crispy.

Frequently Asked Questions (FAQs)
Q: Can I use different types of flour?
A: Yes, you can experiment with other whole grain flours like oat flour or even a gluten-free all-purpose flour blend. Keep in mind that different flours absorb liquid differently, so you might need to adjust the amount of almond milk to achieve the correct batter consistency.
Q: Can I make these waffles dairy-free?
A: Absolutely! This recipe already uses unsweetened almond milk, making it naturally dairy-free. Just ensure your chosen protein powder is also dairy-free (most plant-based options are).
Q: How can I add more flavor to my protein waffles?
A: Beyond toppings, you can add spices like cinnamon or nutmeg to the dry ingredients, mix in a handful of blueberries or chocolate chips to the batter before cooking, or even experiment with different flavored protein powders (e.g., chocolate or peanut butter protein powder for a unique twist).
Q: What’s the best way to store leftover batter?
A: If you have leftover batter, store it in an airtight container in the refrigerator for up to 2-3 days. The batter might thicken over time, so you may need to add a splash more almond milk and whisk gently before cooking.
And let’s not forget about the waffle’s equally delicious cousin: THE PANCAKE! If you’re also a fan of fluffy stacks, we have a diverse array of healthy pancake recipes for you to choose from on Fit Foodie Finds. Explore these options for even more protein-packed and wholesome breakfast inspiration:
Explore Our Healthy Pancake Recipes
- Hearty Banana Oatmeal Pancakes
- Grain-Free Paleo Coconut Flour Pancakes
- Super Simple 3-Ingredient PB2 Pancakes
- Nutrient-Rich Blueberry Protein Pancakes
- Wholesome Sweet Potato Power Pancakes
- Seasonal Paleo Pumpkin Pancakes
- Savory Maple Breakfast Sausage Pancakes
- High-Protein Cottage Cheese Pancakes
- The Best Healthy Pancakes on the Internet (Seriously!)

Discover More of Our Favorite…
Even More Delicious Waffle Recipes
- Irresistible Cinnamon Roll Waffles
- Unique Matcha Green Tea Waffles
- Wholesome Gluten-Free Waffles
- Flavorful Pumpkin Waffles
Fluffy Protein Waffles Recipe
Prep: 10 minutes
Cook: 15 minutes
Total: 25 minutes

Ingredients
Dry Ingredients
-
1 cup white whole wheat flour -
1/2 cup plant-based vanilla protein powder, we used Vanilla Garden of Life -
1/2 teaspoon baking powder -
1/2 teaspoon baking soda
Wet Ingredients
-
2 large eggs -
1.25 cups unsweetened, plain almond milk* -
1 teaspoon vanilla extract -
2 tablespoons melted coconut oil
Instructions
-
Begin by preheating your waffle iron to medium heat. This is key for crispy waffles.
-
In a large bowl, mix together eggs, almond milk, and vanilla extract. In a separate bowl, whisk together the flour, protein powder, baking powder, and baking soda. Gradually add the dry ingredients to the wet mixture, mixing until just combined and no dry streaks remain. Avoid overmixing.
-
Finally, stir in the melted coconut oil until fully incorporated. If the batter is too thick, add an additional splash of almond milk.
-
Once your waffle maker is completely heated, lightly spray both sides with non-stick cooking spray (coconut oil spray works wonderfully). Pour about ½ cup of batter onto the waffle maker, close, and flip (if applicable). Cook for approximately 1 and ½ to 2 minutes until golden brown. If needed, cook for an additional 20-30 seconds for extra crispness.
-
Use non-stick tongs to carefully remove the cooked waffle from the iron. Allow to cool slightly on a wire rack before serving.
Tips & Notes
- Almond milk: The exact amount of almond milk might vary slightly depending on the brand and type of protein powder you use. Plant-based protein powders can absorb liquid differently. As the batter sits, it may thicken, so feel free to add a splash more almond milk if necessary before cooking subsequent waffles.
- Do not overmix: Overmixing can lead to tough waffles. Mix until just combined.
- Rest the batter: Allowing the batter to rest for 5-10 minutes can help the flour fully hydrate and result in a more tender waffle.
Watch It
Nutrition
Carbohydrates: 20 g,
Protein: 12 g,
Fat: 11 g,
Fiber: 4 g,
Sugar: 0 g
Nutrition information is automatically calculated and should be used as an approximation. It may vary based on specific ingredients and brands used.
Love this recipe? Leave a comment below!
Don’t forget to tag your posts on social media with the hashtag #fitfoodiefinds, we’d love to see what delicious creations you come up with!