Welcome to an exciting journey into our recently transformed cabin kitchen! My husband and I are thrilled to finally share the full reveal of our Scandinavian Modern cabin kitchen, a project that skillfully blends contemporary design with rustic charm. In this comprehensive post, we’ll walk you through every step of our renovation process, offering an honest and detailed review of our experience building an IKEA kitchen on a budget. Prepare to be inspired by the possibilities of affordable, high-impact design!
Get ready to say hello to the heart of our Wisconsin cabin – a beautifully crafted Scandinavian Modern kitchen that my husband and I poured our hearts into renovating. Our goal was clear: achieve a high-end look and exceptional functionality without breaking the bank. The result is a stunning IKEA kitchen that perfectly encapsulates our vision, and we genuinely couldn’t be happier with how it turned out. Join us as we dive deep into all the intricate details, design choices, and practical insights from this rewarding renovation journey.
Embracing the Scandi-Mod Design: A Rustic-Modern Harmony
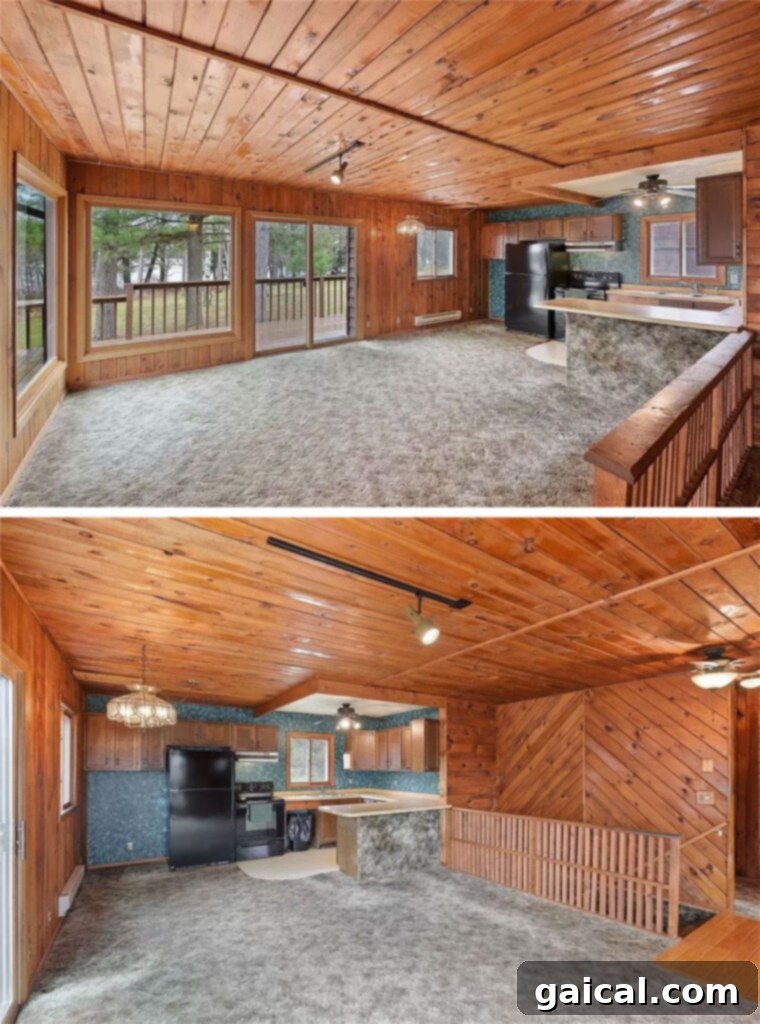
The overarching aesthetic for our beloved cabin has always been Scandinavian-modern, tastefully infused with a rustic twist. When we first acquired this home from its previous owners of three decades, we were immediately struck by their diligent preservation of the natural wood paneling throughout the property. It was a charming foundation, but the house, including the kitchen, certainly needed a significant refresh. We discovered a staggering 3,000 sq. ft. of carpet, even extending onto the kitchen island, alongside an original kitchen crying out for tender love and care.
Our primary objective for this kitchen renovation was to seamlessly blend Scandinavian modern elements with the cabin’s inherent charm, particularly its beautiful wood paneling. We wanted to honor the home’s history while introducing fresh, contemporary touches that would elevate its style and functionality. To achieve this delicate balance, we made intentional design decisions.
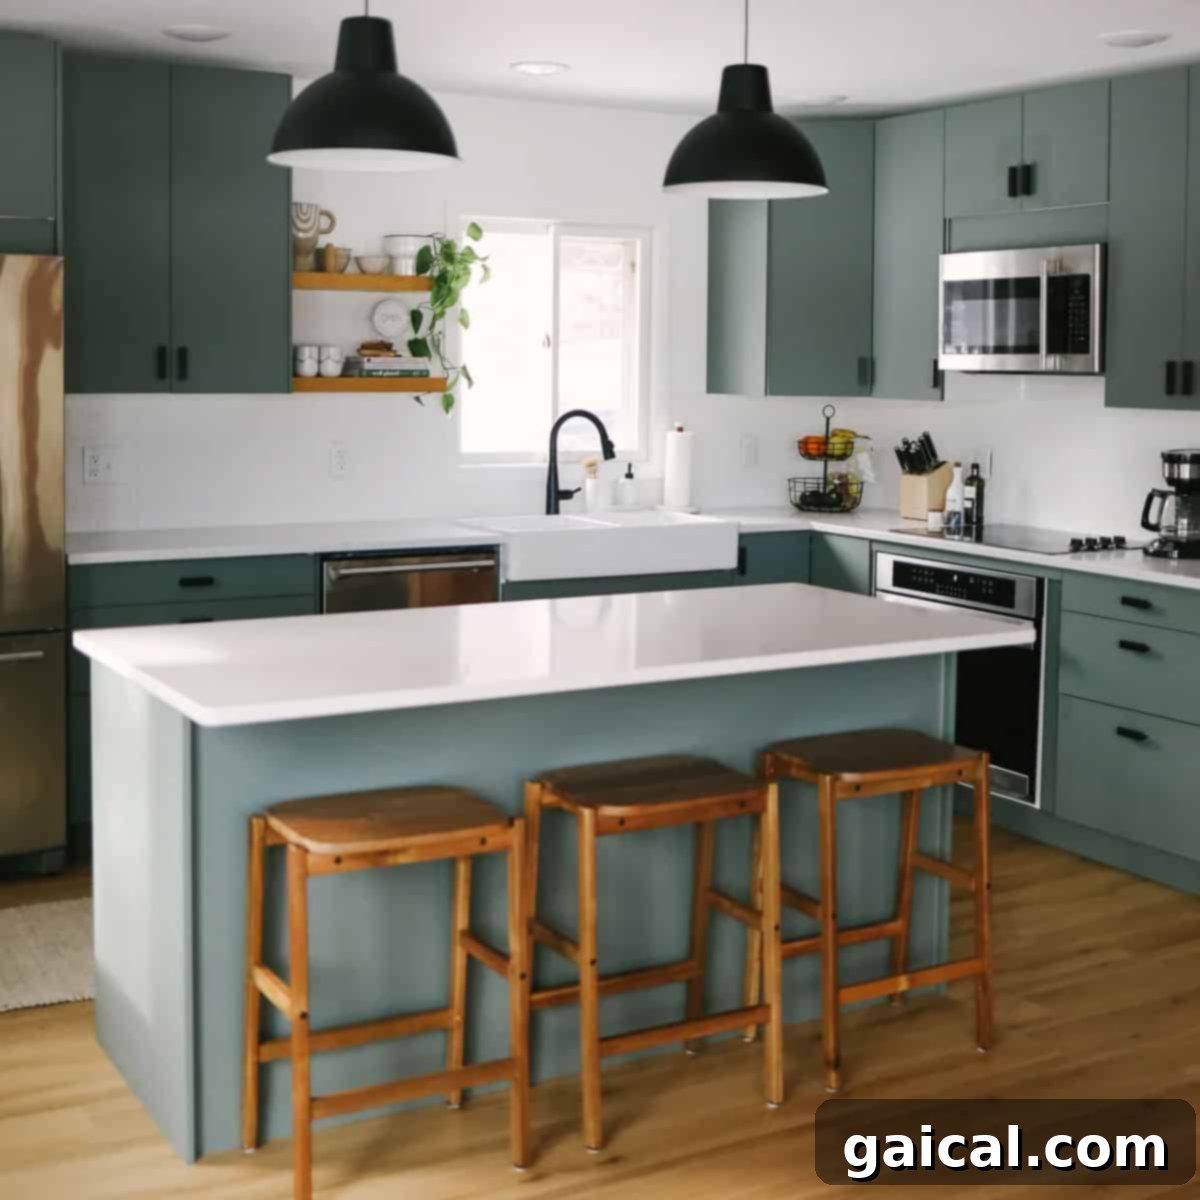
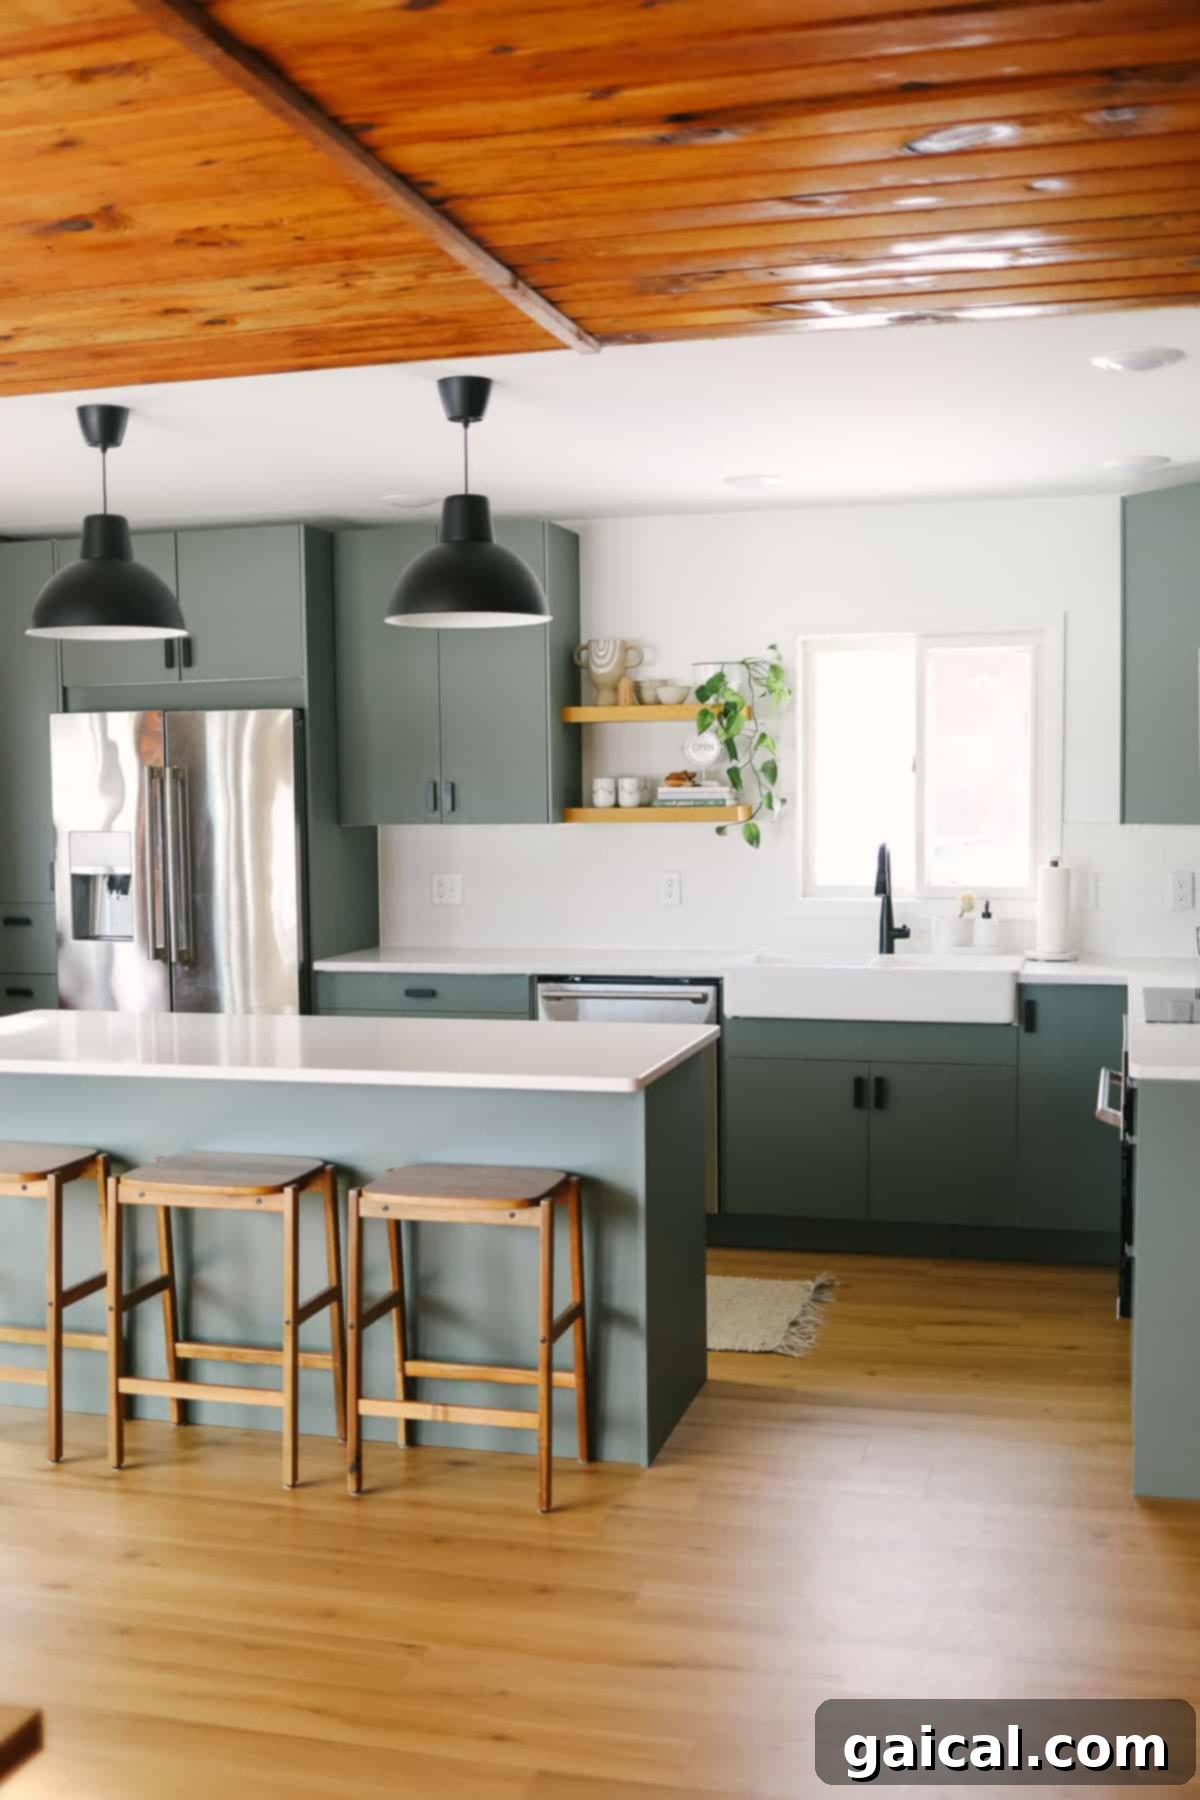
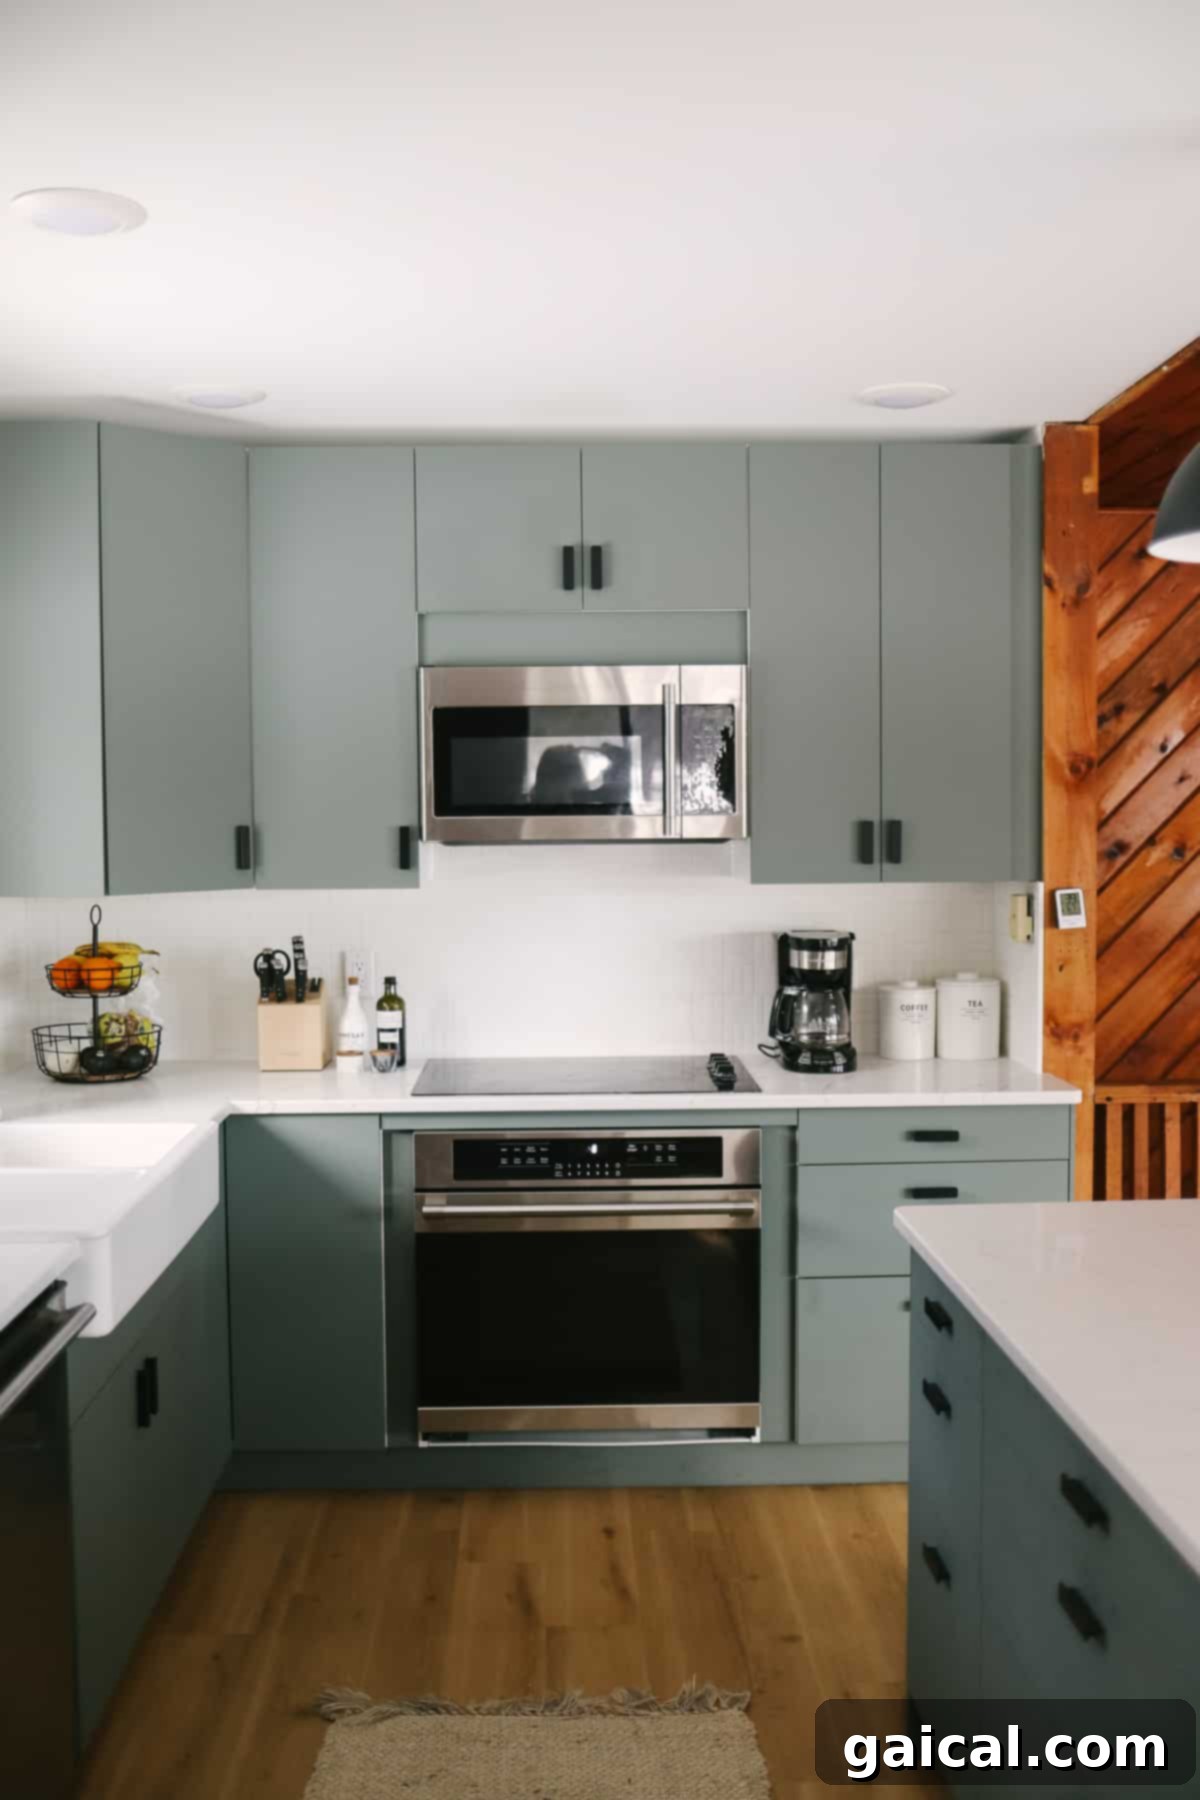
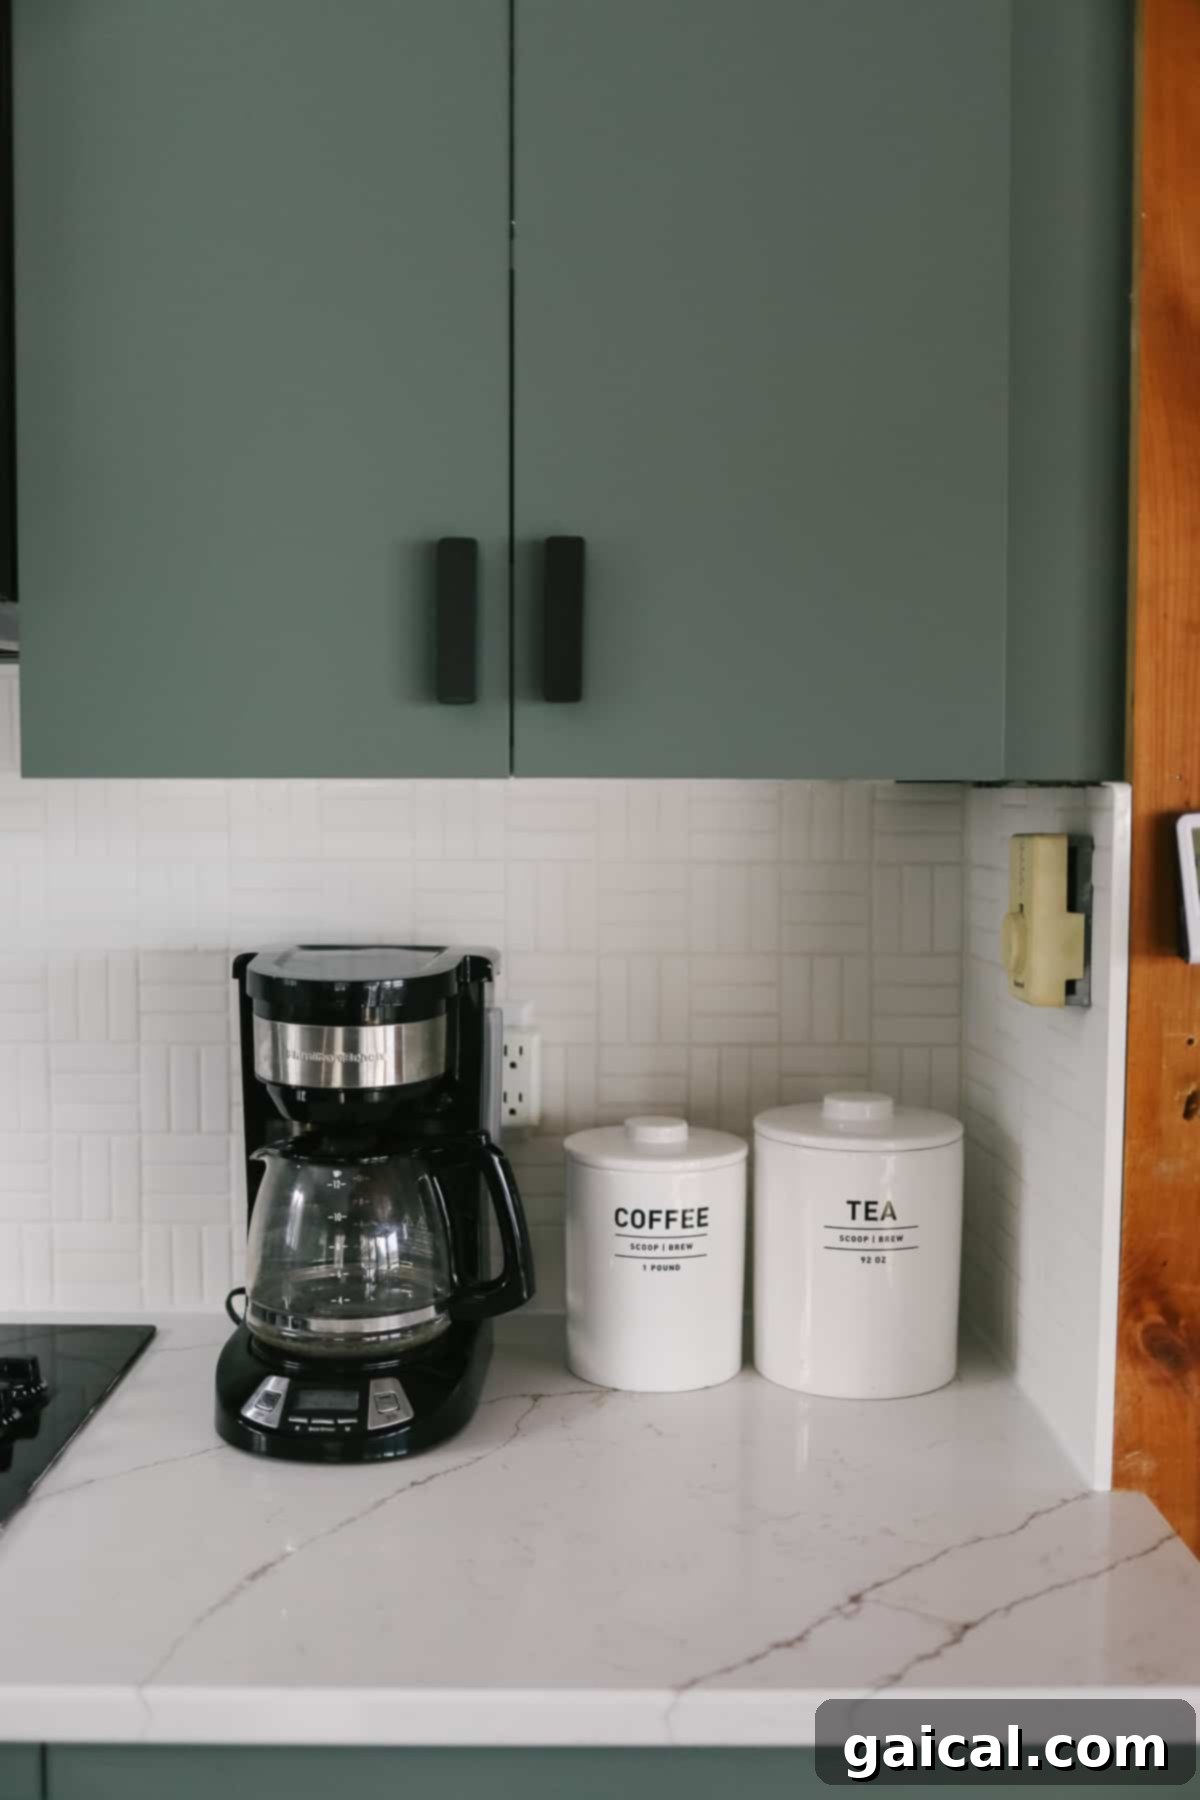
We chose to retain the warm, inviting wood paneling on both the walls and ceiling, as it provided a crucial rustic anchor for our design. To brighten the space and introduce a touch of modern sophistication, we installed a pristine white backsplash, complemented by crisp white paint on the remaining wall areas. Instead of opting for predictable white or natural wood cabinets, which might have clashed or faded into the background, we made a bold choice: rich green/grey cabinets. This unique color perfectly harmonizes with the existing wood paneling, creating a cohesive yet striking visual narrative that truly defines our Scandinavian Modern aesthetic.
The Heart of the Renovation: Sourcing Our Materials
Embarking on a budget-conscious renovation meant strategic material sourcing. For this project, the vast majority of our materials proudly came from IKEA, renowned for its affordability and modern design. Only a select few items were sourced elsewhere to achieve specific aesthetic or quality goals. Below, you’ll find direct links to everything we used, alongside our honest opinions on the selection and installation process.
Stylish & Affordable: Cabinets & Hardware from IKEA
Our cabinet selection process was significantly impacted by the challenges of the COVID-19 pandemic, leading to widespread shipping delays and increased costs across the industry. We were committed to a strict budget, yet needed a solution that offered both style and timely delivery. After pricing options at Menards, BOXI, and IKEA, the choice became clear: IKEA offered the best value by far, coupled with what was initially promised as the fastest delivery time.
One key difference we noted was that IKEA cabinets arrive unassembled, making it a true DIY project that requires hands-on assembly and installation. In contrast, Menards and BOXI provided pre-assembled units, which, while convenient, significantly increased their overall price point. This factor alone made IKEA a compelling option for budget-conscious renovators like us.
We ultimately selected IKEA’s BODARP Matte Gray/Green Cabinets. This choice was driven by my admiration for their sleek, flat-panel Scandinavian design. Crucially, it allowed us to achieve the desired green kitchen aesthetic without the added cost and effort of painting cabinets ourselves. The matte finish adds a sophisticated touch, perfectly aligning with our modern vision.
The decision paid off beautifully. The gray/green color palette pairs exquisitely with our white oak LVP flooring and the cabin’s original woodworking, creating a warm, inviting, and cohesive atmosphere. We firmly believe that pure white cabinets might have appeared too stark or overly modern in this rustic setting, making our chosen hue the ideal bridge between the two styles. We are incredibly pleased with this color choice, which truly defines the kitchen’s character.
Sleek Hardware to Complete the Look
To complement our green/grey cabinets, we also sourced our cabinet hardware from IKEA. At an astonishing $4 per piece, these Hackas matte black cabinet pulls are an absolute steal. Their minimalist design and matte black finish contribute significantly to the modern Scandinavian vibe, proving that style doesn’t have to come with a hefty price tag. They feel sturdy, look fantastic, and elevate the entire cabinet system.
IKEA Appliances: Convenience, Cost, and a Sticky Surprise
One of the most appealing aspects of choosing an IKEA kitchen is its reputation as a true “one-stop shop.” Their kitchen systems are thoughtfully designed to accommodate standard-sized appliances, making the integration process smooth. We decided to purchase our major kitchen appliances directly from IKEA for several compelling reasons:
- Unbeatable Timing: During a period when appliance lead times were notoriously long, IKEA promised a shipping window of just four weeks, which was incredibly appealing for keeping our renovation on schedule.
- Exceptional Cost-Effectiveness: It’s genuinely hard to beat IKEA’s competitive pricing on appliances, especially when furnishing an entire kitchen. Their affordability made a significant impact on our overall budget.
- Streamlined Convenience: The ability to order all our kitchen components – from cabinets to appliances – at once, without the hassle of coordinating multiple deliveries from various retailers, was a huge benefit and saved us valuable time and effort.
- Strategic Savings: We timed our purchase perfectly with a 20% off Friends and Family sale, which further reduced the price of our appliances, maximizing our budget efficiency.
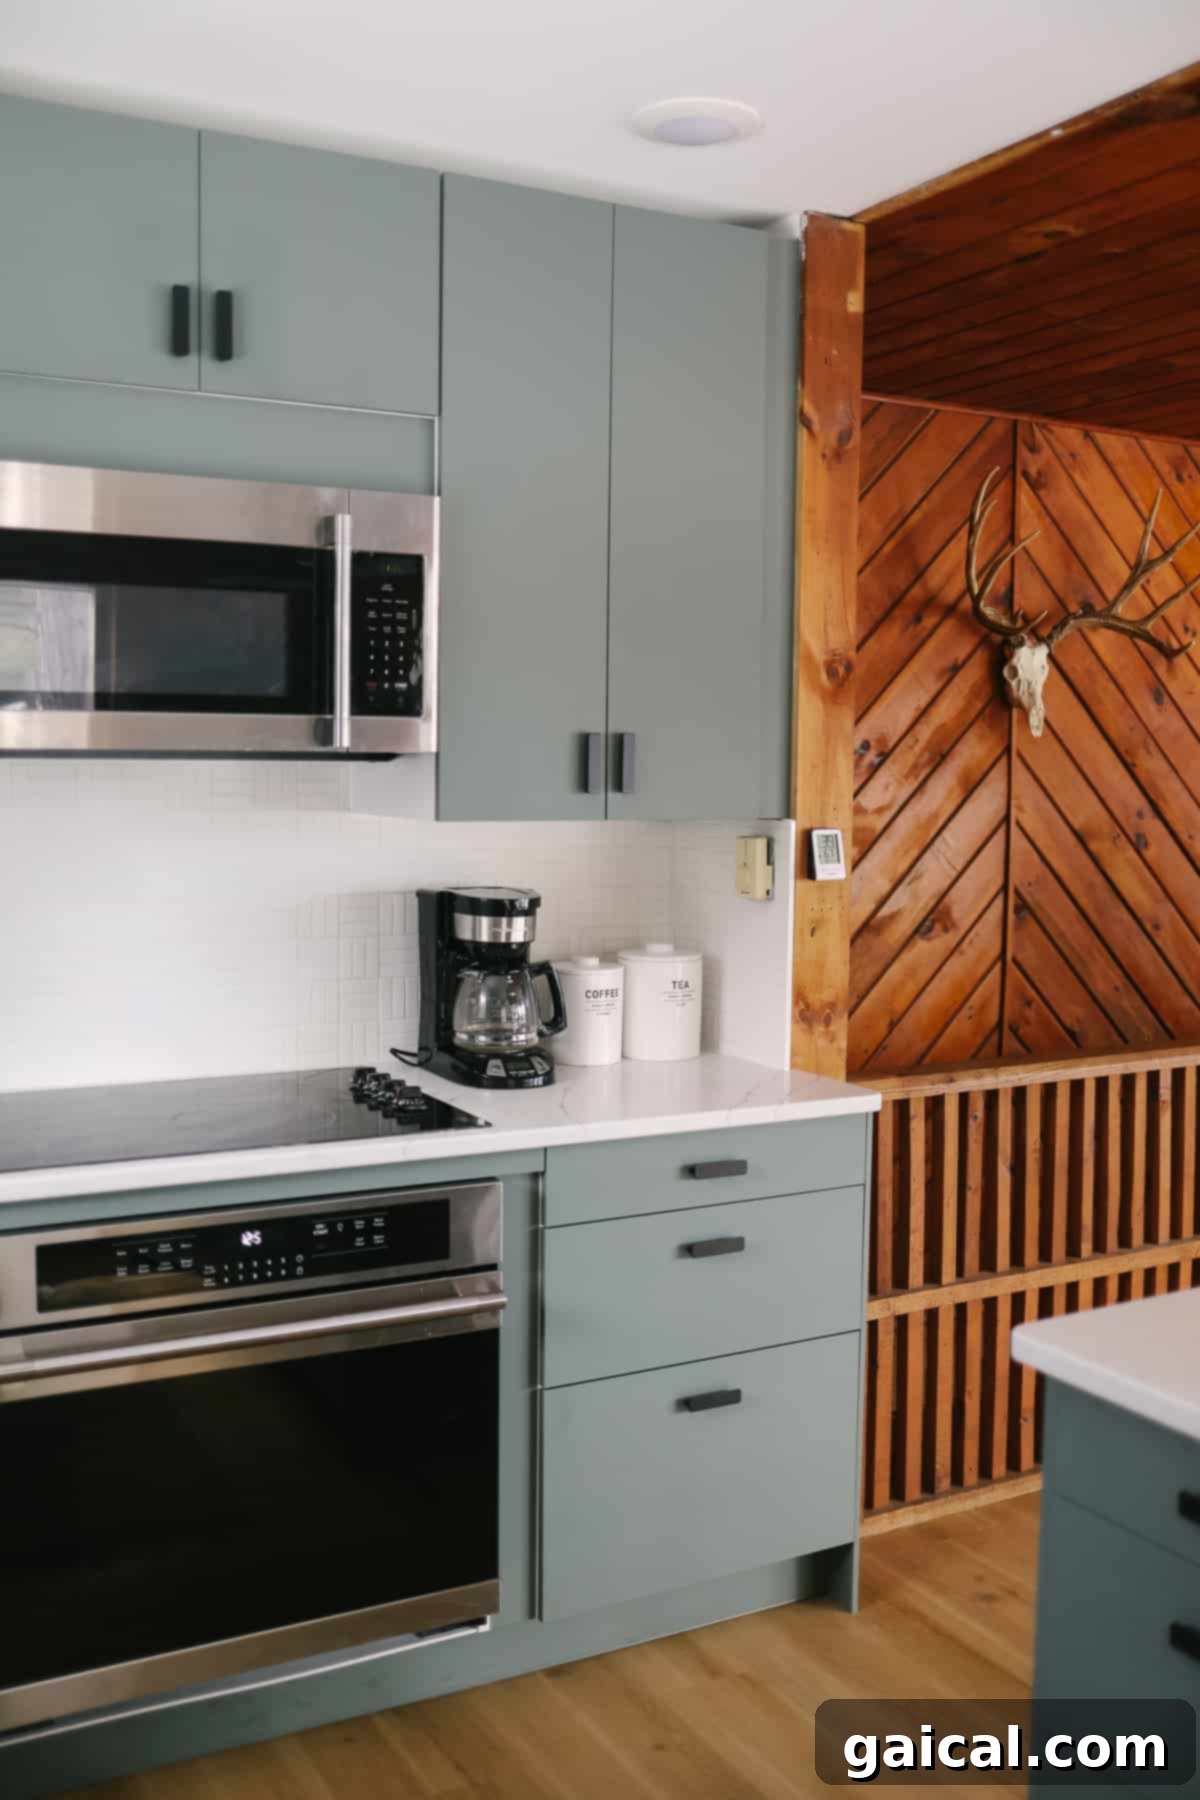
While these IKEA appliances provided an excellent solution for our budget-conscious cabin kitchen, it’s important to set expectations. They are by no means high-end luxury models, but rather reliable, functional options perfectly suited for our cabin’s needs. We secured a fantastic deal, but I must share one massive caveat: the infuriatingly sticky plastic protector.
Each appliance arrived meticulously wrapped in a thin, highly adhesive plastic film designed for protection during transit. However, removing this sticky mess proved to be an unexpected and utterly frustrating challenge. The plastic adheres tenaciously, especially in crevices, around handles, and along edges. It sounds almost comical, but months later, there are still small, stubborn bits of plastic clinging to every single appliance we purchased. It requires painstaking precision with an Exacto-knife to fully remove, a task we simply haven’t had the time or patience to complete. This minor but persistent annoyance is definitely something to be aware of if you’re considering IKEA appliances.
Our Selected IKEA Appliances
For those interested in the specific models, here are direct links to each of our chosen IKEA appliances, which have proven to be reliable workhorses in our cabin kitchen:
- Refrigerator: STJÄRNSTATUS French Door Refrigerator (Stainless Steel)
- Microwave: UPPSEENDE Over-the-Range Microwave with True Convection (Stainless Steel)
- Dishwasher: ESSENTIELL Built-in Dishwasher (Black Stainless Steel)
- Wall Oven: ADRÄTT Wall Oven with True Convection, Self-Cleaning (Stainless Steel)
- Cooktop: NEDDRAGEN Glass-Ceramic Cooktop (Black)
The Perfect Farmhouse Sink & A Faucet Upgrade
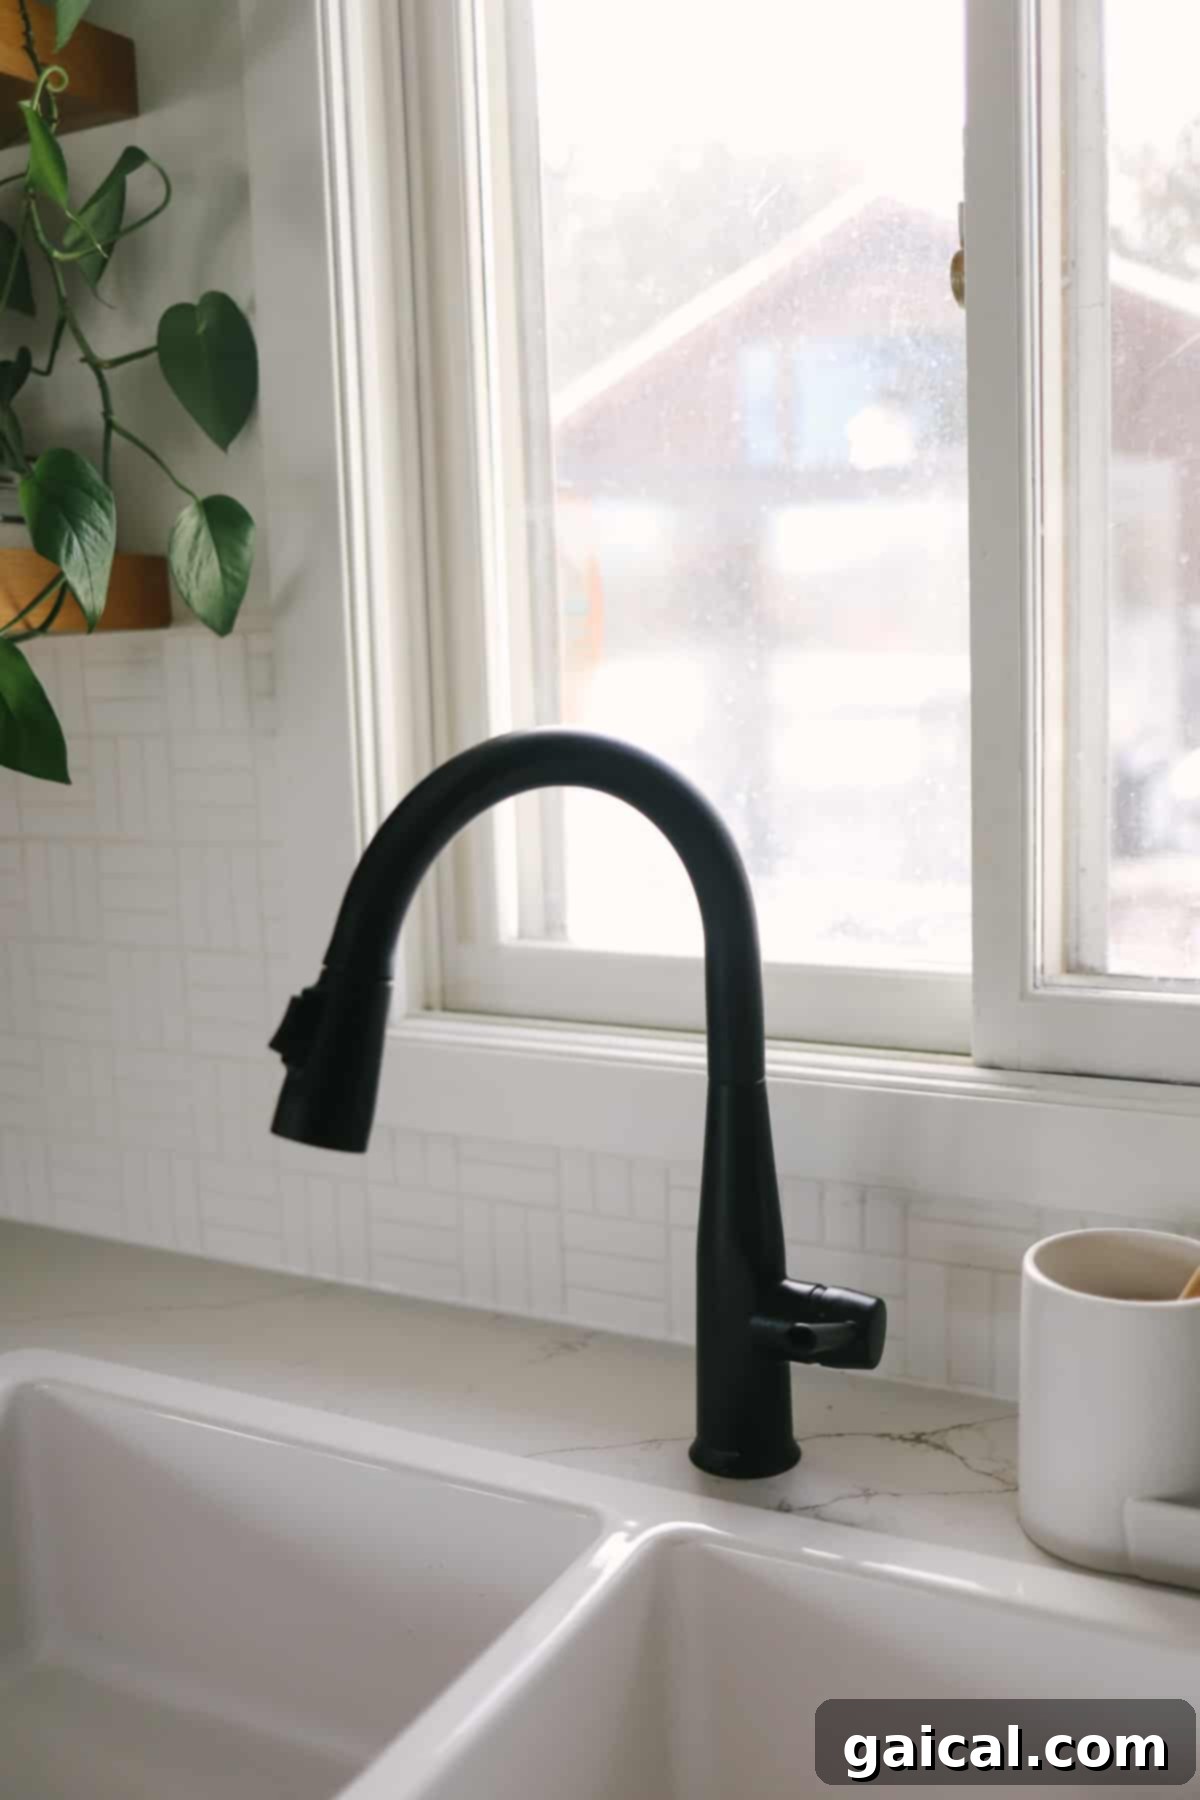
Achieving my dream farmhouse sink was a non-negotiable for this renovation, and IKEA remarkably simplified the selection process by offering a few well-designed options. We ultimately chose the IKEA Havsen Apron-Front Double Bowl Sink in white. Its clean lines and practical double-bowl design make it both aesthetically pleasing and highly functional for daily use. While it’s only been a few months since installation, we’ve been thoroughly impressed with its durability and performance so far.
Regarding the faucet, our initial purchase was also from IKEA. However, after living with it for a short period, we decided to upgrade for both enhanced aesthetics and improved quality. We opted for the Delta Essa Faucet in Matte Black. This choice proved to be an excellent decision. The Delta Essa’s sleek, modern profile and robust construction perfectly complement the Scandinavian Modern vibe of our kitchen, adding a touch of sophisticated elegance and superior functionality that we truly appreciate. Its matte black finish creates a striking contrast against the white sink and backsplash.
Affordable Brilliance: IKEA Pendant Lights
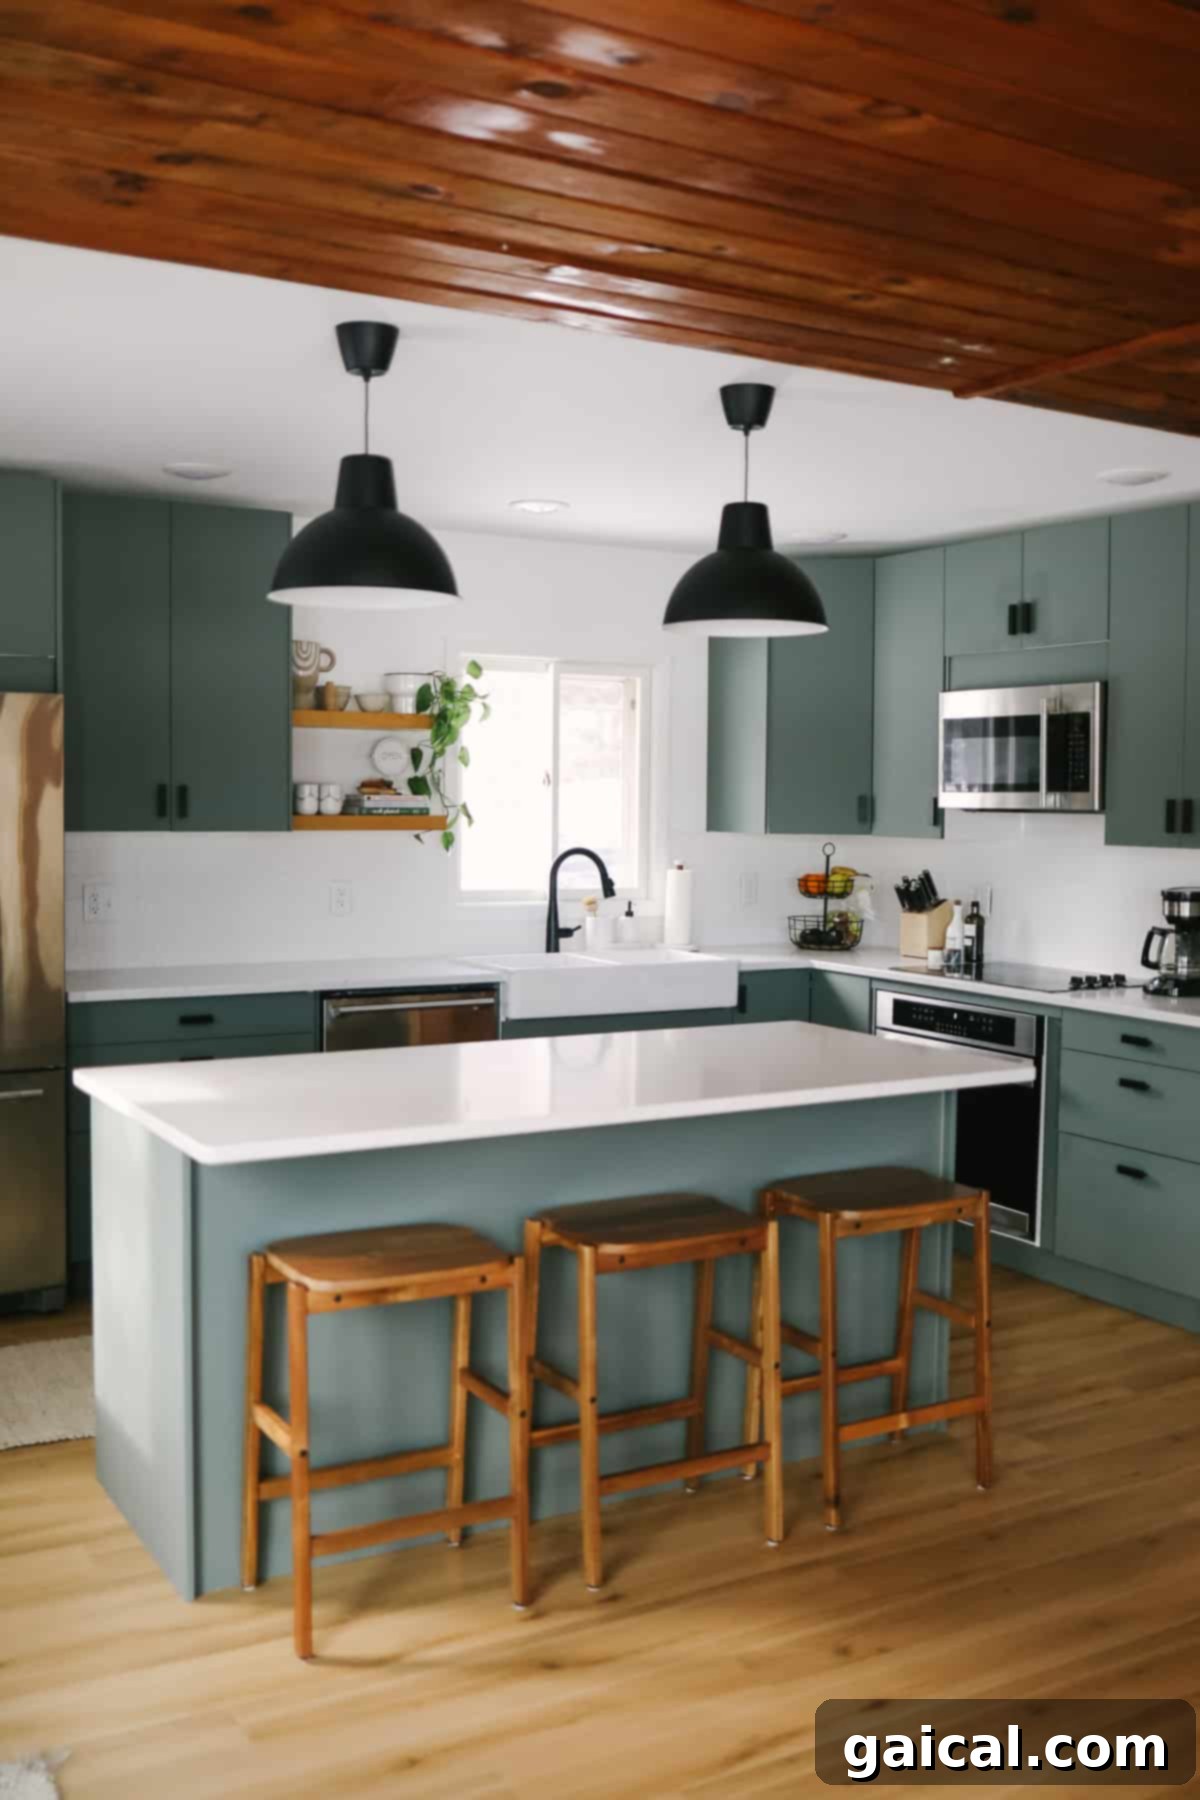
Prepare for a revelation: these striking pendant lights cost an astounding $42 for the pair – yes, total! At just $21 apiece from IKEA, you’d be hard-pressed to find a better deal anywhere. I had a clear vision for matte black pendants to anchor our kitchen island, and when I spotted these at IKEA, I simply couldn’t pass up such incredible value. They instantly added the modern, industrial touch I was looking for, providing focused illumination over the island.
My only minor wish is that the interior of the pendants matched the matte black exterior, rather than being white. However, for such an unbeatable price, this is a small concession we were more than happy to make. They still deliver a powerful aesthetic punch and plenty of light. It’s a testament to how thoughtfully chosen, budget-friendly items can dramatically impact a space.
Beyond the two stylish pendant lights, we strategically installed four recessed lights throughout the kitchen ceiling. This decision proved to be invaluable, as they provide a significant boost of ambient lighting, particularly important in a cabin setting where natural light can sometimes be limited. While electrical work represented one of our more substantial line items in the budget, the enhanced brightness and overall functionality it brought to the kitchen made it an absolutely worthwhile investment. The combination ensures the space is always well-lit, whether for cooking, dining, or entertaining.
The Elusive Dream: White Oak Floating Shelves
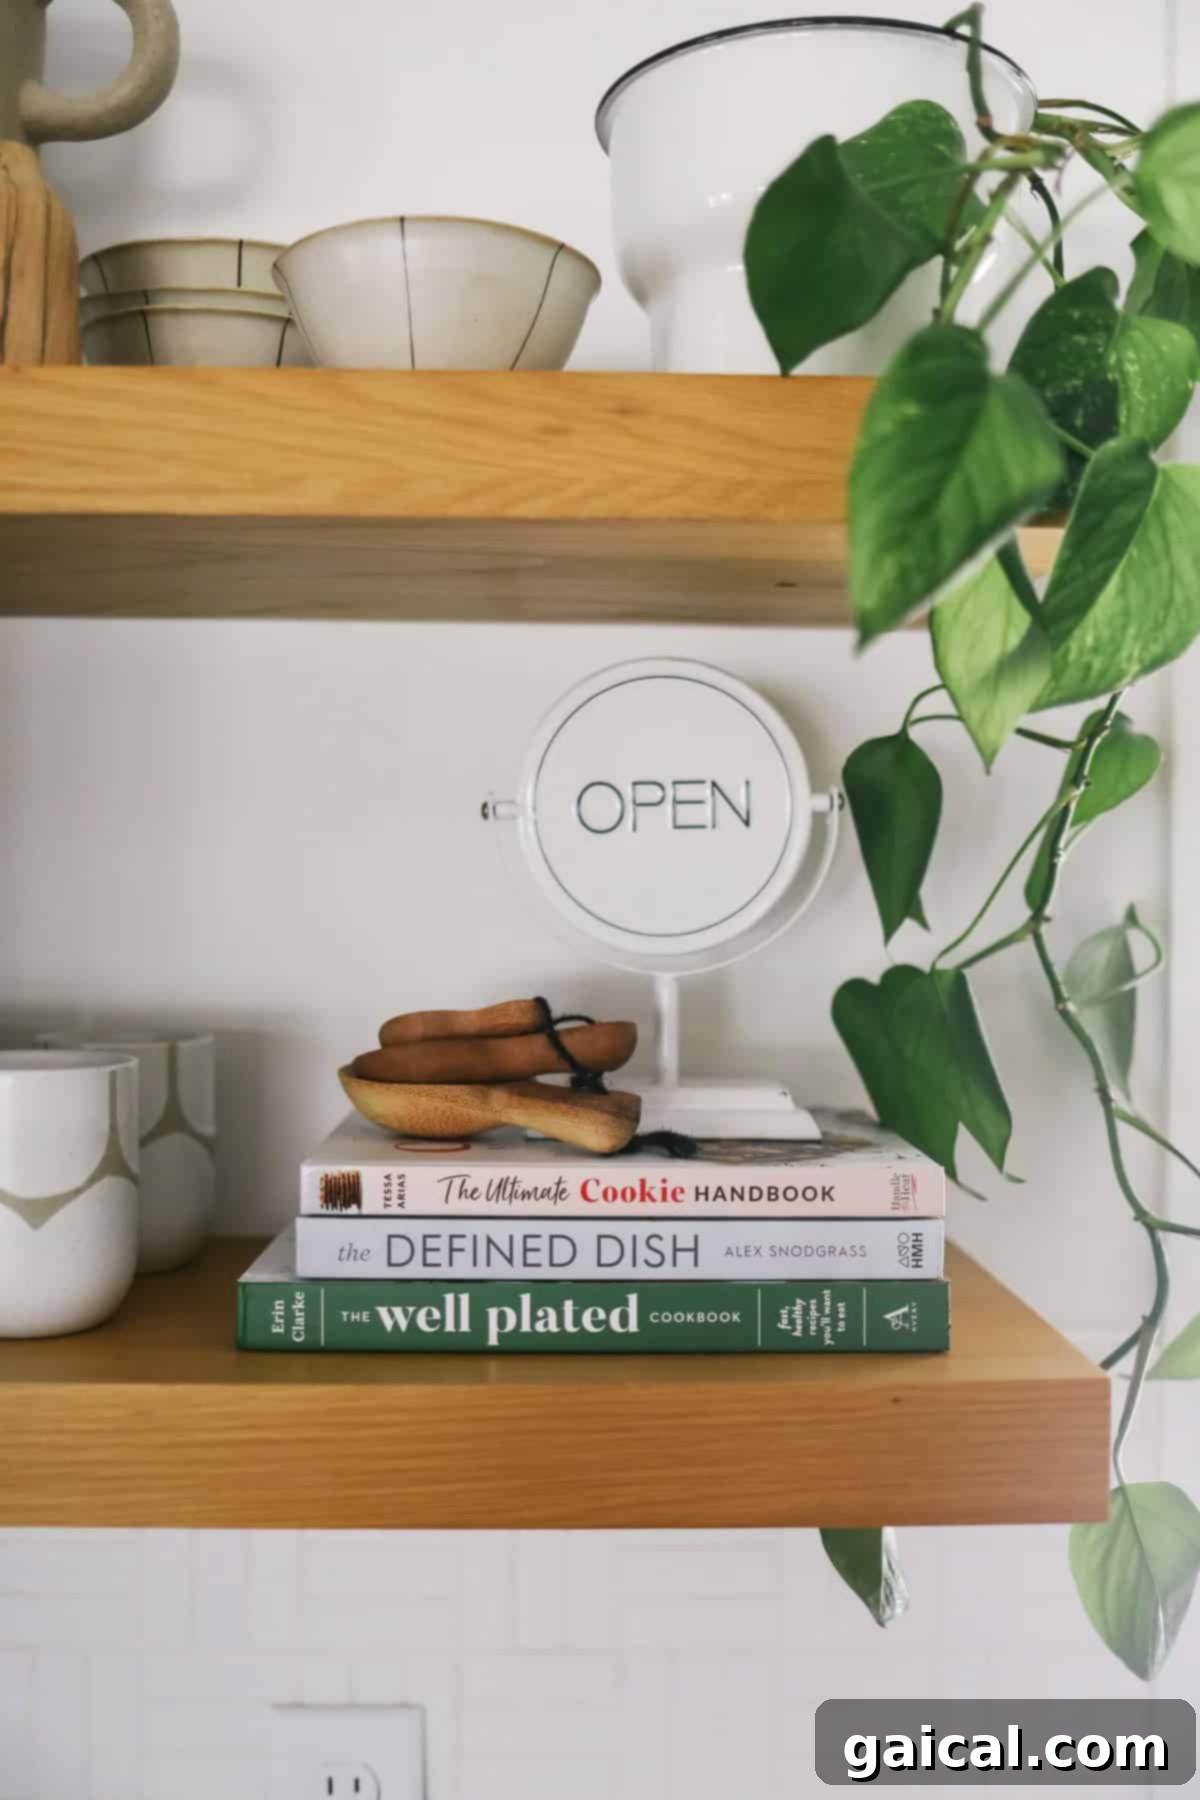
Who knew that sourcing the perfect floating shelves would be one of the most challenging aspects of our kitchen renovation? This item proved particularly difficult for me to find, as I had a very specific vision: I needed a precise size and a beautiful white oak finish. After several frustrating purchases and returns, I finally discovered the floating shelves of my dreams from Rejuvenation. The relief was immense!
These shelves, crafted from real 2-inch thick white oak, are undeniably one of the more expensive elements in our entire kitchen. However, their superior quality, stunning craftsmanship, and the warmth they bring to the space make them absolutely worth every penny. They are not merely functional storage but also serve as key aesthetic statements, perfectly complementing the rustic-modern theme and adding invaluable character to our walls. They provide open storage that keeps the kitchen feeling light and airy, while allowing us to display curated decor.
Floating Shelf Specifications
For those who, like me, fell in love with these exquisite white oak floating shelves, here are the exact specifications of the ones we installed:
- Thickness: 2-inches (a substantial, high-quality feel)
- Width: 24-inches (perfectly proportioned for our wall space)
- Depth: 10-inches (offering ample space for dishes and decor)
Installation Tip: We strategically hung these shelves approximately 15-inches apart from each other. The lowest shelf was carefully positioned to sit flush against the bottom of our upper cabinets, directly above the tile backsplash. This creates a continuous, thoughtful design line that enhances the visual flow of the kitchen.
The Investment Piece: Quartz Countertops
As anticipated, the countertops emerged as the single most expensive line item within our entire kitchen budget. At the time of our IKEA kitchen purchase, IKEA was not offering or installing their own countertops. We believe this was likely due to the widespread supply chain disruptions and logistical challenges stemming from the COVID-19 pandemic. This meant we needed to source our countertops independently.
We decided to invest in high-quality quartz countertops, recognizing them as a long-term upgrade worth the expenditure. For this crucial element, we turned to a reputable local vendor, Trend Stone Surfaces, based out of Eau Claire, WI. After exploring various options, I fell completely in love with a product called Aldino Giallo Quartz. What captivated me about this particular quartz was its bright white base, beautifully interwoven with subtle brown and gold hues in its delicate veining. It offered the perfect balance of modern brightness and natural warmth, complementing both our green/grey cabinets and the rustic wood paneling.
Our Experience with Trend Stone Surfaces: A Major Setback
While we adored the Aldino Giallo Quartz, our experience with Trend Stone Surfaces was unfortunately far from smooth. We encountered a significant hiccup when the team responsible for measuring our kitchen failed to do so accurately. Both the island and L-shaped perimeter countertops were incorrectly measured, leading to a catastrophic discovery during the installation day: nothing fit.
The timing of this error couldn’t have been worse. The original installation was scheduled for the day before Thanksgiving, leaving us with a completely unusable kitchen for our holiday celebrations. Trend Stone ultimately left the incorrectly cut counters temporarily installed over Thanksgiving, but we were forced to wait an agonizing two more weeks for them to re-cut and reinstall the correct pieces. This delay also necessitated the inconvenient uninstalling and reinstalling of both plumbing and appliance electricity, adding unforeseen complexities and frustrations to our renovation timeline. It was a major headache, but we ultimately got the beautiful countertops we wanted.
Choosing the Perfect Backsplash: Daltile Lattice Weave
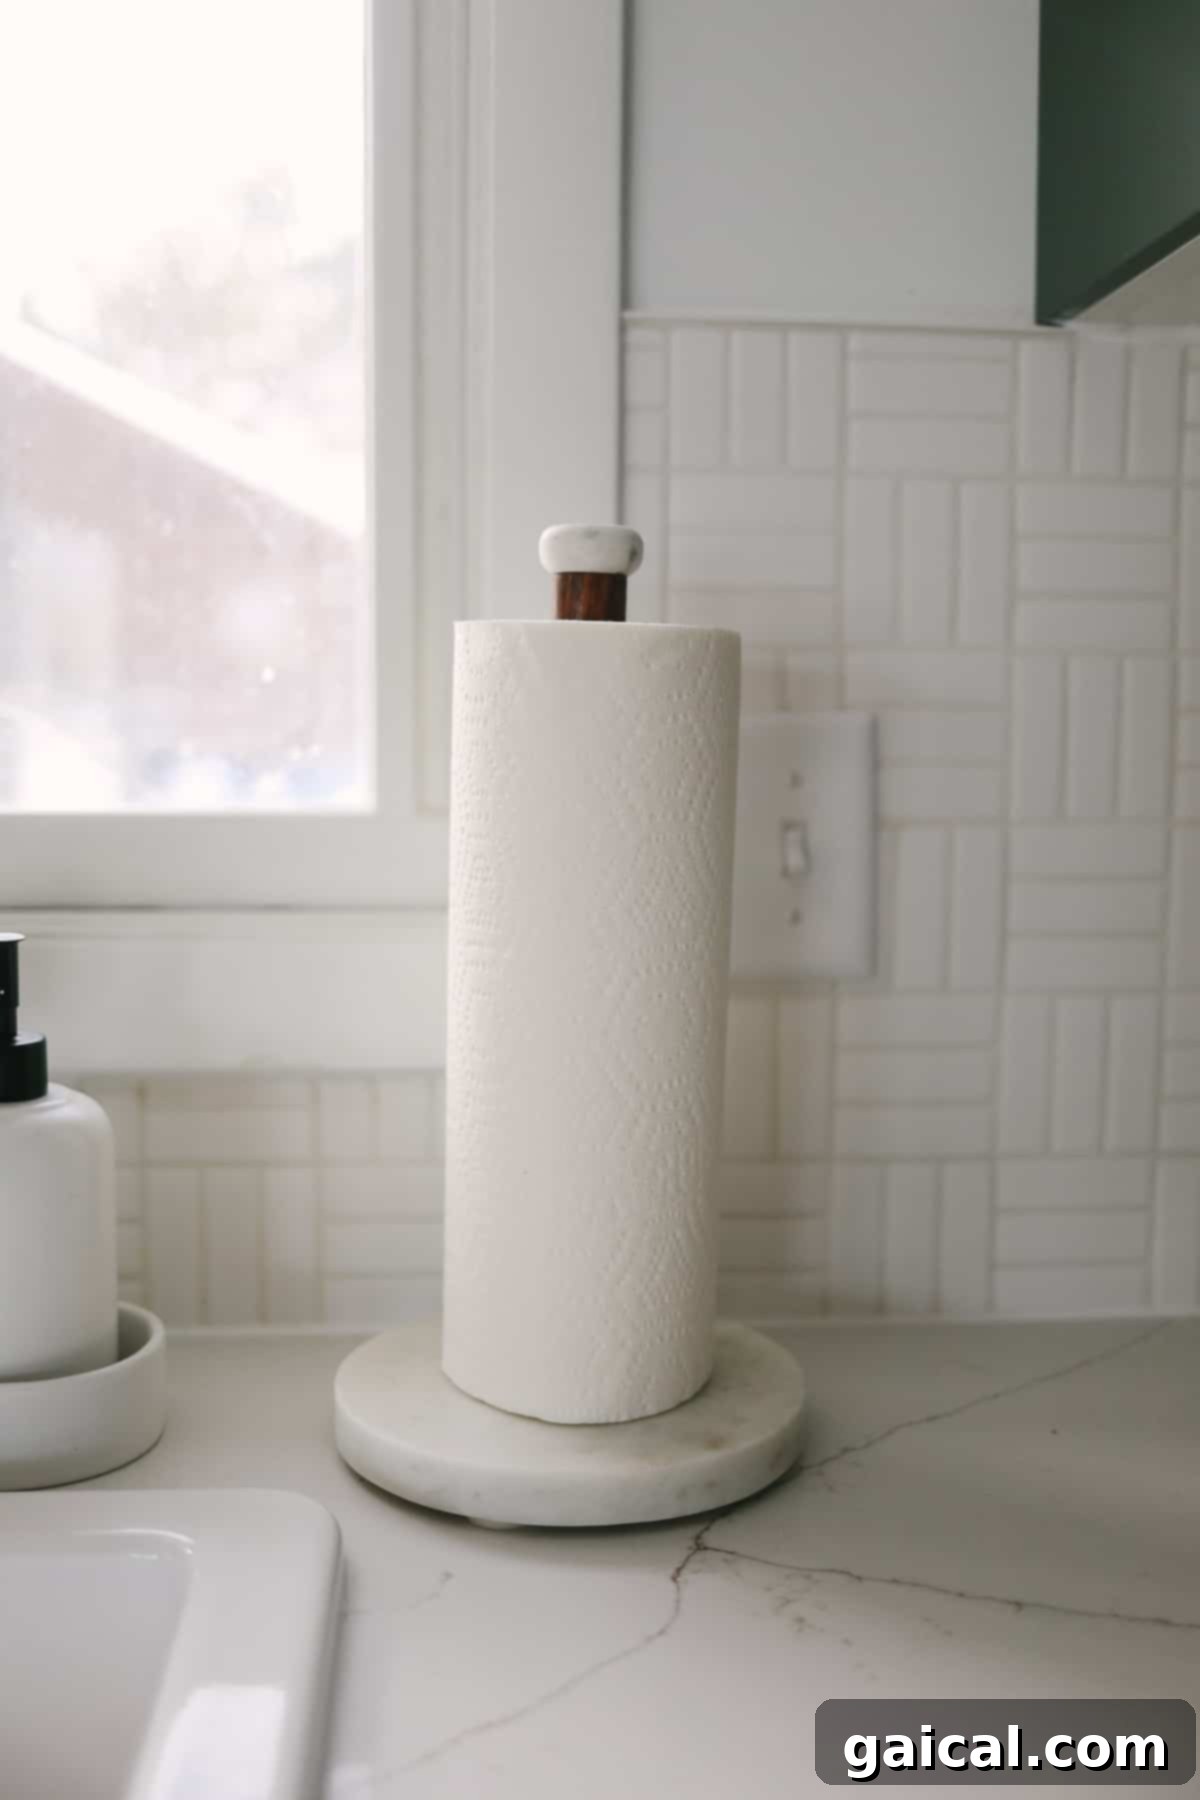
From the outset, I envisioned a simple, elegant white backsplash to provide a clean contrast against our green/grey cabinets and wood paneling. My initial thought leaned towards a skinny subway tile, installed vertically for a modern touch. However, during my search, I stumbled upon this captivating lattice weave pattern from Daltile’s Color Wheel Collection Mosaic, and it was love at first sight. The intricate yet subtle pattern added a layer of texture and sophistication that truly elevated the design beyond a basic subway tile.
The tile itself was quite inexpensive, making it an excellent budget-friendly choice that didn’t compromise on style. My only regret is not purchasing enough to extend the tile all the way up to the ceiling, which would have created an even more dramatic and expansive feel. We were short by just a small margin, so we ultimately decided to tile just the standard backsplash area. Despite this minor adjustment, the lattice weave tile provides a beautiful, clean backdrop that ties the entire kitchen together.
Grout Selection: We opted for a light grey grout color, which subtly defines the lattice pattern without being too stark. A pure white grout would also have looked lovely, offering a more seamless, monochromatic finish, but we preferred the gentle contrast for added depth.
Finishing Touches: Decor and Dining
Beyond the core kitchen elements, carefully selected decor and dining furnishings truly complete the Scandinavian Modern cabin aesthetic. Each piece was chosen for its ability to enhance the overall theme while remaining practical for cabin life:
- European Mule Deer Mount: I have a soft spot for faux antlers, and this European mount from Cast Horn Designs was an absolute find. It adds that perfect touch of rustic cabin charm without any ethical concerns, beautifully balancing the modern elements in the room. It’s a striking focal point that draws the eye and reinforces the cabin’s identity.
- Kitchen Island Stools: The stylish stools featured in our photos were a fantastic score from West Elm during their summer 2021 sale. We managed to purchase two stools for just $70 – an incredible deal! Unfortunately, they are no longer available, a testament to how quickly great design pieces can disappear. We love how their clean lines complement the modern aesthetic while providing comfortable seating at the island.
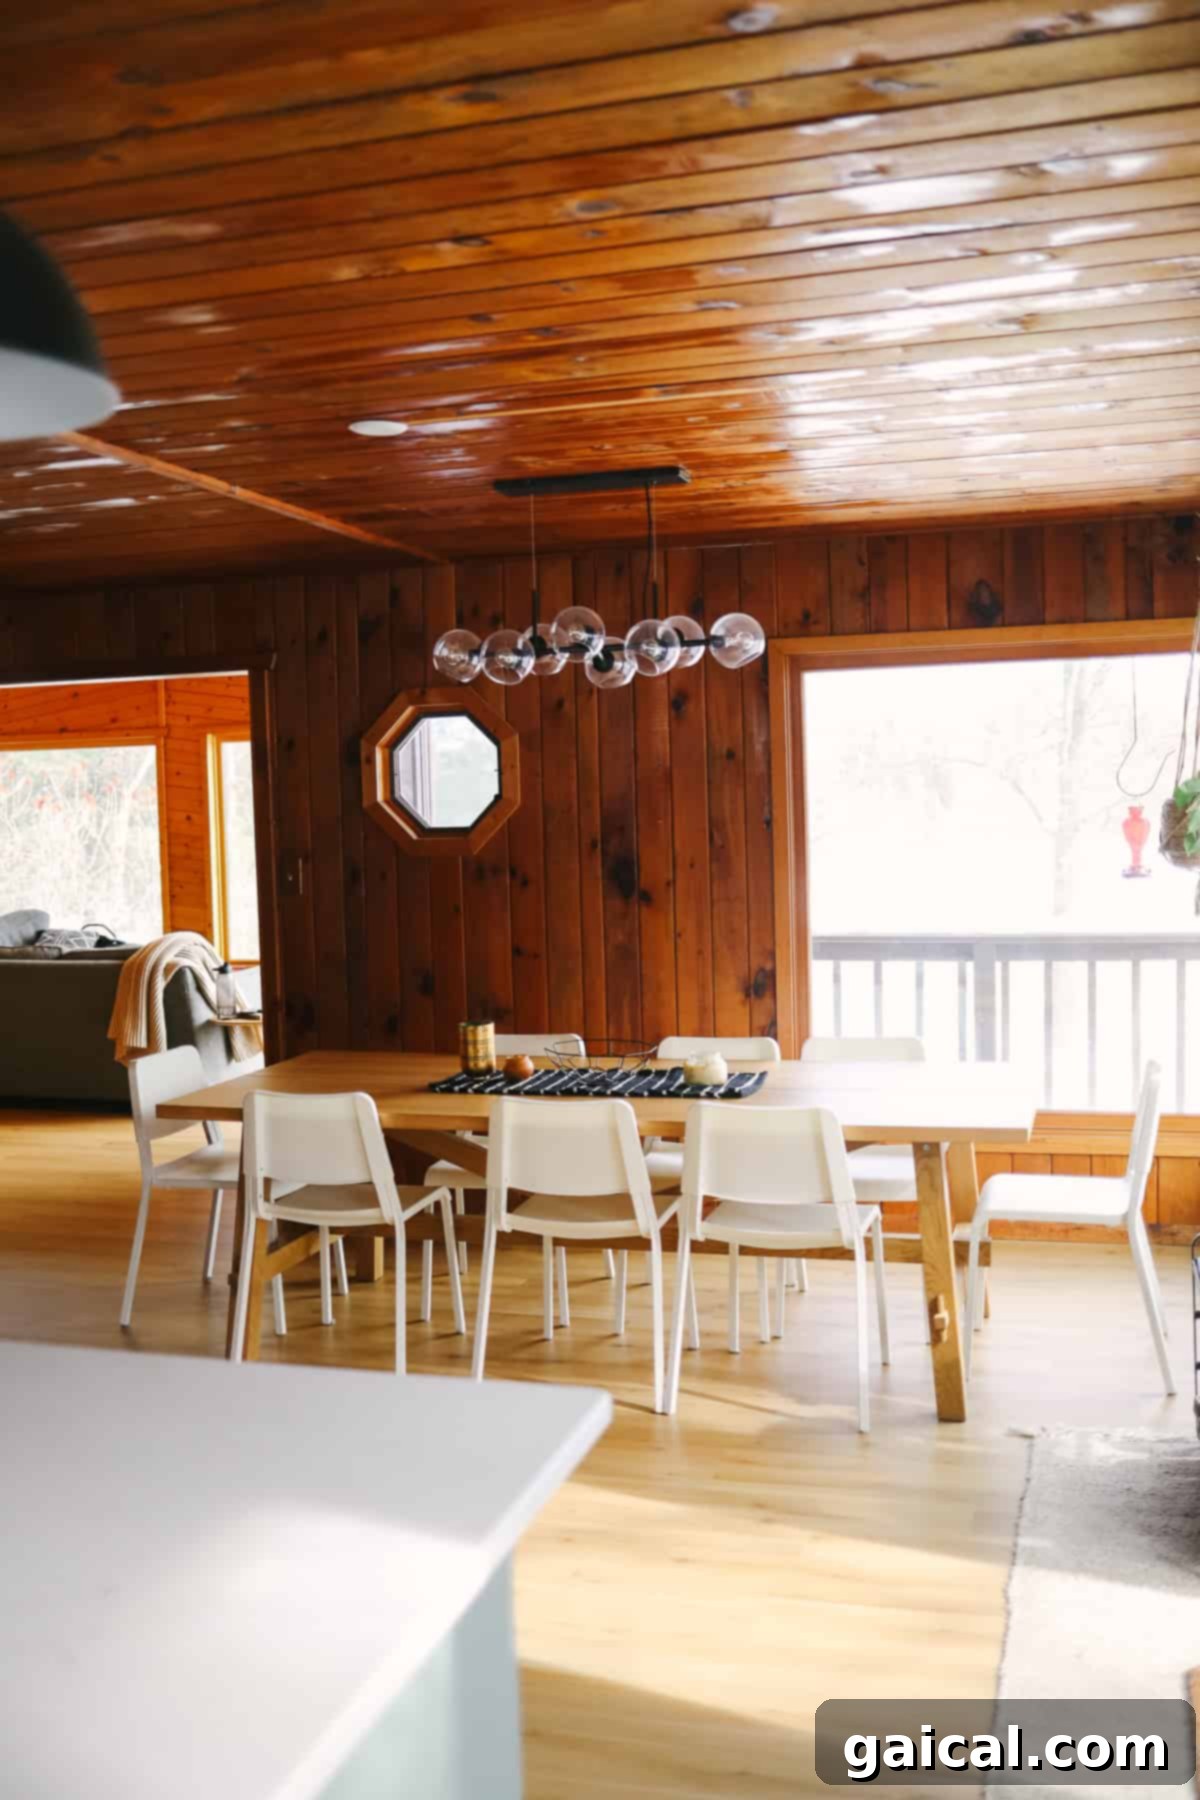
- Dining Light Fixture: Elevating our dining area, the elegant light fixture above our dining table was also purchased from West Elm. It’s available in both matte black and gold, offering versatility to match various decor schemes. Its contemporary design harmonizes beautifully with the kitchen’s modern elements.
- Dining Table: For our cabin, we needed a robust dining table capable of seating a large gathering. The Mockelby table from IKEA, designed to seat ten people, was the ideal solution. For an IKEA piece, its quality is exceptional, offering a solid oak construction that feels substantial and durable. Priced at a reasonable $699, it represents remarkable value for such a large and well-built table.
- Dining Chairs: Keeping our cabin’s practical nature in mind, we didn’t want to overspend on dining chairs. We chose ten IKEA Janinge chairs at $65 each. Their minimalist design, comfortable seating, and easy-to-clean white finish make them perfect for a busy cabin environment. They provide ample seating without cluttering the space, maintaining the clean lines of the Scandinavian aesthetic.
IKEA Kitchen Renovation: An Honest Budget Breakdown
Transparency is key in any renovation project, so we’re excited to share the detailed breakdown of our IKEA kitchen budget, encompassing both materials and labor costs. It’s important to note that this budget specifically covers the kitchen renovation; it does not include the flooring, which was replaced throughout the entire house, nor the ceiling drywall work, as these were separate, broader home improvement projects. We hope this insight helps you plan your own dream kitchen!
Material Costs for Our Scandinavian Modern Kitchen
- IKEA Cabinets: $5,500 (Exceptional value for the quality and design)
- IKEA Appliances: $4,500 (A cost-effective solution for essential kitchen functions)
- IKEA Hardware: $150 (Affordable and stylish pulls)
- IKEA Sink & Faucet (initial): $350 (Farmhouse sink + initial faucet)
- IKEA Pendant Lights: $42 (An unbeatable deal for statement lighting)
- Quartz Countertops (local vendor): $6,000 (A significant investment for durability and aesthetic appeal)
- Daltile Lattice Weave Tile (local): $270 (Budget-friendly and stylish backsplash)
Total Cost of Materials: $16,820
Considering the scope and quality of the finished kitchen, this material cost represents truly fantastic value. The strategic use of IKEA products for the bulk of the project allowed us to allocate funds to key areas like the quartz countertops, where an upgrade was deemed essential for long-term satisfaction.
Labor Costs for Our Professional Kitchen Installation
- Demo & Cabinet Install: $3,500 (Includes removal of old kitchen and expert assembly/installation of IKEA cabinets)
- Appliance Install: $560 (Professional hook-up for all new appliances)
- Plumbing: $400 (Ensuring correct installation of sink, faucet, and dishwasher connections)
- Electric: $1,500 (Wiring for new appliances, recessed lighting, and pendant lights – a crucial safety and functional investment)
- Tile Install: $1,500 (Skilled installation of the lattice weave backsplash)
Total Cost of Labor: $7,460
While hiring professionals added to the overall budget, it provided peace of mind, expertise, and significantly sped up the renovation timeline. It also ensured that complex tasks, such as electrical and plumbing, were handled safely and correctly by licensed tradespeople.
Total Project Cost: $24,280
We are genuinely amazed that our entire Scandinavian Modern cabin kitchen renovation, including both materials and professional labor, came in at under $25,000! This figure demonstrates that creating a stylish, functional, and high-quality kitchen doesn’t necessarily require an exorbitant budget, especially when leveraging smart sourcing strategies like IKEA.
It’s worth noting that this project could have been nearly $7,500 less if my husband and I had undertaken all the labor ourselves. We recognize that many individuals possess incredible DIY skills and could complete a similar kitchen renovation for around $17,000. However, from the very beginning, we made a conscious decision to hire out the construction aspects. Our rationale was to ensure a smoother, more efficient process and to guarantee a professional finish, allowing us to focus on the design and enjoyment of our transformed space rather than the intensive physical labor.
An Honest Review: Pros & Cons of an IKEA Kitchen
Having completed our full IKEA kitchen renovation, we’ve gained valuable insights into the advantages and disadvantages of opting for an IKEA system. Here’s our candid assessment to help you make an informed decision for your own project:
Pro – Exceptional Design Services: One of the absolute standout benefits of choosing an IKEA kitchen is their complimentary design service. While you can utilize their intuitive online kitchen planner from home, the real magic happens in-store. You can bring your measurements and sit down with a professional IKEA kitchen designer. I personally utilized this service twice, spending approximately two hours each session. The designers were incredibly knowledgeable, helping us optimize our layout, select components, and place the order with precision. This invaluable, free resource can save countless hours of planning and prevent costly mistakes.
Pro – Unbeatable Price Point: When it comes to affordability without sacrificing modern aesthetics, IKEA’s prices are truly difficult to match. Our total material cost for the kitchen was $16,820, and a substantial $6,000 of that was allocated to our premium quartz countertops, which were not from IKEA. Many other custom cabinet providers quoted us prices close to our *entire* material budget just for cabinets alone. The fact that you can achieve almost an entire, stylish kitchen for under $20,000 in materials is a testament to IKEA’s incredible value proposition, making high-quality kitchen renovations accessible.
Con – Significant Supply Chain & Delivery Issues: This was, without a doubt, the most frustrating aspect of our IKEA kitchen experience. While we understand that many of these issues may have been exacerbated by the COVID-19 pandemic, the impact was considerable. Our initial delivery was promised within a remarkably fast four weeks, but the order simply never arrived – with no prior email notification or phone call. After diligently tracking it down, we were rescheduled for another four weeks out. When the partial order finally did arrive, approximately three-quarters of our items were missing.
This led to hours of back-and-forth communication with customer service, trying to locate and reorder missing components. Some products were fortunately in stock and shipped promptly, but a handful of crucial items, notably a corner base cabinet, remained elusive. As anyone familiar with kitchen renovations knows, all base cabinets must be installed before moving on to the next critical step: countertop templating and installation. We were advised to “keep an eye” on inventory and “call the store every week” to check availability. It ultimately took a frustrating three to four months to receive every single item we needed, requiring immense persistence and frequent follow-ups on our part. This experience significantly delayed our timeline and tested our patience.
Con – The Sticky Plastic Protector on Appliances: As mentioned earlier, the protective plastic film on IKEA appliances proved to be a persistent nuisance. While intended to safeguard the finish during shipping, its extremely adhesive nature makes it incredibly difficult to remove completely, especially from tight corners and crevices. We found ourselves picking at tiny bits of plastic for weeks, and some remain stubbornly attached, requiring a careful hand with an Exacto-knife. It’s a minor detail, but one that detracts from the immediate satisfaction of a new appliance and adds an unexpected, tedious chore.
Con – Self-Assembly Requirement: For those who aren’t avid DIYers, the fact that IKEA kitchens arrive in a multitude of flat-pack boxes, requiring complete self-assembly and installation, is a definite drawback. While we chose to hire professionals for this part of the job, it’s a significant time commitment and requires a certain level of skill and patience. The sheer volume of boxes and components can be overwhelming, and it’s certainly not a task for everyone. Factor this into your budget and timeline if you plan to do it yourself, or consider the added cost of professional assembly.
The Dramatic Transformation: Before Photos
No kitchen reveal would truly be complete without the dramatic “before” photos that showcase the incredible transformation! We couldn’t possibly leave you hanging without a glimpse into the starting point of our cabin kitchen journey. Prepare to be amazed by the “before” state – and yes, that includes plenty of carpet in unexpected places! These images truly underscore the scope of our renovation and the impact of our Scandinavian Modern vision. Enjoy the journey from dated to dazzling!