
How to Roast Garlic: Your Simple Guide to Flavorful Perfection
Unlock a world of rich, aromatic flavor by learning how to roast garlic in your oven. This incredibly simple technique transforms pungent raw garlic into soft, sweet, and deeply savory cloves that instantly elevate any meal. Forget complex preparations; our easy-to-follow guide makes achieving perfectly roasted garlic easier than you might imagine, bringing gourmet taste right to your kitchen.
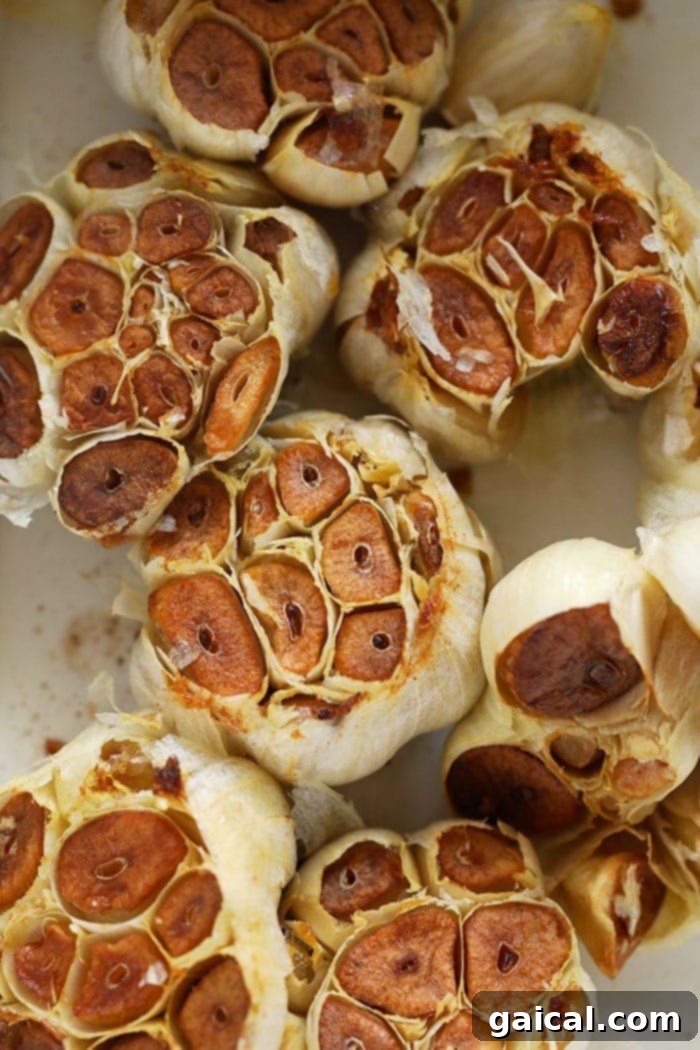
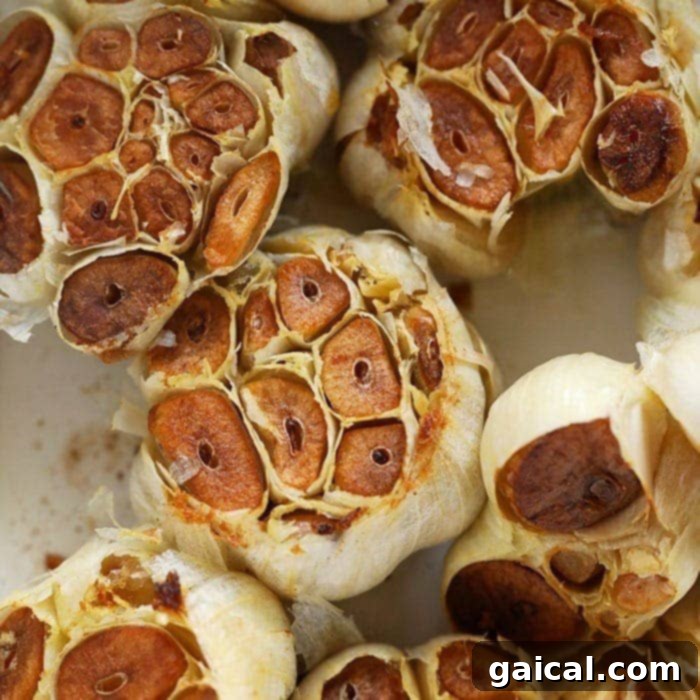
Once you experience the sublime taste of homemade roasted garlic, you’ll find yourself reaching for it constantly. While fresh garlic cloves offer a vibrant, sharp kick, roasting them unlocks an entirely new dimension of flavor. The high heat gently caramelizes the natural sugars within each clove, transforming them into a spreadable, almost jam-like consistency with a wonderfully mellow, sweet, and nutty profile. Not to mention, the warm, inviting aroma that fills your kitchen during the roasting process is an absolute treat!
Creating this culinary magic requires just a few basic ingredients: whole garlic bulbs, a touch of olive oil, and a pinch of salt. In about 40 minutes, you’ll have a batch of exquisite roasted garlic ready to be incorporated into sauces, creamy dips, hearty soups, and countless other dishes. We particularly love adding entire garlic heads to a sheet pan of roasted root vegetables, mashing it into our favorite ricotta pasta, or even blending it into fluffy mashed potatoes for an unforgettable side dish. Get ready to transform your cooking with this essential technique!
Why Roast Garlic? The Transformative Power of Heat
Many home cooks stick to fresh garlic, which is fantastic for certain dishes. However, roasting garlic offers a completely different, yet equally desirable, flavor profile and texture. Here’s why you should embrace oven-roasted garlic:
- Milder, Sweeter Flavor: The intense, pungent bite of raw garlic mellows considerably during roasting. The heat breaks down allicin, the compound responsible for garlic’s sharpness, while caramelizing its natural sugars. The result is a surprisingly sweet, rich, and nutty flavor that’s less assertive but deeply satisfying.
- Creamy, Spreadable Texture: Instead of firm, chopped cloves, roasted garlic becomes incredibly soft and spreadable, almost like butter. This makes it perfect for mashing into dips, spreading on toast, or whisking into dressings.
- Enhanced Aroma: Roasting garlic fills your home with an irresistible, comforting aroma that’s distinct from the sharper scent of raw garlic. It’s a wonderful sensory experience that signals deliciousness is on the way.
- Incredibly Versatile: The milder, sweeter flavor of roasted garlic makes it suitable for a wider range of dishes, from savory to slightly sweet applications. It adds depth without overpowering other ingredients.
- Easy Preparation: With minimal prep and hands-on time, roasting garlic is a foolproof way to prepare a batch of this flavorful ingredient to have on hand for days.
Essential Ingredients for Perfect Roasted Garlic
This method is wonderfully simple, requiring only two core ingredients and an optional seasoning. Quality matters, even in simplicity!
- Whole Garlic Bulbs: Look for firm, plump garlic bulbs without any soft spots or green sprouts. While a single head of garlic works, roasting several at once is more efficient and ensures you always have some on hand.
- Olive Oil: A good quality extra virgin olive oil is preferred here, as its fruity notes complement the garlic beautifully. It helps the garlic cloves soften and caramelize, preventing them from drying out or burning.
- Salt (to taste): A sprinkle of sea salt or kosher salt enhances the natural flavors of the roasted garlic, bringing out its sweetness and savory depth. Freshly ground black pepper is also a welcome addition.
Creative Variations for Your Roasted Garlic
While classic roasted garlic is sublime on its own, don’t hesitate to experiment with these simple additions to customize the flavor to your liking:
- Herb Infusion: Add fresh sprigs of rosemary, thyme, or oregano to the baking dish alongside the garlic bulbs. The herbs will infuse the olive oil and garlic with their fragrant essences during roasting, creating an even more complex flavor profile.
- Spice It Up: Before drizzling with olive oil, sprinkle the garlic bulbs with a pinch of red pepper flakes for a subtle heat, smoked paprika for a smoky depth, or a dash of your favorite homemade spice blend for a unique twist.
- Alternative Oils: While olive oil is a classic choice, feel free to use other oils. Avocado oil offers a neutral flavor and high smoke point, while a touch of truffle oil post-roasting can add an incredibly luxurious aroma. Coconut oil can also be used for a slightly different flavor.
- Citrus Brightness: Place a lemon wedge or a few orange peel strips in the baking dish with the garlic. The citrus notes will subtly infuse the garlic, adding a refreshing brightness that pairs wonderfully with its sweetness.
- Roast with Other Vegetables: Maximize your oven’s use by simultaneously roasting other root vegetables like quartered onions, sweet potato chunks, carrots, or even bell peppers. The flavors will meld beautifully, creating a delicious medley.
Frequently Asked Questions About Roasting Garlic
Do you need to peel the garlic first?
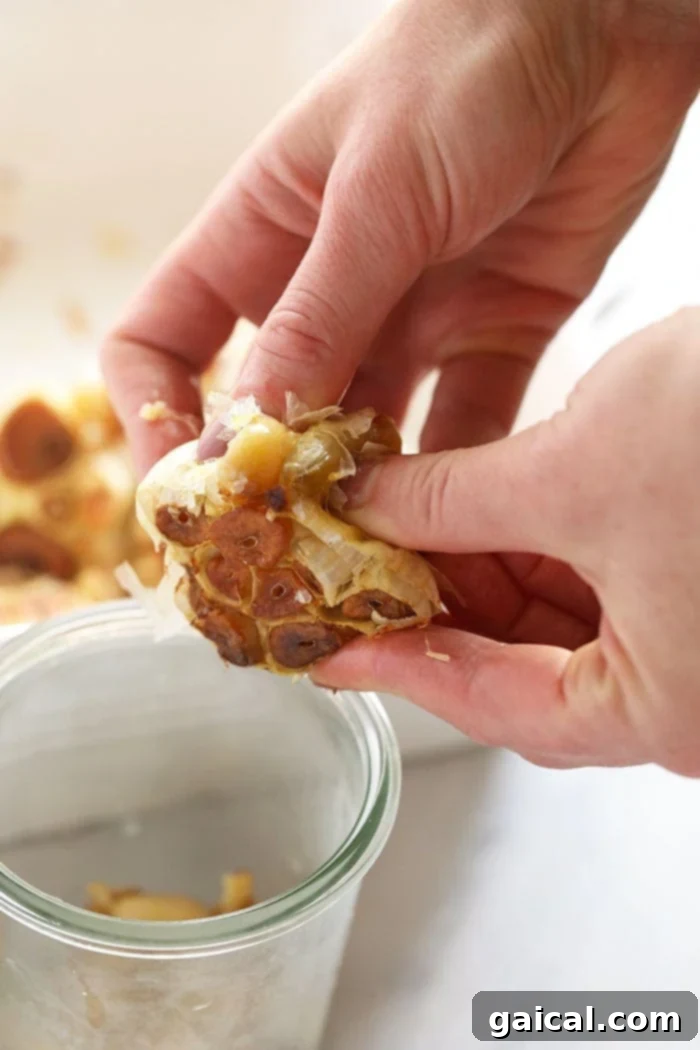
Absolutely not! There is no need to peel the garlic cloves before roasting. The outer skin acts as a protective layer, helping the garlic steam and soften while preventing it from burning. Once roasted, the tender, caramelized cloves will easily slide right out of their papery casings, making extraction a breeze.
Can you use more or less garlic bulbs than the recipe calls for?
Yes, this recipe is incredibly flexible! The beauty of roasting garlic is that it scales effortlessly. Whether you want to prepare just one head of roasted garlic for a quick snack or ten heads for a large gathering or meal prep, the method remains the same. Simply adjust the amount of olive oil accordingly – about 1/2 teaspoon per bulb – and ensure your baking dish is large enough to accommodate all the garlic in a single layer.
How do you know when the roasted garlic is done?
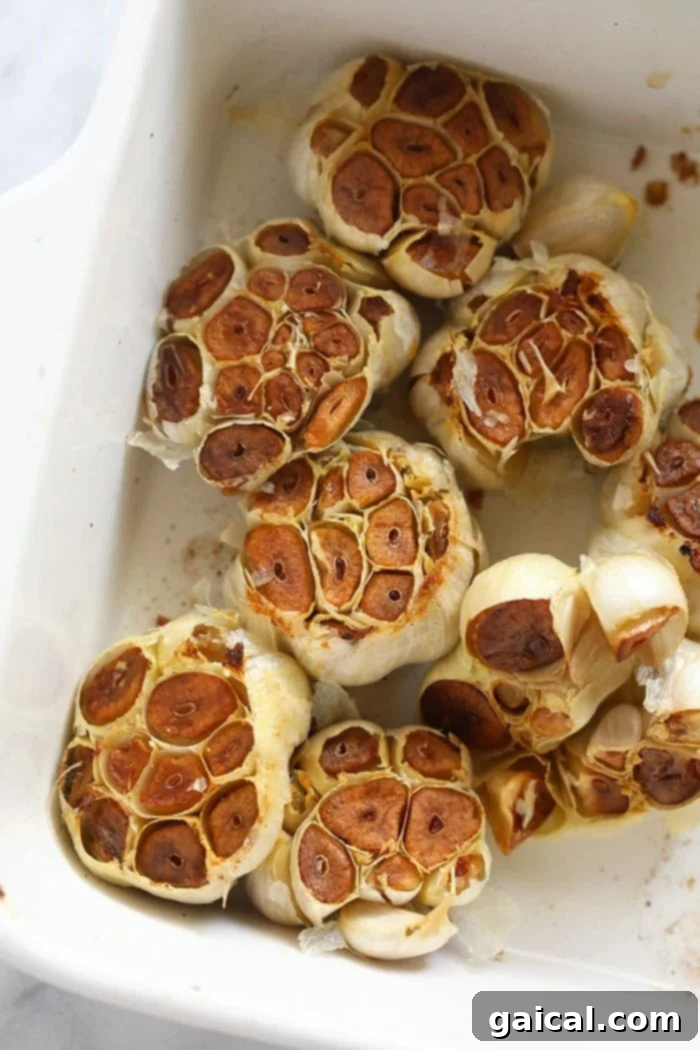
Perfectly roasted garlic will be wonderfully fragrant, filling your kitchen with its sweet aroma. Visually, the cloves should appear golden brown and slightly caramelized at the exposed tops. When gently squeezed, the bulbs should feel very soft, indicating that the cloves inside are tender and creamy. This typically takes about 40 minutes when baked at 375ºF (190ºC).
Discover More Delicious…
Favorite Roasted Vegetable Recipes
If you love the simplicity and flavor enhancement that roasting brings, explore some of our other top roasted vegetable dishes:
- Honey Balsamic Roasted Carrots: Sweet and tangy carrots, perfectly caramelized.
- Oven Roasted Brussels Sprouts: Crispy on the outside, tender on the inside – a true revelation.
- Roasted Root Vegetables: A colorful medley of hearty vegetables, ideal for a wholesome side.
- Roasted Delicata Squash: Sweet, tender, and incredibly easy to prepare.
- Ranch Roasted Potatoes: Crispy potatoes coated in a savory ranch seasoning.
- Garlic Roasted Cauliflower: A simple yet flavorful way to enjoy this cruciferous vegetable.
Storing Your Roasted Garlic
Proper storage ensures your delicious roasted garlic remains fresh and flavorful for future use:
- Refrigerator: Once the roasted garlic cloves have cooled completely to room temperature, gently squeeze them out of their skins. Store the extracted cloves in an airtight container in the refrigerator for up to 5 days. For extra flavor and preservation, you can also store them submerged in a small amount of fresh olive oil in a sealed jar. This method can extend their freshness slightly, but always ensure the garlic is fully submerged and use it within a week, discarding if any signs of spoilage appear.
- Oil Infusion (Caution): While storing roasted garlic in oil at room temperature is appealing, it carries a risk of botulism if not handled correctly due to the anaerobic environment. To be safe, always refrigerate garlic stored in oil and use it within a week, or freeze it for longer storage.
Freezing Roasted Garlic for Long-Term Enjoyment
One of the best ways to preserve roasted garlic is by freezing it! It freezes wonderfully, allowing you to enjoy its delightful flavor for months.
- Freezing Whole Cloves: After roasting and cooling, squeeze the individual cloves from their skins. Spread them in a single layer on a parchment-lined baking sheet and freeze for about an hour, or until completely solid. This flash-freezing step prevents the cloves from sticking together. Once frozen, transfer the solid cloves to an airtight freezer-safe container or a heavy-duty freezer bag. They will keep for up to 3 months, ready to be added directly to hot dishes.
- Freezing in Oil Cubes: For ultimate convenience, mash the roasted garlic cloves with a fork and mix with a bit of fresh olive oil to create a paste. Spoon this mixture into ice cube trays and freeze until solid. Once frozen, pop out the garlic-oil cubes and transfer them to a freezer bag or container. These pre-portioned cubes are perfect for dropping into sauces, soups, or sautéing, and can be stored for up to 6 months.
Roasted Garlic Crostini: A Simple & Elegant Appetizer
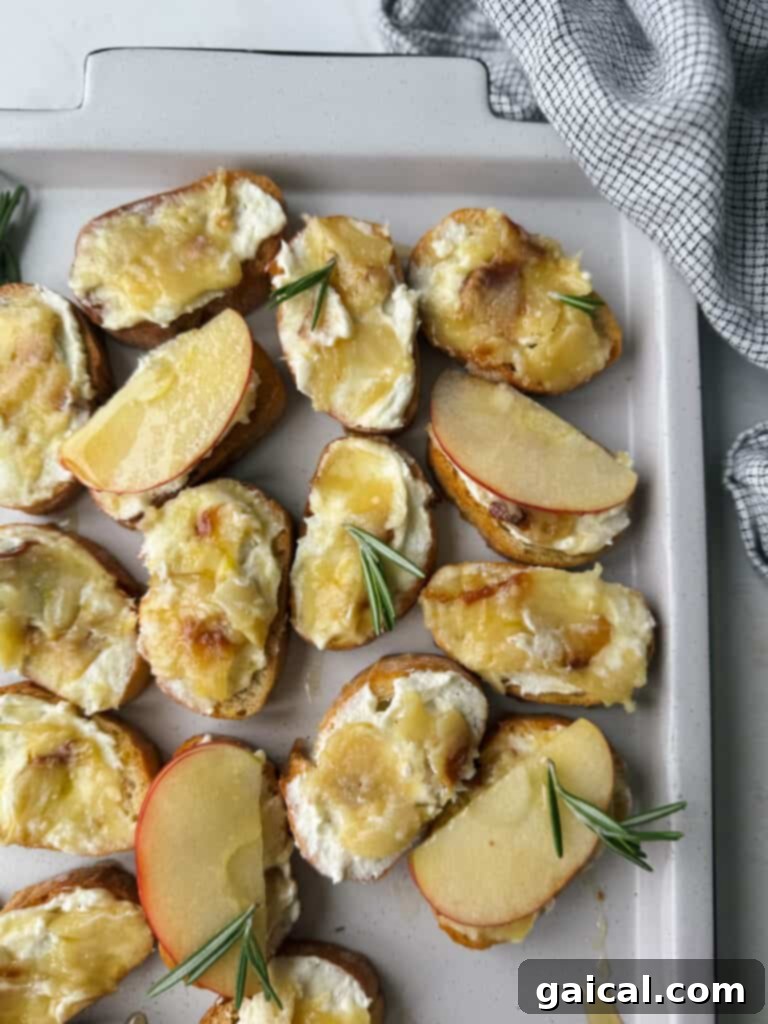
Elevate your appetizer game with this delightful roasted garlic crostini. The sweet, mellow garlic pairs perfectly with whipped feta, crisp apple, and a drizzle of honey for an irresistible bite. This quick recipe is perfect for entertaining or a gourmet snack:
Ingredients:
- 3 heads of roasted garlic, cloves extracted
- 1 baguette, sliced diagonally and lightly toasted until golden
- 1/3 cup whipped feta cheese (or plain feta mashed with a little cream cheese)
- 3 tablespoons honey
- A pinch of salt (if needed, depending on feta)
- Freshly ground black pepper (optional)
- Fresh thyme leaves (optional, for garnish)
Instructions:
- Spread a generous layer of whipped feta onto each toasted baguette slice.
- Gently mash 1-2 roasted garlic cloves onto the feta on each crostini.
- Arrange thin slices of apple over the garlic and feta.
- Drizzle generously with honey and sprinkle with a pinch of black pepper or fresh thyme leaves, if desired.
- Serve immediately and enjoy the burst of flavors!
Endless Serving Suggestions for Roasted Garlic
The beauty of roasted garlic lies in its incredible versatility. Its caramelized, slightly sweet yet deeply savory flavor harmonizes with an astonishing array of dishes. Once you have a batch on hand, you’ll find countless ways to incorporate it:
- Spread & Dips: Mash roasted garlic cloves and mix them with cream cheese for a delectable bagel spread, or fold them into a savory butter for corn on the cob or steak. They are also fantastic minced and added to any dip, like a creamy spinach dip, a rich white bean dip, or a bright lemon garlic hummus.
- Pasta & Grains: Mince and toss roasted garlic into any of your favorite pasta dishes, from simple spaghetti aglio e olio to more complex cream sauces. It’s also excellent stirred into risottos, couscous, or quinoa for an extra layer of flavor.
- Soups & Stews: Add mashed roasted garlic to any savory soup or stew during the last few minutes of cooking to infuse it with a rich, comforting depth. It’s particularly good in tomato soup, lentil soup, or a hearty chicken noodle.
- Vegetables & Sides: Sauté minced roasted garlic with your favorite vegetables, or smash it into roasted potatoes, sweet potatoes, or mashed cauliflower. It pairs beautifully with green beans, asparagus, or broccoli.
- Salad Dressings & Vinaigrettes: Mince roasted garlic very finely and whisk it into homemade salad dressings, such as our balsamic vinaigrette, for a sophisticated and mellow garlic flavor.
- Breads & Spreads: Beyond crostini, spread roasted garlic on warm crusty bread, foccacia, or bagels. Mix it with herbs and butter for an amazing garlic bread.
- Meat & Poultry: Rub mashed roasted garlic onto chicken, fish, or beef before roasting or grilling for an aromatic crust. Stir it into marinades or sauces for an extra depth of flavor.
- Eggs: Fold minced roasted garlic into scrambled eggs, omelets, or frittatas for a surprisingly delightful breakfast or brunch.
- Simply Enjoy It: Seriously! The caramelized cloves are so delicious on their own, you might just find yourself eating them whole as a savory snack. They are like nature’s little candy!
Roasted Garlic Recipe: Your Easy Guide
Transform your dishes with this simple yet incredibly flavorful oven-roasted garlic. It’s perfect for adding a sweet, savory touch to almost anything!
By: Emily Richter
Prep Time: 5 mins
Cook Time: 40 mins
Total Time: 45 mins
Yields: 6 Servings (approx. 6 garlic bulbs)

Ingredients
- 6 bulbs of garlic
- 3 teaspoons olive oil (approximately 1/2 teaspoon per bulb)
- Pinch of salt (optional)
- Optional: black pepper, fresh herbs (rosemary, thyme)
Instructions
-
Preheat Oven & Prepare Dish: Preheat your oven to 375ºF (190ºC). Lightly spray a small baking dish or a quarter sheet pan with nonstick cooking spray, or line with parchment paper or foil. Set aside.
-
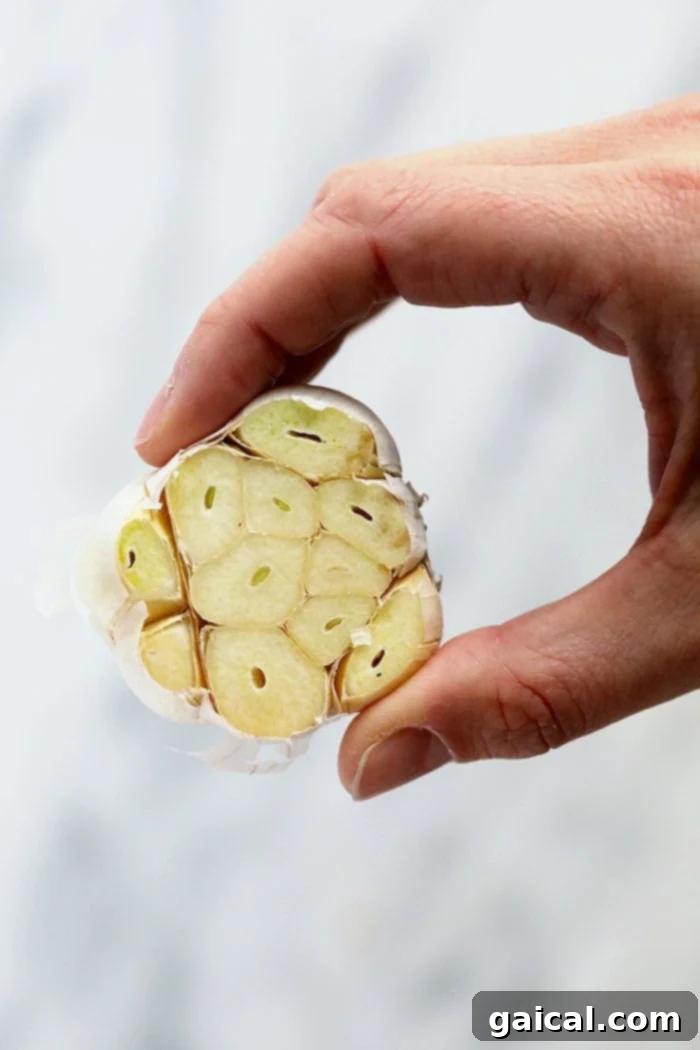
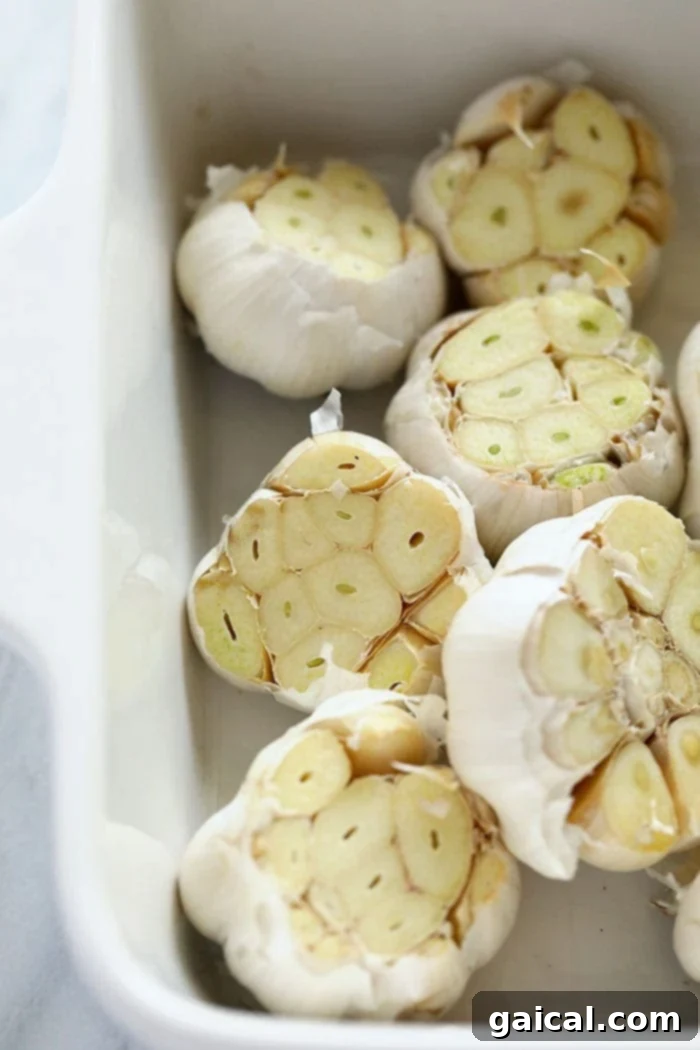
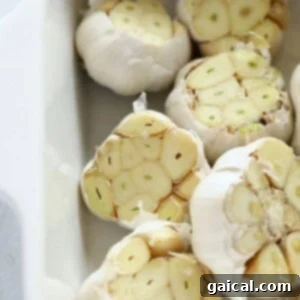
Prepare Garlic Bulbs: Using a sharp knife, carefully slice off about 1/4 to 1/2 inch from the very top of each whole garlic bulb. This step exposes the individual garlic cloves, allowing the oil to penetrate and the heat to caramelize them efficiently. Be careful not to cut too much off the bottom, as you want the bulb to remain intact.

-
Arrange & Season: Place the prepared garlic bulbs cut-side up in your baking dish or on the prepared sheet pan. Drizzle each bulb generously with about 1/2 teaspoon of olive oil, ensuring the exposed cloves are well-coated. You can also sprinkle with a pinch of salt and black pepper at this stage, or tuck in a sprig of fresh rosemary or thyme.
-
Roast to Perfection: Bake for 40 minutes in the preheated oven. For even caramelization, gently flip the garlic bulbs halfway through the baking time (around 20 minutes), so they are flat-side down for the remaining 20 minutes. The garlic is done when the cloves are golden brown, deeply fragrant, and feel very soft when squeezed.
-
Cool: Remove the baking dish from the oven and let the roasted garlic cool for at least 10 minutes. This makes it easier to handle and allows the flavors to settle.
-
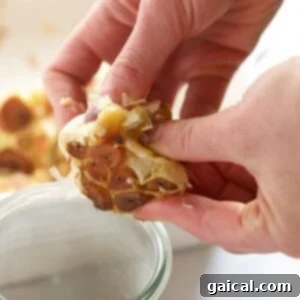
Extract & Enjoy: Once cool enough to handle, gently squeeze each garlic bulb from the bottom. The soft, caramelized cloves will easily pop out of their papery skins. Use them immediately in your favorite recipes, or store for later use as outlined in our storage section.

Tips & Notes for Best Results
- Choosing Garlic: Select firm, unblemished garlic bulbs. Avoid any that are soft, moldy, or have green sprouts, as these indicate older garlic which might taste bitter.
- Don’t Overcrowd: Ensure garlic bulbs have a little space between them in the baking dish to allow for even roasting and caramelization.
- Foil Cover (Optional): If you find your garlic browning too quickly on top before it’s tender, you can loosely cover the baking dish with aluminum foil for the first 20-25 minutes of baking, then remove it to allow for caramelization.
- Use the Garlic-Infused Oil: The olive oil remaining in the baking dish after roasting is infused with incredible garlic flavor. Don’t discard it! Strain it and use it in salad dressings, marinades, or for sautéing.
- Storage: Store roasted garlic cloves in an airtight container for up to 5 days in the refrigerator.
- Freezing Instructions: Spread the roasted garlic cloves on a baking sheet and freeze until fully frozen (about 1 hour) to prevent sticking. Transfer frozen cloves into an airtight container or bag and freeze for up to 3 months. For convenience, mash with a little oil and freeze in ice cube trays.
Nutrition Information (Approximate)
Nutrition information is an approximation based on the ingredients and preparation method, and may vary. Values are per serving (assuming 6 servings per 6 bulbs):
- Calories: 60 kcal
- Carbohydrates: 6 g
- Protein: 1 g
- Fat: 4 g
- Fiber: 0 g
- Sugar: 0 g
Disclaimer: Nutrition information is automatically calculated, so should only be used as an approximation.
Love This Recipe? Leave a Comment Below!
We absolutely love hearing from you! If you tried this roasted garlic recipe and loved it, please share your thoughts and experiences in the comments section below. Your feedback helps other home cooks discover and enjoy these delicious recipes.
Don’t forget to share your culinary creations on social media with the hashtag #fitfoodiefinds. We’d love to see what delicious dishes you’re making with your perfectly roasted garlic!