
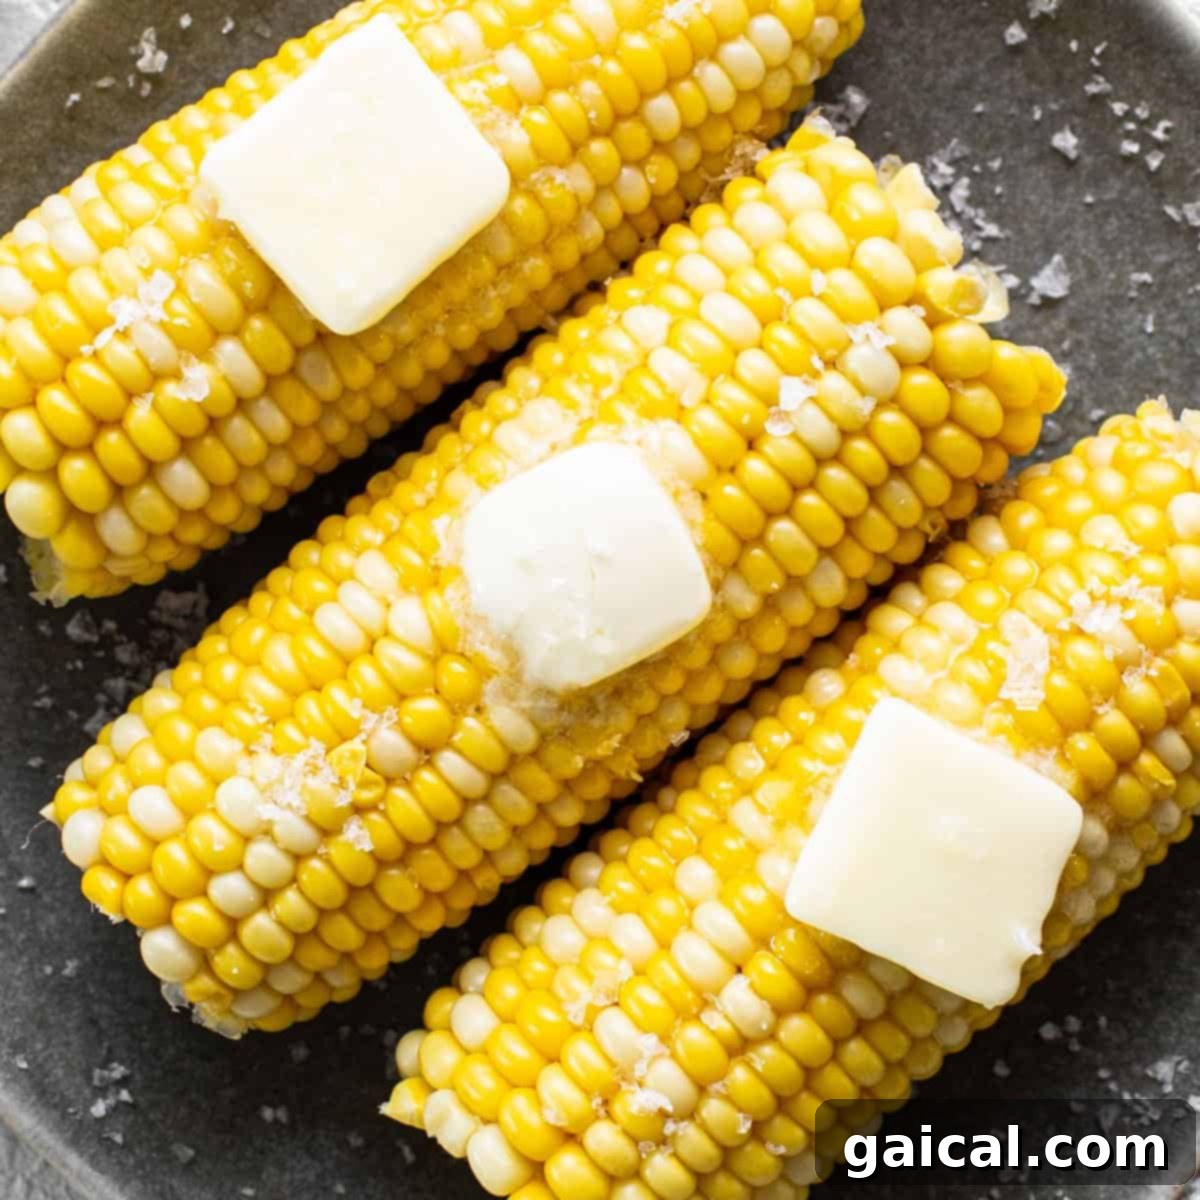
Boiling corn on the cob is, without a doubt, the quintessential method for achieving corn that is consistently sweet, tender, and perfectly juicy. Forget dry or starchy corn; our straightforward technique guarantees mouth-watering results every single time. The secret lies in a simple, yet often overlooked, step: adding the fresh corn cobs and cold water to the pot simultaneously. By following this approach, bringing the water to a gentle boil, and then immediately turning off the heat as soon as bubbles begin to form, you unlock the corn’s natural sweetness and maintain its ideal texture. It’s a method so simple, yet so effective, that it will transform your corn-cooking experience.
For those of us who grew up in the heart of the Midwest, where cornfields stretch as far as the eye can see and fresh sweet corn is a summer staple, mastering the art of cooking corn on the cob is practically a birthright. It’s more than just a side dish; it’s a celebration of summer’s bounty, a taste of home. While there are many ways to prepare corn, from grilling to air frying, boiling remains the most beloved and foolproof method. The simplicity of boiling allows the corn’s pure, unadulterated flavor to shine through, making it a timeless classic. This guide will walk you through every step to ensure your corn on the cob is nothing short of spectacular.
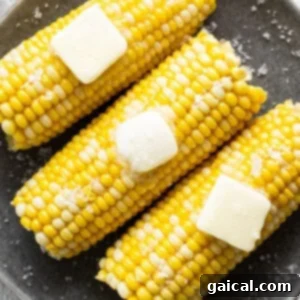
The ultimate way to savor boiled corn on the cob is undeniably straightforward – with a generous slather of creamy butter and a sprinkle of flaky sea salt. This classic combination enhances the corn’s inherent sweetness and creates an irresistible culinary experience. Trust us, it’s perfection in every bite!
Why Boiling is the Best Way to Cook Corn on the Cob
You might be wondering, with so many modern cooking methods available, why do we champion boiling as the superior technique for corn on the cob? The answer lies in its ability to consistently deliver sweet, tender, and moist kernels. Unlike grilling or roasting, which can sometimes dry out the corn or leave it unevenly cooked, boiling ensures uniform heat distribution, resulting in every kernel bursting with flavor and juice. It’s a gentle cooking process that preserves the corn’s natural sugars and delicate texture, preventing it from becoming tough or starchy. For a truly authentic taste of summer, boiling is simply unmatched in its ability to bring out the very best in fresh sweet corn.
Boiling also offers unparalleled convenience. It requires minimal active cooking time and simple equipment, making it ideal for busy weeknights, large family gatherings, or casual summer barbecues. The consistent results and ease of preparation are why it has remained a kitchen staple for generations.
What You’ll Need for Perfect Boiled Corn on the Cob
Gathering the right ingredients and tools is the first step towards achieving culinary success. Luckily, preparing delectable boiled corn on the cob requires only a few basic items, making it accessible for any home cook.
- Fresh Corn on the Cob: The fresher your corn, the sweeter and more tender your final result will be. We highly recommend purchasing unshucked corn still in its husk. This protective layer helps to retain moisture and flavor, acting as nature’s perfect packaging. When selecting corn, look for bright green husks that are tightly wrapped, and silks that are slightly damp and sticky to the touch, not dry or brittle. A good indicator of freshness is also plump, firm kernels visible if you gently peel back a small section of the husk. Avoid corn with dry husks, dark spots, or mushy kernels. Aim for 1-2 ears per person.
- Large Stock Pot with Lid: Size matters when it comes to boiling corn. Ensure you have a pot large enough to comfortably accommodate all your corn cobs in a single layer, allowing them to be fully submerged in water. A lid is crucial for bringing the water to a boil efficiently and trapping steam, which helps the corn cook evenly and quickly.
- Cold Water: Tap water is perfectly fine. You’ll need enough to cover the corn completely in the stock pot. The use of cold water, rather than hot, is a key element of our secret method, allowing for a more gradual and even cooking process that prevents the corn from becoming rubbery or losing its natural sugars.
- Optional (but Highly Recommended): Butter and Salt: While not strictly necessary for cooking, these are essential for serving. Unsalted butter allows you to control the seasoning, and a good quality sea salt or kosher salt will elevate the corn’s flavor significantly. Some people also enjoy a splash of milk or a pinch of sugar in the boiling water, though with truly fresh corn, it’s often unnecessary.
The Ultimate Secret to Perfectly Cooked Corn on the Cob
We’ve experimented with numerous corn cooking methods over the years, from air fryer corn on the cob to grilling, and while those have their place, boiling consistently stands out for its superior results. The texture, the sweetness, the undeniable juiciness – it’s simply unbeatable, especially when you apply our simple secret.
Our golden rule for achieving perfectly juicy and tender corn is deceptively simple: always add your corn and cold water to the pot at the SAME time. This is critical. Instead of dropping corn into already boiling water, which can shock the kernels and lead to a tougher, rubbery texture, starting from cold water allows the corn to cook gently as the water gradually heats up. This slow, even rise in temperature helps the kernels plump up beautifully and retains their natural sweetness and moisture. It allows the corn to cook from the inside out without rapidly breaking down the cell walls. Once the water comes to a rolling boil, your corn is essentially done! The residual heat will continue to cook it just enough without overdoing it, ensuring that vibrant color and crisp-tender bite.
How Long to Boil Corn on the Cob for Optimal Flavor and Texture
The cooking time for boiled corn on the cob is remarkably quick, and often, less is more. For fresh, sweet corn, you’re not trying to soften it for a long period, but rather to heat it through and enhance its natural flavors. Generally, corn on the cob will take approximately 5 to 10 minutes to cook from the moment the water begins to boil. However, this timeframe can vary depending on several factors:
- Amount of Water: A larger volume of water will take longer to come to a boil.
- Heat Intensity: The strength of your stove’s burner directly impacts how quickly the water reaches boiling point.
- Number of Cobs: More corn cobs in the pot will also extend the time it takes for the water to boil and for the corn to cook through.
- Corn Freshness and Size: Very fresh, young corn may cook slightly faster than older or larger cobs.
The key indicator that your corn is ready isn’t necessarily a timer, but rather its appearance. Perfectly boiled corn will turn a vibrant, deep yellow color, and the kernels will look plump and glossy. As soon as you see those first bubbles forming vigorously and the corn looking bright, it’s time to turn off the heat and remove the cobs. Overcooking can quickly lead to tough, dry, and less flavorful corn, so keep a close eye on it! The goal is a crisp-tender bite, not mushy kernels. Some experienced cooks even recommend a very brief boil, just 2-3 minutes, for exceptionally fresh and tender corn, followed by removing it from the heat.
Creative Serving Suggestions for Boiled Corn on the Cob
While the classic pairing of butter and salt is always a winner and our personal favorite, boiled corn on the cob is an incredibly versatile vegetable that can be dressed up in countless delicious ways. Don’t limit yourself to just the basics – explore these exciting ideas to elevate your corn experience and impress your guests!
- Classic Butter & Salt: A timeless combination that highlights the corn’s natural sweetness. For an extra touch, try compound butters infused with fresh herbs like chives or parsley, a hint of roasted garlic, or a sprinkle of smoked paprika for depth.
- Mexican Street Corn Style (Elotes): Drizzle with a creamy sauce made from mayonnaise, sour cream, a squeeze of fresh lime juice, chili powder (or a blend of chili, cumin, and paprika), and crumbled cotija cheese. A sprinkle of fresh cilantro adds a vibrant, authentic finish.
- Spicy & Zesty: A squeeze of fresh lime juice and a dash of cayenne pepper or a sprinkle of Tajín seasoning will add a delightful kick and tangy flavor. Hot sauce enthusiasts can add a few drops of their favorite.
- Herby Freshness: Finely chopped fresh herbs like cilantro, parsley, basil, dill, or mint can add a burst of flavor and color. Mix them with a little olive oil or melted butter for easy application.
- Sweet & Savory: A light drizzle of honey or maple syrup along with a pinch of smoked paprika and a dash of black pepper creates an intriguing balance of flavors that’s both comforting and exciting.
- Parmesan & Garlic: Brush with melted garlic butter and generously sprinkle with freshly grated Parmesan cheese for an umami-rich topping that’s utterly addictive.
- Asian-Inspired: A brush of sesame oil, a sprinkle of toasted sesame seeds, and a dash of soy sauce or tamari can give your corn an unexpected, savory twist.
Delicious Recipes Featuring Corn Kernels
Beyond serving it on the cob, boiled corn kernels can be incorporated into a myriad of dishes, adding sweetness and texture. Here are some fantastic recipes where corn truly shines:
- Fresh Corn Salsa: Say hello to our vibrant Fresh Corn Salsa! Inspired by summer’s bounty, this refreshing salsa is brimming with farm-fresh corn, ripe tomatoes, crisp red onion, jalapeño for a hint of heat, and a hit of zesty lime. Perfect as a dip with tortilla chips or a vibrant topping for grilled chicken or fish tacos.
- The Mexican Street Corn Salad: This irresistible recipe is a deconstructed take on classic Mexican street corn, or “Esquites.” It’s made with grilled (or boiled and then lightly charred) corn, juicy tomatoes, red onion, a creamy, tangy dressing, and delicious crumbled cotija cheese, offering all the flavors without the mess of eating it on the cob.
- Street Corn Chicken Salad: Elevate your traditional chicken salad by incorporating the lively flavors of Mexican street corn. This recipe combines tender shredded chicken with corn, a creamy, zesty dressing, fresh herbs, and a touch of spice, making it perfect for sandwiches, wraps, or as a standalone meal.
- Thai Chili Summer Corn Salad: For an exotic twist, try this delightful Asian-inspired salad. It’s a fantastic mix of grilled corn, crunchy carrots, vibrant red pepper, crisp cabbage, and a bold, sweet-and-spicy Thai chili vinaigrette. A truly refreshing and flavorful side dish that pairs wonderfully with grilled meats.
- Corn Fritters: These savory homemade corn fritters are a delightful way to enjoy corn. Made with whole corn kernels, a touch of white whole wheat flour for a wholesome base, pickled jalapeños for a tangy kick, and fresh green onions, they make for a perfect appetizer or light lunch, often served with a dollop of sour cream or a spicy aioli.
Storage and Reheating Boiled Corn on the Cob
Having leftover boiled corn is a rare luxury, but if you find yourself with extra cobs, proper storage will ensure they remain delicious for future enjoyment, preserving that sweet, tender texture.
- Storage: Allow your cooked corn on the cob to cool completely to room temperature before storing. This crucial step prevents condensation from forming inside the container, which can lead to soggy corn and promote bacterial growth. Once cool, transfer the cobs into an airtight container or a heavy-duty, gallon-size plastic freezer bag. Press out as much air as possible from the bag before sealing. Stored correctly, boiled corn on the cob will keep beautifully in the refrigerator for up to 3-5 days.
- To Reheat: You have a couple of easy options for reheating, aiming to warm it through without overcooking.
- Microwave: For a quick method, place a cob or two on a microwave-safe plate, cover loosely with a damp paper towel, and heat for 60-90 seconds, flipping halfway through, until heated through.
- Stovetop: Alternatively, you can reheat them gently over medium-low heat on the stovetop. Place the cobs in a shallow pan with a small amount of water (about an inch) or a knob of butter. Cover the pan and steam them for 3-5 minutes, turning occasionally, until warm. Be careful not to boil them again for too long, as this can dry out the kernels.
Can You Freeze Corn on the Cob for Later Enjoyment?
Absolutely! Freezing corn on the cob is a fantastic way to preserve the vibrant taste of summer and enjoy sweet corn even when it’s out of season. It allows you to savor that peak freshness months after harvest. While you can freeze whole cobs, we often find that freezing just the kernels is more space-efficient and convenient for future recipes like salsas, soups, or stir-fries.
How to Freeze Corn Kernels from Boiled Cobs (Our Preferred Method)
If you’ve already boiled your corn using our method, you’re halfway there! Here’s how to proceed for freezing the kernels:
- Cool Completely: After your corn has been perfectly boiled and removed from the hot water, allow it to cool completely to room temperature. This is essential to prevent ice crystals and freezer burn.
- Slice Kernels: Stand a cooled cob upright in a large, shallow bowl (the bowl will catch the kernels as they fall). Using a sharp knife, carefully slice downwards along the cob, removing just the kernels. Be sure to cut close enough to the cob to get all the sweet goodness, but not so deep that you get tough, starchy bits of the cob.
- Package for Freezing: Transfer the separated corn kernels into a freezer-safe gallon-size bag or a vacuum-sealable bag. For best results and to prevent freezer burn, remove as much air as possible from the bag before sealing. A vacuum sealer works wonders here, but manually pressing the air out and sealing works well too.
- Freeze: Lay the bag flat in your freezer until the kernels are frozen solid. This helps to prevent clumping and makes it easier to break off portions later. Once frozen, you can store the bag upright or in any configuration that fits best. Frozen corn kernels can be stored for up to 3 months for optimal quality, though they will remain safe to eat for longer (up to 8-12 months, but flavor and texture may degrade).
When you’re ready to use them, simply thaw the kernels in the refrigerator overnight, or add them directly to your favorite soups, stews, salads, or stir-fries. They’ll bring a burst of summer flavor to any dish, even in the dead of winter!
More of our Favorite Ways to Cook…
Delicious Corn on the Cob Recipes
- Grilled Corn on the Cob: For that smoky, charred flavor, grilling is an excellent alternative, adding a delicious depth of taste.
- Air Fryer Corn on the Cob: A quick and easy method for crispy-tender results with minimal fuss, perfect for a modern kitchen.
- Grilled Corn in Foil: Ideal for camping or a fuss-free BBQ, trapping moisture and flavor for perfectly steamed and tender cobs.
How to Boil Corn on the Cob
Print Recipe
Ingredients
- 6 ears fresh corn on the cob
- Water (enough to cover corn)
- Butter, to serve (optional)
- Salt, to serve (optional)
Instructions
-
First, carefully peel back the husks and remove all silks from your corn cobs. Discard husks and silks. You can also break off the stem end for easier handling if desired.

-
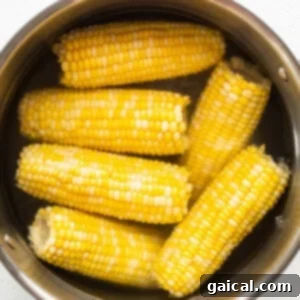
Next, transfer the shucked corn cobs into a large stock pot. Fill the pot with cold water, ensuring the corn is fully submerged. Place the lid firmly on top of the pot.
-
Turn the heat to high. Allow the water to come to a full, rolling boil. The corn will cook gently as the water gradually warms up, ensuring a tender and sweet result.
-
Once the water has reached a vigorous boil (and the corn has transformed into a vibrant, deep yellow color), immediately turn off the heat. Do not let the corn sit in boiling water for too long as this can make it tough.
-
Using tongs, carefully remove the corn cobs from the hot water immediately to prevent further cooking. Place them on a platter to cool slightly before handling.
-
Serve your perfectly boiled corn on the cob without delay, preferably with a generous pat of butter and a sprinkle of salt. Enjoy the taste of summer!
Nutrition
Carbohydrates: 17 g,
Protein: 3 g,
Fat: 1 g,
Fiber: 2 g,
Sugar: 6 g
Nutrition information is automatically calculated and should be used as an approximation only.
Love this recipe? Leave a comment below!
Don’t forget to tag your posts on social media with the hashtag #fitfoodiefinds, we’d love to see what you’re up to!