
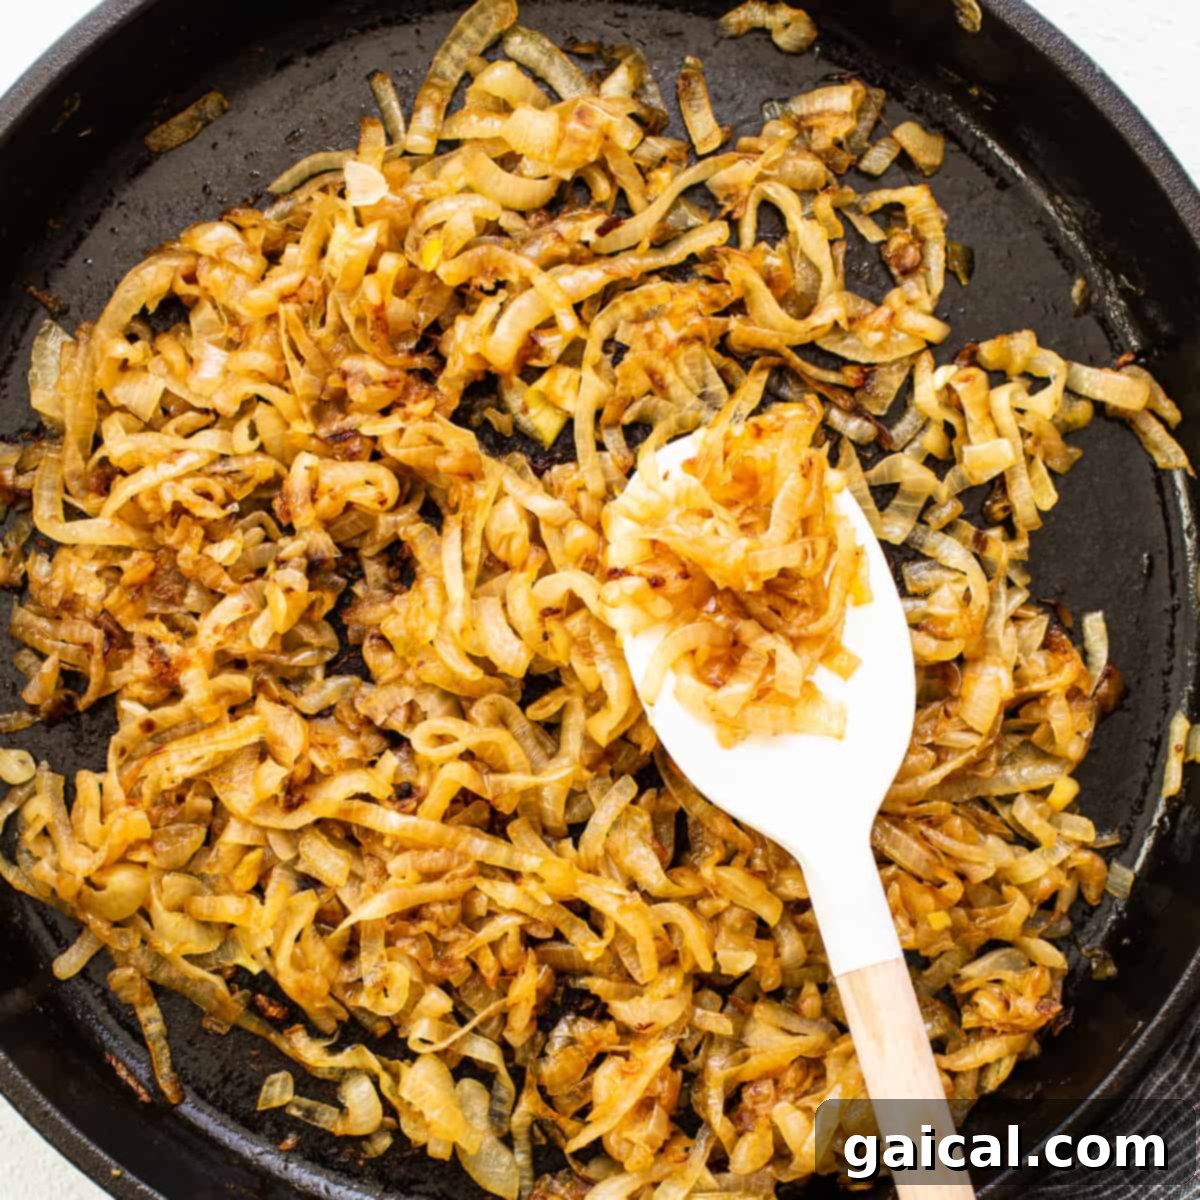
Have you ever experienced that moment when a simple ingredient is transformed into something truly extraordinary? That’s the magic of caramelized onions. Far from just a cooking technique, caramelizing onions is an art that elevates their natural sweetness and savory depth into a rich, complex condiment. This comprehensive guide will walk you through the essential steps to master perfectly caramelized onions on your stovetop, revealing the secrets to achieving that deep golden-brown hue and irresistible flavor that enhances virtually any dish.
The beauty of this culinary transformation lies in its simplicity. You only need three humble ingredients: fresh onions, quality olive oil, and a touch of salt. The real key, however, is patience. We’ll show you exactly how to cook them “low and slow” over gentle heat, allowing their sugars to slowly develop into a luscious, sweet, and savory perfection that will become a staple in your kitchen.
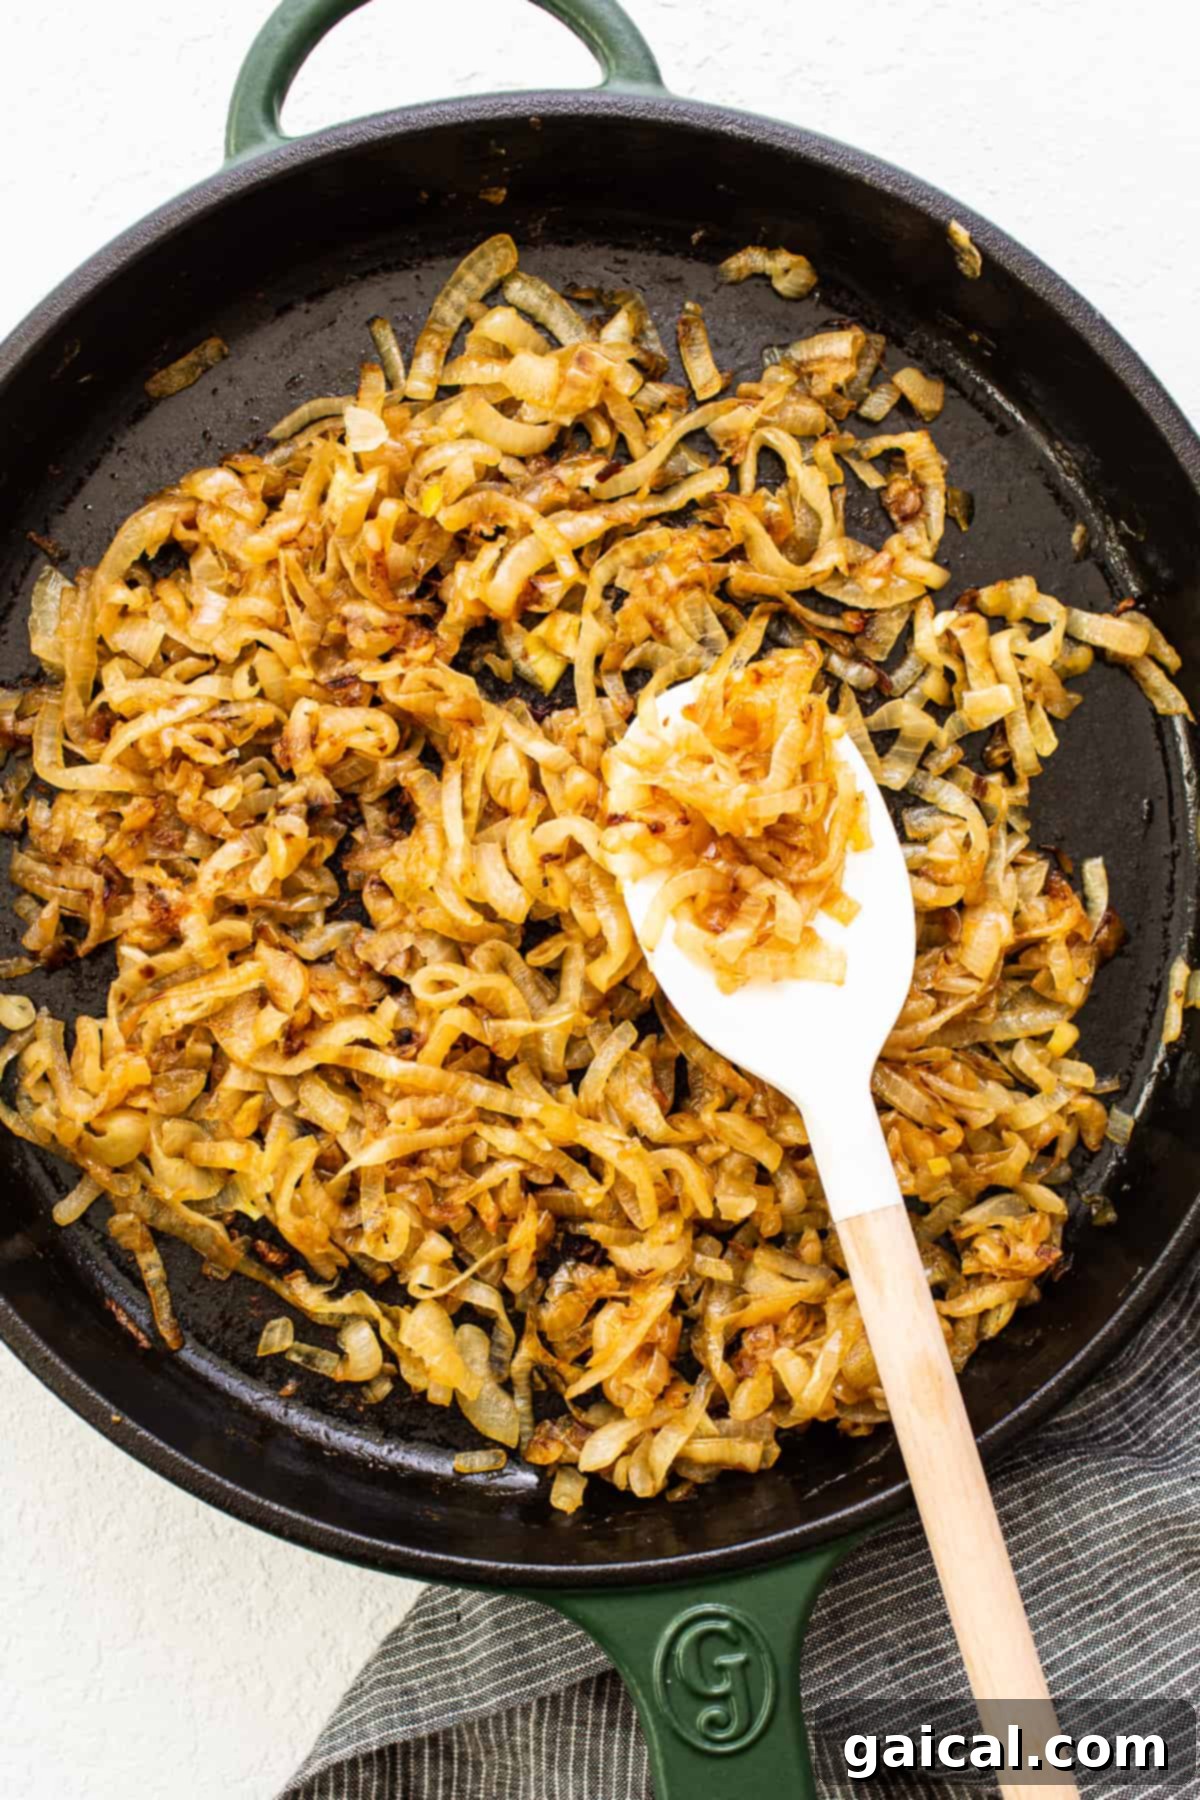
Mastering Stovetop Caramelized Onions for Ultimate Flavor
Who doesn’t adore the rich, sweet, and savory flavor that only caramelized onions can provide? We’re passionate about making a generous batch of these golden gems to keep in the refrigerator, ready to elevate an endless array of meals. Imagine them piled high on juicy burgers, folded into fluffy morning omelettes, or adding an unexpected depth to vibrant salads. But their versatility doesn’t stop there; think gourmet sandwiches, savory tarts, pizzas, crostini, or even as a flavorful base for a classic French onion soup.
This foolproof caramelized onion recipe is designed for ease and flavor. Don’t hesitate to double or even triple the quantities. Once prepared, these delicious onions can be stored in the refrigerator for up to a week, making meal prep a breeze and ensuring you always have this secret ingredient on hand to transform ordinary dishes into culinary delights.
Why Caramelized Onions Are a Kitchen Essential
There are countless reasons why caramelized onions will quickly become one of your favorite kitchen staples:
Caramelized onions infuse every dish with an unparalleled depth of flavor. They deliver a unique blend of savory umami notes and profound sweetness, a complexity that few other condiments can match. They are truly one-of-a-kind, adding a gourmet touch to even the simplest ingredients.
Once you master the straightforward technique of caramelizing onions, you’ll find yourself making them time and time again. The process, though requiring patience, is incredibly rewarding, yielding a versatile ingredient that elevates everything from everyday meals to special occasion dishes. It’s a fundamental skill that unlocks a world of flavor possibilities.
Beyond their incredible taste, caramelized onions offer practical benefits. They’re a fantastic way to utilize onions before they spoil, and having a batch ready means you’re always just a spoonful away from enhancing a meal, saving you time and effort in the kitchen.
Featured Ingredients for Perfect Caramelized Onions
Achieving perfectly caramelized onions starts with selecting the right ingredients. While simple, each component plays a crucial role in developing that deep, rich flavor.
- Yellow Onions: These are our go-to choice for caramelizing due to their ideal balance of sweetness and pungency. Yellow onions have a relatively high sugar content that caramelizes beautifully, developing a mild, deeply sweet, and savory flavor that forms the foundation of this dish. Their firm texture also holds up well during the long cooking process.
- Olive Oil: A good quality olive oil is essential here. It not only prevents sticking but also contributes a subtle fruity and peppery note that complements the onions’ sweetness. The fat in the oil also helps facilitate the Maillard reaction, leading to that desirable browning and flavor development. While olive oil is preferred for its flavor, other fats like butter or ghee can also be used, each imparting a slightly different nuance to the final product.
- Salt: Often underestimated, salt is a critical ingredient in this recipe. Its primary role is to draw out moisture from the onions through osmosis, which initially helps them soften and prevents them from burning prematurely. Crucially, adding salt partway through the cooking process (as detailed in our instructions) also enhances and brings out the onions’ natural, delicious flavors, making them taste even sweeter and more complex.
Can I Use Any Type of Onion for Caramelized Onions?
Absolutely! While yellow onions are often recommended, you can indeed use almost any type of onion to make caramelized onions. Each variety will offer a slightly different flavor profile and texture, making experimentation a fun way to discover new culinary dimensions:
- White Onions: These onions have a stronger, more pungent flavor when raw. When caramelized, they tend to break down a bit more easily and may cook faster. The resulting flavor will be sweet but with a sharper, more assertive onion undertone. Be sure to keep a closer watch on them during cooking to prevent over-softening.
- Yellow Onions: As mentioned, these are the classic choice. They possess a mild yet distinct onion flavor that transforms into a wonderfully balanced sweetness during caramelization. They hold their shape well and are perfect for beginners and seasoned cooks alike.
- Red/Purple Onions: Known for their vibrant color, red onions will unfortunately lose most of their striking hue when cooked for an extended period. However, they caramelize beautifully, yielding a delightful and pronounced sweetness with a slight peppery edge. They are fantastic for adding a gourmet touch to dishes where their unique flavor can shine.
- Sweet Onions (e.g., Vidalia, Walla Walla): These onions contain even more sugar than yellow varieties, making them caramelize faster and often resulting in an intensely sweet product. If you enjoy a very sweet caramelized onion, these are an excellent choice.
How to Properly Slice Onions for Caramelized Perfection
The way you slice your onions is surprisingly important for achieving uniformly caramelized results. Consistency is key to ensuring that all your onion pieces cook evenly, preventing some from burning while others remain undercooked.
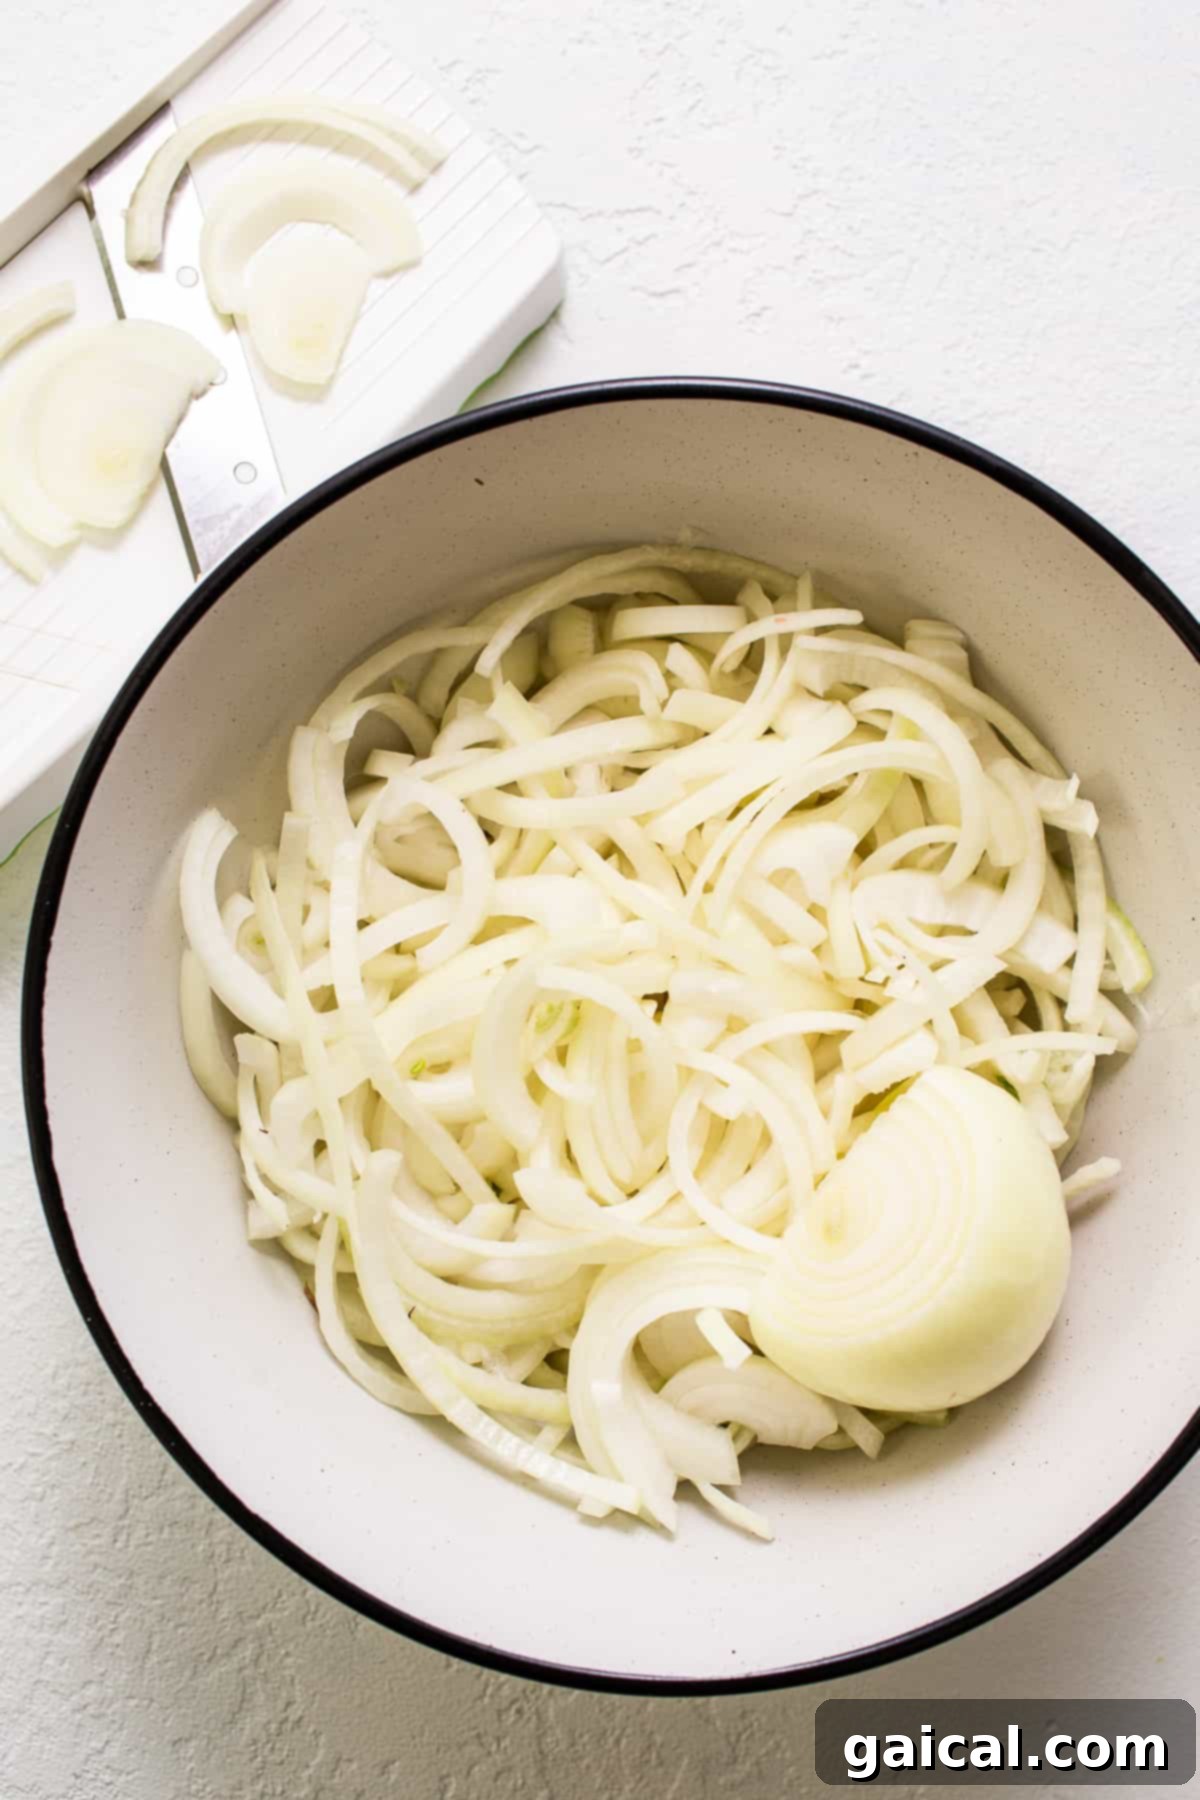
When preparing onions for caramelization, you’ll want to aim for slices that are approximately 1/4 to 1/2-inch thick. If the slices are too thin, they will disintegrate and turn mushy during the long cooking process, losing their desirable texture. Conversely, if they are too thick, they will take significantly longer to soften and caramelize, potentially leading to uneven cooking.
We highly recommend slicing all of your onions to a relatively uniform size. Here are a couple of methods:
- Using a Sharp Knife: First, trim off the top and root ends of the onion. Halve the onion lengthwise through the root. Peel off the outer layers. Place the onion halves cut-side down on your cutting board. Make even, consistent slices across the onion, maintaining the recommended thickness. Slicing with a sharp knife along the grain (from root to stem) helps the onions hold their structure better during cooking.
- Using a Mandoline Slicer: For absolute precision and speed, a mandoline slicer is an excellent tool. It guarantees that every slice is the exact same thickness, which promotes incredibly even caramelization. Exercise extreme caution when using a mandoline, always using the safety guard to protect your fingers.
Regardless of your chosen method, taking the time to properly slice your onions will set you up for success and result in beautifully caramelized pieces every time.
How to Caramelize Onions on the Stovetop: Step-by-Step Guide
Patience is your best friend when caramelizing onions. Follow these steps for stovetop perfection:
- Prepare Your Onions: Begin by peeling the outer layers of your chosen onions. Then, using a sharp knife or a mandoline, slice all the onions to a consistent thickness of about 1/4 to 1/2-inch. Uniformity is crucial for even cooking.
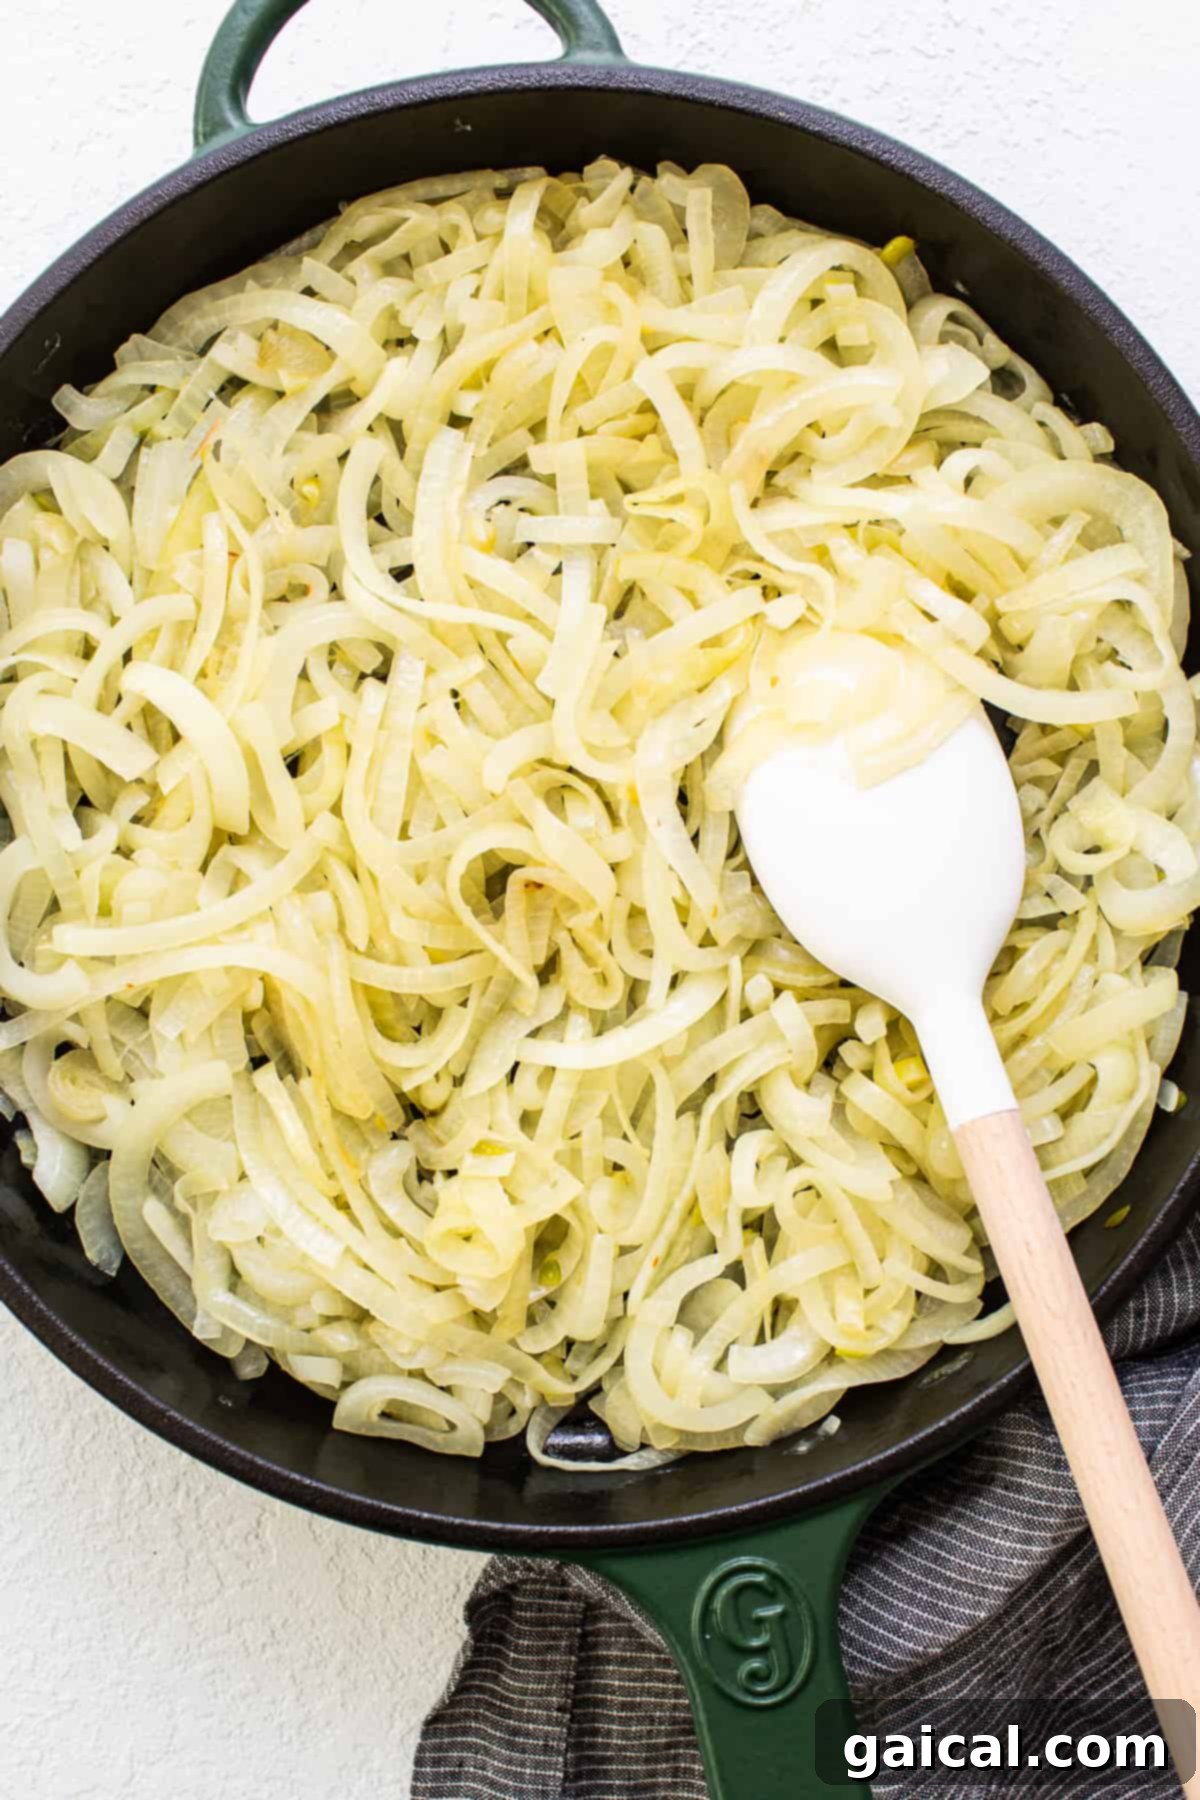
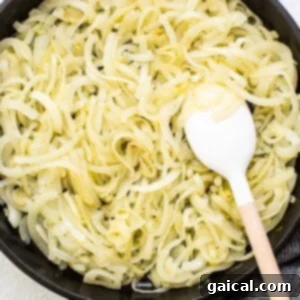
- Initial Sauté and Softening (The Sweat): Heat a large, heavy-bottomed skillet or cast iron pan over very low heat. Add the olive oil. Once the oil is shimmering and fragrant, add all of the sliced onions to the pan. Toss them gently with the oil to ensure they are all lightly coated. At this stage, DO NOT add salt. Allow the onions to cook undisturbed over low heat for the first 30 minutes, stirring occasionally (every 5-7 minutes) to prevent sticking and promote even softening. During this phase, the onions will release their moisture and begin to soften, becoming translucent.
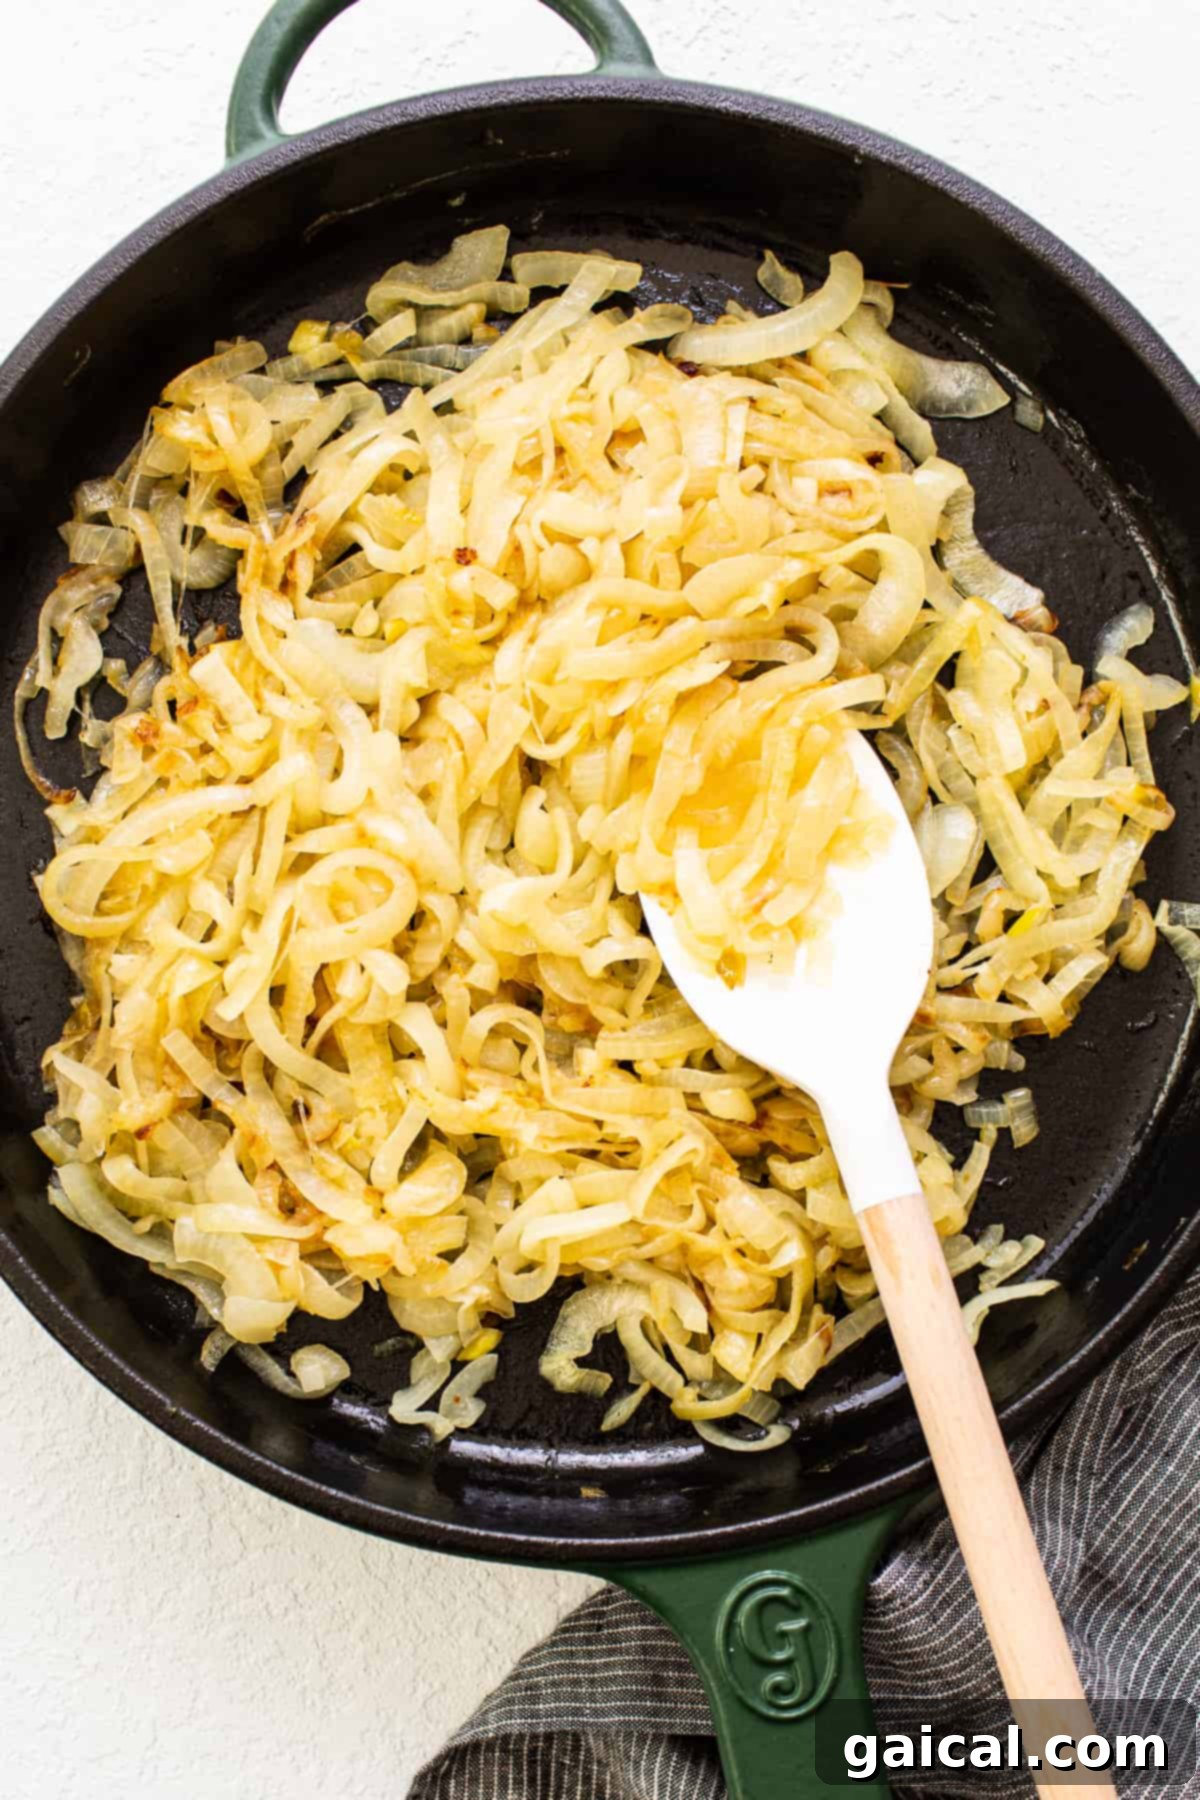
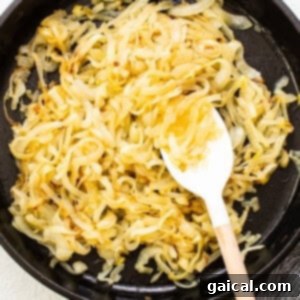
- Salting and Browning (The Maillard Reaction): After the initial 30 minutes, the onions should be significantly softened and translucent. Now, add the salt to the pan and toss thoroughly to distribute. Continue to cook for an additional 20-30 minutes over low heat, stirring periodically. The salt will help draw out any remaining moisture and, more importantly, will facilitate the browning process (the Maillard reaction), where sugars and amino acids react to create complex, savory flavors and that signature golden-brown color. Watch for the onions to start sticking to the bottom of the pan – this is a good sign, as these brown bits (fond) are packed with flavor.
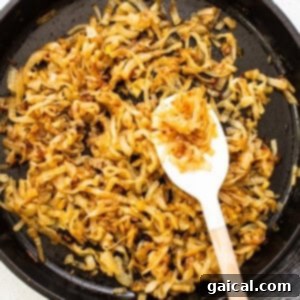
- Developing Deep Caramelization and Sweetness: Continue cooking the onions for another 10-15 minutes, still over low heat, until they reach a deep golden-brown color and have a deliciously sweet, almost jam-like consistency. The total cooking time will typically range from 50 to 70 minutes. If the onions start to stick excessively, you can add a tablespoon or two of water or broth to deglaze the pan, scraping up all those flavorful brown bits from the bottom. This process adds depth and prevents burning.
- Serve or Store: Once the onions are perfectly caramelized, remove them from the heat. Serve them immediately while warm, or allow them to cool completely before transferring them to an airtight container for later storage in the refrigerator.
easy
Caramelized Onions in the Oven
Looking for an even more hands-off approach to caramelizing onions, especially for larger batches? The oven method can be a fantastic alternative, allowing for slow, even cooking with less frequent stirring. Check out our comprehensive guide on how to caramelize onions in the oven here. It’s perfect for busy cooks!
Top Tips for Flawless Caramelized Onions
Consistent Slicing is Crucial: As emphasized, ensure your onions are sliced uniformly, about 1/4 to 1/2-inch thick. If they are too thin, they will cook down to nothing, and if they are too thick, they won’t soften and brown evenly.
Timing the Salt is Key: Do not add salt to the onions right away. Adding salt too early draws out moisture too rapidly, causing the onions to “boil” in their own liquid instead of browning. Introducing salt halfway through the cooking process allows the onions to soften first, then encourages the beautiful Maillard reaction for deep flavor and color.
Embrace the “Low and Slow” Method: Caramelized onions require patience. They are meant to be cooked very gently over low heat for an extended period, typically 50-70 minutes. Rushing the process by increasing the heat will result in burnt or unevenly cooked onions, not true caramelization. The low heat allows the natural sugars to slowly break down and develop complexity.
Choose the Right Pan: The type of pan you use significantly impacts the outcome. A heavy-bottomed skillet, such as a cast iron pan or a good quality stainless steel pan, is ideal because it distributes heat evenly and retains it well. While nonstick pans can also work, they may not achieve the same level of browning (fond development) as cast iron. Always keep an eye on your onions, regardless of the pan, as heat distribution can vary.
Don’t Overcrowd the Pan: If you’re making a very large batch, consider dividing the onions and cooking them in two separate pans or in batches. Overcrowding the pan lowers the temperature and steams the onions instead of allowing them to brown effectively.
Deglaze for Extra Flavor: As the onions cook and brown, flavorful bits will stick to the bottom of the pan. Don’t let these go to waste! If the pan gets too dry, add a tablespoon or two of water, vegetable broth, or even wine, and scrape up the ‘fond’ with a wooden spoon. This process is called deglazing and adds incredible depth to your caramelized onions.
Frequently Asked Questions About Caramelized Onions
Properly caramelizing onions on the stovetop typically takes about 50 to 70 minutes. This extended cooking time over low heat is essential for the onions to slowly release their moisture, break down their complex sugars, and undergo the Maillard reaction, developing that characteristic deep brown color and complex sweet and savory flavor. Patience is truly a virtue here!
You can successfully caramelize onions using either butter or oil, and the choice largely comes down to personal preference and desired flavor. We prefer olive oil for its slightly fruity notes and higher smoke point, which makes it less likely to burn during the long cooking process. Butter, however, imparts a rich, nutty flavor that many people love. If using butter, consider clarifying it or mixing it with a bit of olive oil to prevent the milk solids from burning at low temperatures over an extended period.
Adding salt too early in the caramelization process can be detrimental. If salt is added at the very beginning, it will rapidly draw out moisture from the onions. This causes the onions to “boil” and steam in their own liquid, rather than gently sautéing and browning. By adding salt halfway through, after the onions have already softened and released much of their initial moisture, you encourage browning (the Maillard reaction) and prevent them from becoming mushy. It helps create that desirable rich, golden-brown color and concentrated flavor.
Some recipes suggest adding a tiny pinch of baking soda to onions to speed up the browning process. Baking soda raises the pH of the onions, which can indeed accelerate the Maillard reaction. However, we generally advise against it for this recipe. While it speeds up browning, baking soda can significantly alter the texture of the onions, making them too soft and mushy, and it can also impart a slightly metallic or soapy off-flavor to the final caramelized onions, compromising their natural sweetness and depth. We prefer to achieve rich caramelization the good old-fashioned way, with patience and low heat, for the best flavor and texture.
While it’s possible to use frozen onions, fresh onions are highly recommended for the best results. Frozen onions tend to release a lot of water very quickly, leading to a steamed, mushy texture rather than the desired slow softening and browning. If you must use frozen, ensure they are thawed and thoroughly patted dry before cooking, and be prepared for a longer cooking time to evaporate the excess moisture.
Storage and Make-Ahead Tips
Caramelized onions are a fantastic make-ahead ingredient. Once you’ve gone through the effort, you’ll want to ensure they last!
- Refrigeration: Allow the caramelized onions to cool completely to room temperature before storing. Transfer them to an airtight container and store them in the refrigerator for up to 7 days. They can be reheated gently on the stovetop or in the microwave.
- Freezing: For longer storage, caramelized onions freeze beautifully. Once cooled, portion them into small, freezer-safe bags or containers (ice cube trays are great for individual servings). They can be stored in the freezer for up to 3 to 6 months. Thaw them in the refrigerator overnight or gently reheat from frozen directly in a pan over low heat.
Having a batch of caramelized onions ready to go means you’re always just a spoonful away from adding gourmet flavor to your meals!
More of our Favorite Ways to…
Delicious Pairings: Serve with Caramelized Onions
The versatility of caramelized onions is truly astounding. Once you have a batch ready, a world of culinary possibilities opens up. Here are some of our favorite ways to enjoy them:
- Gourmet Burgers and Sandwiches: Elevate any Chicken Burger, Turkey Burger, Lemon Dill Salmon Burger, Sweet Potato Black Bean Burger, or Roasted Garlic Black Bean Burger to restaurant quality. They’re also incredible on grilled cheese, steak sandwiches, or even simple toast.
- Breakfast and Brunch: Fold them into omelettes, scrambled eggs, quiches, or frittatas for a savory morning treat.
- Savory Tarts and Pizzas: Use them as a base for an elegant onion tart, or scatter them over homemade pizzas with goat cheese and fresh herbs.
- Soups and Stews: They are the foundational flavor for classic French onion soup, but can also deepen the flavor of almost any savory soup or stew.
- Appetizers and Spreads: Mix them with cream cheese for a delectable dip, spread them on crostini, or serve them alongside a cheese board.
- Meat and Poultry Accompaniments: They pair wonderfully with roasted chicken, pork chops, or as a topping for grilled steak.
- Salads: Add a sweet and savory punch to green salads, especially those featuring goat cheese, nuts, or balsamic vinaigrette.
How to Caramelize Onions
Ingredients
- 4 large yellow onions
- 3 tablespoons olive oil
- 1 ½ teaspoons salt
Instructions
-
Use a mandoline or a very sharp knife to slice all 4 onions into even slices to about ¼” to ½-inch thick.

-
Heat a large, cast iron skillet over low heat and add the olive oil. When the olive oil is fragrant, add the onions.
-
Toss the onions with the olive oil and let the onions cook on low for 30 minutes, stirring periodically.
-
After 30 minutes, season the onions with salt, stir, and let the onions cook for another 20-30 minutes over low heat, stirring periodically.
-
When the onions turn a golden brown color and are caramelized, remove them from the pan.
-
Use the caramelized onions on burgers, on salads, wraps, sandwiches or however you would like.
Tips & Notes
- Do not add the salt to the onions right away. Add the salt halfway through the cook time so the onions don’t cook in their own liquid too early, which would cause them to boil instead of brown.
- Caramelized onions are meant to be cooked very low and slow. This patient approach is crucial and should take approximately 50-70 minutes for optimal flavor development.
- If the onions start to stick excessively, deglaze the pan with a small amount of water or broth to scrape up the flavorful brown bits.
Nutrition
Nutrition information is automatically calculated, so should only be used as an approximation.
Love this recipe? Leave a comment below!
Don’t forget to tag your posts on social media with the hashtag #fitfoodiefinds, we’d love to see what you’re up to!
Photography: Photos taken in this post are by Ashley McGlaughlin from The Edible Perspective.