
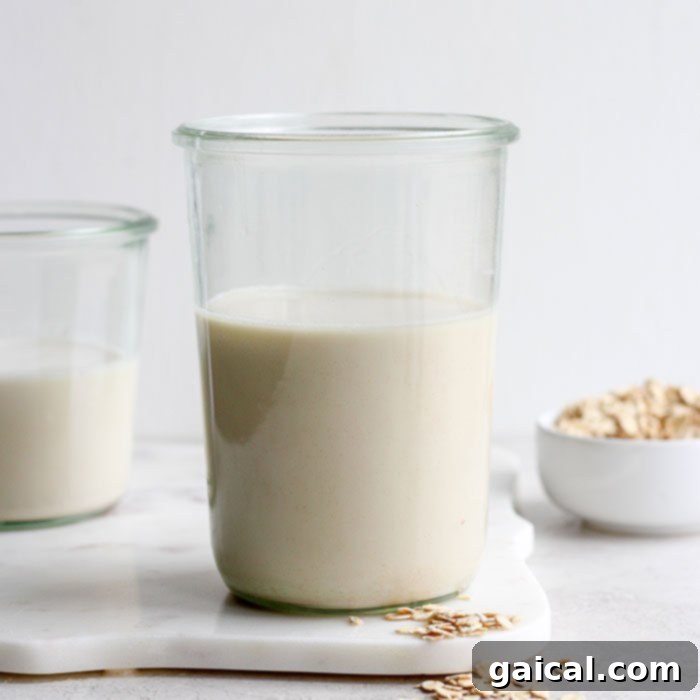
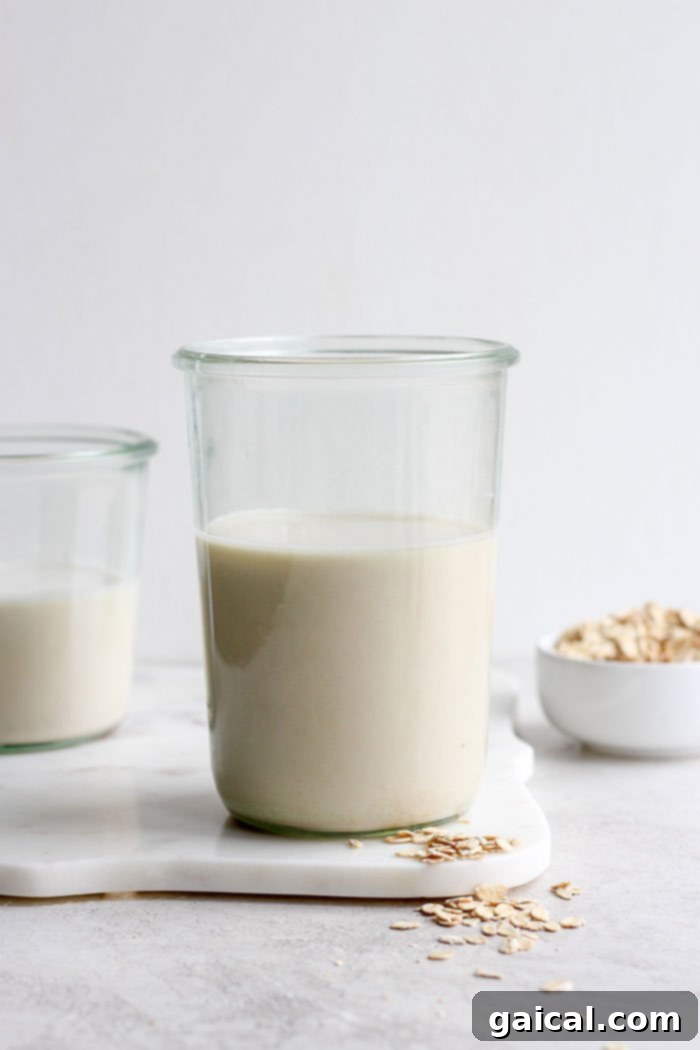
Welcome to your new favorite kitchen adventure! We’re thrilled to share our meticulously crafted recipe for homemade oat milk, designed to revolutionize your plant-based milk experience. Forget store-bought options laden with unnecessary additives and discover the immense joy of creating a fresh, wholesome, and incredibly versatile oat milk right in your own kitchen. Our recipe stands out for its remarkable simplicity, allowing for endless customization, ensuring a naturally nutrient-rich beverage, proving consistently cost-effective, and granting you complete control over every single ingredient that goes into your glass.
Prepare to savor the unparalleled creamy texture and delightful, nuanced flavor of oat milk that is perfectly tailored to your personal taste and dietary preferences. This comprehensive guide will walk you through every essential step, from expertly selecting the best type of oats to mastering the art of efficient straining, ensuring you achieve the smoothest, most delicious non-dairy milk imaginable, free from any sliminess or gritty residue.
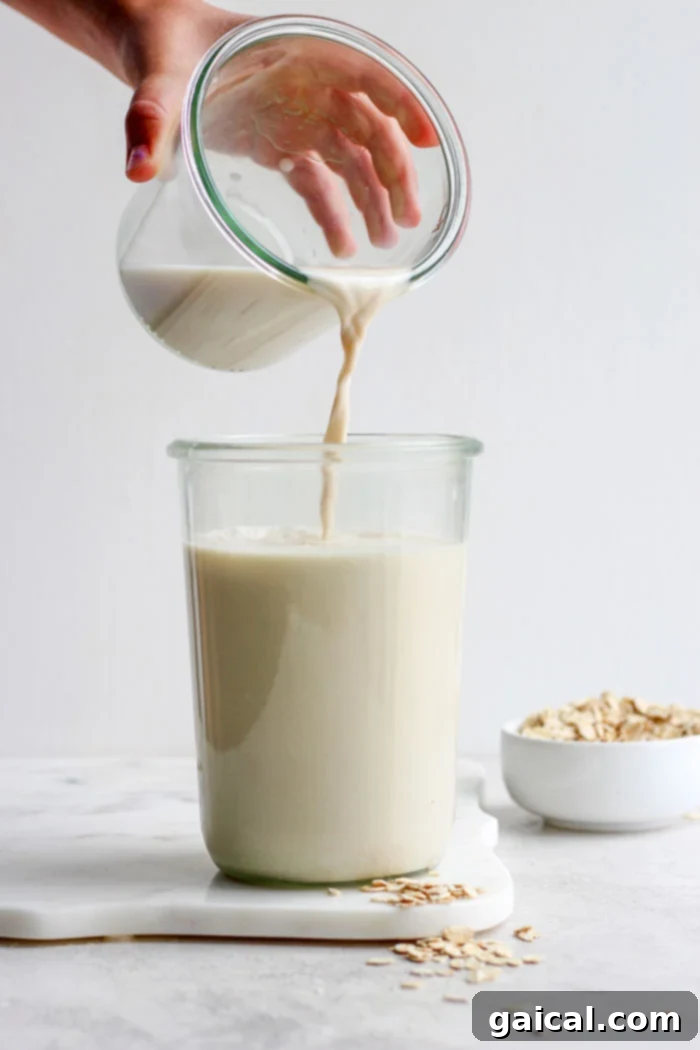
Why Homemade Oat Milk is the Best Non-Dairy Option for You
If you’re anything like us, you’ve likely already developed a deep, unwavering affection for oat milk. Its smooth, slightly sweet, and subtly nutty profile makes it an irresistible addition to countless recipes and beverages. We absolutely adore incorporating its creamy goodness into our creamy overnight oats, blending it seamlessly into our nutritious and refreshing smoothies, and of course, elevating our morning routine with a decadent iced brown sugar oat milk shaken espresso. Homemade oat milk takes this obsession to a whole new level, offering an unmatched freshness and purity that many commercially produced versions simply cannot provide.
At its core, oat milk is a wonderfully straightforward plant-based milk alternative, crafted from just two primary ingredients: wholesome rolled oats and clean water. Its inherent mild sweetness and faint nutty undertones provide a perfectly balanced flavor that complements rather than overpowers other ingredients, rendering it exceptionally versatile across a wide spectrum of culinary applications. While the convenience of pre-packaged oat milk often comes with a noticeably higher price tag at grocery stores and specialty coffee shops, crafting your own at home is remarkably economical. This hands-on DIY approach not only saves you significant money over time but also empowers you with complete control over the quality and specific type of oats and water used, ensuring a premium, additive-free product every single time you make it.
The Unbeatable Benefits of Choosing Oat Milk
Oat milk serves as an outstanding, incredibly versatile alternative to traditional cow’s milk, capable of being seamlessly substituted in a precise 1:1 ratio in the vast majority of recipes without compromising flavor or texture. Beyond its delightful mild and slightly nutty flavor, it boasts several significant advantages that cater to diverse dietary needs and preferences. It is naturally vegan and, when carefully prepared with certified gluten-free oats, also entirely gluten-free, making it an ideal choice for individuals managing allergies, intolerances, or specific lifestyle diets. For those seeking a wonderfully creamy liquid base, oat milk is truly unparalleled. It excels in coffee drinks, enhancing their richness and frothing beautifully without curdling, enriches oatmeal recipes with its inherent creaminess, creates luscious smoothie bowls, and performs exceptionally well in various baking applications. Its neutral yet inviting taste profile allows it to complement both sweet and savory dishes effortlessly, providing a gentle richness to everything it touches.
Beyond dietary compatibility, choosing oat milk often comes with notable environmental benefits. Oat cultivation generally requires significantly less water and land resources compared to dairy farming or even the production of some other popular plant milks like almond milk. This makes oat milk a more sustainable and environmentally friendly option for many conscious consumers concerned about their ecological footprint. Its rapidly growing popularity is a clear testament to its delicious taste, superior creamy texture, and its strong appeal to an increasingly health-conscious and environmentally aware global audience.
Oat Milk Nutrition Facts: What Makes It So Healthy?
One of the many compelling reasons to embrace oat milk is its impressive and beneficial nutritional profile, especially when crafted at home, free from unnecessary fillers, added sugars, or industrial thickeners. Our homemade oat milk is inherently vegan, dairy-free, soy-free, and nut-free, positioning it as an excellent and safe choice for individuals navigating common allergies, sensitivities, or specific dietary restrictions. Oats themselves are a fantastic, natural source of various essential vitamins, minerals, and dietary fiber. While many store-bought oat milks are heavily fortified with additional nutrients, homemade oat milk still offers inherent benefits directly from the wholesome grain. It’s notably a good source of soluble fiber, particularly beta-glucans, which are known to aid in digestion and support heart health by potentially lowering cholesterol. It also contains essential B vitamins, which are crucial for energy metabolism and overall well-being. Compared to many dairy options, homemade oat milk tends to be naturally lower in saturated fat.
Here’s an approximate nutritional breakdown per 1 cup (240ml) serving of our homemade oat milk, which can vary slightly depending on your specific ingredients (e.g., brand of oats) and whether optional sweeteners are included:
- Fat: Approximately 1-2g (minimal, predominantly healthy unsaturated fats from the oats)
- Calories: Around 80-120 kcal (lower if unsweetened, higher with added dates or syrup)
- Fiber: About 2-3g (contributing to digestive health and satiety)
- Protein: Approximately 2-3g (a valuable plant-based protein source)
- Carbohydrates: Excellent source of complex carbohydrates from the oats, providing sustained energy release throughout your day.
By taking the simple step of making it yourself, you effectively bypass the gums (like gellan gum), oils (such as rapeseed oil), and synthetic stabilizers often prevalent in commercial brands, giving you a purer, cleaner, and more natural beverage that you can truly trust.
Essential Ingredients and Tools to Get Started on Your Homemade Oat Milk Journey
The true beauty and appeal of this homemade oat milk recipe lie in its delightfully minimal requirements. You genuinely only need two core ingredients to form the foundation of this delicious beverage, with any additional flavorings serving as delightful, optional enhancements to customize your drink. Gathering all your simple ingredients and essential kitchen tools before you begin will ensure a smooth, efficient, and thoroughly enjoyable preparation process, leading to perfect results every time. Here’s a detailed list of what you’ll need to embark on your journey to fresh, creamy homemade oat milk:
- Old Fashioned Rolled Oats: These are our unwavering top recommendation for achieving the absolute best creamy texture in your oat milk. Their larger, flatter flakes process exceptionally well without quickly becoming overly slimy. While quick-cooking oats can technically be used in a pinch, be extra vigilant and cautious not to over-blend them, as they break down significantly faster and are much more prone to contributing to a slimier consistency. It’s imperative to avoid using steel-cut oats, as their dense, hard nature means they simply won’t yield the desired smooth, milky consistency. Opt for certified gluten-free rolled oats if you require a strict gluten-free diet.
- Filtered Water: The inherent quality of your water remarkably impacts the final taste and purity of your oat milk. We highly recommend utilizing filtered water whenever possible to ensure a clean, fresh, and perfectly neutral base for your homemade beverage. Unfiltered tap water can sometimes impart subtle off-flavors or chlorine notes that will be noticeably present in the delicate flavor profile of your finished oat milk.
- A Tiny Pinch of Salt: A minuscule amount of salt acts as a brilliant flavor enhancer, subtly balancing out the slight natural sweetness of the oats and harmonizing with any additional sweeteners you might incorporate. It does not make the milk salty, but rather brightens, deepens, and rounds out the overall taste profile, making it more robust and satisfying.
- Medjool Dates (Optional Natural Sweetener): If you prefer a naturally sweet oat milk without refined sugars, plump Medjool dates are an utterly excellent choice. They offer a rich, decadent, caramel-like sweetness along with a boost of fiber and minerals, all without the need for artificial additives. Always ensure they are pitted completely before adding them to your blender.
- High-Powered Blender: This particular tool is an absolutely non-negotiable component for achieving truly smooth, lump-free oat milk. A powerful blender, such as a Vitamix or the impressive Beast Blender, is essential for rapidly and effectively breaking down the oats. Weaker blenders may struggle to achieve the desired consistency, potentially leaving you with a grainier or less uniform texture. Investing in a good quality high-speed blender will significantly improve your oat milk-making experience.
- Fine-Mesh Sieve and a Tea Towel or Nut Milk Bag: This combination is unequivocally crucial for efficiently separating the silky liquid from the fibrous oat pulp. A clean, thin, tightly woven tea towel or a dedicated nut milk bag works exceptionally well, as their fine weave effectively filters out nearly all solid particles, leaving you with wonderfully smooth, pulp-free milk. While cheesecloth can technically work, you may need to use multiple layers to achieve sufficient filtration.
- Airtight Storage Container: A spacious 32 oz. Mason Jar with a convenient spout is often considered ideal for both the straining process and for subsequent, organized storage. However, any clean glass jar, bottle, or jug with a tightly fitting lid will perfectly suffice to keep your freshly made homemade oat milk pristine and fresh in the refrigerator.
Exploring Other Delicious Sweetener Options for Your Oat Milk
While Medjool dates offer a wonderfully natural and rich sweetness, you have an abundance of other fantastic options to customize your homemade oat milk to absolute perfection. Feel entirely free to experiment with these popular alternative sweeteners to discover your personal favorite, tailoring the taste exactly how you like it:
- Pure Maple Syrup: A classic and beloved plant-based sweetener that imparts a lovely, earthy, and distinctly warm flavor. Start with a small amount, perhaps a tablespoon or two, and gradually add more to achieve your desired level of sweetness.
- Honey: For those who do not strictly adhere to a vegan diet, honey provides a delicate sweetness and can introduce unique floral or caramelized notes, depending on its origin.
- Agave Nectar: Another excellent vegan-friendly option, agave nectar possesses a relatively neutral flavor profile and a high sweetness level, making it easy to blend without altering the oat milk’s inherent taste.
- Pure Vanilla Extract: While not a sweetener in itself, a dash (or a teaspoon) of high-quality pure vanilla extract can remarkably enhance the perceived sweetness and add a comforting, aromatic depth to your oat milk, making it feel more indulgent.
Pro Tip: Are you not a fan of sweet oat milk at all? No problem whatsoever! You can effortlessly omit any and all added sweeteners and simply enjoy the pure, natural, and wholesome taste of unsweetened homemade oat milk. This version is particularly versatile and perfect for savory dishes, or for individuals who prefer to add their preferred sweetener directly to their coffee, cereal, or other applications as needed.
Our Favorite Kitchen Companion
The Beast Blender
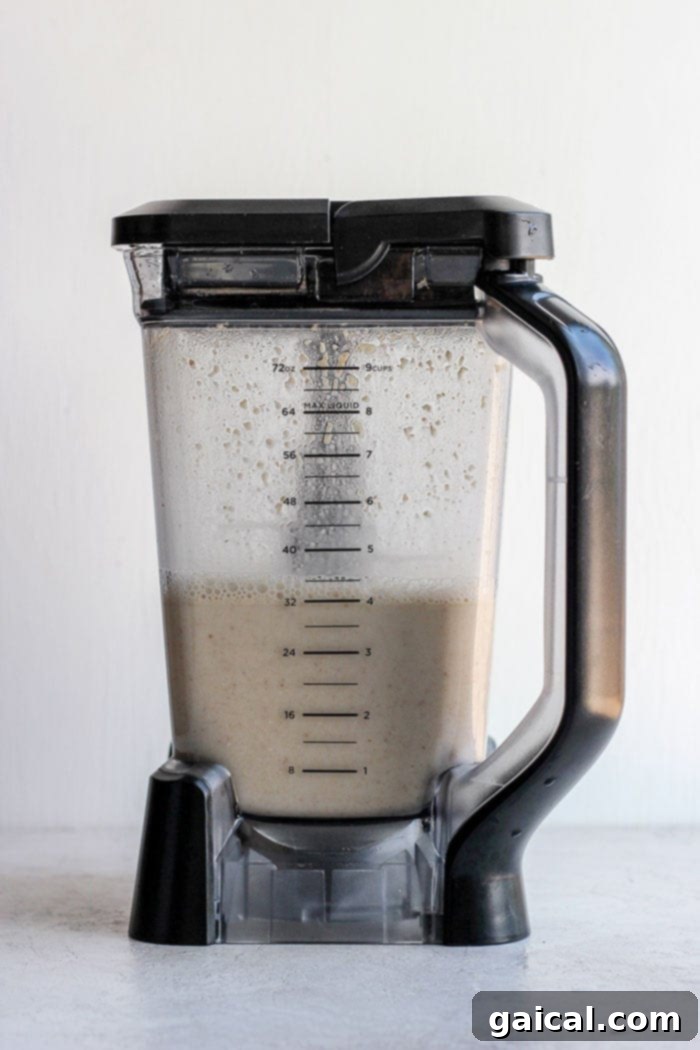
The Beast Blender is our absolute go-to for achieving perfectly smooth textures in everything from vibrant smoothies and creamy dips to hearty soups and, of course, our signature homemade oat milk. It’s the ideal compact size for everyday kitchen use, yet offers truly fantastic power for its sleek design, all while being moderately priced. A truly powerful, efficient, and aesthetically pleasing addition to any modern kitchen!
Expert Tips and Tricks for Achieving Perfectly Smooth Homemade Oat Milk
Making oat milk at home is an incredibly rewarding culinary endeavor, but a few key techniques and insider tips can significantly elevate your results from merely good to absolutely flawless. Follow these expert recommendations closely to ensure your homemade oat milk is consistently smooth, wonderfully creamy, and, most importantly, never plagued by that undesirable slimy texture:
Utilize a High-Speed Blender: This is arguably the single most crucial piece of advice for successful oat milk creation. A powerful, high-speed blender, such as a Vitamix or a Beast Blender, is indispensable for rapidly and efficiently breaking down the oats without the need for prolonged blending. Weaker blenders might necessitate longer blending times, which dramatically increases the risk of developing that undesirable, starchy, slimy texture. Consider this an investment in consistently superior homemade oat milk.
Absolutely Avoid Soaking the Rolled Oats Before Blending: Contrary to many nut milk recipes that explicitly require pre-soaking of nuts, oats behave quite differently. Through extensive testing and experimentation, we have definitively found that soaking rolled oats prior to blending releases excessive amounts of their natural starches and regrettably leads to a noticeably slimy, unappetizing consistency in the final milk. For oat milk, fresh, dry, un-soaked oats are always the superior choice for optimal results.
Do Not Over-Blend the Oats: This is perhaps the most critical tip for preventing the dreaded sliminess. Blend the oats just enough until they are thoroughly broken up and the liquid takes on a milky, opaque appearance. Stop blending precisely before they become a completely smooth, gelatinous paste. Over-blending mercilessly releases too much of the oat’s inherent starches, invariably resulting in a thick, slimy, and unpleasantly pulpy texture. Aim for a brief blending time, typically around 30-60 seconds on high, depending on the sheer power of your blender. It is always far better to slightly under-blend than to inadvertently over-blend.
Blend Sweetener and Water First: If you’re incorporating any form of sweetener, such as Medjool dates, it is paramount to blend them thoroughly with the filtered water and salt *before* you introduce the oats. This strategic sequencing ensures that the sweeteners are completely pulverized and evenly dissolved into the water, creating a homogenous, sweetened base. If you add dates concurrently with the oats, they might not blend completely, leading to uneven sweetness and potential loss of flavor when the oat pulp is ultimately strained out.
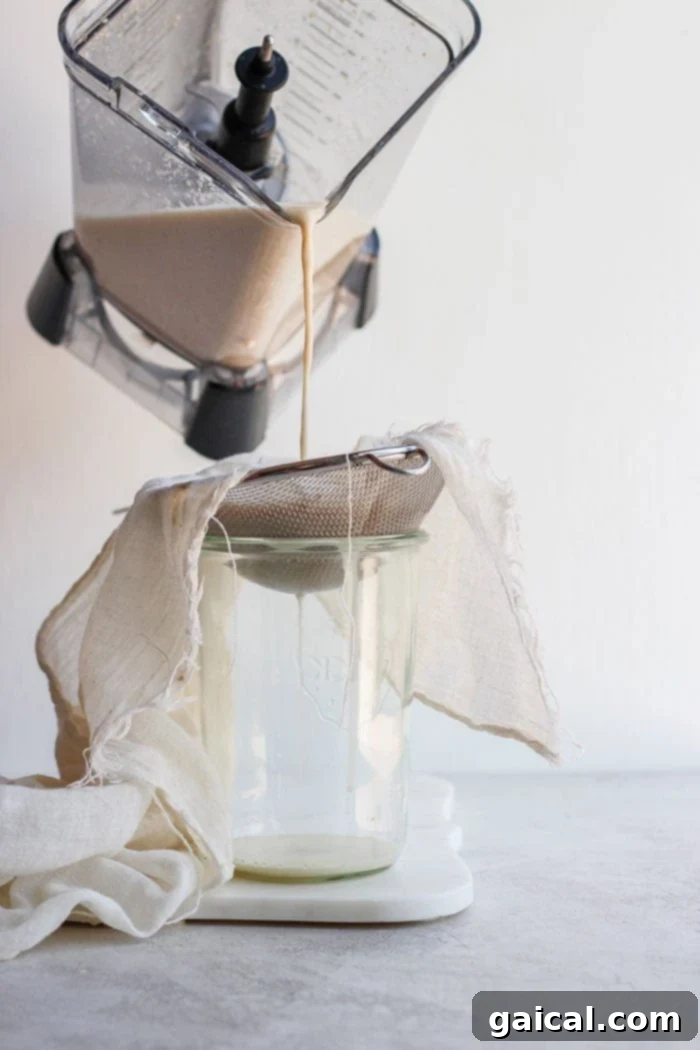
Employ the Correct Straining Method with Care: For the smoothest possible oat milk, a combination of a fine-mesh sieve and a clean, thin tea towel or a dedicated nut milk bag is overwhelmingly the most effective approach. Position the clean tea towel inside the sieve, which is then placed over a large bowl, pitcher, or directly into your chosen storage jar. Slowly and deliberately pour the blended mixture into the towel-lined sieve. Gently gather the edges of the towel and carefully, yet firmly, squeeze the liquid through. Patience is a virtue here; this step takes time, but it is absolutely essential for achieving a pulp-free result. Avoid aggressively squeezing the towel, as this can inadvertently force small starch particles and fine pulp through the fabric, contributing to a less smooth and potentially slimier texture. Allow gravity to perform most of the work, with only gentle, assisting pressure from your hands.
Always Keep it Cold: A simple yet effective tip is to always use cold, filtered water when blending your oat milk. Starting with cold ingredients helps to minimize the release of starches during the blending process, which directly contributes to a smoother, less slimy final product. Furthermore, immediately refrigerate your freshly made homemade oat milk after you have completed the straining process.
Experiment with Flavorings: Once you’ve confidently mastered the basic oat milk recipe, do not hesitate to unleash your creativity! During the initial blending phase (with the water and sweetener), feel free to add a dash of pure vanilla extract, a comforting pinch of cinnamon, a hint of cardamom, or even a tablespoon of unsweetened cocoa powder for delightful flavored oat milk variations. Just remember that effective straining remains key!
Creative and Delicious Ways to Enjoy Your Homemade Oat Milk
Once you’ve successfully crafted your fresh batch of wonderfully creamy homemade oat milk, a world of culinary possibilities unfolds before you! Its versatile, subtly sweet flavor and impeccably smooth texture make it a perfect companion for an incredibly wide array of culinary creations. Here are some of our absolute favorite ways to seamlessly incorporate this delightful plant-based milk into your daily routine and cherished recipes:
Blissful Smoothies: Oat milk provides an absolutely wonderful, naturally creamy base for any smoothie concoction, adding a touch of natural sweetness and a silky mouthfeel without ever overpowering the vibrant flavors of fruits and vegetables. Try it in our incredibly refreshing strawberry banana smoothie, a nutrient-packed and energizing breakfast smoothie, or a satisfyingly protein-rich triple berry protein smoothie for an extra boost of goodness. Its neutral profile means it pairs beautifully with everything from exotic tropical fruits to robust leafy greens, enhancing texture and flavor without being intrusive.
Moist and Flavorful Muffins: Oat milk can be effortlessly substituted for dairy milk in the vast majority of muffin recipes, typically at a straightforward 1:1 ratio. This makes it incredibly simple and convenient to adapt your favorite baked goods to be entirely dairy-free. Explore our extensive and delicious collection of healthy muffin recipes on Fit Foodie Finds, confident that your homemade oat milk will deliver consistently perfect, moist results. We highly recommend trying it in:
- Our comforting and aromatic banana bread muffins, for an extra layer of moisture and a subtle, harmonious oat flavor.
- Both savory and sweet zucchini muffins, where its mildness allows the other vibrant ingredients to truly shine.
- Classic and wholesome blueberry oatmeal muffins, creating a delightful and harmonious blend of oat goodness and fruity bursts.
The Perfect Oatmeal Companion: It’s truly no surprise that oat milk and oatmeal are a match quite literally made in culinary heaven! Using homemade oat milk in your daily bowl of oatmeal dramatically enhances its inherent creaminess and imparts a natural, comforting flavor that beautifully complements the oats themselves. Elevate your morning meal by preparing your oatmeal with this freshly made oat milk. It’s fantastic in satisfying baked oats, imparts a wonderfully silky texture to hearty steel cut oats, and makes for an incredibly satisfying and nutritious protein oats breakfast. The combination truly amplifies the entire oat experience, making your breakfast more enjoyable.
Rich Coffee and Tea Beverages: Oat milk is highly renowned for its exceptional ability to froth beautifully, making it an ideal, barista-favorite choice for crafting exquisite lattes, creamy cappuccinos, and a myriad of other coffeehouse-style beverages. Its natural, delicate sweetness and inherent creamy texture impeccably complement both coffee and various teas, creating a luxurious and indulgent drink experience. Use it generously in your cherished morning brew, or effortlessly whip up a delightful iced oat milk latte for an afternoon treat.
Creamy Soups and Savory Sauces: Do not, by any means, limit your homemade oat milk to solely sweet applications! Its wonderfully neutral flavor profile makes it a fantastic, dairy-free base for creating sumptuously creamy soups, rich savory sauces, and even impossibly smooth mashed potatoes. It adds an exquisite richness and velvety texture without ever overwhelming other flavors, providing a brilliant and healthy vegan alternative to heavy cream or traditional dairy milk in countless savory dishes.
Craving Another Delightful Plant-Based Milk?
Homemade Almond Milk
If you’ve thoroughly enjoyed the process of making homemade oat milk, you might be equally delighted by our incredible recipe for homemade almond milk! All you need are raw almonds, clean water, and your preferred choice of sweetener to effortlessly create a rich, exquisitely delicious, and incredibly fresh batch of dairy-free almond milk right in your own kitchen.
Storing Your Homemade Oat Milk for Maximum Freshness
Proper storage techniques are absolutely crucial to enjoying your delicious homemade oat milk for as long as humanly possible, maximizing its flavor and quality. Unlike many commercially produced oat milks, which often rely on various stabilizers, emulsifiers, and preservatives to extend their shelf life, homemade versions are wonderfully fresh and entirely additive-free. This purity, while beneficial for health, inherently means they have a shorter shelf life. However, with just a few simple and mindful steps, you can easily keep your homemade oat milk tasting fantastic throughout its prime.
Once you’ve diligently finished making your oat milk and it has been thoroughly strained to a silky smoothness, it is critically important to transfer it into an appropriate storage container without delay. We strongly recommend utilizing a clean, airtight glass jar or a sturdy jug. Mason jars are an excellent and popular choice because they come in various convenient sizes and seal tightly, effectively protecting your precious milk from absorbing any unwanted odors from the refrigerator’s environment. Glass is also non-reactive and helps maintain the milk’s pure flavor.
Always make it a habit to clearly label your container with the exact date you made the oat milk. This simple but effective practice helps you easily keep track of its freshness and prevents any guesswork. Store your homemade oat milk in the refrigerator, ideally positioned in the coldest part (usually the back of the bottom shelf), for an optimal period of up to 7 days. While it might still be palatable a day or two beyond this timeframe, it’s generally best practice to consume it within a week to ensure peak taste, texture, and overall quality.
Before each and every use, remember to give your oat milk a vigorous shake. It is entirely natural for some of the finer oat particles and natural solids to settle at the bottom of the container over time, which can create a slightly separated appearance. Shaking ensures that the milk remains uniformly creamy and consistent in both texture and flavor. If, upon inspection, you detect any unusual off-smells (such as sourness), significant and unresolvable separation that doesn’t recombine with shaking, or a distinctly sour or acidic taste, it’s a clear indication that it’s best to safely discard the batch. Embrace and enjoy the fresh, wholesome, and unadulterated taste of your very own homemade creation!
More Delicious Recipes Featuring…
More Ways to Love Your Versatile Homemade Oat Milk
Your exciting journey into the wonderful world of homemade oat milk doesn’t have to conclude with just drinking it straight! Here are even more fantastic recipes and innovative ideas where your fresh, creamy oat milk can truly shine, bringing a delightful dairy-free touch and a boost of nutrition to your favorite meals, snacks, and beverages:
- Classic Oatmeal: Revisit the comforting basics with your homemade oat milk for the creamiest, most satisfyingly comforting bowl of oatmeal you’ve ever had, amplifying the oat-on-oat goodness.
- Decadent Peanut Butter Overnight Oats: Combine the irresistible richness of peanut butter with the smooth, luscious texture of oat milk for an effortlessly delicious, make-ahead breakfast that’s both convenient and incredibly tasty.
- Energizing Post-Workout Cold Brew Protein Drink: Effectively fuel your body’s recovery with a delightfully refreshing and protein-packed cold brew drink, made exceptionally smooth and creamy with your freshly prepared oat milk.
- Fluffy and Flavorful Banana Pancakes: Elevate your cherished weekend brunch with these light, airy, and incredibly flavorful pancakes, using oat milk as your dairy-free liquid base for a truly special treat.
- Creamy Vegan Pasta Sauces: Utilize homemade oat milk to create luxurious, velvety, and entirely dairy-free pasta sauces, adding a delicate richness and smooth texture without the need for heavy cream.
- Comforting Hot Chocolate or Spicy Chai Lattes: Warm up from the inside out with a soothing and indulgent cup of hot chocolate or a fragrant, spicy chai latte, made extra rich, creamy, and wonderfully frothy with your homemade oat milk.
- Homemade Vegan Ice Cream Base: Get creative and experiment with using oat milk as the foundational base for your very own homemade vegan ice cream, yielding a surprisingly creamy, scoopable, and satisfying frozen dessert that everyone will love.
The culinary versatility of homemade oat milk truly knows no bounds. We wholeheartedly encourage you to get wonderfully creative in your kitchen and discover all the amazing, transformative ways this simple yet powerful ingredient can enhance and elevate your cooking, baking, and beverage crafting!
Homemade Oat Milk Recipe: Creamy & Simple
Craft incredibly smooth (never slimy) homemade oat milk with just 2 main ingredients. This recipe is simple, versatile, cost-effective, and yields a creamy, delicious plant-based milk perfect for all your needs – from coffee to baking.
By: Linley Hanson
Prep Time: 30 mins
Cook Time: 0 mins
Total Time: 30 mins
Yields: Approximately 4 cups (4 servings)
Ingredients
- 4 cups filtered water (cold is recommended)
- 2 Medjool dates, pitted (optional, for natural sweetness)
- 1/8 teaspoon fine sea salt (or a pinch)
- 1 cup old fashioned rolled oats (ensure certified gluten-free if required)
Instructions
-
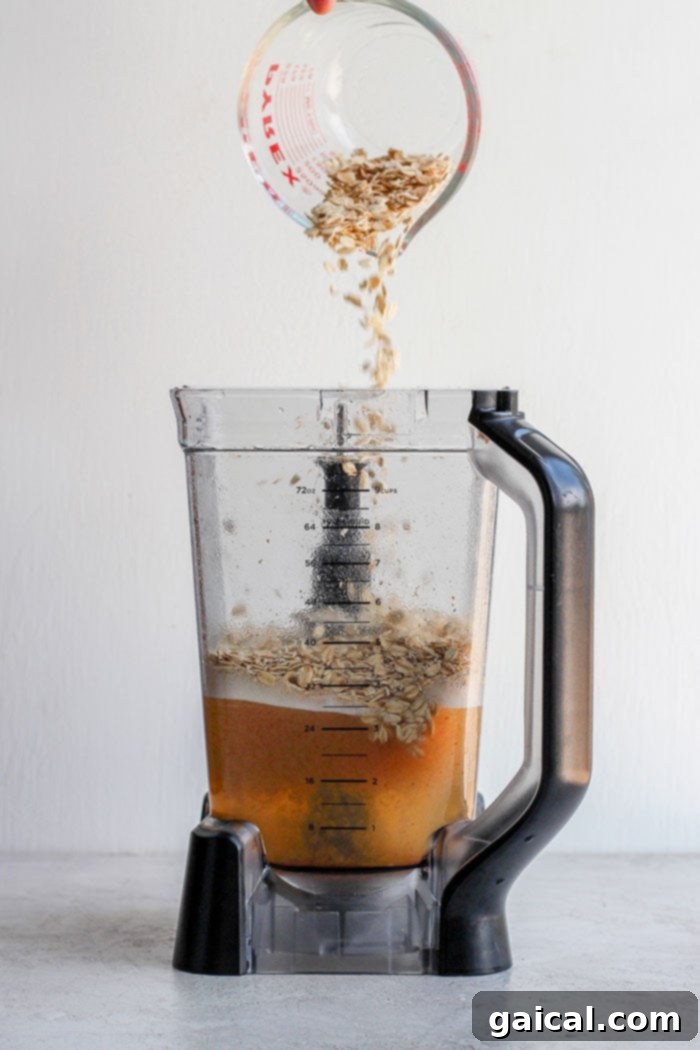
First, if you’re using dates for sweetness, place the pitted Medjool dates, cold filtered water, and salt into a high-speed blender. Blend thoroughly until the dates are completely pulverized and fully integrated into the water, creating a smooth, consistently sweetened liquid base. This crucial step ensures even sweetness throughout your final oat milk.
-
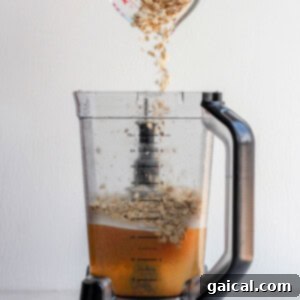
Next, add the old-fashioned rolled oats to the blender, combining them with the sweetened water mixture. Blend for approximately 30-60 seconds on high speed. The primary objective here is to break up the oats into small, fine pieces, but it is critical not to pulverize them completely into a fine, powdery paste. Over-blending will unfortunately release an excessive amount of oat starches, inevitably leading to an undesirable slimy, thick consistency. Stop blending as soon as the liquid takes on a milky, opaque appearance and the oats are visibly broken down.

-
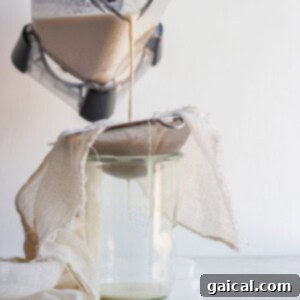
Prepare for the straining process: Place a fine-mesh sieve securely over a large bowl, a spacious pitcher, or directly over your chosen storage jar. Carefully line the sieve with a clean, thin tea towel or a dedicated nut milk bag. Ensure that the edges of the towel hang over the sides of the sieve so you can easily gather and squeeze it later.
-
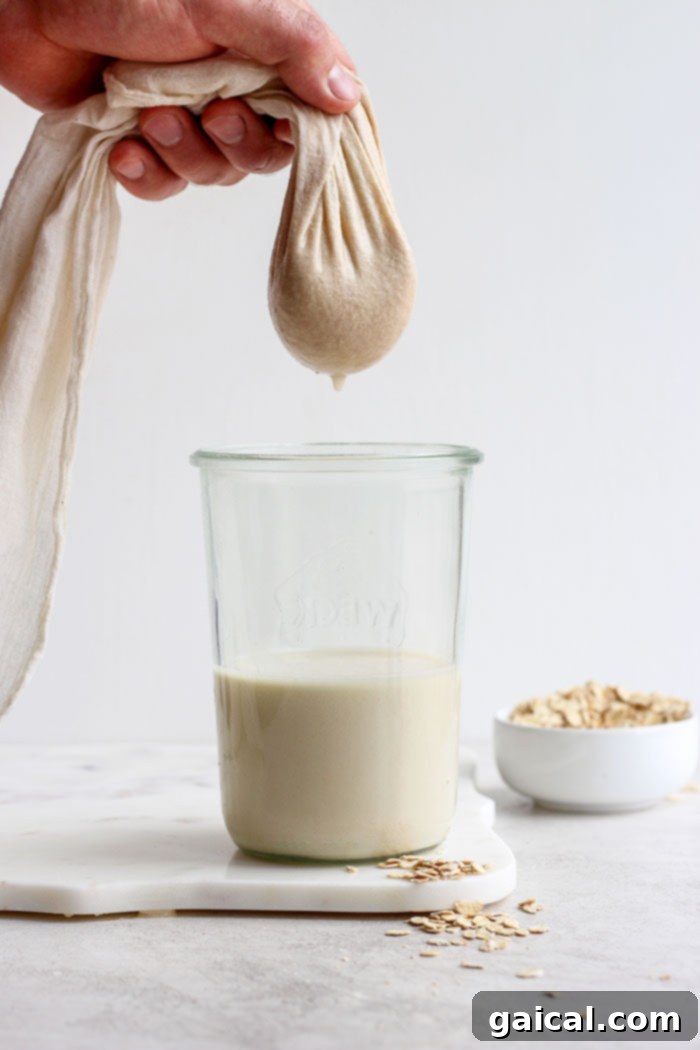
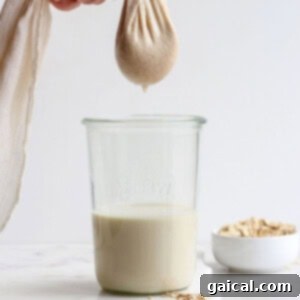
Slowly and with great care, pour the blended oat milk mixture into the prepared tea towel positioned within the sieve. Allow the liquid to naturally drain through into the container placed beneath. Once the majority of the liquid has passed through, gently gather the edges of the tea towel together and carefully squeeze out any remaining oat milk. Exercise patience during this step, as it can take a few minutes to complete. It’s important to avoid aggressive squeezing, as this can inadvertently force fine oat pulp particles through the fabric, resulting in a less smooth texture and potentially introducing sliminess.
-
Once all the delicious oat milk has been completely strained, transfer it into a clean, airtight mason jar or a suitable jug. Securely place a tight-fitting cover on the container and immediately store your homemade oat milk in the refrigerator. It will remain fresh and delicious for up to 7 days. Remember to give it a good shake before each use, as some natural separation of solids may occur over time.
Tips & Notes for Success
- Sweetener Customization: The Medjool dates are entirely optional. If you prefer unsweetened oat milk, simply omit them. For alternative sweetening options, consider adding a tablespoon or two of pure maple syrup or honey, incorporating them alongside the water and salt in the initial blending step to taste.
- No Soaking Required: Do not soak your rolled oats before blending! Soaking them releases starches that inevitably lead to a slimy, unappealing texture in your finished homemade oat milk. Always use dry oats.
- Avoid Over-Blending: This cannot be stressed enough – blend the oats just until they are visibly broken up and the liquid appears milky. Blending for too long or attempting to dissolve the oats completely will create an unfortunate and undesirable strange, pulpy, and slimy consistency.
- Always Use Cold Water: Starting with cold water helps significantly to minimize starch release during the blending process, which is crucial for achieving a smoother, less slimy final product.
- Gentle Straining is Key: Be patient and gentle during the straining process. Aggressive squeezing can force fine oat particles through the cloth, making your milk less smooth and potentially leading to a slimier result.
- Flavor Enhancements: Feel free to add a splash of vanilla extract, a pinch of cinnamon, or even a teaspoon of cocoa powder during the initial blend (with water and sweetener) for flavored variations.
Watch the Recipe in Action
For a clear visual guide, watch our step-by-step video demonstrating how to make perfectly smooth homemade oat milk:
(Note: This video embed is a placeholder example. Replace the `src` attribute with your actual video link if available.)
Approximate Nutrition Facts (per serving)
(Based on 4 servings, approximately 1 cup each, and includes Medjool dates as sweetener)
- Calories: 108 kcal
- Carbohydrates: 23 g
- Protein: 3 g
- Fat: 1 g
- Fiber: 3 g
- Sugar: 8 g
Nutrition information provided is automatically calculated and should be used as an approximation. Actual values may vary based on specific ingredient brands, quantities, and preparation methods.
Love this homemade oat milk recipe? Share your thoughts below!
Don’t forget to tag your beautiful culinary creations on social media with the hashtag #fitfoodiefinds – we absolutely adore seeing what deliciousness you’re whipping up in your kitchen with our recipes!
Photography by: The Wooden Skillet