
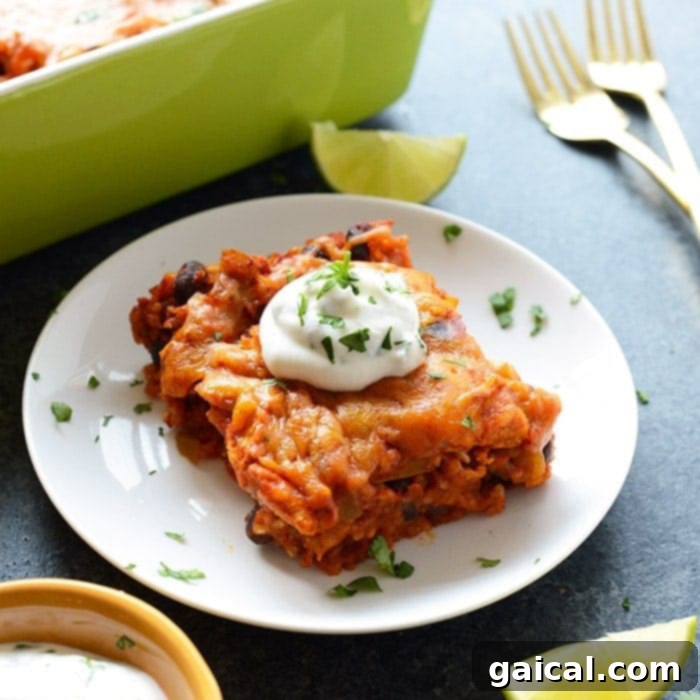
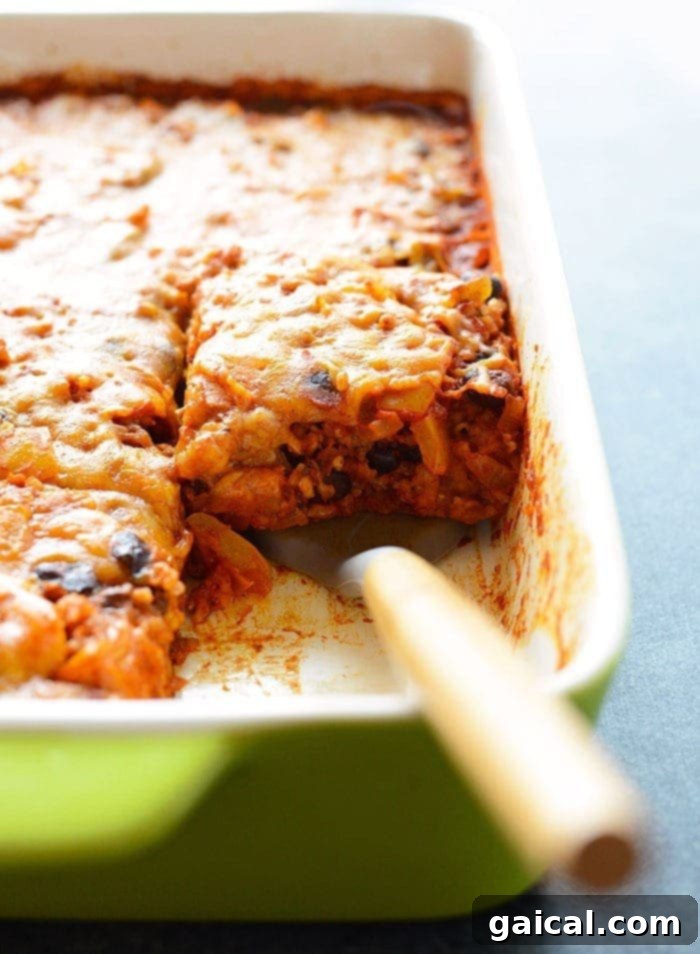
Prepare to experience the finest chicken enchilada casserole you’ll ever taste! This recipe revolutionizes weeknight dinners by allowing you to assemble all ingredients, raw, in a single casserole dish. In just 60 minutes, you’ll pull out a healthy, flavorful, and complete chicken casserole that the entire family will adore.
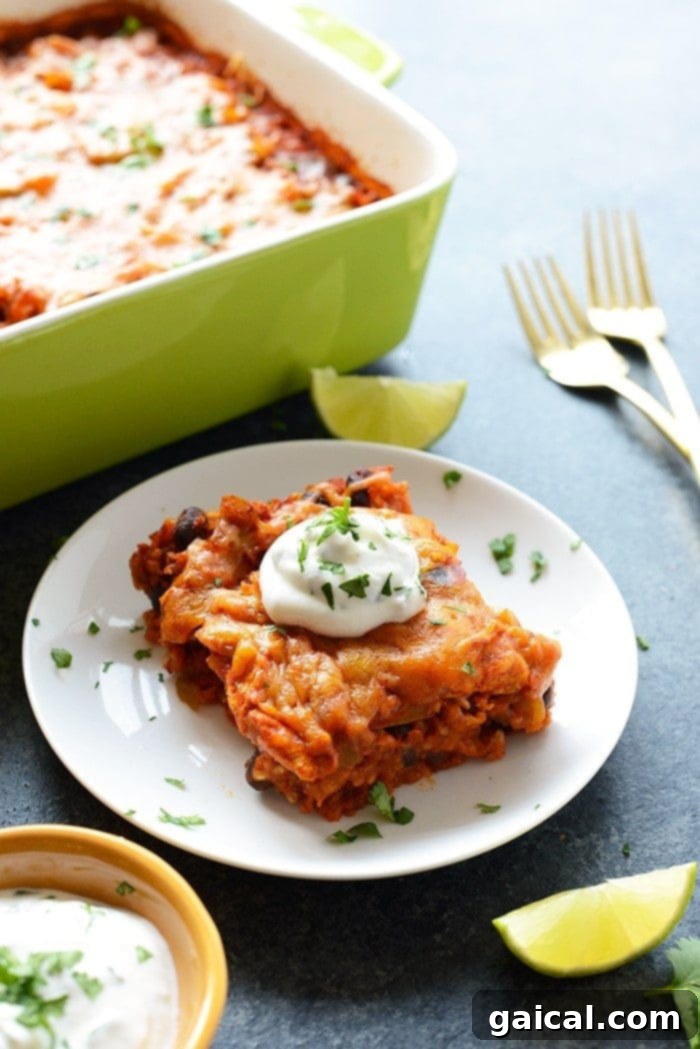
We affectionately call this effortless chicken enchilada casserole the “everything but the tortilla chicken enchilada casserole.” By replacing traditional soggy tortillas with wholesome brown rice, we’ve crafted an extraordinary dish that retains all the beloved enchilada flavors in a more satisfying and nutritious format. This ingenious swap not only eliminates the risk of a mushy base but also adds a fantastic texture and nutritional boost, making it a staple in any healthy kitchen.
Nutrition Bonus: Each generous serving of this incredible casserole delivers over 30g of lean protein and is packed with a vibrant array of vegetables. It’s a true win for a balanced, delicious meal!
The Magic of Raw Ingredients: Effortless Preparation!
The standout feature of this healthy chicken enchilada casserole is its incredible simplicity: everything goes into the dish raw. Forget about pre-cooking chicken, sautéing vegetables, or preparing rice separately. This “dump and bake” method streamlines your cooking process, requiring minimal effort beyond basic chopping and mixing. It’s perfect for busy weeknights when you crave a homemade, wholesome meal without the usual time commitment and extensive cleanup.
Chicken Selection & Preparation
For this recipe, we recommend using boneless, skinless chicken breasts, which cook evenly and absorb flavors beautifully. Boneless, skinless chicken thighs can also be a delicious alternative if you prefer a richer flavor profile. Chopping the chicken into uniform bite-sized pieces (about 1-inch chunks) ensures that it cooks thoroughly and evenly alongside the rice and vegetables. While leaving the breasts whole is an option, dicing them allows for better distribution throughout the casserole and a more consistent texture in every bite. This raw-to-baked approach means the chicken simmers directly in the enchilada sauce, infusing it with maximum flavor.
Vibrant Veggies for Flavor and Health
Bell peppers (yellow and green) and onions form the aromatic base of this casserole, contributing both fresh flavor and essential nutrients. But don’t feel limited to these; this recipe is incredibly versatile! Feel free to get creative and incorporate other vegetables you have on hand or seasonal favorites. The beauty of this dish is its flexibility, allowing you to boost the nutritional content and customize the flavor profile effortlessly. Here are some fantastic suggestions that would integrate seamlessly into this healthy chicken enchilada casserole:
- Potatoes or Sweet Potatoes: Diced into small cubes, they add heartiness and a touch of sweetness.
- Butternut Squash: Cubed, it offers a creamy texture and earthy flavor, perfect for fall.
- Kale or Spinach: Roughly chopped, these leafy greens wilt down beautifully, adding a powerful nutrient punch.
- Corn: Fresh, frozen, or canned corn kernels add sweetness and a pop of color.
- Zucchini or Yellow Squash: Diced, they cook quickly and add moisture.
The Heart of the Flavor: Enchilada Sauce
The enchilada sauce is the star of this casserole, defining its rich, savory character. Therefore, your choice of sauce is paramount. It’s highly recommended to taste your chosen enchilada sauce beforehand to ensure it meets your expectations for flavor and spice level. Some store-bought varieties can be blander than others, while some offer a bold, authentic taste. Our personal favorite is Frontera Red Chile Sauce for its robust and well-balanced flavor, but any high-quality store-bought sauce will work. For those who enjoy a more customized touch, a homemade enchilada sauce can elevate this dish to an even higher level, allowing you to control the spice and ingredient quality.
The Game-Changer: Brown Rice Instead of Tortillas
Finally, the ingredient that truly makes this a unique and healthier “casserole” rather than a traditional enchilada bake: RICE! We’ve consciously ditched the potentially soggy tortillas in favor of nutrient-dense brown rice. This swap provides a fantastic texture, absorbs the rich enchilada sauce beautifully, and adds a significant amount of fiber to your meal. The rice truly transforms the dish, turning it into a hearty, cohesive casserole. Keep reading below for an in-depth discussion on which type of rice works best, as we’ve thoroughly tested several varieties to ensure perfect results every time.
Let’s Talk About Rice: Choosing the Right Grain for Your Casserole
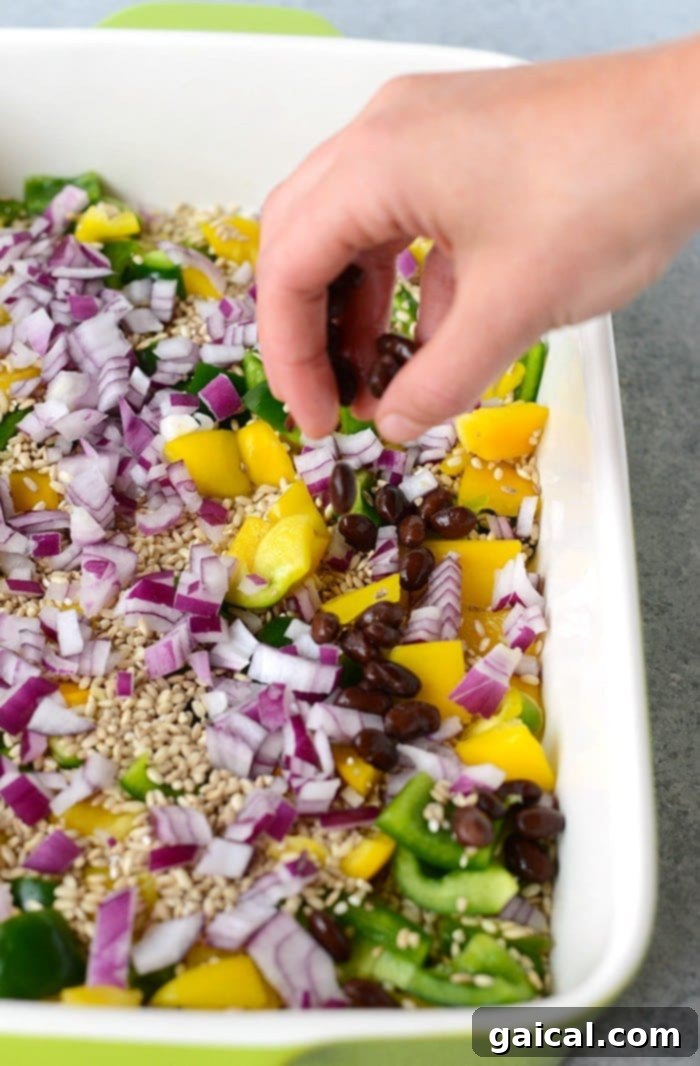
The success of this casserole hinges significantly on the type of rice you use, particularly because it cooks raw alongside the other ingredients. Our initial tests for this recipe utilized a specific type of grain known as germinated brown rice. You might be asking, what exactly is germinated brown rice? Germinated brown rice, also referred to as sprouted brown rice, undergoes a minimal processing step where it is soaked and allowed to begin sprouting. This process not only enhances its nutritional profile (increasing GABA, lysine, and vitamin E) but also significantly impacts its cooking time and texture. We observed that germinated brown rice cooks notably faster and results in a softer, more tender grain compared to conventional brown rice, making it an ideal choice for this 60-minute casserole where every ingredient needs to cook in unison. This rapid cooking characteristic is precisely why it’s perfectly suited for this dish, delivering a delightful texture without extending the overall baking time.
Optimal Rice Substitutions for Perfect Results
While germinated brown rice is our top recommendation for its quick-cooking properties and enhanced nutrition, we understand it might not always be readily available. After extensive testing, we’ve identified excellent substitutions that ensure your chicken enchilada casserole turns out perfectly. Understanding the nuances of each rice type is key to adapting the recipe successfully:
- Long-Grain White Rice: This is by far the best and most reliable substitution for germinated brown rice, working beautifully with a 1:1 ratio. We have personally tested this method, and it yields excellent results. Long-grain white rice cooks more quickly than traditional brown rice, making it a fantastic choice for maintaining the recipe’s 60-minute cook time without compromising texture. It absorbs the enchilada sauce wonderfully, ensuring a flavorful and tender grain throughout the casserole.
- Long-Grain Brown Rice: If you opt for classic long-grain brown rice, it’s important to note that its denser nature requires a longer cooking period. To ensure the rice is fully tender and cooked through, you will need to increase the casserole’s baking time by an additional 30 minutes to an hour. This adjustment accounts for the slower absorption rate and tougher outer bran layer of traditional brown rice. We recommend checking for tenderness towards the end of the extended cooking period to ensure perfect results.
- Quick-Cooking Rice (Instant Rice): While we haven’t personally tested this specific product for this particular casserole, we’ve successfully used quick-cooking brown or white rice in similar “dump and bake” dishes, such as our Southwest Chicken Casserole. We are hopeful it would work here with a slight modification to the liquid content. If you choose to use quick-cooking rice, we suggest decreasing the amount of enchilada sauce by 1 cup and reducing the chicken broth to 1/2 cup. This adjustment is necessary because instant rice has been partially pre-cooked and absorbs less liquid, preventing the casserole from becoming too soupy. Always monitor the casserole during baking and adjust liquid as needed.
By understanding these rice variations, you can confidently prepare this healthy chicken enchilada casserole, adapting it to whatever ingredients you have in your pantry while still achieving a delicious, satisfying meal.
Why Our Healthy Chicken Enchilada Casserole is a Weeknight Winner
Beyond its incredible flavor, this chicken enchilada casserole offers a multitude of benefits that make it an indispensable addition to your recipe repertoire. It’s designed for modern lifestyles, balancing nutritional value with unparalleled convenience. The “dump and bake” method is a game-changer for busy families, drastically cutting down on active cooking and cleanup time. This means less stress in the kitchen and more quality time around the dinner table. Furthermore, its impressive nutritional profile, boasting over 30g of protein per serving alongside a wealth of fresh vegetables and whole grains, makes it an ideal choice for health-conscious eaters and those focusing on balanced macros. It truly is a comprehensive meal in a single dish, minimizing the need for additional sides. The flexibility to customize vegetables and adjust spice levels also caters to diverse palates, ensuring everyone at the table finds something to love.
Customization Tips & Delicious Variations
This healthy chicken enchilada casserole is not just a recipe; it’s a canvas for culinary creativity! Its adaptable nature allows for numerous modifications to suit your taste, dietary preferences, or whatever ingredients you have on hand. Don’t hesitate to experiment and make it truly your own.
- Protein Swaps: While chicken breast is fantastic, feel free to experiment with other lean proteins. Diced turkey breast or ground turkey can be substituted 1:1. For a plant-based version, consider using firm tofu (pressed and crumbled), tempeh, or an additional can of black beans or pinto beans. Cooked shredded beef or pork could also be added, though they might require slight adjustments to liquid and cooking time.
- Vegetable Medley: The bell peppers and onions are a great start, but the possibilities are endless! Incorporate seasonal vegetables for freshness and variety. Add a can of drained corn for sweetness, diced zucchini or yellow squash for a lighter texture, or even some finely chopped carrots for added nutrients. For an extra kick, a diced jalapeño or serrano pepper can be included.
- Spice Level Adjustments: If you love heat, consider adding a pinch of cayenne pepper, a dash of your favorite hot sauce to the enchilada mixture, or some extra chili powder. For a milder flavor, ensure your enchilada sauce is labeled “mild” and reduce the amount of green chiles if desired.
- Cheese Choices: Mexican shredded cheddar cheese blend is classic, but you can certainly try other cheeses. Monterey Jack, Colby, or even a dairy-free shredded cheese blend would work wonderfully. For a richer topping, a sprinkle of cotija cheese after baking adds a salty, crumbly finish.
- Flavor Boosters: A squeeze of fresh lime juice over the finished casserole brightens all the flavors. Fresh cilantro is almost mandatory for that authentic enchilada taste. Avocado slices, a dollop of Greek yogurt or sour cream, or even a drizzle of homemade queso fresco can add an extra layer of deliciousness.
Embrace the versatility of this easy chicken enchilada casserole and turn it into a personalized culinary masterpiece!
Serving Suggestions for Your Enchilada Casserole
This healthy chicken enchilada casserole is a complete meal in itself, thanks to its protein, vegetables, and rice. However, you can easily elevate the dining experience with a few simple additions. Serve it alongside a crisp green salad with a light vinaigrette to add freshness and contrast. A side of homemade or store-bought salsa, guacamole, or even a bowl of extra black beans can complement the flavors beautifully. For those who enjoy a little crunch, a handful of tortilla chips on the side is always a welcome addition. Don’t forget a generous sprinkle of fresh cilantro and a lime wedge for squeezing over individual servings – these simple garnishes make a world of difference!
Troubleshooting: Ensuring Your Casserole Success
Even the simplest recipes can present minor challenges. Here are a few common issues you might encounter with this chicken enchilada casserole and how to easily remedy them:
- Rice is too crunchy: This is the most common concern. If your rice is still a bit firm after the recommended baking time, don’t panic! First, ensure you’ve allowed the casserole to rest, covered, for at least 5-10 minutes after baking. This crucial step allows the residual heat and steam to continue cooking the rice to tender perfection. If it’s still too firm, cover the casserole tightly with foil and return it to a 350ºF (175ºC) oven for an additional 10-15 minutes, adding a splash more broth or sauce if it looks dry.
- Casserole is too soupy: If your casserole seems excessively wet, it might be due to variations in liquid absorption by your chosen rice type, or too much liquid was added. To thicken it up, remove the foil during the last 15-20 minutes of baking. The exposed surface will allow some liquid to evaporate. A quick fix after baking is to let it rest for a longer period (up to 20 minutes) as it will continue to absorb liquid as it cools.
- Chicken isn’t fully cooked: This is less likely with the diced raw chicken and sufficient cook time, but if you’re concerned, ensure your chicken pieces are cut uniformly and are not overly large. Using a meat thermometer to check an internal temperature of 165ºF (74ºC) for the chicken is always a good practice. If not done, cover and bake for a few more minutes.
- Lacking flavor: If the casserole tastes a bit bland, consider the quality of your enchilada sauce. You can always add more spices like cumin, garlic powder, chili powder, or even a dash of smoked paprika to the liquid mixture before baking. A squeeze of fresh lime juice after baking can also brighten the flavors significantly.
With these tips, you’re well-equipped to tackle any minor hiccups and enjoy a consistently perfect chicken enchilada casserole!
How to Reheat Chicken Enchilada Casserole
One of the many advantages of this chicken enchilada casserole is how well it reheats, making it fantastic for meal prep or leftovers. You have several convenient options:
- Microwave: For a single serving, place your portion of chicken enchilada casserole into a microwave-safe bowl. Heat on high for 1.5 to 2 minutes, stirring halfway through, or until thoroughly warmed. Covering the bowl with a microwave-safe lid or damp paper towel can help retain moisture.
- Oven: To reheat a larger portion or the entire casserole, preheat your oven to 350ºF (175ºC). Place the casserole back into its original baking dish (or a similar oven-safe container), covered tightly with aluminum foil to prevent drying out. Reheat for approximately 20 minutes, or until the center is piping hot.
- Stove-Top: For a quicker reheat that helps maintain some texture, add about 1/2 tablespoon of olive oil or a splash of broth to a large skillet. Transfer a single serving or small batch of the casserole to the skillet and sauté over medium-high heat for about 5-7 minutes, stirring occasionally, until it’s heated through. This method can also help crisp up any rice that might have softened.
Can You Freeze Chicken Enchilada Casserole?
Absolutely! This healthy chicken enchilada casserole is an excellent candidate for freezing, making it ideal for future quick meals. For the best freezing and reheating results, we highly recommend assembling and baking the casserole in a disposable aluminum baking dish. This makes it incredibly convenient to transfer directly from the oven to the freezer. We also suggest holding off on adding the shredded cheese until you are ready to reheat, as freezing and thawing can sometimes alter the texture of melted cheese.
Freezing Directions: First, allow the cooked casserole to cool completely to room temperature. This step is crucial to prevent ice crystals from forming, which can lead to a soggy texture upon thawing. Once cool, cover the casserole tightly with a layer of plastic wrap, pressing it down directly onto the surface of the casserole to remove as much air as possible. Follow this with a layer of heavy-duty aluminum foil, ensuring a tight seal. Label the foil with the casserole’s name and the “best by” date, which is typically up to 3 months from the date of preparation. Place it in the freezer.
Reheating from Frozen: To reheat, transfer the frozen casserole to the refrigerator and allow it to thaw completely overnight. Once thawed, remove the plastic wrap and foil (if adding fresh cheese) or simply the plastic wrap (if already topped with cheese). Then, use any of the reheating methods described above. If reheating from frozen without thawing (not recommended for best results, but possible), it will require a significantly longer baking time in the oven (likely 1.5-2 hours at 350ºF), covered, until thoroughly heated through.
Storage Solutions for Leftovers
Proper storage ensures your delicious chicken enchilada casserole remains fresh and safe to eat. Once cooled, transfer any leftovers into a glass or other airtight container. This casserole will keep beautifully in the refrigerator for up to 5 days. For ultimate convenience and easy meal planning, we highly recommend portioning out the casserole into single-serving containers immediately after it has cooled. This creates a perfect grab-and-go meal prep option, making healthy eating effortless throughout your busy week.
Explore More Delicious Chicken Casserole Recipes
If you’ve fallen in love with the convenience and flavor of this healthy chicken enchilada casserole, you’re in luck! We have a wide array of other fantastic chicken casserole recipes that are just as easy and satisfying. Expand your weeknight dinner rotation with these wholesome and hearty options:
- Easy Orange Chicken Casserole: A lighter take on a takeout favorite, baked in a casserole dish.
- Chicken Tikka Masala Casserole: Experience the rich, creamy flavors of India in an effortless casserole format.
- Healthy Cashew Chicken Casserole: A delightful blend of chicken, cashews, and quinoa for a complete meal.
Best Healthy Chicken Enchilada Casserole Recipe
This is truly the best healthy chicken enchilada casserole you will ever eat! Simply combine all ingredients raw in your casserole dish, bake for 60 minutes, and enjoy a wholesome, flavor-packed meal that’s perfect for any occasion.
By: Lee Funke
Prep Time: 15 mins
Cook Time: 1 hr
Total Time: 1 hr 15 mins
Servings: 8
Pin Recipe
Print Recipe
Ingredients
- 1.5 cups germinated brown rice* (see below for other options)
- 1 medium yellow bell pepper, diced (about 1 cup)
- 1 medium green bell pepper, diced (about 1 cup)
- 1 cup purple onion, finely diced (about 1 cup)
- 1 (4.5-oz) can green chiles
- 1 (15-oz) can black beans, drained and rinsed
- 1 lb. boneless, skinless chicken breast, cut into 1-inch chunks
- 3 cups enchilada sauce (red or green)
- 1 cup chicken broth*
- 1 tablespoon garlic powder
- 1 tablespoon ground cumin
- 1/4 teaspoon salt (or to taste)
- 1 cup Mexican shredded cheddar cheese
Optional Toppings:
- Fresh cilantro, chopped
- A squeeze of fresh lime juice
- Greek yogurt or sour cream
- Diced avocado
- Jalapeño slices
Instructions
- Preheat your oven to 375ºF (190ºC). Lightly grease or spray a large ceramic casserole dish (approx. 9×13 inches) with nonstick cooking spray.
- Prepare your vegetables: dice the yellow and green bell peppers, and finely dice the purple onion. Distribute these prepped vegetables evenly across the bottom of the casserole dish.
- Prepare the chicken breast by cutting it into uniform 1-inch chunks. Arrange the chicken pieces in a single layer over the scattered vegetables in the dish.
- Add the dry germinated brown rice, canned green chiles (undrained), and drained black beans to the casserole dish, spreading them evenly amongst the chicken and vegetables.
- In a separate large bowl (such as a Pyrex or other glass bowl), combine the enchilada sauce, chicken broth, garlic powder, ground cumin, and salt. Whisk vigorously until all the spices are well incorporated and the mixture is smooth.
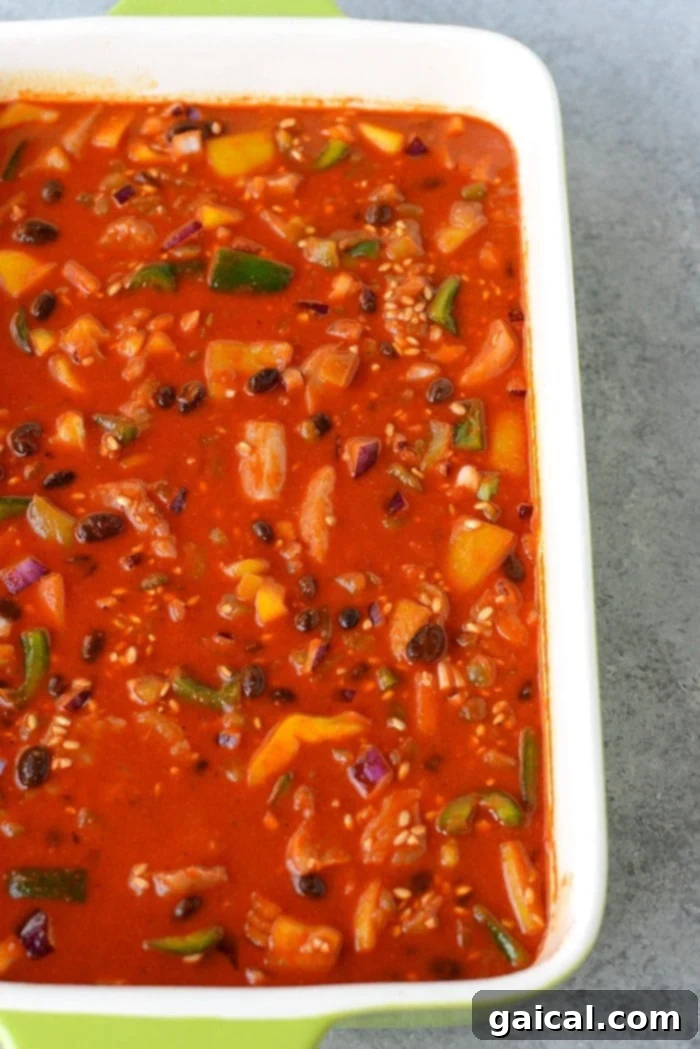
- Carefully pour the liquid enchilada mixture over all the solid ingredients in the casserole dish. Using a large spoon or spatula, gently stir everything together to ensure all ingredients are coated. Then, lightly press down on all solid contents so they are mostly submerged in the liquid. This ensures even cooking of the rice.
- Cover the casserole dish tightly with aluminum foil (this step is critical for proper rice cooking). Place the covered dish into the preheated oven and bake for 30 minutes.
- After 30 minutes, carefully remove the casserole from the oven. Remove the foil and give the contents a good stir. At this point, the mixture will still appear a bit soupy, which is normal. Re-cover the dish tightly with the foil and return it to the oven for another 30 minutes.
- Once the second 30-minute baking period is complete, remove the casserole from the oven. Uncover and sprinkle the top evenly with the Mexican shredded cheddar cheese. Place the casserole back into the oven, uncovered, for an additional 3-5 minutes, or until the cheese is beautifully melted and bubbly.
- Remove the finished casserole from the oven and let it sit, uncovered, for approximately 5-10 minutes before slicing and serving. This resting period allows the flavors to meld, the liquids to fully absorb, and the rice to finish cooking to its perfect tenderness. Garnish individual servings with fresh cilantro, a dollop of Greek yogurt or sour cream, and a squeeze of fresh lime juice for a burst of brightness.
Tips & Notes
- Rice Variations: Germinated brown rice cooks quite differently from conventional short-grain or long-grain brown rice due to its sprouting process. The most successful substitution we’ve found is long-grain white rice, which can be substituted 1:1 without changing the cook time. If you opt for traditional long-grain brown rice, you will need to increase the casserole’s total baking time by an additional 30 minutes to an hour to ensure the rice is fully cooked and tender.
- Broth Alternatives: While chicken broth adds a great depth of flavor, you can easily substitute water or vegetable broth for a vegetarian option or if chicken broth is unavailable.
- Crucial Resting Time: Do not skip the resting period after baking. Allowing the casserole to sit, covered, for at least 5-10 minutes is essential for two reasons: it allows the casserole to cool down to a more palatable temperature, and critically, the residual heat and steam continue to cook the rice to a perfect tender consistency. If your rice is still slightly crunchy, extending this covered resting time will greatly help.
Nutrition
Calories: 487 kcal, Carbohydrates: 76 g, Protein: 34 g, Fat: 8 g, Fiber: 13 g, Sugar: 6 g
Nutrition information is automatically calculated, so should only be used as an approximation.
Love this recipe? Leave a comment below!
Don’t forget to tag your posts on social media with the hashtag #fitfoodiefinds – we’d love to see your delicious creations!