
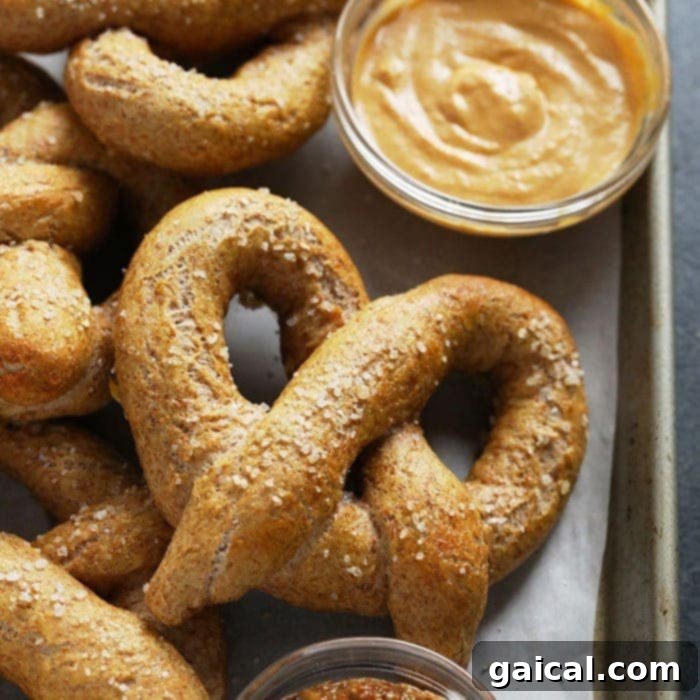
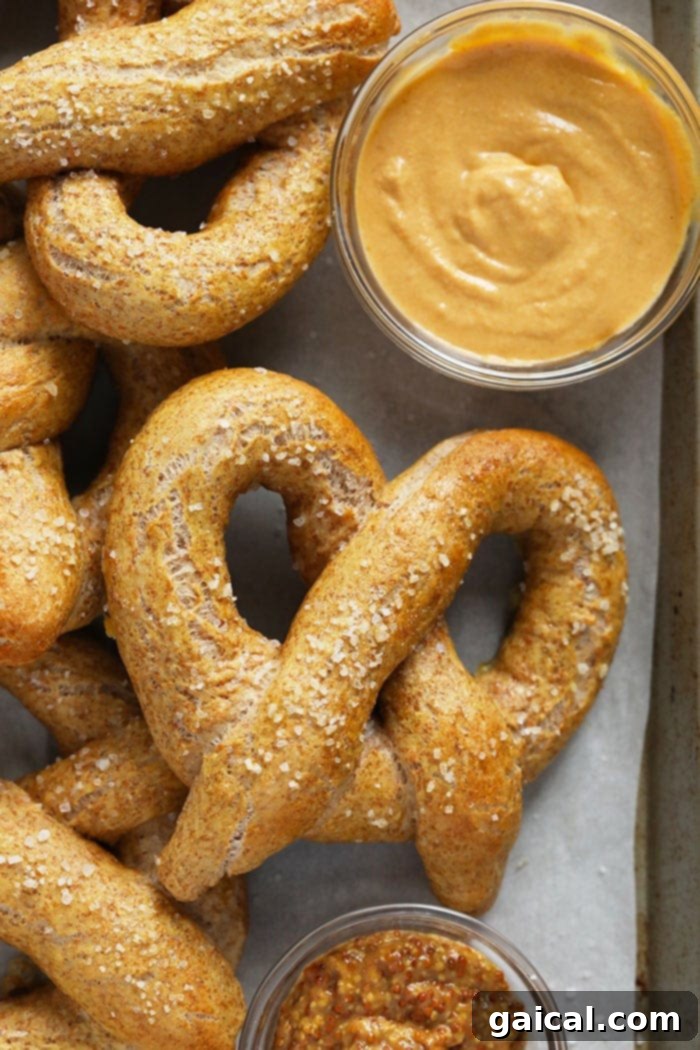
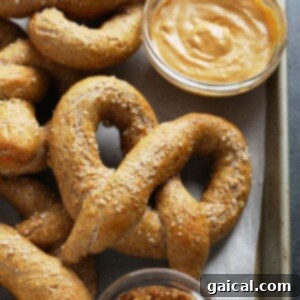
Say goodbye to greasy food court cravings and hello to your new favorite healthy snack! We’ve crafted the ultimate healthy soft pretzel recipe, thoughtfully blending the lightness of white flour with the nutritional benefits of whole wheat. These homemade pretzels are not only incredibly easy to prepare but also come together in approximately an hour, making them perfect for a quick, wholesome bite or a delightful appetizer for any occasion. With just a few basic ingredients, you can whip up a batch of warm, fluffy, and satisfying pretzels that taste like a treat but feel much better for you.
Featured Comment
“This recipe is fantastic! I made these healthy soft pretzels on a Saturday evening and served them for brunch the next morning with a delicious cinnamon sugar sauce, eggs, and bacon. It was an absolute hit! My family adored them, and my brothers immediately asked for another batch. Thank you so much for sharing this wonderful recipe!” – Isabella
Imagine biting into a warm, chewy pretzel with a perfectly crisp exterior and a soft, airy interior, all without the guilt. Our recipe helps you achieve just that! We’re taking those nostalgic mall pretzel vibes and elevating them into a healthier, homemade version that’s surprisingly simple to create. The subtle hint of sweetness combined with the satisfying texture makes these pretzels truly irresistible. By incorporating smart ingredient swaps, we ensure these pretzels are a touch more nutritious, packed with fiber, but still bursting with the flavor you love. Get ready to impress your taste buds and your guests with these wholesome, homemade delights!
Essential Ingredients and Tools for Homemade Soft Pretzels
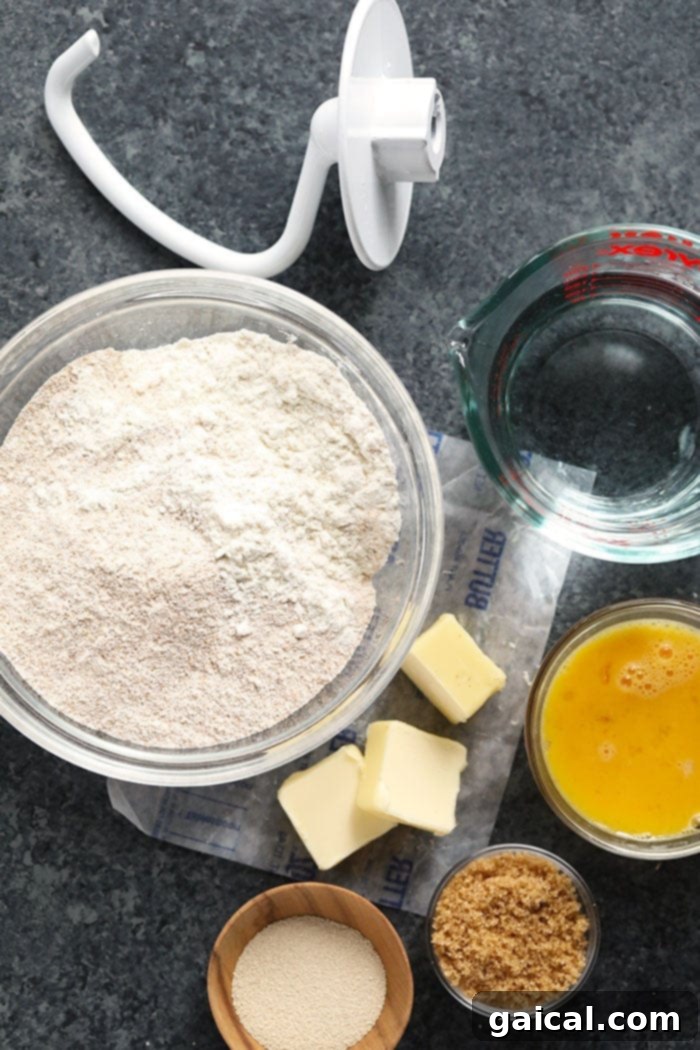
Crafting the perfect healthy soft pretzel at home requires a few key ingredients and tools that ensure a delightful baking experience and a delicious end product. Each component plays a crucial role in achieving that signature pretzel taste and texture. Here’s a detailed look at what you’ll need:
- Active Dry Yeast: This is the magical leavening agent responsible for the dough’s beautiful rise and fluffy texture. It consumes sugars and releases carbon dioxide, creating air pockets within the dough. If you have instant yeast on hand, you can use it directly without proofing, but active dry yeast adds an extra layer of confidence as you can see it activate.
- Lukewarm Water: The ideal temperature for activating your yeast is crucial—around 105°F (40°C). This warmth helps dissolve the yeast and sugar, kickstarting the fermentation process. Water that’s too hot can kill the yeast, while water that’s too cold won’t activate it properly, resulting in a flat pretzel.
- All-Purpose Flour: Forming the essential structure of our pretzel dough, all-purpose flour provides the necessary gluten development. Gluten is a protein that gives the dough its elasticity and chewiness, allowing it to stretch and hold its shape, which is vital for that classic pretzel pull.
- Whole Wheat Flour: This is our secret weapon for a healthier pretzel. Whole wheat flour introduces a lovely nutty flavor and significantly boosts the fiber content compared to using only all-purpose flour. It makes the pretzels more filling and adds valuable nutrients, contributing to a more wholesome snack without compromising on taste.
- Baking Soda: A crucial ingredient for the pretzel bath! When pretzels are briefly boiled in a baking soda solution, it creates an alkaline environment on their surface. This high pH level is what gives pretzels their distinctive deep brown crust and unique, savory flavor. Without it, you’d just have boiled bread sticks.
- Brown Sugar: Beyond just adding a subtle sweetness, brown sugar acts as food for the yeast, helping it to activate and grow. Its molasses content also contributes to a slightly richer flavor profile in the finished pretzels.
- Salt: Essential for both flavor and controlling yeast activity. In the dough, it balances the sweetness and enhances the overall taste. Coarse sea salt, sprinkled on top before baking, provides that iconic pretzel crunch and burst of savory flavor.
- Melted Butter: Incorporating melted butter into the dough adds richness, tenderness, and helps create a more pliable dough that’s easier to work with. It also contributes to the golden color and appealing aroma of the baked pretzels.
Recommended Equipment:
- Stand Mixer: While you can certainly mix and knead by hand, a stand mixer with a dough hook attachment, like a KitchenAid, simplifies the process immensely. It ensures thorough mixing and kneading, saving you time and effort. If you don’t have one, don’t worry—your hands work just as well, just be prepared for a bit of a workout!
- Large Pot: Essential for the crucial baking soda bath step. Make sure it’s large enough to comfortably submerge your pretzels.
- Slotted Spoon or Spatula: For carefully transferring the pretzels from the boiling water to the baking sheet.
- Baking Sheet and Parchment Paper: To prevent sticking and ensure even baking.
- Pastry Brush: For applying the egg wash evenly.
- Kitchen Scale (Optional but Recommended): For precise dough portioning.

Who knew baking homemade pretzels could be this easy and rewarding? Let’s dive into the step-by-step process!
How to Craft Your Healthy Soft Pretzels: A Step-by-Step Guide
Step 1: Activate the Yeast for Perfect Dough
The first crucial step in making delicious soft pretzels is activating your yeast. This process ensures your dough will rise beautifully, yielding light and airy pretzels.
- Begin by gathering your active dry yeast, a tablespoon of brown sugar, and lukewarm water (aim for about 105°F or 40°C, which is comfortably warm to the touch but not hot).
- Pour the lukewarm water into the bottom of your stand mixer bowl (or a large mixing bowl if kneading by hand). Add the brown sugar and then sprinkle the active yeast over the surface of the water.
- Gently whisk these ingredients together just enough to combine. Do not over-mix.
- Set the bowl aside in a warm spot for about 10-15 minutes. During this time, the yeast will begin to “bloom.” You’ll notice a foamy, bubbly layer forming on the surface – this is a clear sign that your yeast is alive, active, and ready to work its magic! If no foam appears, your yeast might be old or the water temperature was off, and it’s best to start this step over.
Step 2: Preparing Your Soft Pretzel Dough
Now that your yeast is happily activated, it’s time to bring the rest of the ingredients together to form the perfect pretzel dough – a balance of chewiness from gluten and tenderness from butter.
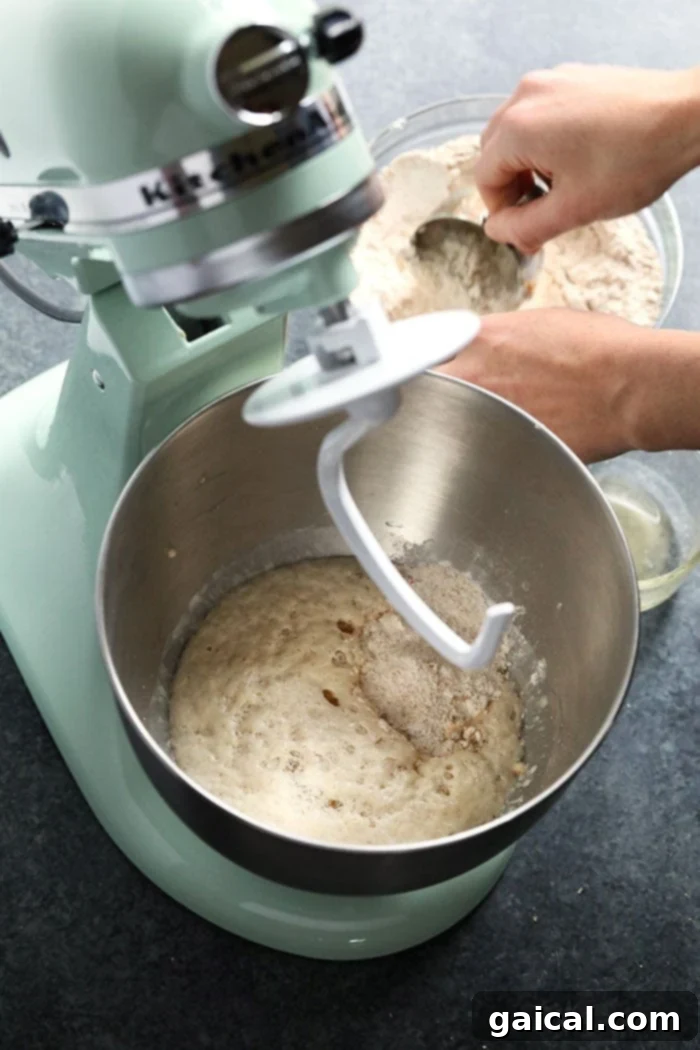
- If using a stand mixer, attach the dough hook attachment to your mixer.
- In a separate medium-sized bowl, whisk together the all-purpose flour, whole wheat flour, salt, and melted butter. Thoroughly combining the dry ingredients first ensures they are evenly distributed throughout the dough, preventing pockets of unmixed flour or salt.
- With your stand mixer running on a low speed, begin gradually adding the dry ingredient mixture to the wet yeast mixture in the bowl. Add it about a third of a cup at a time. This slow incorporation allows the flour to fully hydrate and encourages the development of gluten strands, which are essential for the pretzel’s signature chewy texture.
- Continue adding flour and mixing on low speed until a soft, cohesive dough forms. The dough is ready when it pulls away cleanly from the sides of the bowl and is no longer excessively sticky to the touch. Keep in mind that humidity levels in your kitchen can affect how much flour is needed, so you might use slightly more or less than the recipe specifies. The goal is a pliable, slightly tacky dough, not a dry, stiff one.
Step 3: Resting the Dough for Easier Handling
Once your dough has come together, a short resting period is essential. This step, though brief, makes a significant difference in the ease of handling and the final texture of your pretzels.
- After your dough has reached the desired consistency, carefully remove it from the stand mixer. Transfer it to a lightly floured surface and gently knead it by hand for just one or two minutes. This brief manual kneading helps to further smooth out the dough and ensure the gluten is well-developed. Shape the dough into a neat ball.
- Lightly flour a clean countertop or a large plate and place the dough ball on top. Cover the dough ball with a clean kitchen towel (a tea towel works perfectly).
- Allow the dough to rest for approximately 10-15 minutes. This crucial resting period gives the gluten a chance to relax after kneading, making the dough much more pliable and easier to roll out into long ropes for shaping your pretzels without it snapping back excessively. It’s a small step that yields big results in the shaping process.
Step 4: Shaping Your Classic Soft Pretzels
Now for the fun part: transforming your dough into the iconic pretzel shape! This step requires a bit of practice but is very satisfying.
- After the dough has rested and become more relaxed, divide it into 6 equal portions. For precise, uniformly sized pretzels, use a kitchen scale to ensure each portion weighs the same. If you don’t have a scale, simply eyeball the divisions to create roughly equal balls of dough.
- Take one portion of dough and place it on a lightly floured surface. Using both hands, gently roll the dough out into a long rope, aiming for a length of approximately 20-25 inches. Strive for a consistent thickness throughout the entire rope to ensure even baking. Thicker ends might be undercooked, while very thin sections could burn.
- To form the classic pretzel shape, create a U-shape with your dough rope. Take the two ends of the “U” and twist them over each other twice. Then, bring the twisted ends down towards the bottom curve of the “U” and gently press them into place to secure the pretzel form. This creates the traditional pretzel knot.
- Repeat the process with the remaining dough portions until all 6 pretzels are shaped.
Pro Tip for Pretzel Shaping!
Don’t feel limited to the traditional pretzel shape! You can twist your dough into any creative form you like—perhaps a simple knot, a stick, or even letters. The key is to ensure that any ends you bring together are firmly pinched to form a single, continuous shape. This prevents the pretzel from unraveling and falling apart during the critical water bath step, ensuring beautiful, intact pretzels every time.
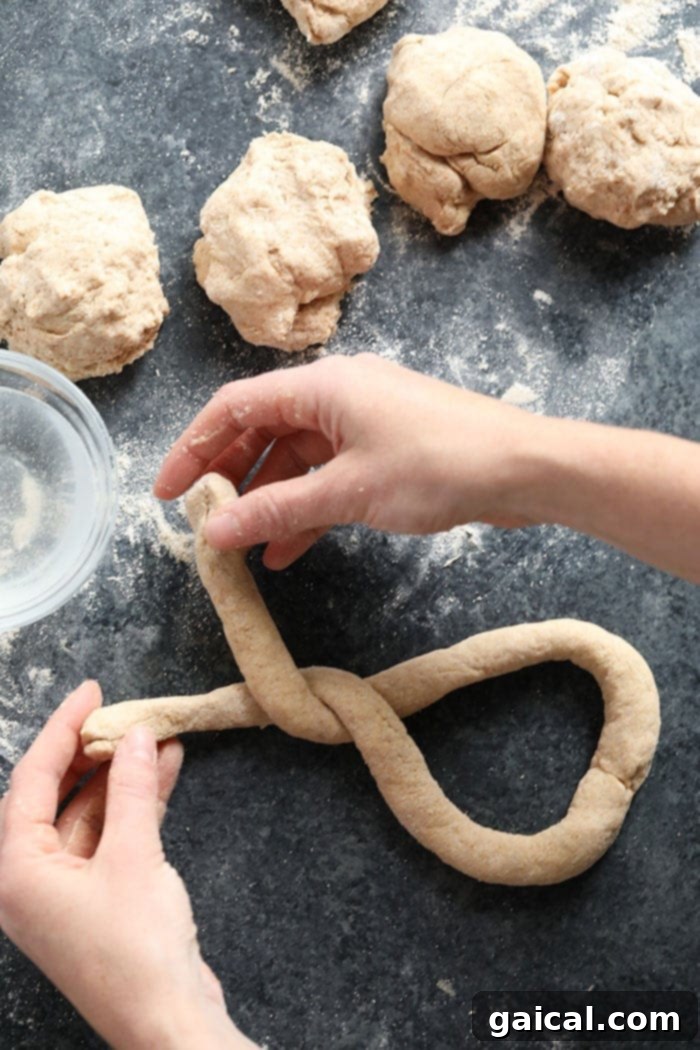
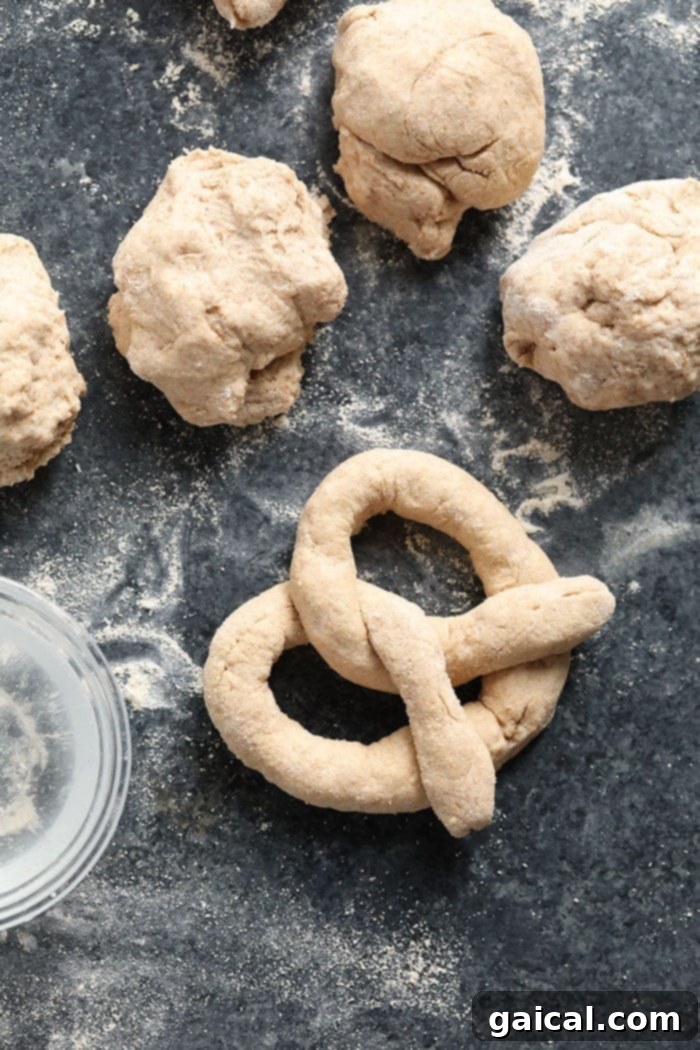
Step 5: The Crucial Baking Soda Flash Boil
This step is what truly transforms your dough into a “pretzel.” The short boil in an alkaline solution is essential for developing the characteristic brown crust and savory flavor.
- In a large pot, add approximately 8-9 cups of water and bring it to a rolling boil over high heat. Once boiling, carefully stir in 1/3 cup of baking soda. Be cautious, as the solution may foam up slightly. The baking soda creates a highly alkaline environment in the water bath.
- Once the baking soda water is boiling steadily, carefully lower each shaped pretzel into the water, one at a time, using a slotted spoon or spatula. Allow each pretzel to boil for a quick 15-20 seconds per side, or 30 seconds total. This brief, hot bath does two important things: it gelatinizes the starches on the surface of the dough, which helps create that unique chewy exterior, and the alkaline solution initiates the Maillard reaction, leading to the deep brown color and distinctive flavor during baking.
- After the flash boil, gently remove the pretzel from the water with the slotted spoon, allowing any excess water to drip off.
Step 6: The Golden Egg Wash and Salty Finish
The final touches before baking give your pretzels their beautiful sheen and irresistible savory crunch.
- After the boiling step, immediately transfer the boiled pretzels onto your prepared baking sheet lined with parchment paper. Keep a little space between each pretzel.
- In a small bowl, whisk one large egg with a tiny splash of water (about a teaspoon) to create a smooth egg wash.
Quick Baking Tip!
Don’t be alarmed if there’s a little excess water pooling around the pretzels on the parchment paper after transferring them from the boiling bath. This is perfectly normal! The water will quickly evaporate during the high heat of the baking process, leaving you with perfectly crisp pretzels.
- Using a pastry brush, gently and evenly coat the tops and visible sides of each pretzel with the egg wash. This egg wash acts as a glaze, promoting a rich, beautiful golden-brown color and a lovely shine once baked.
- Generously sprinkle coarse sea salt over the tops of the egg-washed pretzels. The coarse salt not only adds a classic savory flavor but also provides a delightful textural contrast. If you prefer a less salty pretzel, you can adjust the amount to your liking.
Step 7: Baking Your Delicious Soft Pretzels to Perfection
The moment of truth! Baking brings all the flavors and textures together, transforming your dough into golden, chewy pretzels.
Preheat your oven to 400ºF (200°C). Place the baking sheet with the prepared pretzels into the preheated oven. Bake for approximately 13-15 minutes, or until the pretzels achieve a beautiful deep golden-brown color. Baking at a relatively high temperature helps create that desirable crispy crust while ensuring the interior remains soft and fluffy.
Once baked to perfection, carefully remove the pretzels from the oven. Let them cool slightly on the baking sheet for a few minutes before transferring them to a wire rack to cool completely. While they are fantastic warm, allowing them to cool slightly helps them set and firm up, enhancing their chewiness. Serve warm with your favorite dipping sauces or enjoy them plain.
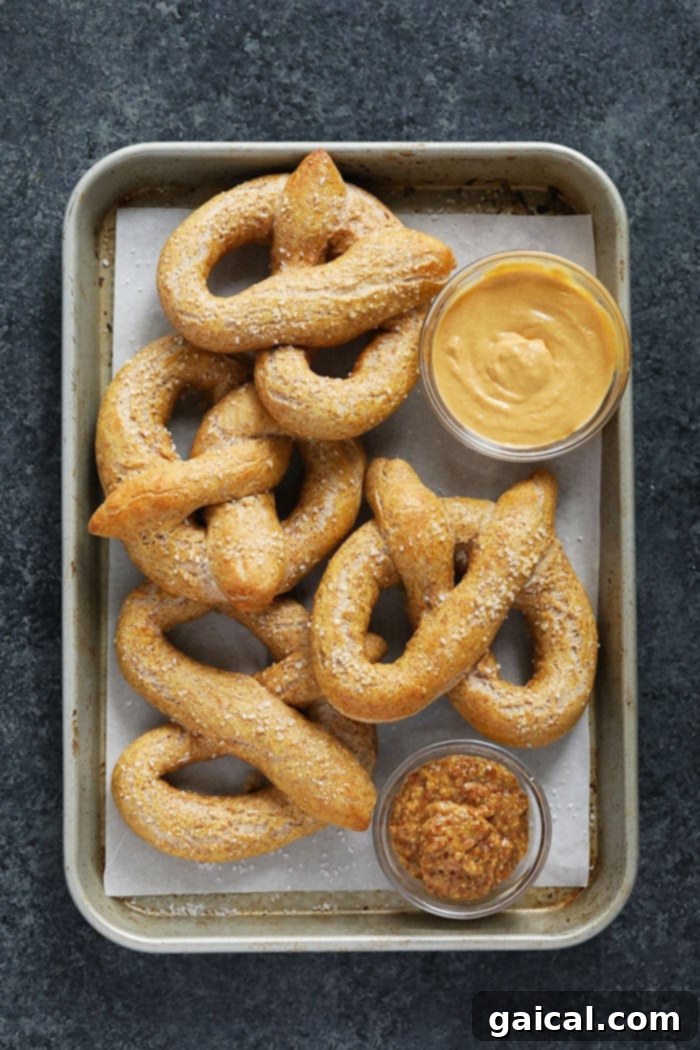
Storing and Reheating Your Homemade Pretzels
While these healthy soft pretzels are best enjoyed fresh out of the oven, any leftovers can be easily stored and reheated to maintain their deliciousness. Proper storage ensures they stay soft and palatable for longer.
To store, place cooled pretzels in an airtight container or a large resealable bag at room temperature for up to 2-3 days. This prevents them from drying out and becoming stale. For an optimal experience, you can gently toast them in a toaster oven or a regular oven at 300°F (150°C) for 1-2 minutes to revive their warmth and a hint of crispiness. Avoid microwaving, as it can make them rubbery.
For longer storage, these pretzels freeze beautifully! Simply place them in a freezer-safe bag or container, separating layers with parchment paper if stacking, and freeze for up to 3 months. When you’re ready to enjoy them, transfer them to the counter to thaw at room temperature for an hour or two. Once thawed, reheat them in a preheated oven at 350°F (175°C) for 5-7 minutes, or until warmed through and slightly crisp on the outside.
Sweet or Savory? Creative Topping Variations
While classic coarse sea salt is a beloved topping, these versatile soft pretzels offer endless possibilities for customization. Absolutely! You can easily transform them into a sweet treat, just like the cinnamon-sugar pretzels you might find at the mall.
To make cinnamon-sugar pretzels: simply bake the pretzels without applying the coarse sea salt. Once they are warm and fresh out of the oven, immediately brush them generously with melted butter. While still warm and buttery, dip each pretzel into a prepared cinnamon-sugar mixture. You can easily make this by combining about 1/4 cup granulated sugar with 1-2 teaspoons of ground cinnamon on a shallow baking sheet or plate. Roll the buttered pretzels in this mixture until fully coated. The warmth of the pretzel and the melted butter will help the cinnamon sugar adhere perfectly, creating a delightful sweet and spicy crust.
Beyond cinnamon sugar, consider other toppings: everything bagel seasoning for an extra savory kick, parmesan cheese, poppy seeds, or even a drizzle of chocolate after baking for a dessert pretzel!
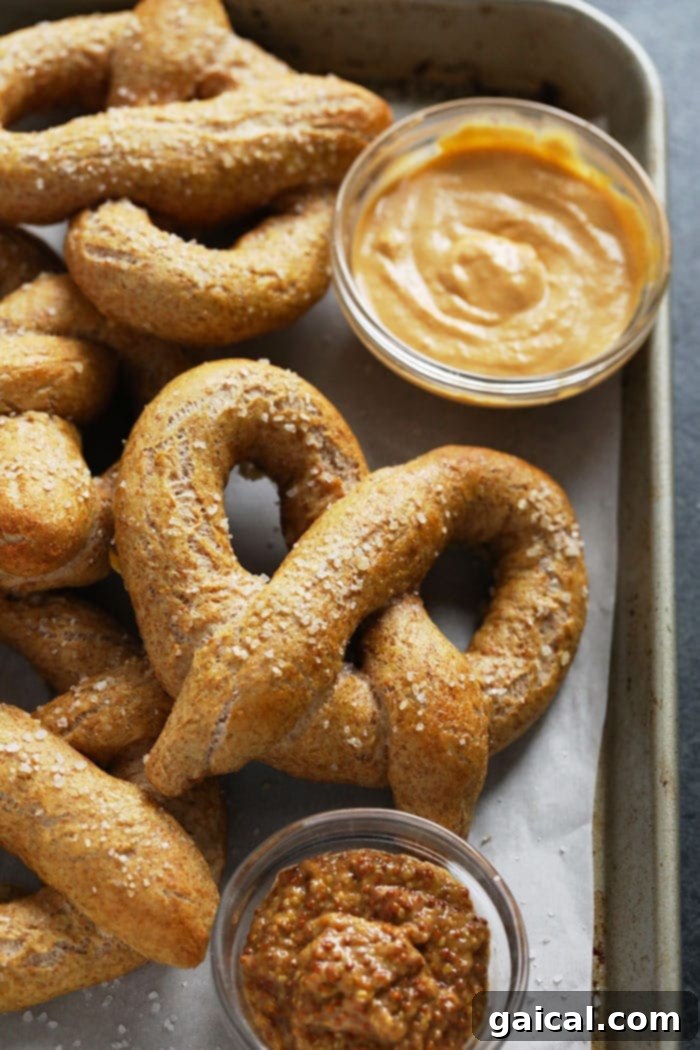
Perfect Pairings: Dipping Sauces for Your Whole Wheat Pretzels
No soft pretzel experience is complete without the perfect dipping sauce! Our healthy whole wheat pretzels are incredibly versatile and pair wonderfully with a variety of sweet and savory accompaniments. Here are some of our top recommendations to elevate your pretzel enjoyment:
- Vegan Queso: For a cheesy, flavorful, and plant-based option, a rich vegan queso is an excellent choice. Its creamy texture and savory spices complement the pretzel’s chewiness beautifully.
- Healthy Chili Cheese Dip: If you’re looking for something hearty and satisfying, a healthy chili cheese dip adds a delicious kick. The warm, spiced flavors of chili combined with gooey cheese are a match made in heaven for soft pretzels, especially perfect for game day or a cozy evening.
- Classic Yellow Mustard or Dijon Mustard: Sometimes, simplicity is best. The tangy, slightly spicy kick of a good quality mustard is a traditional and highly popular pairing for savory pretzels.
- Cream Cheese Dip: For a slightly sweeter and creamier option, a lightened cream cheese dip (perhaps with a touch of honey or maple syrup) can be wonderfully indulgent.
- Nut Butter: For a protein-packed snack, a dollop of peanut butter or almond butter makes an unexpectedly delicious and filling dip.
- Chocolate Sauce: If you opt for cinnamon-sugar pretzels, a warm drizzle of chocolate sauce turns them into an irresistible dessert.
Healthy Soft Pretzel Recipe
Lee Funke
1 hour
15 mins
1 hr 15 mins
6
Ingredients
- 1 packet of active yeast (~about 2.5 teaspoons)
- 2 tablespoons brown sugar
- 1 cup lukewarm water
- 1.5 cups all-purpose flour
- 1.5 cups whole wheat flour
- 1 teaspoon salt
- 2 tablespoons butter, melted
- 1/3 cup baking soda
- 1 large egg (for egg wash)
- Coarse sea salt, for topping
Instructions
- Preheat your oven to 400ºF (200°C) and line a baking sheet with parchment paper. Set aside.
- In the metal bowl of your stand mixer (or a large mixing bowl), combine the yeast, 1 tablespoon of brown sugar, and lukewarm water. Gently stir the mixture, being careful not to over-stir, and let it sit for 10-15 minutes until a foamy layer forms on the surface, indicating the yeast is active.
- While the yeast is activating, in a separate medium bowl, whisk together the all-purpose flour, whole wheat flour, salt, and melted butter until well combined.
- Once the yeast mixture is foamy, attach the dough hook to your stand mixer. With the mixer on low speed, slowly add the flour mixture into the wet ingredients, about 1/3 cup at a time. Continue mixing until a soft dough forms that pulls away from the sides of the bowl and is no longer sticky. You may need slightly more or less flour depending on humidity.
- Lightly flour a clean counter and shape the dough into a ball. Cover it with a clean tea towel and let it rest for 10-15 minutes.
- While the dough rests, fill a large stockpot with 8-9 cups of water and add 1/3 cup of baking soda. Cover and bring to a rolling boil.
- After the dough has rested, gently knead it by hand for 3-4 minutes. Then, divide the dough into 6 equal portions to form individual dough balls.
- Take one dough ball and, using both hands, roll it out evenly into a long rope, approximately 20-25 inches in length. Twist the rope into a pretzel shape and firmly pinch the ends together to prevent them from unraveling in the water bath. Repeat for all dough balls.
- When the baking soda water comes to a boil, carefully place one pretzel at a time into the boiling water for 15-20 seconds. Use a slotted spoon or spatula to remove the pretzel, shaking off any excess water, and place it onto the prepared baking sheet.
- In a small bowl, whisk one large egg with a splash of water to create an egg wash. Brush the top of each pretzel with the egg wash using a pastry brush, then generously sprinkle with coarse sea salt.
- Transfer the baking sheet to the preheated oven and bake for 13-15 minutes, or until the pretzels are a deep golden brown.
- Remove from the oven, let cool slightly on the baking sheet, then transfer to a wire rack to cool completely. Enjoy warm!
Tips & Notes
- The amount of flour needed can vary slightly depending on environmental factors like humidity. The key is to achieve a dough that is soft, pliable, and no longer sticky. Adjust flour in small increments if necessary.
- Ensure your water for yeast activation is lukewarm, not hot or cold, for optimal yeast performance.
- Don’t skip the baking soda bath! It’s crucial for the authentic pretzel taste and golden-brown crust.
- Feel free to experiment with different toppings and dipping sauces to customize your pretzel experience.
Nutrition Information (per serving, approximately)
Calories: 275 kcal
Carbohydrates: 48 g
Protein: 8 g
Fat: 6 g
Fiber: 4 g
Nutrition information is automatically calculated and should be used as an approximation only. Actual values may vary.
Shop This Post
Active Dry Yeast
Baking Sheet
Love this recipe? Leave a comment below!
Don’t forget to tag your posts on social media with the hashtag #fitfoodiefinds – we’d love to see your delicious creations!
More of Our Favorite…
Nostalgic Snack Recipes to Enjoy
If you loved these healthy soft pretzels, you’re in for a treat! We specialize in reinventing classic comfort foods and nostalgic snacks into healthier, equally delicious versions. Explore some of our other popular recipes that will transport you back to your favorite childhood memories, but with a nutritious twist:
- White Chocolate Funfetti Blondies: A vibrant and delightful dessert that’s sure to bring a smile to your face.
- Protein Monster Cookie Dough: Indulge in raw cookie dough cravings safely and healthily with this protein-packed version.
- Healthy Oatmeal Cookies: Classic chewy oatmeal cookies, made with wholesome ingredients for guilt-free enjoyment.
- Instant Pot Applesauce: Quick, easy, and naturally sweet applesauce, perfect as a snack or side.
- Dole Whip: Recreate the beloved theme park treat at home with our simple and refreshing recipe.
- Ginger Molasses Whoopie Pies: Soft, spiced cookies with a creamy filling, a delightful twist on a classic.