
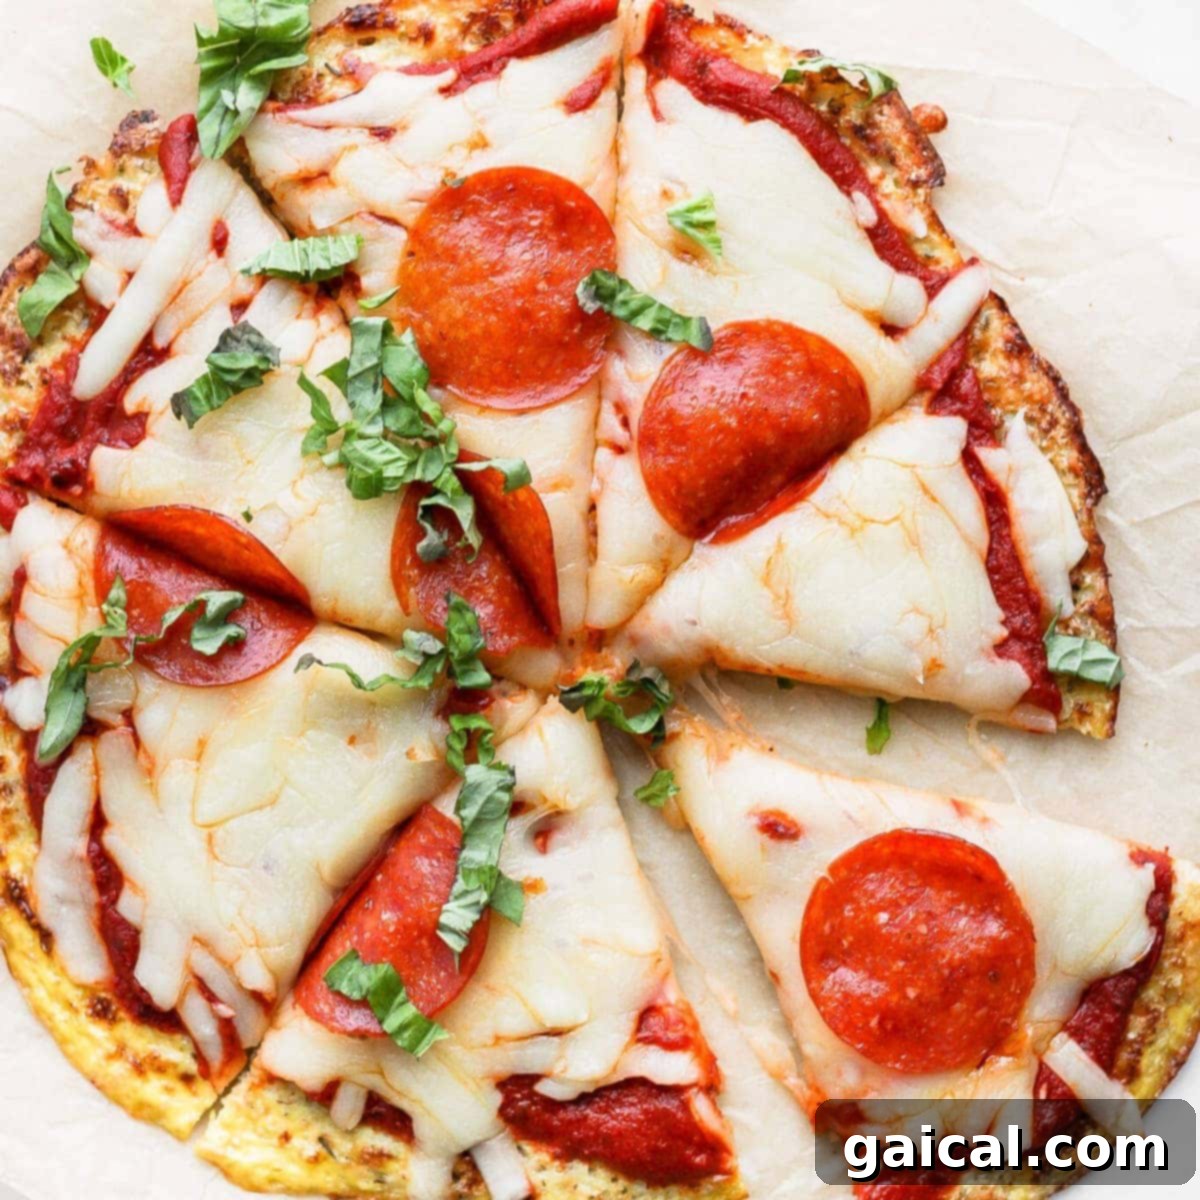
Transform your ordinary dinner into a special occasion with this incredible cauliflower pizza crust recipe. Perfect for a healthy weeknight meal or a fun family pizza night, this gluten-free crust is surprisingly easy to make and bursting with flavor. With just a few staple ingredients like finely processed cauliflower, mozzarella, Parmesan cheese, and a hint of seasoning, you’ll be well on your way to enjoying a delicious, guilt-free pizza that everyone will love.
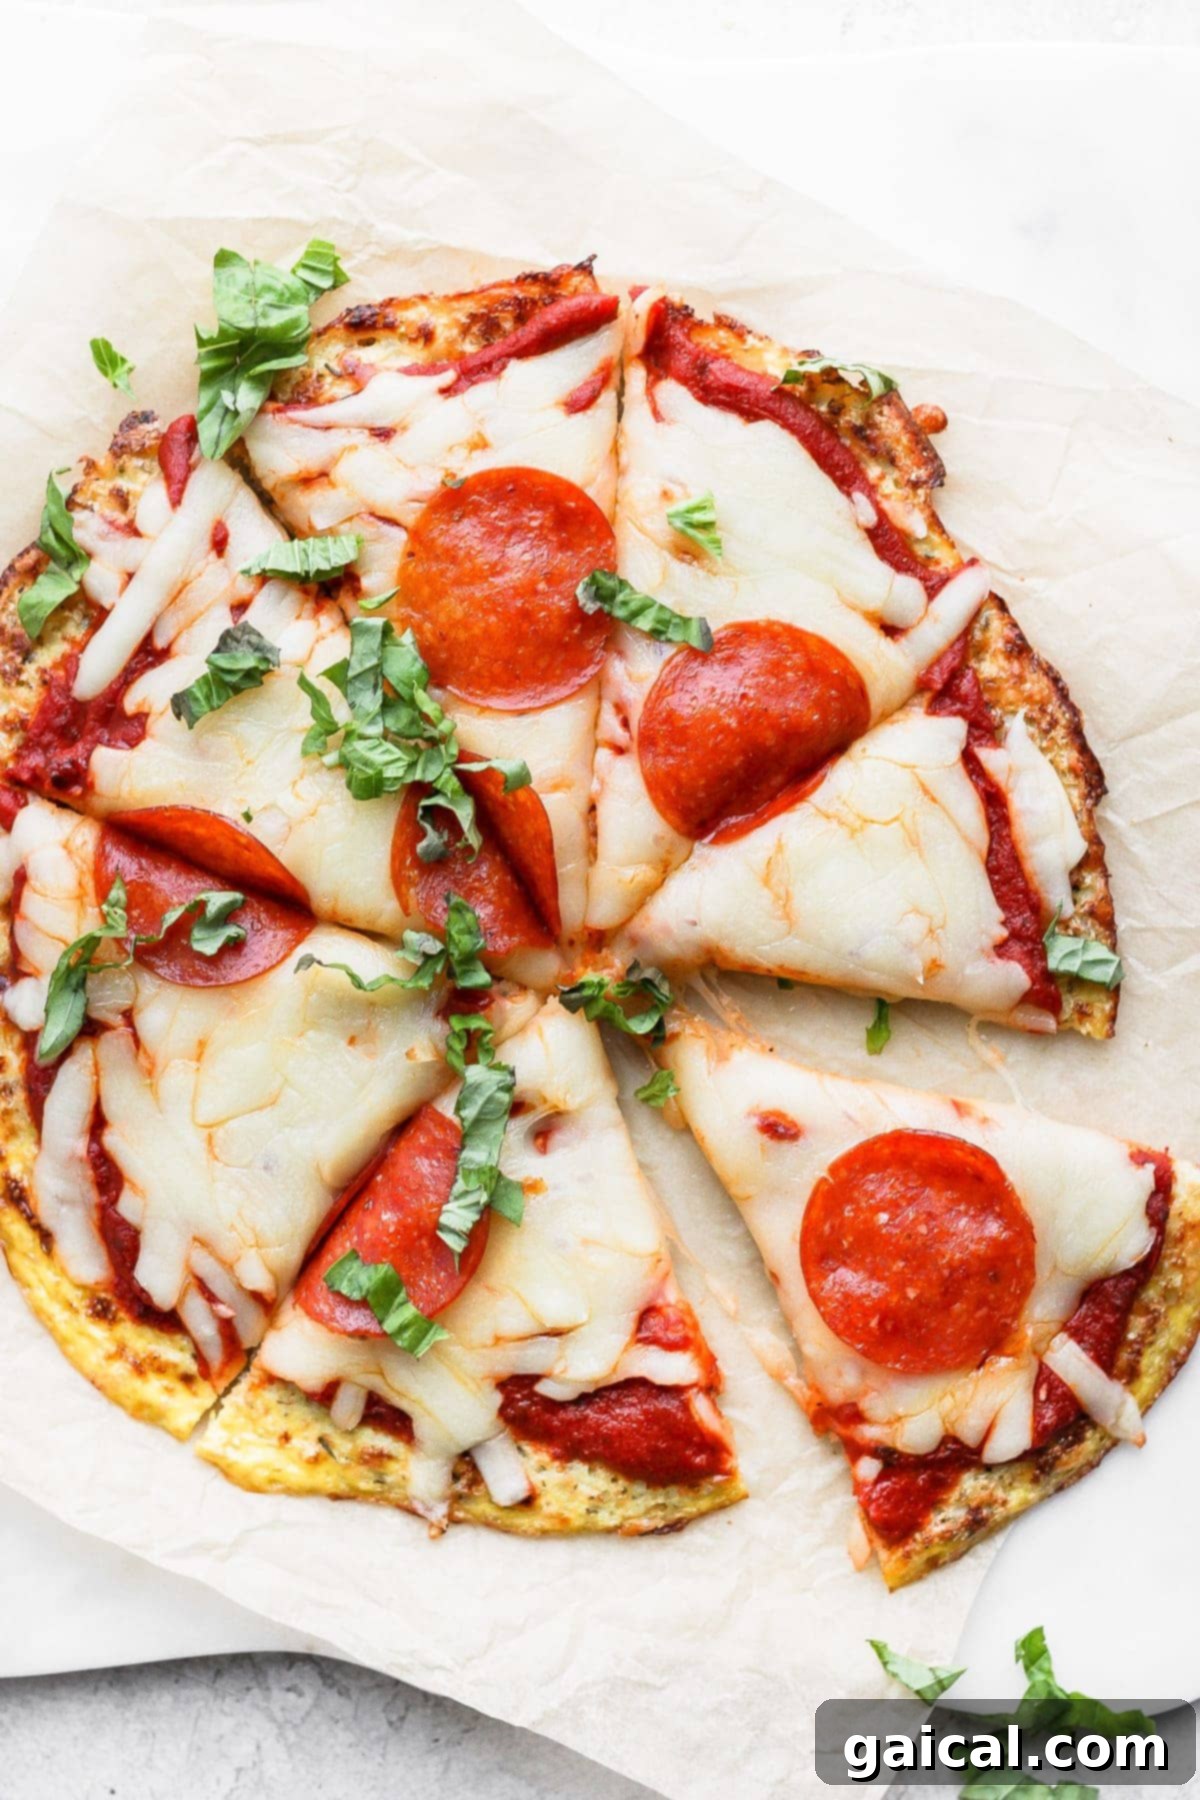
Discover the Best Cauliflower Pizza Crust Recipe for Everyone
Say goodbye to heavy, traditional pizza dough and hello to a lighter, healthier alternative that doesn’t compromise on taste or texture. This cauliflower pizza crust is a game-changer, offering a gluten-free base that’s incredibly flavorful, wonderfully cheesy, and remarkably simple to prepare. It’s not just for those avoiding gluten; it’s so good that even die-hard pizza fans will be adding it to their rotation of favorite recipes!
There are countless reasons why this particular cauliflower crust recipe stands out and has become a beloved staple in many kitchens:
- Simple, Accessible Ingredients: The foundation of this amazing crust relies on everyday items you likely already have in your pantry or can easily find at any grocery store. Cauliflower rice, cheese, and basic seasonings are all it takes, making it a convenient choice for any home cook.
- Effortless Weeknight Dinner Solution: Life gets busy, but that doesn’t mean sacrificing delicious, home-cooked meals. This recipe is designed for ease, allowing you to whip up a fantastic pizza crust quickly, perfect for those hectic weeknights when you need a speedy yet satisfying dinner.
- Incredible Versatility: While it makes an outstanding pizza, this cauliflower crust is also incredibly versatile. Think beyond pizza night! You can easily adapt it into a savory focaccia-style bread, serving it as a delightful appetizer or a wholesome side dish with your favorite meals.
- Crispy Texture Guaranteed: We all crave a pizza crust that’s perfectly crispy, not soggy. This recipe incorporates specific techniques and tips to ensure your cauliflower crust achieves that coveted golden-brown, satisfyingly crisp texture every single time.
- Healthy & Delicious: Enjoy all the comforts of pizza without the guilt. Cauliflower is packed with nutrients, making this crust a healthier choice that’s naturally low in carbohydrates and high in fiber, perfect for a balanced diet.
Essential Ingredients for Your Perfectly Crispy Cauliflower Pizza Crust
Crafting a truly delicious cauliflower pizza crust starts with understanding the role each ingredient plays. You’ll be delighted by how short and straightforward the ingredient list is for this impressive recipe. Here’s a detailed look at everything you’ll need to prepare before you begin:
- Cauliflower Rice: This is the star of our crust! You have the flexibility to use either homemade cauliflower rice or a store-bought version. The key is to ensure it is very finely processed. Finer pieces bind better, leading to a sturdier and crispier crust.
- Mozzarella Cheese: Beyond adding a delightful cheesy flavor, mozzarella acts as a crucial binding agent for the pizza crust. Its melting properties help hold the cauliflower particles together, giving structure to your base. Shred your own for optimal freshness or use pre-shredded for convenience.
- Parmesan Cheese: Complementing the mozzarella, Parmesan cheese not only contributes to the binding process but also infuses the crust with a wonderful depth of salty, umami flavor. Freshly grated Parmesan offers the best taste experience.
- Italian Seasoning: A generous blend of classic Italian herbs like oregano, basil, thyme, and rosemary provides that quintessential pizza aroma and taste. It’s a simple way to elevate the overall flavor profile of your crust.
- Garlic Powder: Everything tastes better with garlic! Garlic powder adds a warm, savory kick that perfectly enhances the other flavors in the crust.
- Red Pepper Flakes: For those who enjoy a little heat, red pepper flakes offer a subtle, pleasant warmth that takes this crust to the next level. Adjust the amount to your preferred spice level.
- Egg: The egg is an indispensable binder, essential for holding the cauliflower and cheese mixture together. We recommend starting with one large egg, but if your mixture appears too crumbly, especially if using a coarser store-bought cauliflower rice, a second egg can be added to achieve the right consistency.
- Olive Oil: The secret weapon for achieving an irresistibly crispy cauliflower crust! Olive oil is applied both to the parchment paper and drizzled over the crust before baking, ensuring a golden, crunchy exterior. Do not skip this important ingredient!

make cooking easier
Grab Your Printable Kitchen Conversions Chart
Keep common kitchen conversions like tablespoons to teaspoons and Fahrenheit to Celsius on hand at all times with our printable kitchen conversions chart. A handy tool for every home cook!
Step-by-Step: How to Make the Perfect Cauliflower Pizza Crust
Get ready to create the crispiest, cheesiest, and most delicious cauliflower pizza crust you’ve ever tasted. Following these detailed steps and incorporating our expert tips and tricks will ensure you achieve a flawless gluten-free pizza base every time. Precision in preparation makes all the difference for a truly outstanding crust.
Preparation is Key for Success
Pro Tip: Before you embark on this culinary adventure, make things significantly easier on yourself by preheating your oven to 375ºF (190ºC) and lining a baking sheet with a sheet of parchment paper. Drizzle one tablespoon of olive oil evenly over the parchment paper. This simple step prevents sticking and is crucial for achieving that desirable crispy crust and effortless flipping later on.
Step 1: Eliminate Excess Moisture from Cauliflower Rice
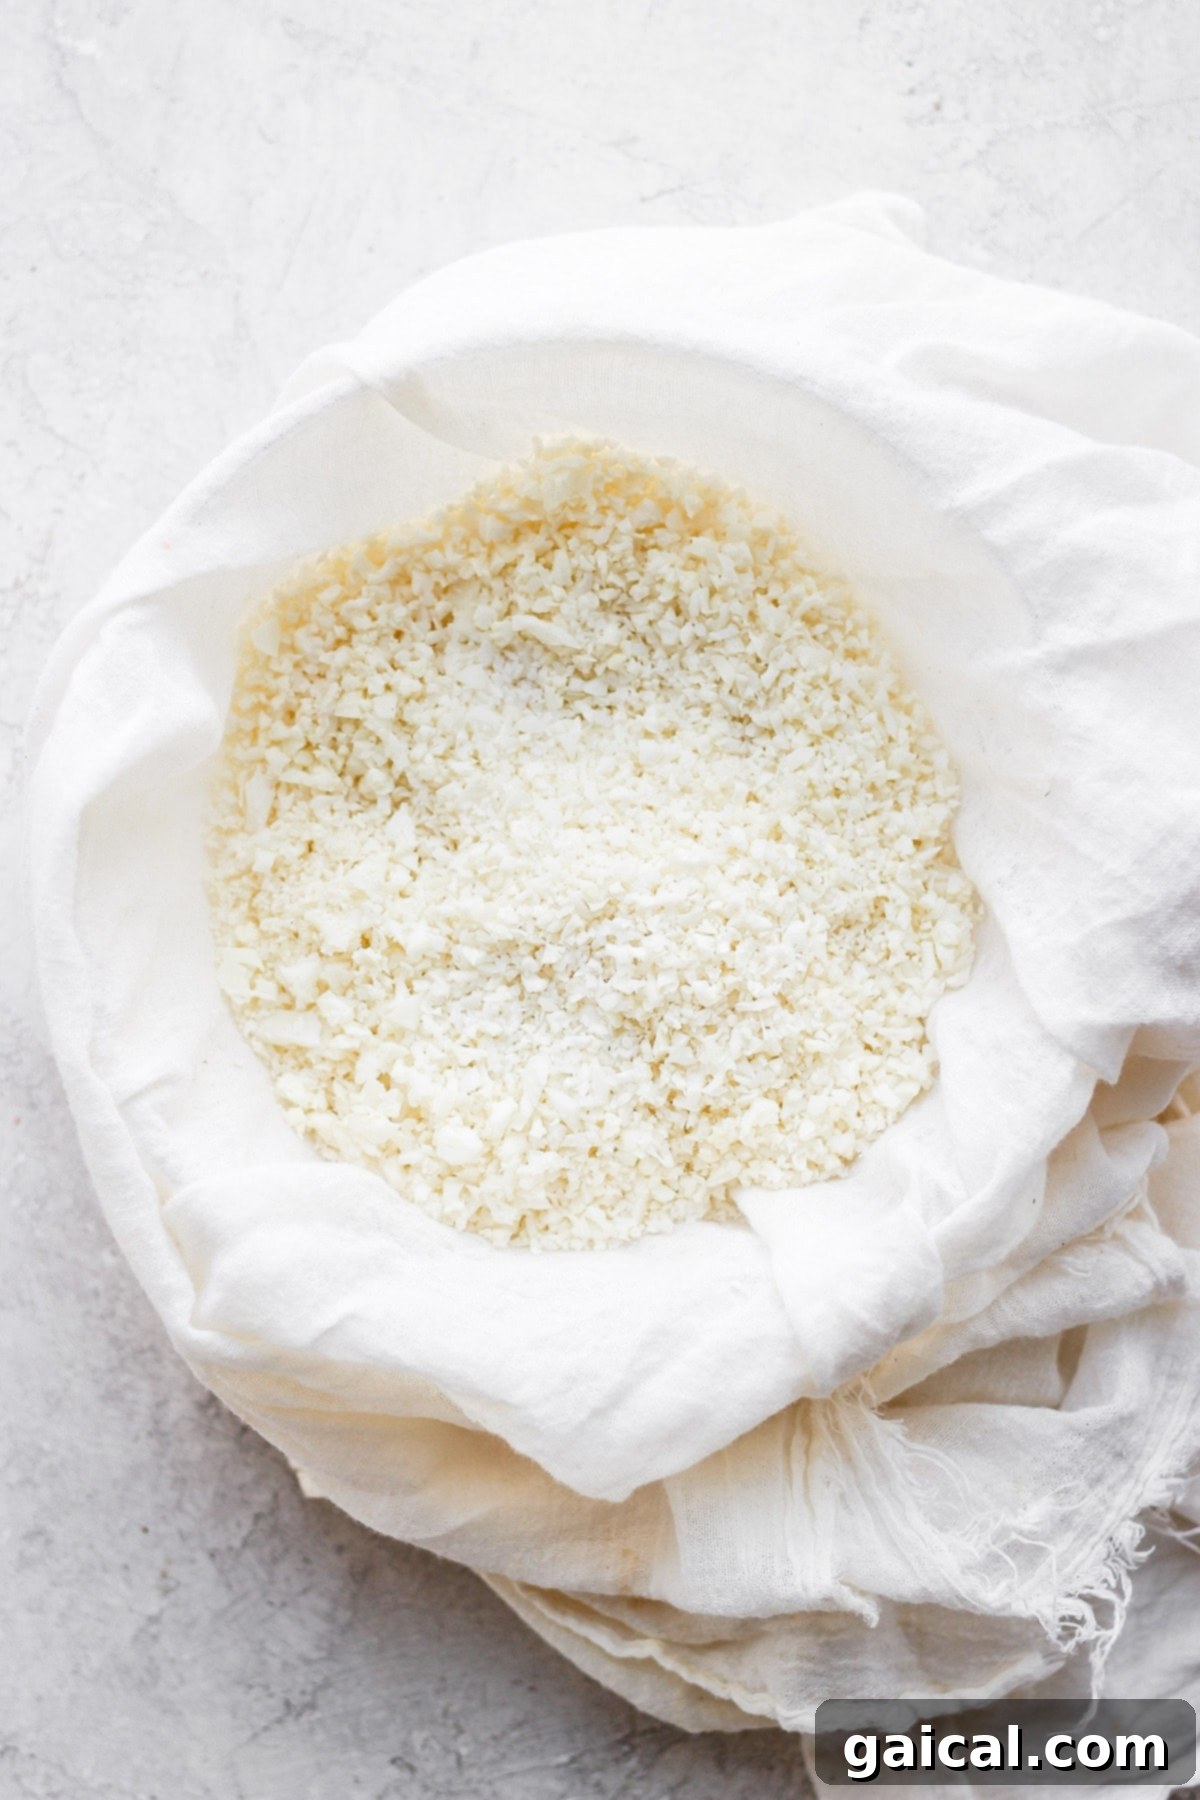
The very first and arguably most critical step is to draw out any excess moisture from your cauliflower rice. Why is this so important? Because residual moisture is the primary culprit behind a mushy, unappetizing pizza crust. Nobody wants a soggy base!
To effectively remove moisture, simply follow these steps:
- Line a large bowl with a clean tea towel or a few layers of cheesecloth.
- Place the cauliflower rice into the lined bowl.
- Sprinkle the cauliflower generously with 1/8 to 1/4 teaspoon of salt. The salt helps to draw out the water.
- Mix the cauliflower and salt gently, then let it sit for 5-10 minutes.
- After resting, gather the edges of the cloth or towel to form a ball around the cauliflower rice.
- Firmly squeeze the cloth over the bowl, pressing out as much liquid as possible. Continue squeezing until the cauliflower feels noticeably dry. Discard the excess liquid.
The Secret to a Strong Crust: Finely Processed Cauliflower
For the best results – a sturdy, resilient cauliflower pizza crust – the cauliflower rice must be finely processed. The smaller and more consistent the cauliflower pieces, the better they will bind together, resulting in a stronger crust that holds its shape beautifully.
Homemade Cauliflower Rice Tips
If you’re making your own cauliflower rice from scratch for this recipe, refer to our homemade cauliflower rice recipe. For this specific crust, process the cauliflower in your food processor for an extra minute or two beyond the usual, aiming for a consistency closer to fine shreds rather than distinct chunks. This finer texture is key to a cohesive crust.
Store-Bought Cauliflower Rice Enhancement
Even if you purchase pre-packaged cauliflower rice from the grocery store, we strongly recommend giving it a quick pulse in a food processor or blender if it contains larger chunks. This extra step ensures all the cauliflower pieces are finely processed, greatly improving the binding and crispiness of your finished crust.
Step 2: Combine Your Crust Ingredients
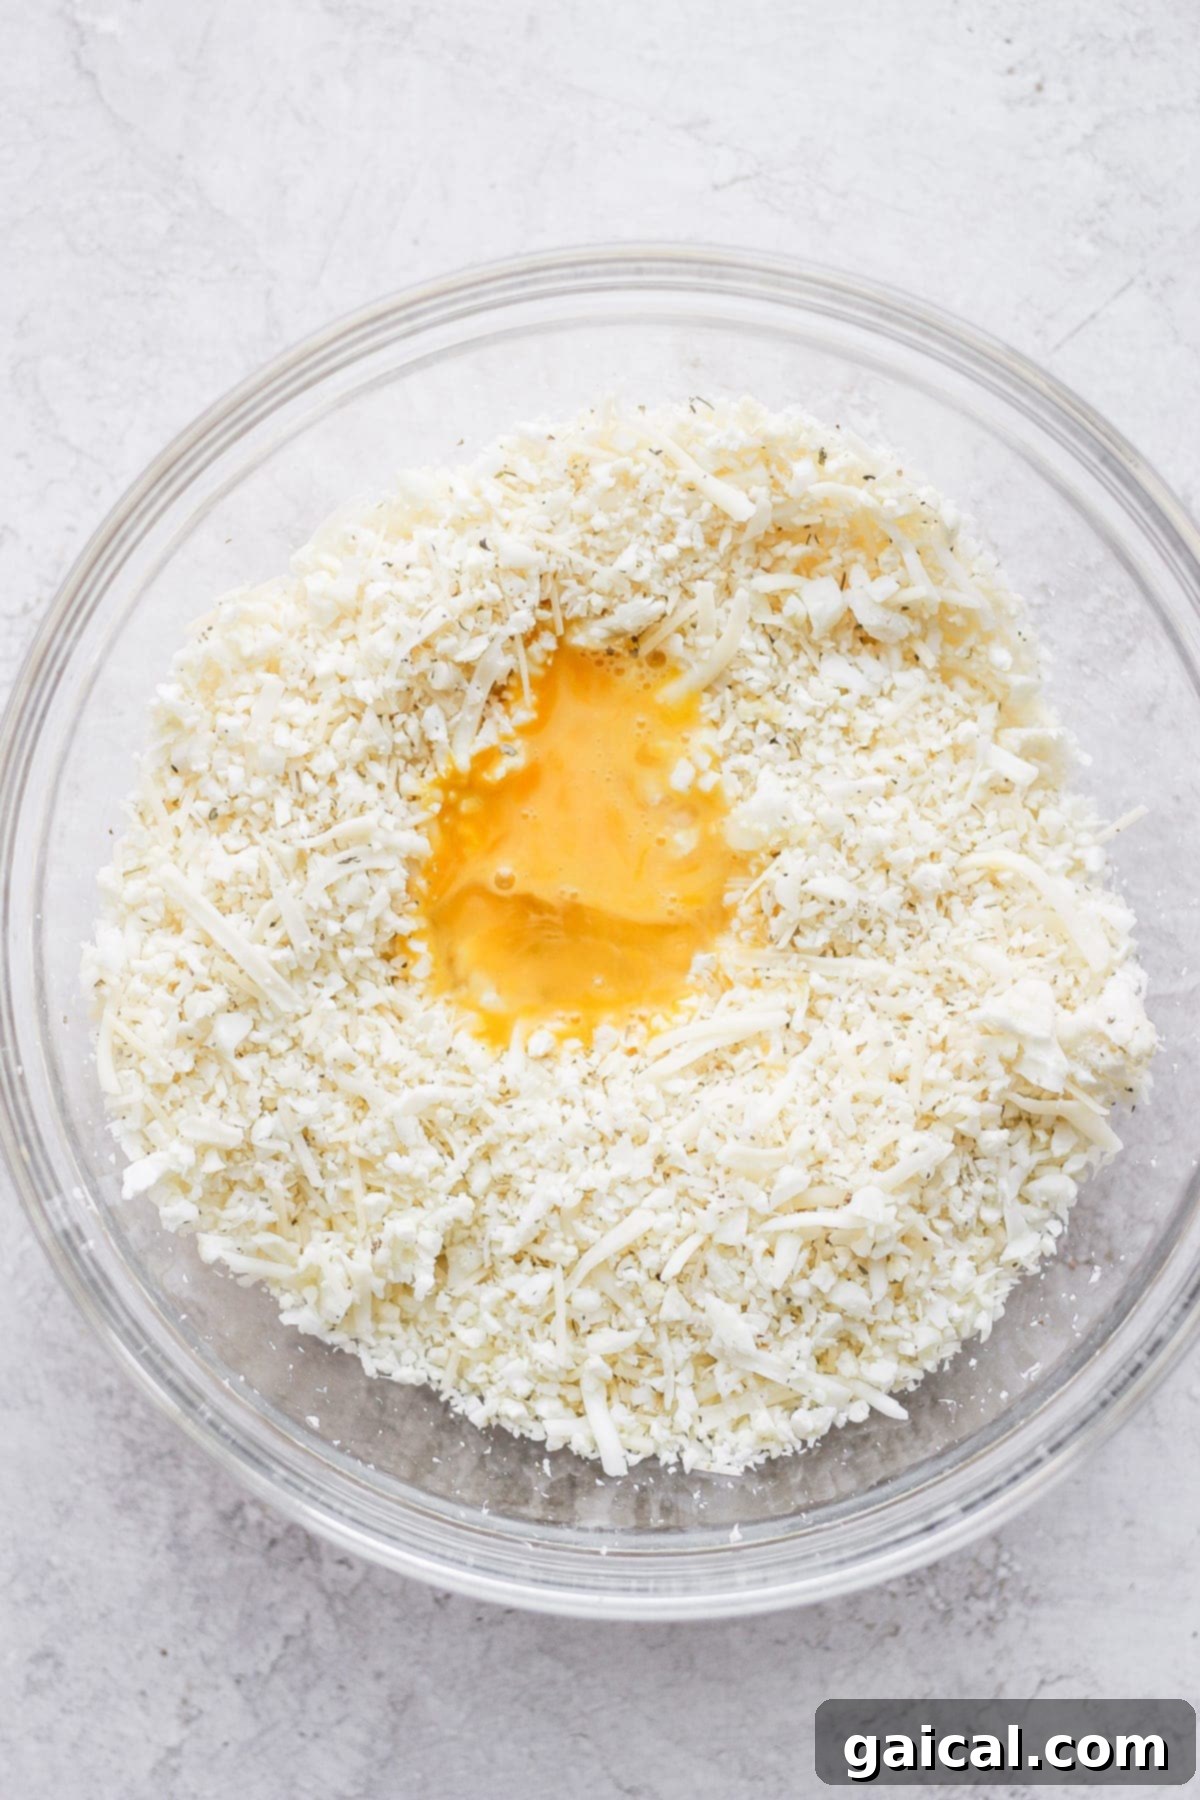
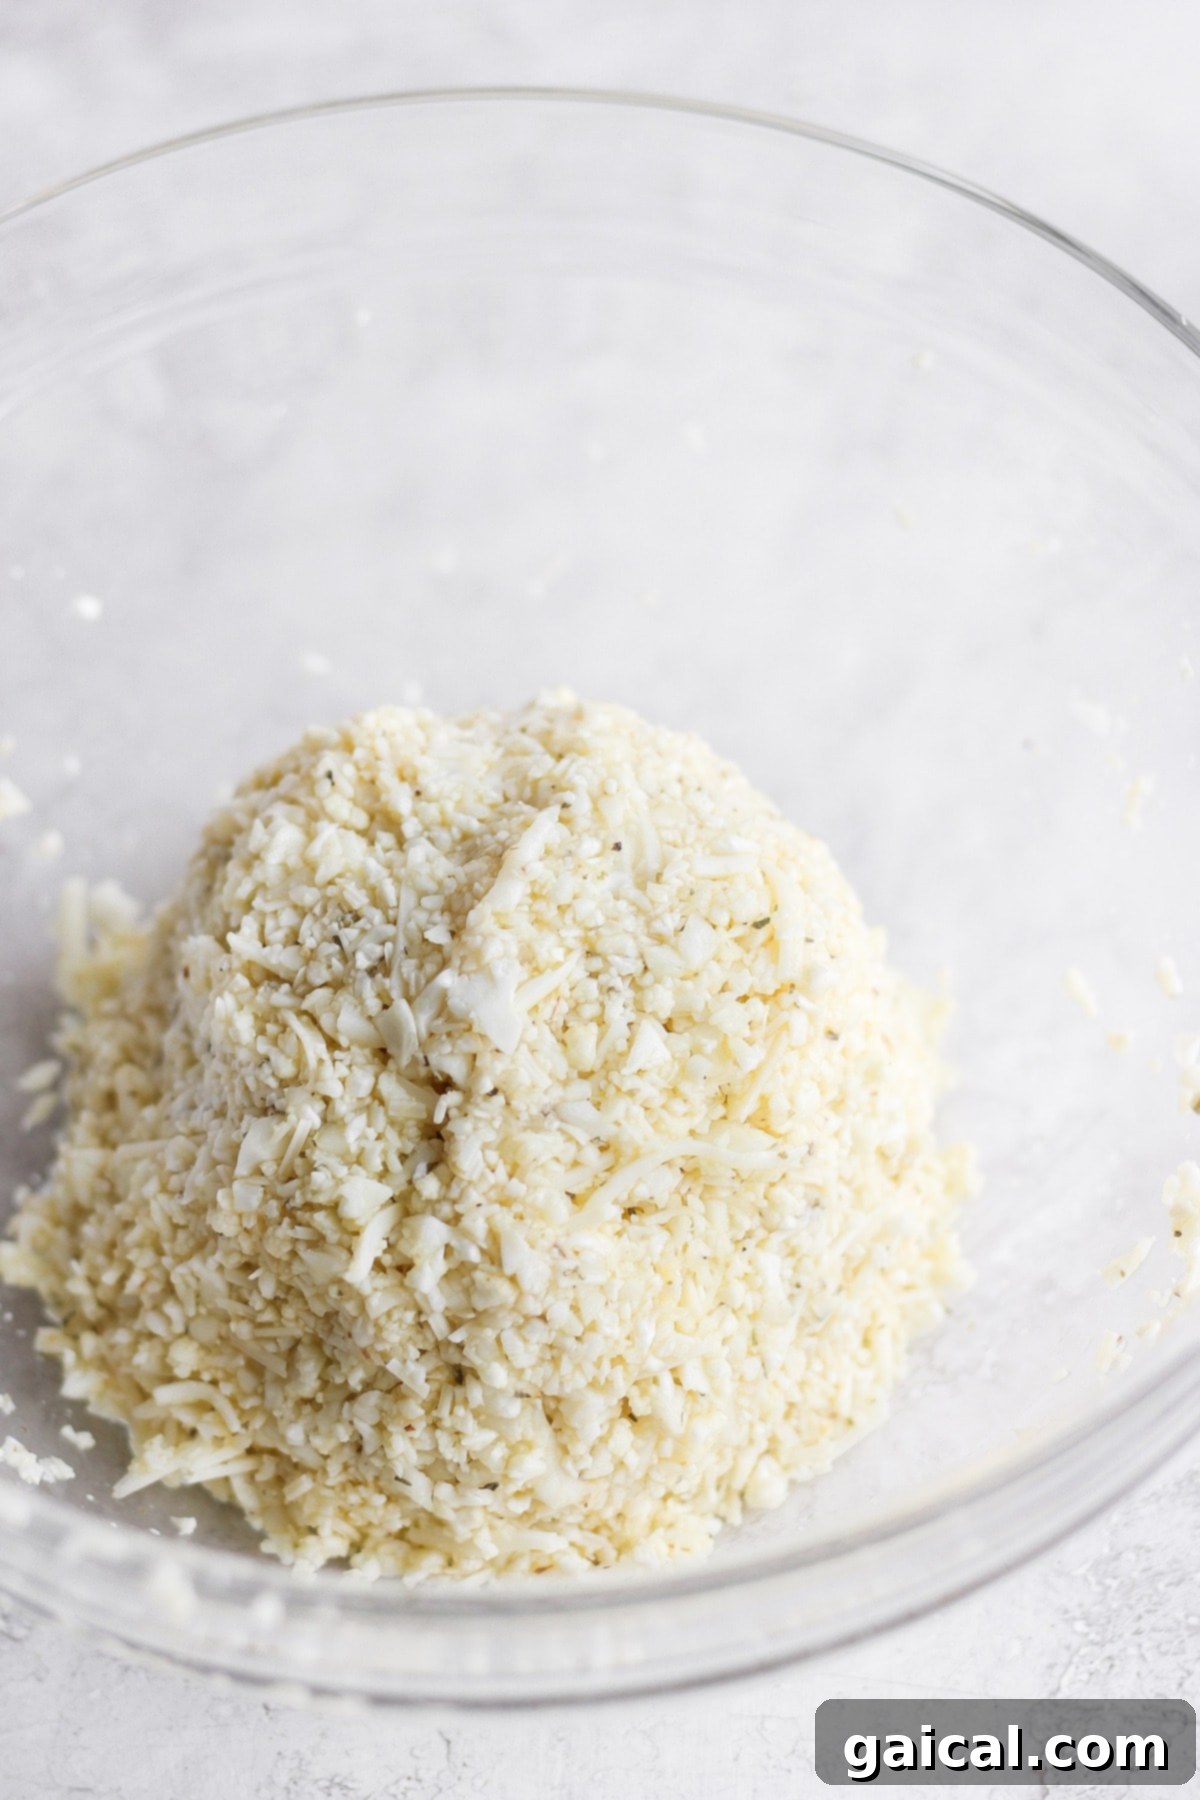
Once you’ve successfully removed the moisture from your cauliflower rice, it’s time to bring all the delicious components of your pizza crust together. Place the dry cauliflower rice into a large mixing bowl. Add all the remaining ingredients for the cauliflower pizza crust – the cheeses, Italian seasoning, garlic powder, red pepper flakes, and the scrambled egg. Mix everything thoroughly with your hands or a sturdy spatula until all ingredients are well combined and the mixture starts to come together.
Customize Your Flavor Profile
We’ve opted for a classic and simple flavor profile with Italian seasoning, garlic powder, and red pepper flakes, which always delivers. However, feel free to unleash your culinary creativity! This is your opportunity to add any of your favorite dried spices to the crust mixture. Consider a pinch of onion powder, a dash of smoked paprika, or even some dried oregano for an extra layer of flavor unique to your taste.
Step 3: Form and Shape Your Pizza Crust
With all your ingredients perfectly mixed, it’s time to transform the cauliflower mixture into your pizza crust. Use your hands to gather the mixture and gently form it into a ball shape. Don’t be concerned if it doesn’t form a perfectly smooth, elastic dough like traditional wheat-based pizza dough; the texture will be different, but it will hold together beautifully once pressed.
A quick reminder: Earlier, you prepped your baking sheet with parchment paper and drizzled 1 tablespoon of olive oil. Ensure this is done before placing your crust mixture down. The olive oil is key for crispiness and preventing sticking!
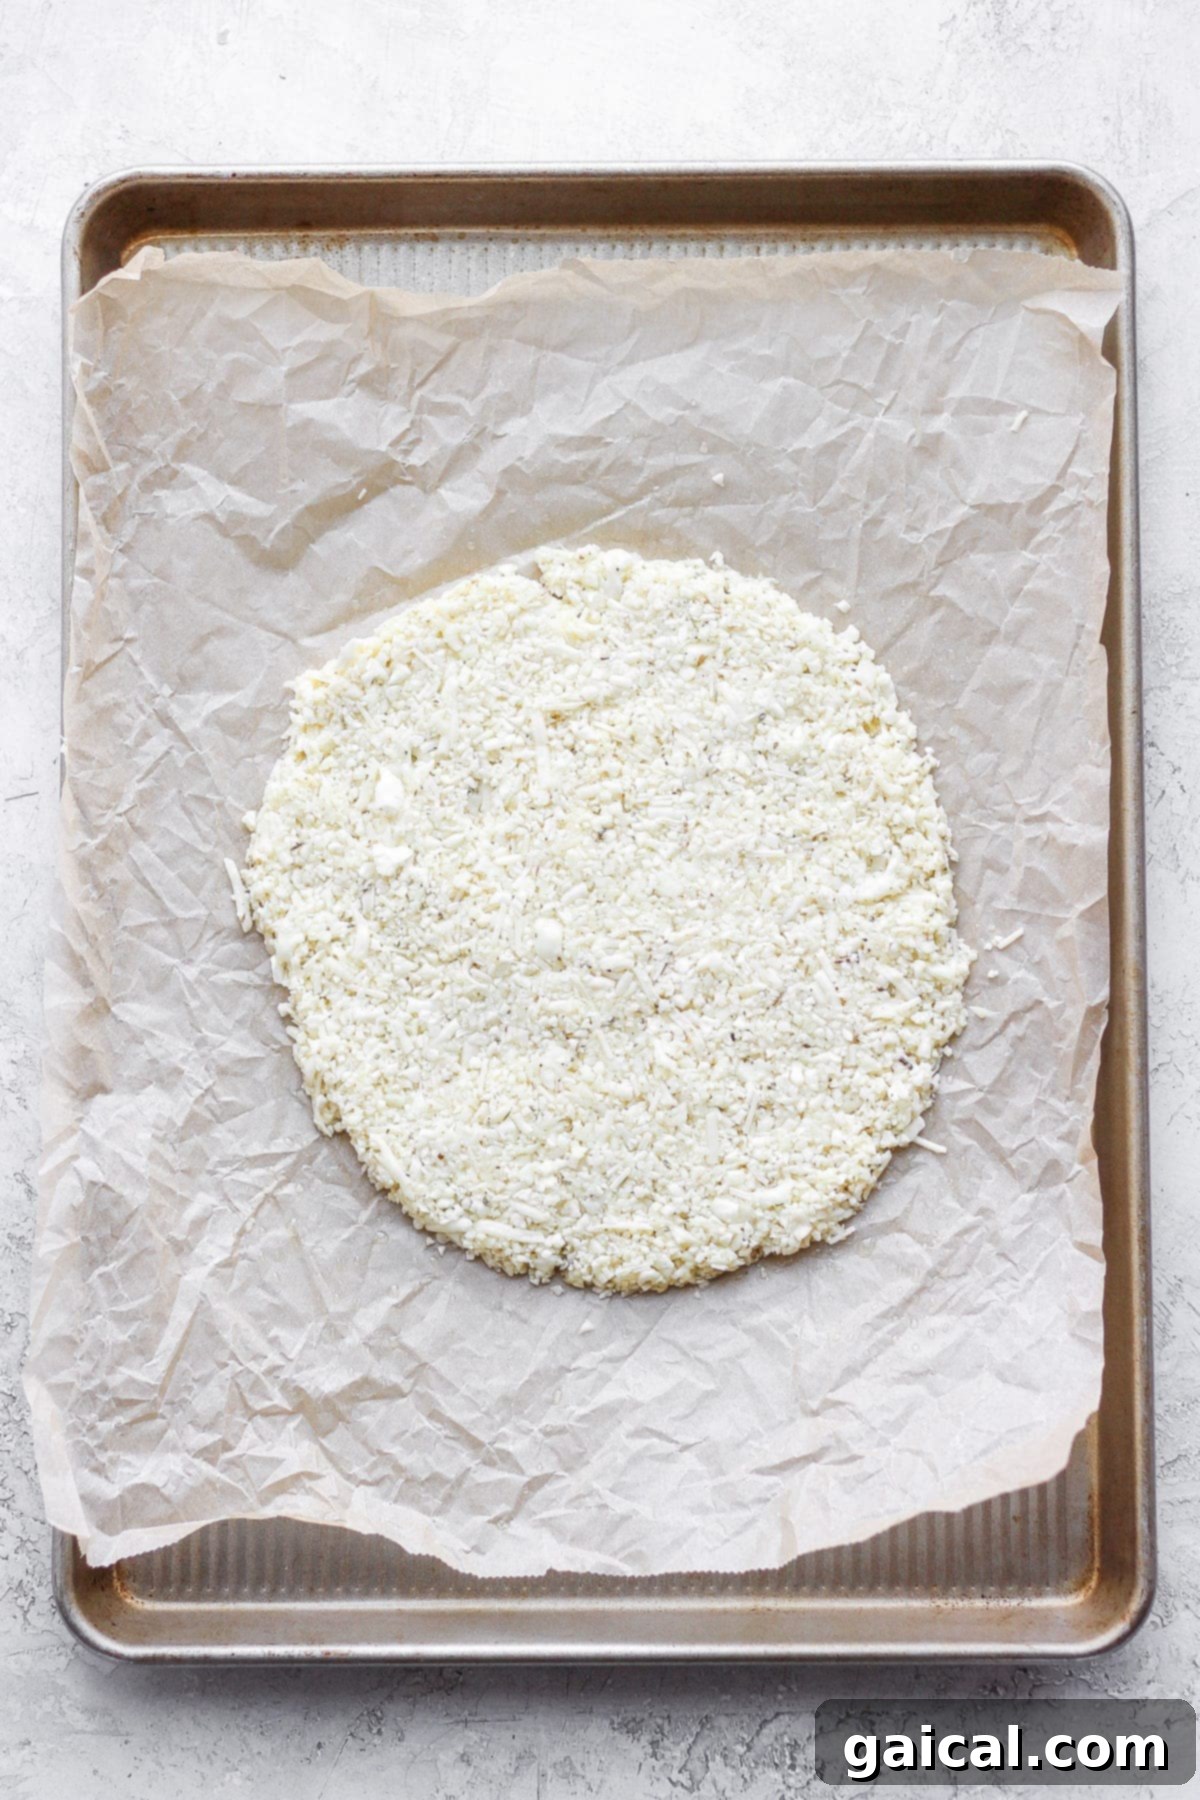
Carefully pick up the cauliflower mixture with both hands and place it onto the olive oil-drizzled parchment paper on your baking sheet. Using the palms of your hands and fingertips, press the mixture down firmly and evenly, shaping it into a desired circle, about 1/8 to ¼-inch thick. It’s essential that the cauliflower mixture is pressed together well, ensuring there are no significant gaps in the crust – a uniform surface is critical for structural integrity.
Before placing your beautifully formed crust into the oven, drizzle the remaining 1 tablespoon of olive oil evenly over the top surface of the cauliflower pizza crust. This additional oil contributes significantly to achieving that coveted golden-brown and extra-crispy texture.
Step 4: Pre-Bake for Initial Crispiness
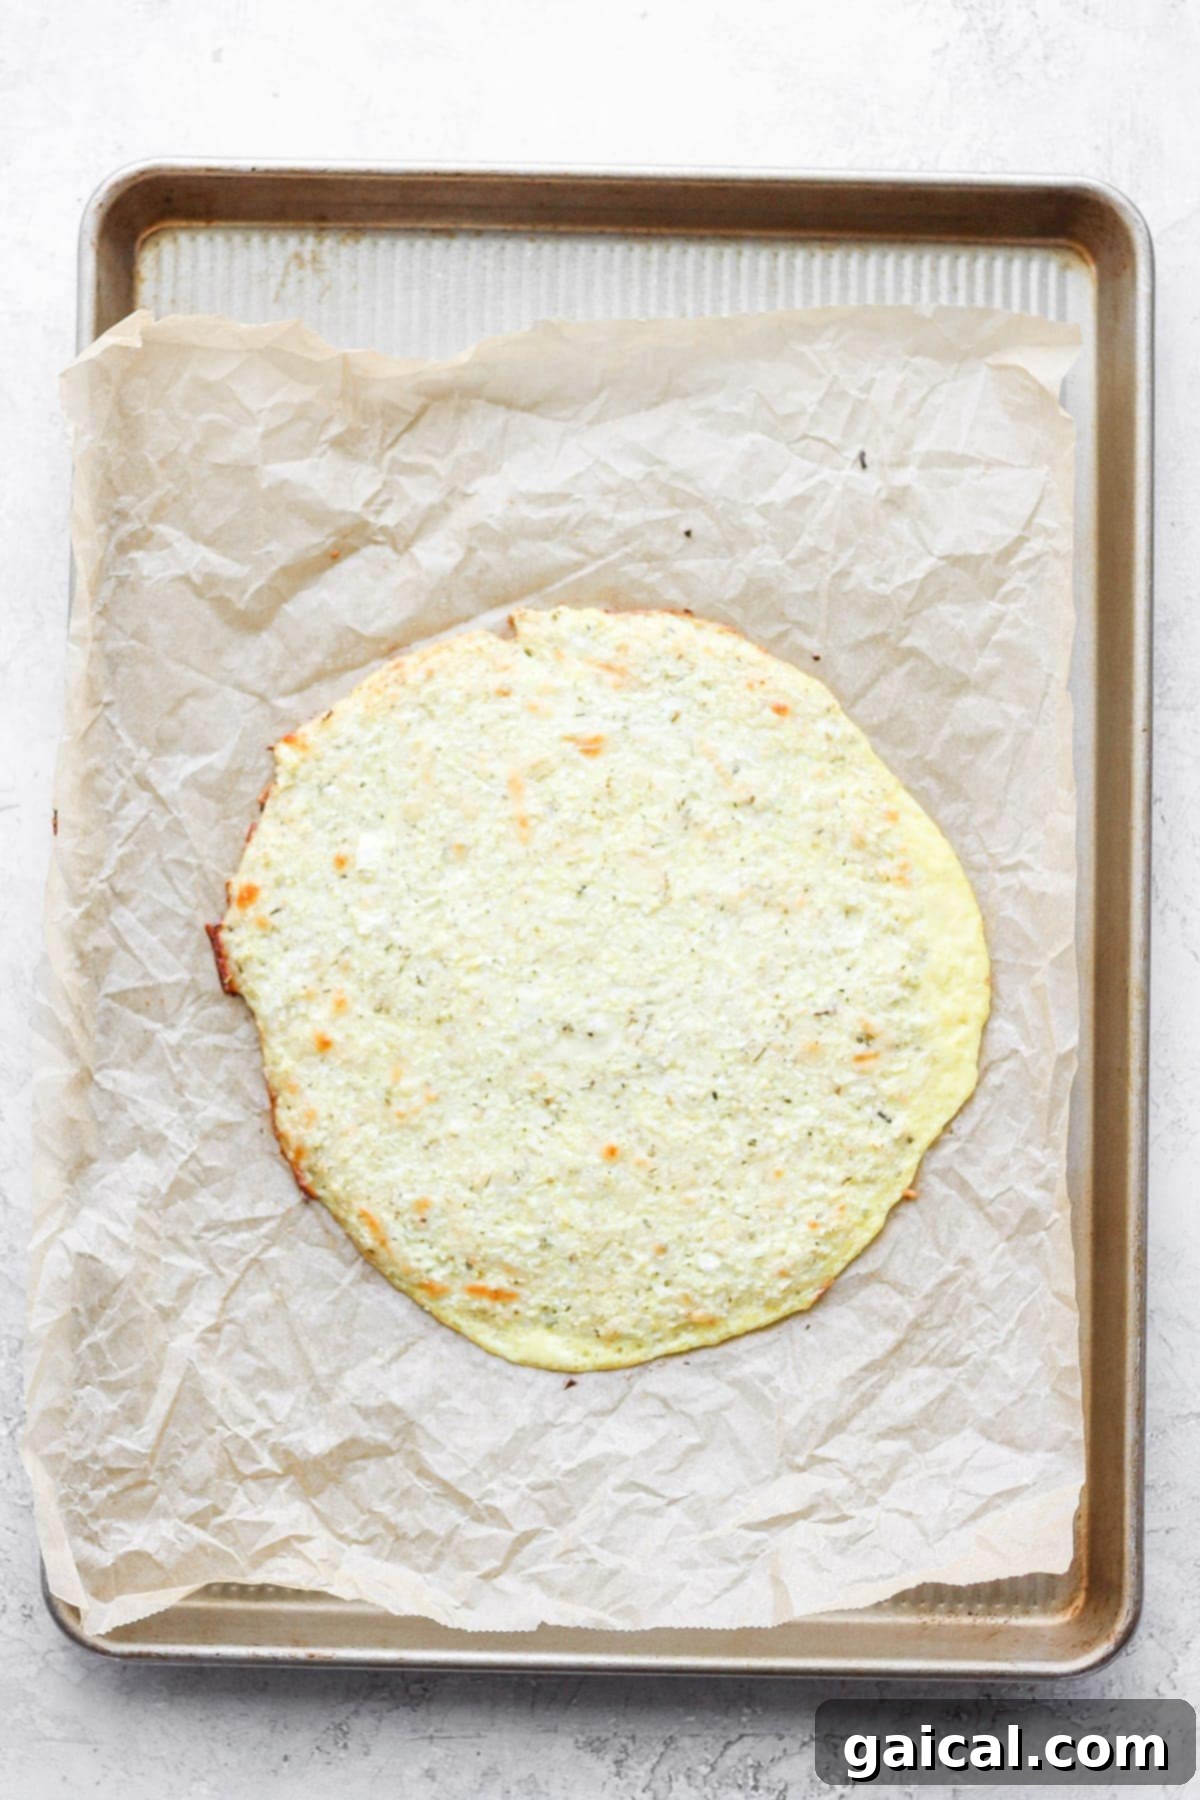
Now that your cauliflower crust is perfectly formed and oiled, it’s time for its first round in the oven. Carefully place the baking sheet with the cauliflower crust into your preheated 375ºF (190ºC) oven. Bake the crust for an initial 20 minutes. This vital pre-baking step helps to further dry out the crust and begin the crisping process, laying the foundation for a truly firm and delicious pizza base.
The Non-Negotiable: Parchment Paper
We understand that sometimes it’s tempting to skip parchment paper if you don’t have it on hand or want to save a step. However, for this cauliflower pizza crust recipe, parchment paper is an absolute necessity! It’s what prevents the crust from sticking to your baking sheet and allows for the critical step of flipping the crust mid-bake. Trust us, it makes all the difference in achieving a perfect, intact crust.
Step 5: The Game-Changer – Flip Your Crust!
This might just be the most important step in perfecting your cauliflower pizza crust! After the initial 20 minutes of baking, you need to flip the crust. This ensures that both sides bake evenly and develop that beautiful golden-brown, crispy texture. Skipping this step often results in a less crispy and potentially soft underside.
To safely and successfully flip your pizza crust:
- Carefully remove the baking sheet from the oven.
- Place another clean piece of parchment paper directly on top of the partially baked cauliflower pizza crust.
- Position a cutting board or a second baking sheet (bottom side down) firmly on top of the new parchment paper.
- With confidence and a swift motion, carefully flip the entire assembly (baking sheet, crust, new parchment, and cutting board) over.
- Remove the original baking sheet and parchment paper. The crust should now be resting on the new parchment paper with the previously unbaked side facing up.
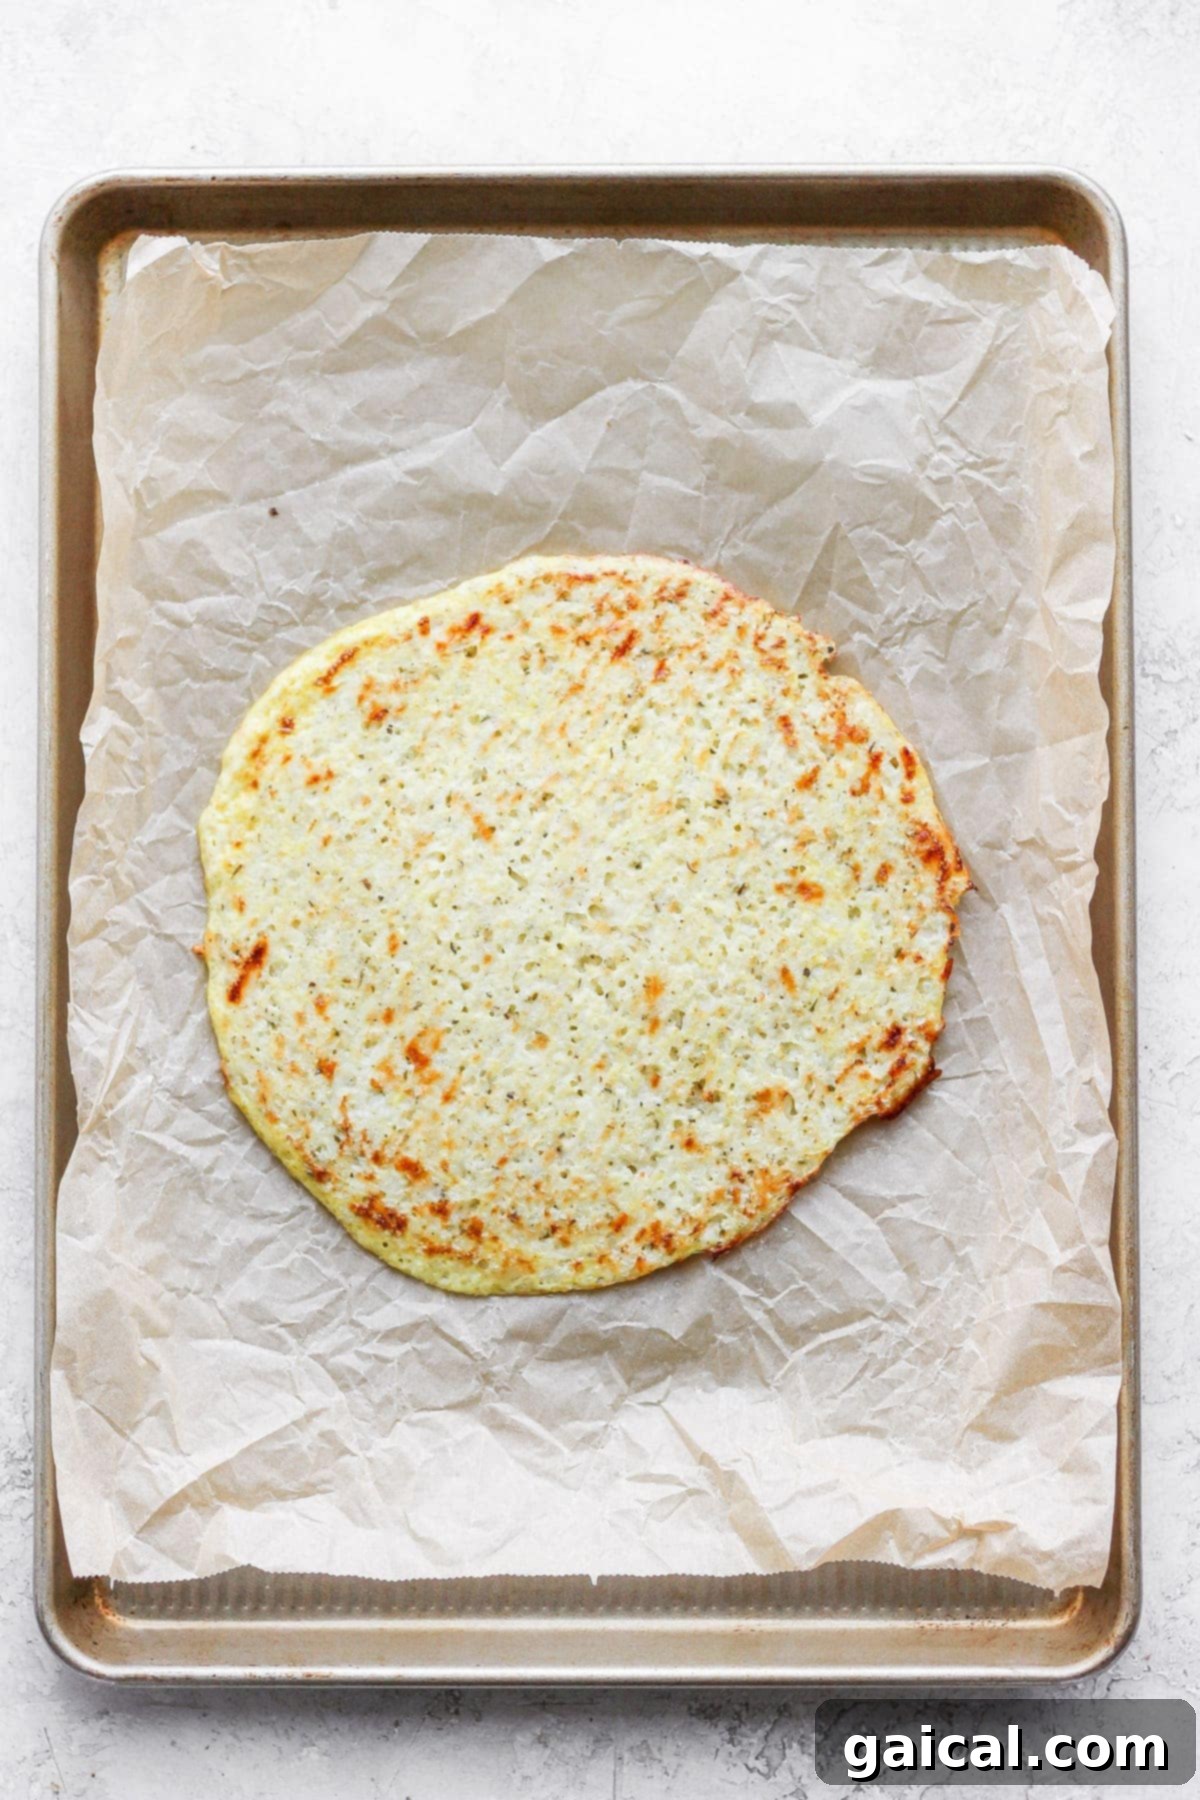
- Slide the baking sheet (with the newly flipped crust and parchment) back into the oven. Bake for an additional 10-12 minutes, or until this side of the crust is also golden brown and feels firm to the touch.
Step 6: Customize with Your Favorite Toppings & Final Bake
Once your cauliflower crust has achieved its beautiful golden-brown crispiness on both sides, remove it from the oven. Let it rest on the baking sheet for 5-10 minutes. This cooling period is important as it allows the crust to firm up even further, ensuring it won’t get soggy when you add your sauce and toppings.
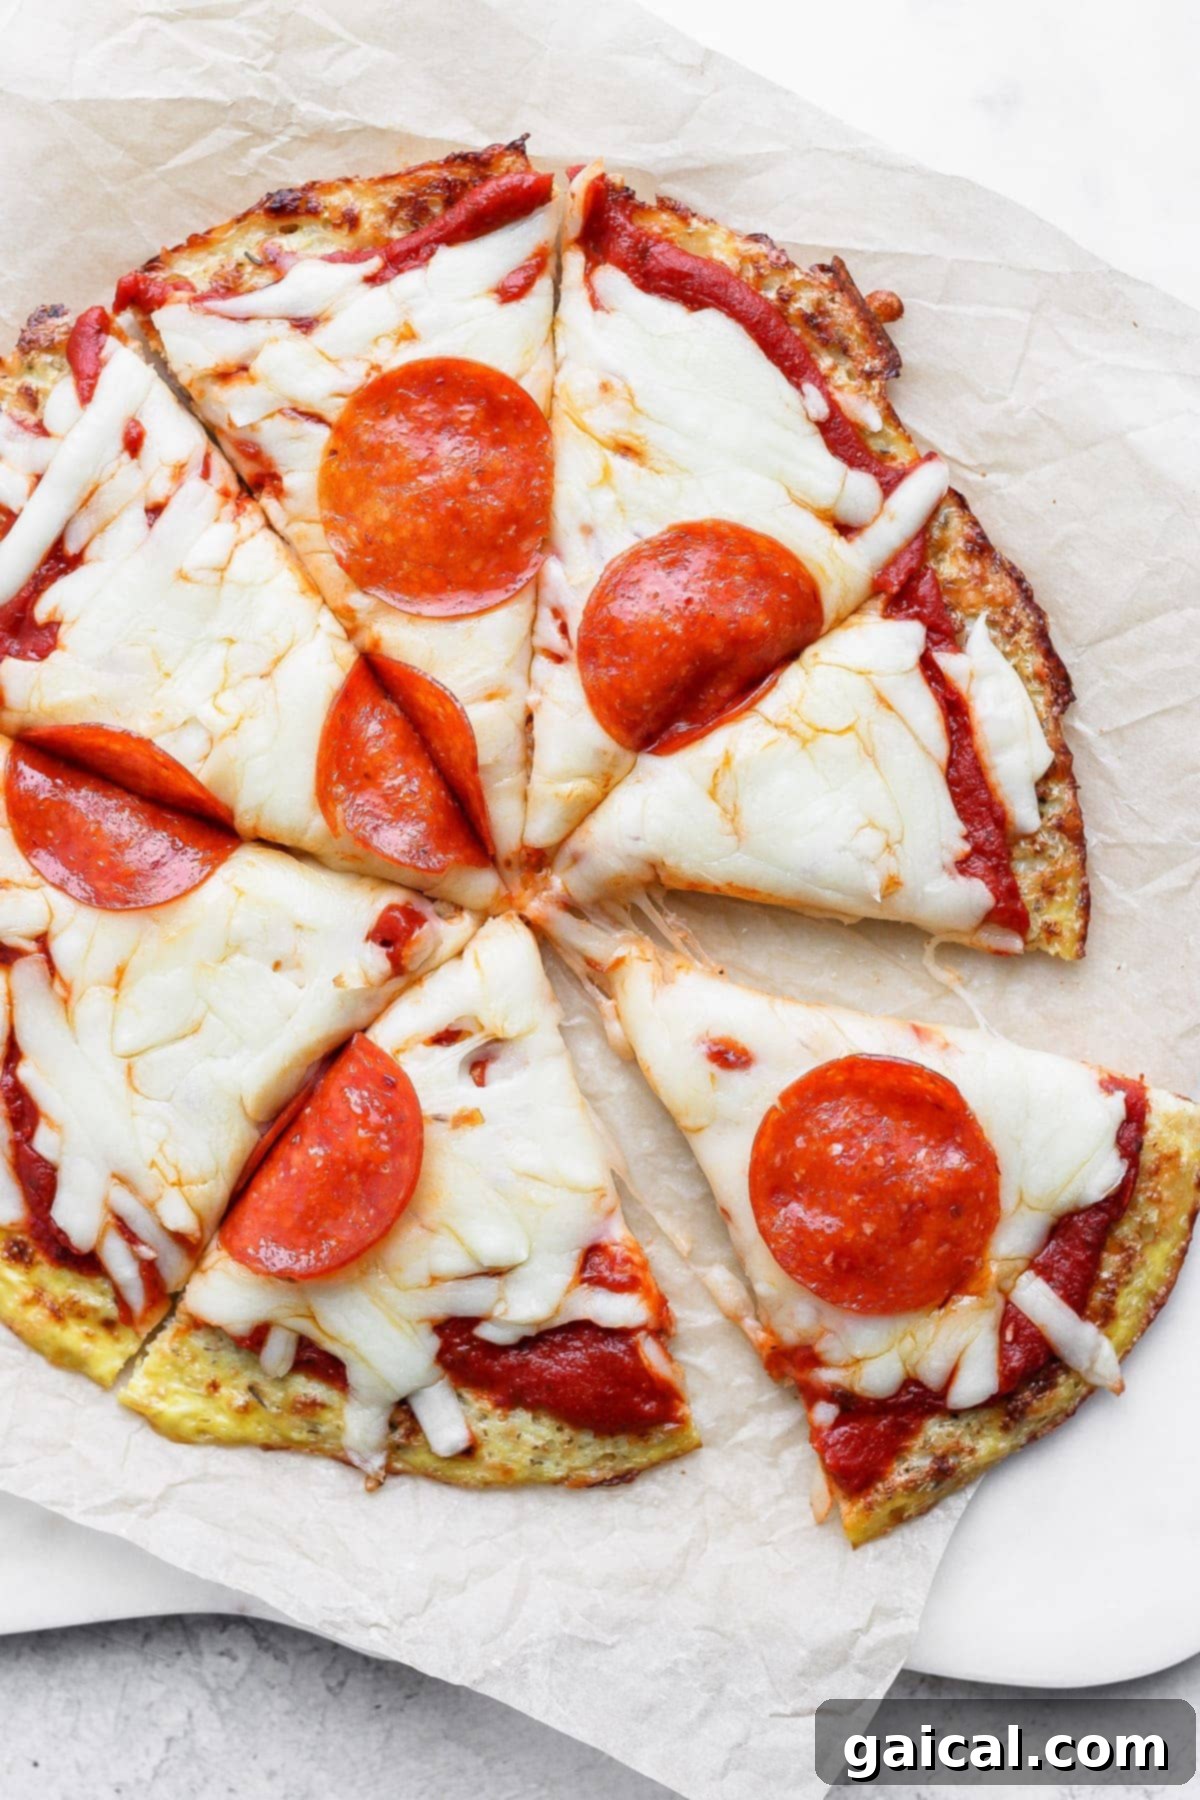
Now comes the fun part: customizing your pizza! You can add whatever toppings your heart desires to this versatile cauliflower pizza crust. We opted for classic pizza toppings – a savory marinara sauce, generous shredded mozzarella cheese, and tasty pepperoni – but don’t hesitate to get creative and explore new flavor combinations!
After adding your toppings, return the pizza to the oven for an additional 8-10 minutes, or until the cheese is melted and bubbly, and the toppings are heated through. Keep a close eye on it to prevent over-browning.
Get Creative with Pizza Topping Combinations!
- Pesto + Fresh Mozzarella + Cherry Tomatoes (a vibrant, fresh, and aromatic choice for a gourmet feel)
- Classic Marinara + Crumbled Italian Sausage + Sharp Provolone Cheese (for a hearty and satisfying traditional flavor)
- Rich Marinara + Sliced Black Olives + Sautéed Mushrooms + Feta Cheese (a vegetarian delight with earthy notes)
- Tangy BBQ Sauce + Shredded Cooked Chicken + Thinly Sliced Red Onion (a popular, savory-sweet combination)
- Creamy Ricotta Cheese + Fresh Spinach + Minced Garlic (for an elegant, flavorful white pizza)
- Spicy Buffalo Sauce + Grilled Chicken Strips + Crumbled Blue Cheese (for those who love a kick!)
- Hummus Base + Kalamata Olives + Sundried Tomatoes + Crumbled Feta (a unique, Mediterranean-inspired twist)
More of our Favorite…
Delightful Pizza Recipes to Explore
Love pizza? So do we! If you enjoyed making this cauliflower crust, you might also want to try some of our other fantastic pizza creations:
- BBQ Chicken Pizza with Caramelized Onions: A savory, sweet, and tangy delight perfect for a crowd.
- Naan Breakfast Pizza: Quick, easy, and customizable for a delicious morning treat or brunch.
- Easy Grilled Sweet Potato Pizzas: A creative and healthy twist, perfect for grilling season.
Cauliflower Pizza Crust Recipe
Craft the ultimate crispy, golden-brown, and flavorful cauliflower pizza crust from scratch. This gluten-free option is perfect for any pizza night and can be customized with all your favorite toppings!
By: Linley Hanson
Print Recipe
Ingredients
For the Crispy Pizza Crust
- 3 cups cauliflower rice, finely processed*
- 1 tablespoon granulated garlic
- 2 teaspoons Italian seasoning
- 1 teaspoon red pepper flakes (optional, for a little kick)
- ½ teaspoon salt
- ½ cup shredded mozzarella cheese
- ½ cup shredded Parmesan cheese
- 1 large egg*
- 2 tablespoons olive oil, separated
For the Delicious Toppings
- ¾ cup pizza sauce
- 1 cup shredded mozzarella cheese
- ⅓ cup pepperoni (or your preferred protein/veggies)
- Fresh basil for garnish
Instructions
- First, preheat your oven to 375ºF (190ºC). Line a baking sheet with parchment paper and drizzle 1 tablespoon of olive oil evenly over the parchment.
- Next, remove excess moisture from the cauliflower rice. Place the cauliflower rice in a large bowl lined with a clean tea towel. Sprinkle with ½ teaspoon of salt.
- Let the cauliflower sit for 5-10 minutes to draw out moisture. Then, gather the towel and squeeze out as much liquid as possible. Discard the squeezed liquid.
- In the large bowl, combine the thoroughly drained cauliflower rice, granulated garlic, Italian seasoning, red pepper flakes, salt, mozzarella, Parmesan, and the scrambled egg. Mix all ingredients until well combined.
- Use your hands to form the cauliflower mixture into a cohesive ball shape.
- Place the cauliflower mixture onto the oiled parchment paper on the baking sheet. Use your hands to press it flat, forming a uniform circle about 1/8 to ¼-inch thick, ensuring no gaps.
- Drizzle the remaining 1 tablespoon of olive oil over the top of the formed crust and spread evenly.
- Place the crust in the oven and bake for 20 minutes at 375ºF (190ºC).
- Remove the crust from the oven. Place another piece of parchment paper on top of the crust and carefully flip it over using a cutting board or another baking sheet. Return it to the baking sheet with the opposite side facing up.
- Bake for an additional 10-12 minutes, or until the second side of the crust is golden brown and crispy.
- Remove the fully baked crust from the oven and let it rest for 5-10 minutes before adding toppings.
- Spread pizza sauce evenly over the rested crust.
- Sprinkle shredded mozzarella cheese on top of the sauce, followed by pepperoni or your chosen toppings.
- Place the pizza back into the oven for an additional 8-10 minutes, or until the cheese is melted and bubbly.
- Remove from the oven, garnish with fresh basil if desired, slice, and serve immediately.
Tips & Notes for Success
- Cauliflower Rice Consistency: For the crispiest, sturdiest crust, always use finely processed cauliflower rice. If using store-bought, a quick pulse in a food processor or blender can significantly improve its texture and binding capabilities.
- Egg as a Binder: The egg is crucial for binding. If your crust feels too crumbly or struggles to hold its shape (especially with less finely processed store-bought cauliflower rice), consider adding a second large egg. Freshly made cauliflower rice, processed very finely, often only requires one egg.
- Don’t Skip the Moisture Removal: This step is non-negotiable! Excess water will lead to a soggy crust. Squeeze out every last drop.
- Pre-Bake and Flip: These steps are key to achieving a uniformly crispy crust on both sides. Don’t rush them!
- Resting Time: Letting the crust cool slightly before adding toppings helps it firm up and prevents it from becoming soggy once the sauce is applied.
Watch How It’s Made
Watch this quick video to see how easily you can make your own cauliflower pizza crust!
Nutrition Information (Per Serving)
Carbohydrates: 12 g,
Protein: 11 g,
Fat: 15 g,
Fiber: 3 g,
Sugar: 4 g
Nutrition information is automatically calculated and should be used as an approximation. Actual values may vary based on ingredients and preparation methods.
Shop This Post: Essential Kitchen Tools
Heavy-Duty Baking Sheet
Versatile Nesting Bowls Set
Love this recipe? Leave a comment below!
Don’t forget to tag your delicious creations on social media with the hashtag #fitfoodiefinds – we’d love to see what you’re cooking up!
Frequently Asked Questions (FAQs) About Cauliflower Pizza Crust
Curious about perfecting your cauliflower pizza crust or wondering about specific details? Here are answers to some of the most common questions:
Q: Can I prepare cauliflower pizza crust in advance?
A: Yes, you absolutely can! You can prepare the cauliflower pizza crust mixture and pre-bake it as instructed. Once the crust is fully baked and completely cooled, store it in an airtight container in the refrigerator for up to 3-4 days. For longer storage, you can freeze pre-baked crusts for up to a month. Thaw the frozen crust in the refrigerator overnight before proceeding with topping and the final bake.
Q: How can I guarantee my cauliflower crust will be truly crispy?
A: The secret to an irresistibly crispy crust lies in a few crucial steps. First, thoroughly squeeze out every last drop of excess moisture from the cauliflower rice; this is paramount. Second, strictly follow the two-stage baking process: the initial pre-bake and the essential flip to bake the other side. Additionally, ensuring your crust is pressed thinly and evenly, along with the strategic use of olive oil, will contribute significantly to its overall crispiness.
Q: What should I do if my crust mixture isn’t binding together?
A: If your cauliflower mixture feels too crumbly and struggles to form a cohesive ball, it typically indicates either too much moisture or an insufficient amount of binder. Double-check that you’ve squeezed out as much liquid as possible from the cauliflower rice. If it still feels loose, gradually add an additional beaten egg to the mixture, one at a time, mixing until it holds together better. Remember, finely processed cauliflower also binds more effectively, so ensure that texture.
Q: Is this cauliflower pizza crust recipe low-carb?
A: Indeed! Cauliflower pizza crust is a highly popular choice for those seeking a low-carb and gluten-free alternative to traditional wheat-based pizza dough. While it does contain some natural carbohydrates from the cauliflower, it is substantially lower in carbs than conventional pizza crust, making it an excellent option for individuals managing their carbohydrate intake or following specific dietary plans.
Q: Can I use frozen cauliflower rice for this recipe?
A: Absolutely! Using frozen cauliflower rice is perfectly acceptable and convenient. However, there’s a key consideration: ensure it is completely thawed before you begin, and be prepared to squeeze out even more moisture than you would with fresh cauliflower. Frozen cauliflower tends to release more water upon thawing, so an extra-vigorous squeeze is vital to prevent a soggy crust and achieve optimal crispiness.
Photography by: The Wooden Skillet