
Mastering Massaged Kale: Your Essential Guide to Tender, Flavorful Salads
Imagine biting into a kale salad that’s rough, bitter, and overwhelmingly fibrous. It’s an experience many have endured, often leading to a misguided aversion to this incredibly nutritious leafy green. The truth is, raw kale, when unmassaged, can indeed be a challenging culinary encounter – much like attempting to chew on shredded paper. But what if we told you there’s a simple, transformative technique that can turn tough, ordinary kale into a remarkably tender, easily digestible, and deliciously palatable base for your salads?
Enter the art of massaging kale. This straightforward process involves gently working kale leaves with a touch of oil and salt, breaking down its rigid cellular structure. The result? A remarkably softer texture, a milder flavor profile, and enhanced digestibility. It’s a game-changer that elevates your kale salads from an obligation to a true delight, even when dressed simply.
Kale holds a special place on our blog, featuring prominently in a variety of healthy and delicious recipes. From vibrant massaged kale and fennel salads to refreshing green smoothies with kale, and even crispy garlic roasted kale chips, its versatility is unmatched. Today, we’re returning to the fundamental technique that unlocks its full potential: teaching you the simple steps to properly massage kale, ensuring every bite is a pleasure.
Kale: A Nutritional Powerhouse and “Green of the Gods”
Kale truly earns its title as the “green of the gods.” For me, leafy greens have always been a staple. Growing up, a household rule dictated trying every new food at least three separate times, in three different meals, before deciding if you liked it. This approach opened my eyes to the incredible adaptability of vegetables, and kale was no exception. I learned to appreciate it in various forms, whether gently wilted in a hearty soup or blended into a nutritious smoothie, its robust flavor never truly bothered me.
Beyond personal preference, kale is celebrated globally as one of the most nutrient-dense foods on the planet. It’s packed with an impressive array of vitamins, including K, A, and C, crucial for bone health, vision, and immune function, respectively. This leafy green also boasts a significant amount of powerful antioxidants like quercetin and kaempferol, which combat oxidative stress and may offer protective benefits against chronic diseases. Furthermore, kale provides essential minerals such as calcium for strong bones, potassium for blood pressure regulation, and magnesium for muscle and nerve function. Incorporating kale into your diet, especially when properly prepared through massaging, allows you to reap these incredible health benefits in a delicious and enjoyable way.
The Transformative Power of Massaging Kale
While the concept of “massaging kale” might sound a little unconventional, it’s a culinary secret that, once discovered, you’ll never abandon. This simple technique is the key to transforming raw kale from a tough, chewy leaf into a tender, flavorful, and incredibly appetizing component for any meal. The physical act of massaging, combined with the presence of oil and salt, initiates a process that breaks down the tough cellulose fibers in kale. This not only softens its texture but also mellows its naturally bitter compounds, resulting in a sweeter, more pleasant taste. The oil helps to distribute flavor evenly and adds a luxurious mouthfeel, while the salt draws out moisture and further aids in tenderization. Follow these easy steps to prepare your kale for the most delightful salads:
1. Selecting Your Kale
Choosing the right kale is the first step towards a perfect massaged kale salad. We typically opt for curly kale due to its affordability and widespread availability. Its ruffled leaves hold dressing beautifully and respond wonderfully to massaging. However, feel free to explore other varieties like Lacinato (Dinosaur) kale, which has a flatter, darker leaf and a slightly milder flavor, or Red Russian kale, known for its purplish stems and sweet, earthy taste. When selecting kale, look for vibrant, deep green leaves without any yellowing or wilting, indicating freshness. It’s important to note that tender baby kale usually doesn’t require massaging, as its delicate leaves are already soft enough to enjoy raw.
2. Prepare Your Kale: Removing Stems and Chopping
The thick, fibrous stems of mature kale are generally undesirable for eating raw in a salad, although they are perfectly edible if cooked or used in other applications. Removing them is crucial for a pleasant eating experience. There are a couple of straightforward methods to “debone” your kale:
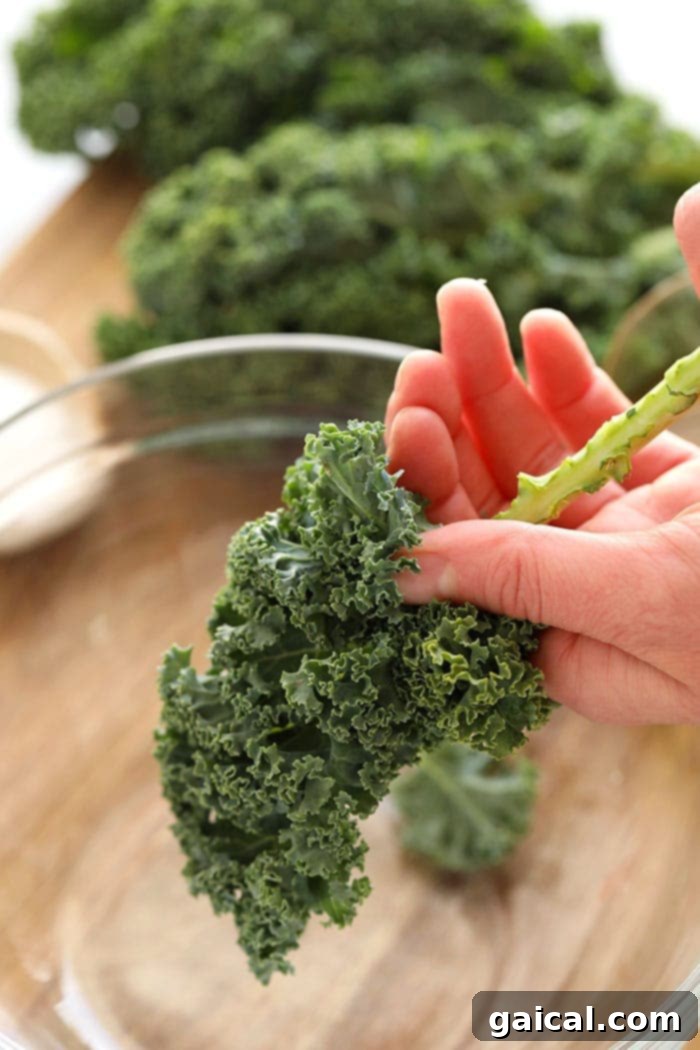
- By Hand: A quick and easy method involves grasping the top of the kale stem firmly with one hand. With the other hand, run your fingers down the stem, stripping the leafy greens away. The leaves will easily detach, leaving the bare stem behind.
- With a Knife: Alternatively, lay a kale leaf flat on a cutting board. Using a sharp knife, carefully cut along both sides of the thick central stem, separating the leafy portions.
Once the stems are removed, discard them (or, a fun tip for pet owners: finely chop the stems into small pieces and use them as healthy treats for your furry friends throughout the week!). Gather the destemmed kale leaves and chop them into bite-sized pieces. Aim for uniform pieces to ensure consistent tenderness and ease of eating. Place the chopped kale into a large salad bowl, ready for the next step.
3. The Essential Lubricants: Oil and Salt
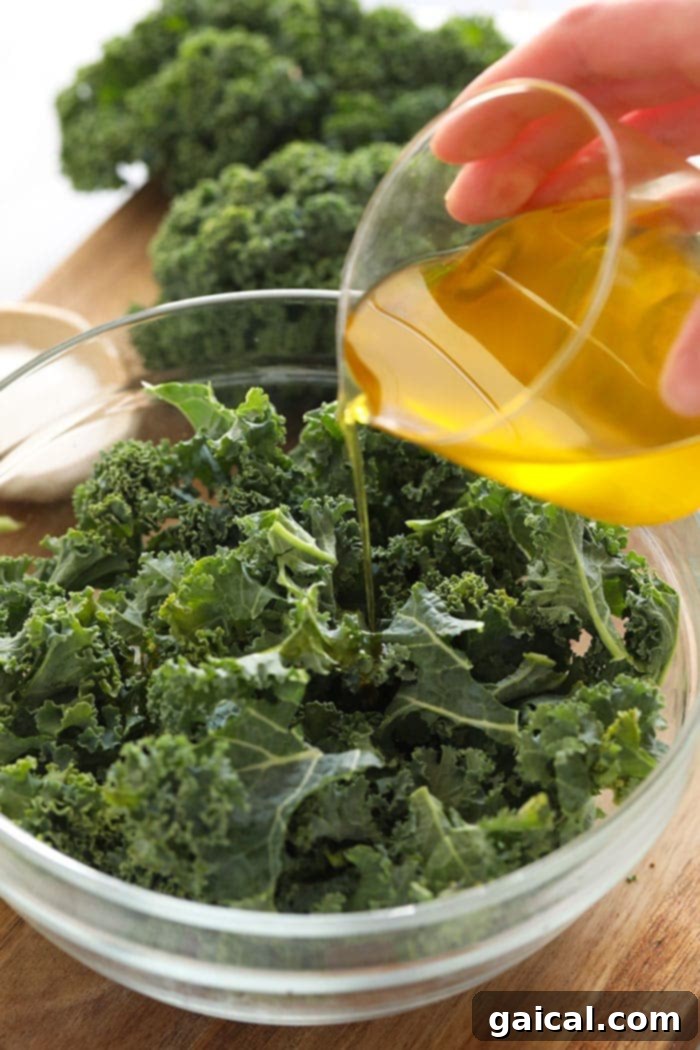
The secret to tenderizing kale lies in combining physical massage with the right ingredients: a high-quality oil and a pinch of salt. Our go-to is extra virgin olive oil, prized for its robust flavor and beneficial healthy fats. It effectively coats the kale, providing lubrication for the massage and helping to break down the tough fibers while infusing a delicious base flavor. The salt acts as an abrasive, aiding the mechanical breakdown of the kale’s cell walls, and also draws out excess moisture, further softening the leaves and reducing bitterness. Don’t be shy about using your preferred cooking oil and a touch of salt; the goal is simply to lightly coat the kale.
Here are some excellent oil options to consider:
- Extra Virgin Olive Oil: Classic, rich flavor, and heart-healthy.
- Avocado Oil: Neutral flavor, high smoke point (though not relevant for raw kale), and rich in monounsaturated fats.
- Coconut Oil: Adds a subtle tropical note; best used when slightly melted.
- Grapeseed Oil: Light and neutral, perfect if you want the kale’s natural flavor to shine.
4. The Massage: Get Hands-On!
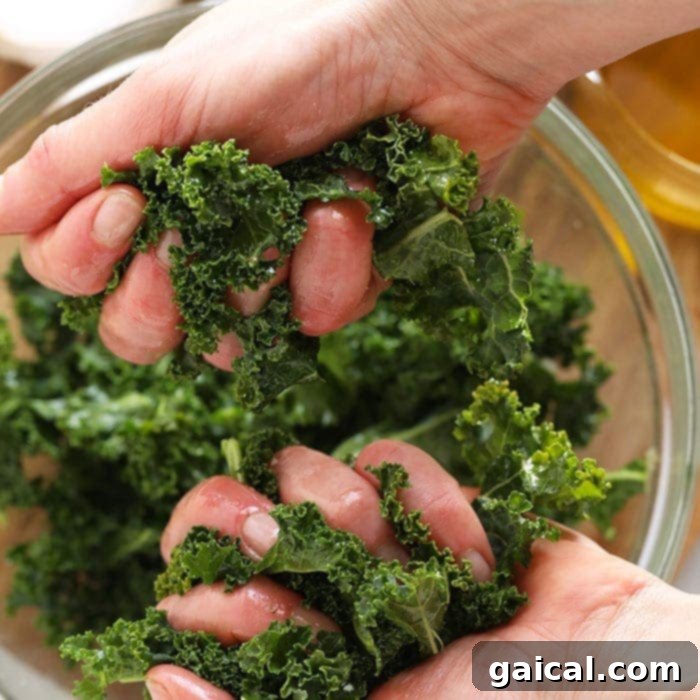
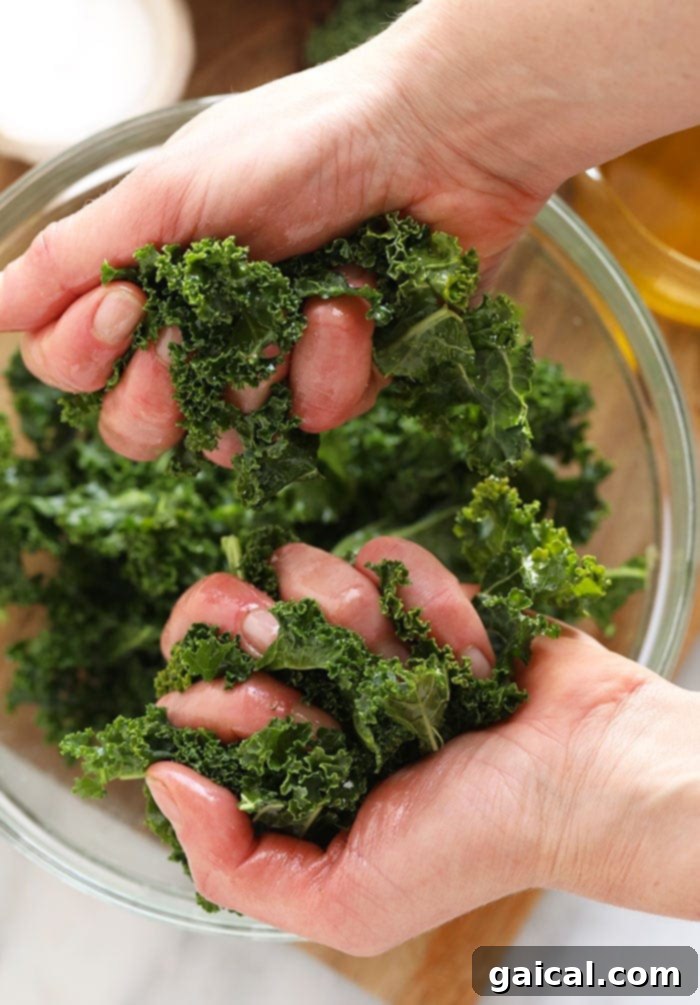
Now for the most satisfying part: the massage! With your hands, thoroughly coat the kale leaves with the oil and salt. Begin to vigorously massage the kale. Think of it like kneading dough or giving a deep tissue massage – you want to really work those leaves. Use a firm pinching and squeezing motion with your fingers, scrunching the kale repeatedly. You’ll notice a remarkable transformation as the kale softens, darkens in color, and reduces significantly in volume. This active manipulation mechanically breaks down the tough cell walls, making the kale palatable and less bitter. Continue massaging for about 3-4 minutes, or until the kale feels noticeably tender and silken to the touch. When it has lost its stiff, rigid texture and appears wilted and glossy, your job is done.
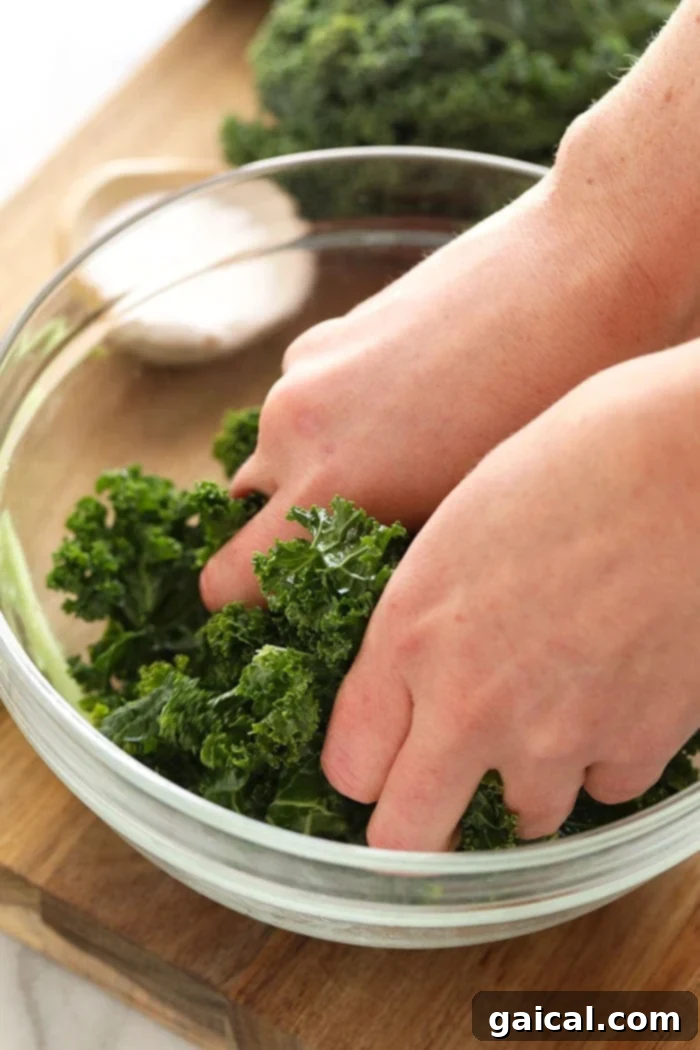
Once your kale is perfectly massaged, it’s ready to be transformed into your favorite salad creation. The possibilities are endless!
Benefits of Massaged Kale: Beyond Just Taste and Texture
The act of massaging kale offers a multitude of benefits that extend beyond simply improving its flavor and texture. By breaking down the tough cell walls, massaging makes the kale not only easier to chew but also easier for your digestive system to process. This can lead to less bloating and better nutrient absorption, ensuring you get the most out of kale’s incredible nutritional profile. The process also helps to neutralize some of the bitter compounds naturally present in kale, resulting in a milder, sweeter taste that is often more appealing, especially to those new to raw kale. Furthermore, massaged kale becomes more pliable and tender, allowing it to better absorb dressings and seasonings, which enhances the overall flavor of your salad. It also holds up well, often tasting even better after a short rest, making it an excellent component for meal prep.
Pro Tips for Perfectly Massaged Kale
- Don’t Over-Oil: A little oil goes a long way. Too much can make your kale greasy. Start with a small amount (2-3 teaspoons per standard bunch) and add more if needed.
- Salt Selection: Fine sea salt or kosher salt works best as it dissolves quickly and distributes evenly.
- Duration Matters: While 3-4 minutes is a good guideline, the exact time depends on the kale’s freshness and thickness. Continue until it feels significantly softer and darker. Trust your senses!
- Add Acidity: A squeeze of lemon juice or a splash of apple cider vinegar can also aid in tenderizing and brightening the flavor of kale. You can add this along with the oil and salt, or as part of your dressing.
- Storage: Massaged kale can be stored in an airtight container in the refrigerator for 2-3 days, making it a fantastic component for quick weeknight salads.
The Best Massaged Kale Salad Recipes
Now that you’ve mastered the art of massaging kale, it’s time to put your tender greens to good use! Here are some of our favorite recipes that beautifully showcase massaged kale, offering a variety of flavors and textures:
- Our Collection of Best Kale Salad Recipes: A comprehensive list offering endless inspiration for every palate.
- Massaged Kale and Fennel Salad with Lemon Vinaigrette: A bright and refreshing combination, perfect for a light lunch.
- Roasted Butternut Squash and Kale Salad with Farro and Goat Cheese: A hearty and satisfying salad, ideal for cooler weather with its warm, earthy flavors.
- Harvest Blackberry and Butternut Squash Massaged Kale Salad: A vibrant salad featuring seasonal fruits and vegetables, bursting with fall flavors.
How to Massage Kale
Massaged Kale Salads are incredibly popular for a reason. This super simple tutorial will show you exactly how to massage kale, making it tender and delicious—it’s easier than you think!
Ingredients
- 12 oz. kale
- 2-3 teaspoons olive oil
- 1/8 teaspoon salt
Instructions
- Begin by rinsing kale under cold water. Make sure all dirt is removed from kale. Pat dry with a paper towel.
- Next, remove the tough stem from the leafy part of the kale using a knife or your hands. Discard stems and set the leafy part of the kale aside.
- Once all kale has been destemmed, cut the leafy kale into small pieces and place into a large salad bowl.
- From there, drizzle olive oil and salt over the kale and massage with your hands for 3-4 minutes until the kale is tender and soft.
- Finally, use your perfectly massaged kale to make your favorite salad! We recommend this Massaged Kale and Fennel Salad or a delightful Harvest Salad.
Nutrition
Calories: 59 kcal,
Carbohydrates: 9 g,
Protein: 4 g,
Fat: 2 g,
Fiber: 4 g,
Sugar: 2 g
Nutrition information is automatically calculated and should be used as an approximation.
Shop This Post
Cutting Boards
Olive Oil
Don’t forget to tag your posts on social media with the hashtag #fitfoodiefinds – we’d love to see what you’re cooking up!