
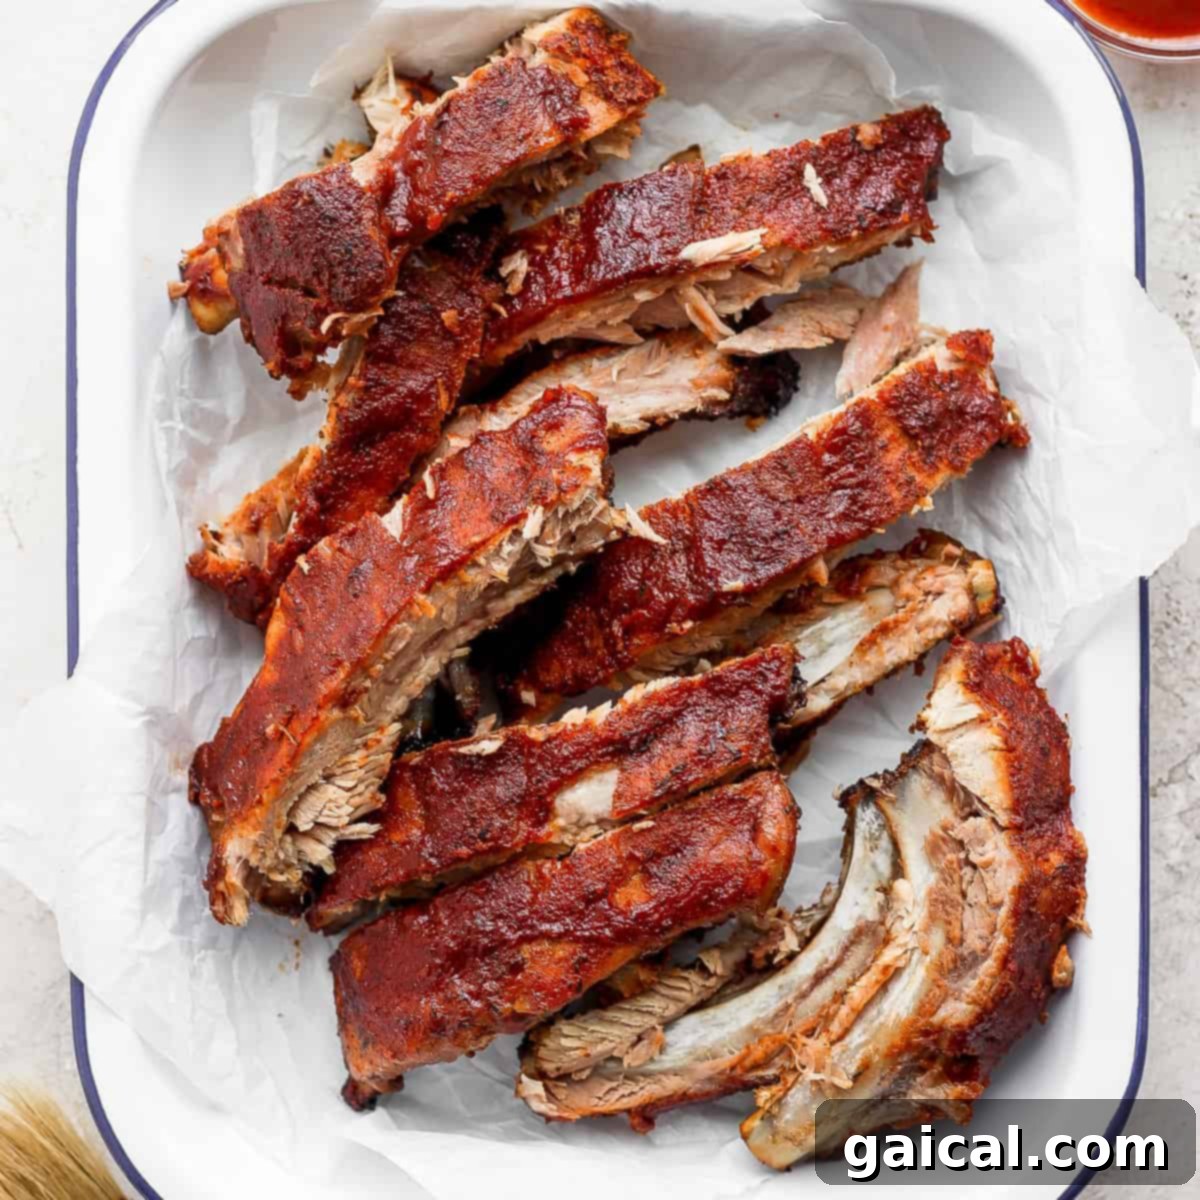
Learn how to make ribs in the oven that are unbelievably tender, juicy, and packed with flavor! This comprehensive guide walks you through every step, from selecting the perfect rack of baby back ribs and applying a rich dry rub, to slow-baking them to perfection, and finally, slathering them with a delicious, homemade BBQ sauce for that irresistible caramelized finish. Prepare to create an unforgettable meal that will impress everyone at your table.
This oven baked ribs recipe stands out as one of the best you’ll find. Its success lies in a meticulous two-step cooking process and a combination of a savory dry rub and a tangy-sweet BBQ sauce. The result? Ribs so succulent and flavorful, they will become your new go-to recipe for any occasion.
There’s truly nothing more satisfying than indulging in perfectly cooked, saucy pork ribs, especially when paired with a big, fluffy baked potato or a vibrant side salad. Today, we’re sharing our ultimate method for creating mouth-watering oven-baked ribs. These ribs are slow-cooked to achieve optimal tenderness and come out bursting with incredible flavor, making them a family favorite.
The Tastiest Oven Baked Ribs: A Foolproof Method
When it comes to preparing baby back ribs, you have a multitude of options. You might opt for ribs on the grill for that classic smoky char during summer gatherings, or experiment with sous vide ribs for a truly gourmet experience. However, for a consistently classic, yet absolutely foolproof, method that delivers incredible results every single time, cooking ribs in the oven is unmatched.
Our perfectly cooked pork ribs owe their exceptional flavor to a carefully crafted rib dry rub and a rich, savory homemade BBQ sauce recipe. These two components work in harmony to penetrate the meat with deep, complex flavors that store-bought rubs and sauces simply can’t replicate.
In this detailed post, we’ll teach you exactly how to make the most perfect oven-baked ribs with just a few simple, yet critical, steps. You’ll be confident in your ability to consistently produce ribs with an amazing texture and flavor profile that will undoubtedly ‘wow’ your guests and earn you rave reviews.
Why You’ll Fall in Love with These Oven Baked Ribs
- Unrivaled Flavor: The depth of flavor in these ribs is truly extraordinary, thanks to the dynamic duo of a meticulously balanced dry rub and a from-scratch BBQ sauce. Each bite is a symphony of sweet, savory, and smoky notes.
- Exceptional Texture: Our oven-baked ribs achieve the ideal balance: tender, juicy meat that pulls cleanly from the bone, rather than falling completely apart. The exterior also boasts a beautifully caramelized, slightly crispy crust that adds another layer of textural delight.
- Incredibly Versatile: Whether you’re planning a casual weeknight dinner for the family or hosting an elegant dinner party, these ribs are sophisticated enough for special occasions yet simple enough for everyday enjoyment.
- Foolproof Method: The oven provides a consistent, controlled environment, eliminating the guesswork often associated with grilling. This recipe is designed to deliver perfect results even for novice cooks.

Understanding Different Cuts of Pork
Curious about where various pork cuts originate on the hog? We’ve simplified it for you. Explore more detailed information on all things pork in our comprehensive pork recipes round-up, ensuring you pick the best cut for any dish.
Essential Ingredients for the Best Oven Baked Ribs
Gathering the right ingredients is the first step to creating truly spectacular ribs. Here’s what you’ll need:
- Baby Back Ribs (~3 lbs.): Look for a good quality rack of pork baby back ribs. These are leaner and more tender than spare ribs, making them ideal for this slow-roasting method. You can typically find them at any grocery store or butcher shop.
- For the Dry Rub:
- Kosher salt (crucial for tenderizing and flavor)
- Garlic powder (adds a foundational savory note)
- Brown sugar (for sweetness and caramelization)
- Dried thyme (earthy and aromatic)
- Chili powder (provides warmth and mild spice)
- Paprika (for color and mild pepper flavor)
- Black pepper (essential for balance)
- Olive Oil: Used to help the rub adhere and to promote browning.
- For the Homemade BBQ Sauce: While store-bought is an option, our homemade sauce elevates these ribs to another level. You’ll need:
- Tomato sauce (the base)
- White onion (finely grated for subtle flavor)
- Garlic (grated for a potent aromatic kick)
- Worcestershire sauce (adds umami and depth)
- Ketchup (for classic BBQ tang and sweetness)
- Molasses (rich, deep sweetness and color)
- Brown sugar (additional sweetness and caramelizing agent)
- Butter (for richness and gloss)
- Apple cider vinegar (for essential tang and balance)
Missing some of these spices? No problem! Other delicious additions to your dry rub could include cumin for an earthy flavor, dried mustard for a sharp tang, or a pinch of cayenne pepper for an extra kick of heat. You can also try our dedicated homemade pork rub for another fantastic flavor profile.
Ribs in the Oven 101: Your Essential Questions Answered
For this particular recipe, we highly recommend using baby back pork ribs. They are known for being lean, tender, and cook relatively quickly, yielding a more desirable texture for this method. We do not suggest using spare ribs for this specific recipe, as their fat content and structure require different cooking times and techniques to achieve ideal tenderness.
Our recipe employs a dual-temperature approach for optimal results. We suggest baking the ribs at a low temperature (300ºF / 150ºC) for the majority of the cooking time to ensure they become incredibly tender. Then, for the final 10-15 minutes, we increase the temperature to a higher heat (400ºF / 200ºC) to perfectly caramelize the BBQ sauce and create that irresistible sticky, slightly crispy exterior.
Caramelization is key to a truly great rack of ribs. The secret lies in the sugar content of your BBQ sauce (which includes brown sugar and molasses in our homemade recipe). When you brush this sauce over the ribs and then increase the oven temperature, the sugars will brown and caramelize, forming a glossy, sticky, and intensely flavorful crust. This process is often referred to as the Maillard reaction, contributing to that deep, rich taste.
While these oven-baked ribs are ideally done when they reach an internal temperature of 195ºF (90ºC), you can also look for visual cues. The meat will start to visibly pull back from the ends of the bones, exposing them. Another excellent indicator is tenderness: when gently prodded with tongs, the meat should feel very tender and offer little resistance, but still have a slight “bite” rather than completely falling off the bone.
Absolutely! Applying the dry rub and allowing the ribs to marinate in the refrigerator overnight (or for at least 30 minutes) significantly enhances their flavor and tenderness. You can also prepare the BBQ sauce a day or two in advance and store it in the refrigerator, making meal prep even easier on the day of cooking.
Slow cooking in the oven ensures an incredibly even cook, allowing the connective tissues in the ribs to break down gradually, resulting in exceptional tenderness. It also creates a consistent environment, eliminating the hot spots and flare-ups that can occur on a grill, and locking in moisture for juicy results.
Our #1 Expert Tip for Cooking Ribs in the Oven
Trust us when we emphasize the importance of cooking these ribs low and slow. This method is the cornerstone of achieving incredibly tender and juicy results, similar to how we prepare our slow-roasted pork shoulder or smoked pork shoulder. The extended, gentle heat allows the tough connective tissues in the ribs to slowly break down, transforming them into succulent, melt-in-your-mouth meat that still retains a satisfying “bite.”
Then, at the very end, crank up the oven temperature to caramelize that glorious, flavorful BBQ sauce. This final high-heat blast creates that irresistible sticky, slightly charred crust that makes these ribs truly unforgettable.
At a Glance: How to Cook Ribs in the Oven
Here’s a quick overview of the essential steps for achieving perfect oven-baked ribs. We’ll dive into more detail for each step below.
- Remove the Membrane: This crucial first step ensures maximum tenderness. Simply slide a knife under the thin membrane on the back of the ribs and pull it off.
- Salt the Ribs: Generously massage kosher salt into the ribs. This initial salting helps draw out moisture and kickstarts the tenderizing process.
- Apply the Dry Rub: Combine your chosen spices and generously coat the entire rack of ribs, massaging the rub deeply into the meat. Wrap and refrigerate for at least 30 minutes, or ideally, overnight.
- Slow Bake to Perfection: Place the seasoned ribs on a greased baking sheet, cover tightly with tin foil, and bake at 300ºF (150ºC) for 2.5 hours.
- Prepare the Homemade BBQ Sauce: While the ribs are baking, whisk all BBQ sauce ingredients in a saucepan, bring to a boil, then simmer to allow the flavors to meld beautifully.
- Caramelize and Glaze: Remove the foil, increase the oven temperature to 400ºF (200ºC), and generously slather the ribs with your delicious BBQ sauce. Return to the oven for 10-15 minutes until the sauce is sticky and caramelized.
- Rest and Enjoy: Allow the ribs to rest for 10 minutes after baking to lock in the juices before slicing and serving.
Mastering Membrane Removal for Tender Pork Ribs
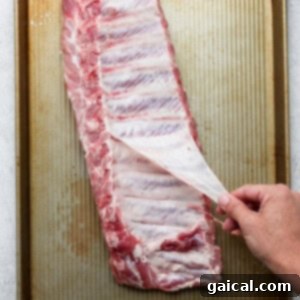
The membrane on the backside of a rack of ribs, also known as the silverskin, is a thin, tough layer of tissue that can make ribs chewy and prevent seasonings from fully penetrating the meat. For truly tender ribs that are a joy to eat, removing this membrane is a non-negotiable step.
To remove the membrane, carefully slide a blunt knife (like a butter knife or the handle of a spoon) under the membrane at one end of the rack. Once you’ve lifted a small corner, grip it firmly with a paper towel (this provides a better grip!) and slowly pull the membrane away from the bones. It might come off in one long strip, or in several pieces. Discard the membrane once removed.
Alternative: Grilling Your Seasoned Ribs
If you’re eager to take these dry-rubbed beauties to the grill for a smoky twist, here’s a quick rundown of what to do after you’ve applied the dry rub and marinated them:
- Low and Slow Grill: Preheat your grill to a consistent 300ºF (150ºC) using indirect heat. Place the ribs on the indirect heat side and grill them for approximately 1 hour. This initial low-temperature cook mimics the oven’s tenderizing effect.
- Sauce and Sear: Increase the grill temperature to 400ºF (200ºC) and generously slather the ribs with your homemade BBQ sauce. Continue to grill, turning occasionally, for an additional 30 minutes, or until the sauce has caramelized and slightly charred in places, creating a delicious crust.
For a more in-depth tutorial on how to grill pork ribs, be sure to check out our dedicated post for all the details.

Pro Tool Alert!
The Thermoworks Thermapen
We cannot stress enough the importance of using a reliable meat thermometer when cooking any cut of meat, especially ribs. It ensures perfect doneness and food safety every time. The Thermapen is our absolute go-to meat thermometer, consistently delivering accurate and instant readings.
Delectable Sides to Serve with Our Perfect Oven Ribs
These incredible oven-baked ribs pair wonderfully with a variety of side dishes, transforming your meal into a truly memorable feast. Choose from one of the delicious options below, and you absolutely won’t be disappointed:
Couscous Salad: This refreshing Mediterranean couscous salad is a fantastic, light addition to any meal, especially during warmer months. Packed with fresh vegetables and zesty flavors, it serves beautifully as either a vibrant side or a colorful main dish.
Grilled Corn in Foil: A summer staple that complements ribs perfectly! Achieve perfectly cooked, sweet corn on the cob every single time with this incredibly easy Grilled Corn in Foil recipe. Minimal cleanup, maximum flavor!
Smoked Baked Potatoes: Elevate your potato game with these smoked baked potatoes. They offer a subtle smoky flavor and come out perfectly slow-cooked, providing a hearty and comforting side that effortlessly completes any barbecue-inspired meal.
Grilled Cauliflower: For a healthy and flavorful vegetable side, this grilled cauliflower is an excellent choice. It’s first steamed for 10 minutes to tenderize, then perfectly grilled to achieve a beautiful char and smoky depth – an amazing accompaniment!
Mexican Street Corn Salad: Our vibrant Mexican Street Corn Salad is a symphony of flavors, featuring grilled corn kernels, ripe tomatoes, crisp red onion, and a rich, creamy cotija yogurt sauce with a bright squeeze of lime juice. It’s a bold and exciting side dish.
Classic Coleslaw: A cool, crisp, and creamy coleslaw provides a refreshing contrast to the richness of the ribs. Its tangy dressing and crunchy texture are an ideal palate cleanser.
Sweet Potato Fries: The natural sweetness of baked or air-fried sweet potato fries offers a delightful counterpoint to the savory, smoky ribs and is always a crowd-pleaser.
Storage and Reheating Suggestions for Leftover Ribs
If you happen to have any of these delicious ribs left over (a rare occurrence, we know!), proper storage is key to maintaining their quality. Store leftover ribs in an airtight container or tightly wrapped in a piece of tin foil in the refrigerator for up to 3-5 days. This will prevent them from drying out and keep them fresh.
To Reheat: For best results, reheat ribs gently. You can wrap them in foil and warm them in an oven preheated to 300ºF (150ºC) for about 20-30 minutes, or until heated through. Alternatively, a quick reheat on a grill over indirect heat can also work wonders, helping to crisp up the sauce again. Avoid microwaving if possible, as it can make the meat tough.
More of our Favorite…
Essential Pork Recipes to Try Next
- Grilled Pork Chops: Juicy, tender, and perfectly seared pork chops, ideal for a quick weeknight dinner or a weekend BBQ.
- Pork Rib Marinade: Discover our secret marinade that infuses pork ribs with incredible flavor, perfect for grilling or roasting.
- Crock Pot Pork Roast: Effortlessly tender pork roast cooked to perfection in your slow cooker, making for an easy and delicious meal.
- Baked Pork Tenderloin: A lean and flavorful option, our baked pork tenderloin recipe guarantees a juicy and savory result every time.
- Instant Pot Pulled Pork: Get fall-apart tender pulled pork in a fraction of the time with this convenient Instant Pot recipe, perfect for sandwiches and more.
- All Our Delicious Pork Recipes! Explore our full collection for endless pork-inspired culinary adventures.
Oven Baked Ribs (The Ultimate How-To Guide)
Linley Hanson
1 hr
3 hrs
4 hrs
6 servings
Print Recipe
Ingredients
For the BBQ Ribs
- 1 rack baby back ribs, approximately 3 lbs.
- 1/2 tablespoon kosher salt
- 2 tablespoons garlic powder
- 2 tablespoons brown sugar
- 2 teaspoons dried thyme
- 2 teaspoons chili powder
- 1 teaspoon paprika
- 1 teaspoon black pepper
- 1 tablespoon olive oil
For the Homemade BBQ Sauce
- 1 cup tomato sauce
- 2 tablespoons grated white onion
- 1 tablespoon grated garlic
- 1 tablespoon Worcestershire sauce
- 1 tablespoon ketchup
- 1 tablespoon molasses
- 2 tablespoons dark brown sugar
- 1 teaspoon chili powder
- ½ teaspoon paprika
- ½ teaspoon salt
- ¼ teaspoon pepper
- 1 tablespoon butter
- ¼ cup apple cider vinegar
Instructions
-
Prepare the Ribs: Start by carefully removing the membrane (silverskin) from the backside of the rack of ribs. This thin, tough layer can prevent the ribs from becoming fully tender. Use a blunt knife or spoon handle to lift a corner of the membrane, then grip it with a paper towel and pull it off. Discard the membrane.

-
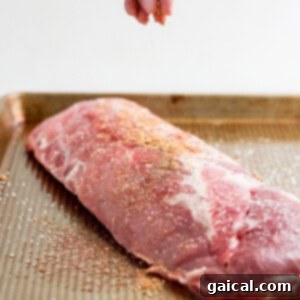
Initial Salting: Sprinkle the ribs generously with kosher salt, ensuring both sides are covered. Gently massage the salt into the meat. Set the ribs aside for a few minutes; the salt will begin to draw out moisture and tenderize the meat.
-
Create the Dry Rub: In a small bowl, combine the garlic powder, brown sugar, dried thyme, chili powder, paprika, and black pepper. Mix these spices thoroughly until well combined.
-
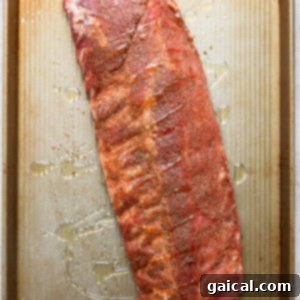
Apply the Dry Rub: Liberally sprinkle the mixed spices over both sides of the ribs, ensuring the entire rack is evenly coated. Gently massage the dry rub into the meat.
-
Marinate (Optional but Recommended): For maximum flavor penetration, wrap the seasoned ribs tightly in plastic wrap and place them in the refrigerator for at least 30 minutes. For even deeper flavor, marinate overnight (up to 12 hours).
-
Preheat Oven: Preheat your oven to 300ºF (150ºC). Prepare a large baking sheet by spraying it with nonstick cooking spray or lining it with foil for easier cleanup.
-
Prepare for Baking: Unwrap the marinated ribs and place them meaty-side up on the prepared baking sheet.
-
Drizzle and Cover: Drizzle the ribs lightly with olive oil, then cover the baking sheet very tightly with aluminum foil. Ensure a secure seal to trap moisture and steam, which is crucial for tenderizing.
-
Slow Bake: Place the covered baking sheet into the preheated oven and bake the ribs at 300ºF (150ºC) for 2.5 hours. This “low and slow” method ensures exceptional tenderness.
-
Make the BBQ Sauce: With about 30 minutes of bake time remaining for the ribs, begin preparing the homemade BBQ sauce. Add all the BBQ sauce ingredients (tomato sauce, grated onion, grated garlic, Worcestershire, ketchup, molasses, brown sugar, chili powder, paprika, salt, pepper, butter, and apple cider vinegar) to a saucepan. Whisk thoroughly until all ingredients are combined.
-
Simmer the Sauce: Bring the BBQ sauce to a boil over high heat, then immediately reduce the heat to low. Let the sauce simmer gently for 15 minutes, stirring occasionally. This allows the flavors to deepen and meld. Remove from heat once thickened.
-
Uncover and Increase Heat: Once the ribs have baked for 2.5 hours, carefully remove them from the oven. Remove and discard the aluminum foil. Increase the oven temperature to 400ºF (200ºC).
-
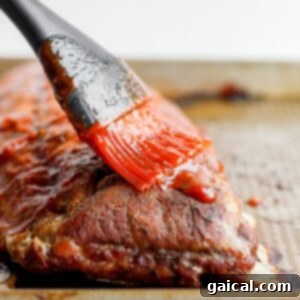
Apply BBQ Sauce: Generously slather the homemade BBQ sauce over the top side of the ribs, ensuring a thick, even coating.
-
Caramelize the Glaze: Return the sauced ribs to the 400ºF (200ºC) oven and bake for an additional 10-15 minutes, or until the BBQ sauce begins to caramelize, thicken, and become slightly sticky and glossy on the ribs. Watch carefully to prevent burning.
-
Rest and Serve: Once caramelized, remove the ribs from the oven. Let them rest on the baking sheet for 10 minutes before slicing into individual portions and serving immediately. Enjoy your perfectly cooked oven baked ribs!
Tips & Notes
- Store-Bought BBQ Sauce: While our homemade BBQ sauce is highly recommended for unparalleled flavor, feel free to use your favorite high-quality store-bought BBQ sauce if you’re short on time. Aim for a brand with good sugar content for optimal caramelization.
- Spice Level Adjustment: Adjust the chili powder and paprika in both the dry rub and BBQ sauce to your preferred level of heat. Add a pinch of cayenne for an extra kick!
- Aluminum Foil is Key: Ensure the ribs are tightly wrapped in foil during the initial low-temperature bake. This creates a steaming environment that helps break down connective tissues and keeps the ribs incredibly moist.
- Don’t Rush the Rest: Allowing the ribs to rest for 10 minutes after cooking is crucial. This step lets the juices redistribute throughout the meat, resulting in a more tender and flavorful final product.
Nutrition Information (Estimated per serving)
Carbohydrates: 49 g,
Protein: 33 g,
Fat: 49 g,
Fiber: 5 g,
Sugar: 49 g
Disclaimer: Nutrition information is automatically calculated and should only be used as an approximation. It may vary based on specific ingredients and brands used.
Love this recipe? Share your thoughts below!
Don’t forget to tag your culinary creations on social media with the hashtag #fitfoodiefinds – we absolutely love seeing what delicious dishes you’re whipping up!
Photography by: The Wooden Skillet