
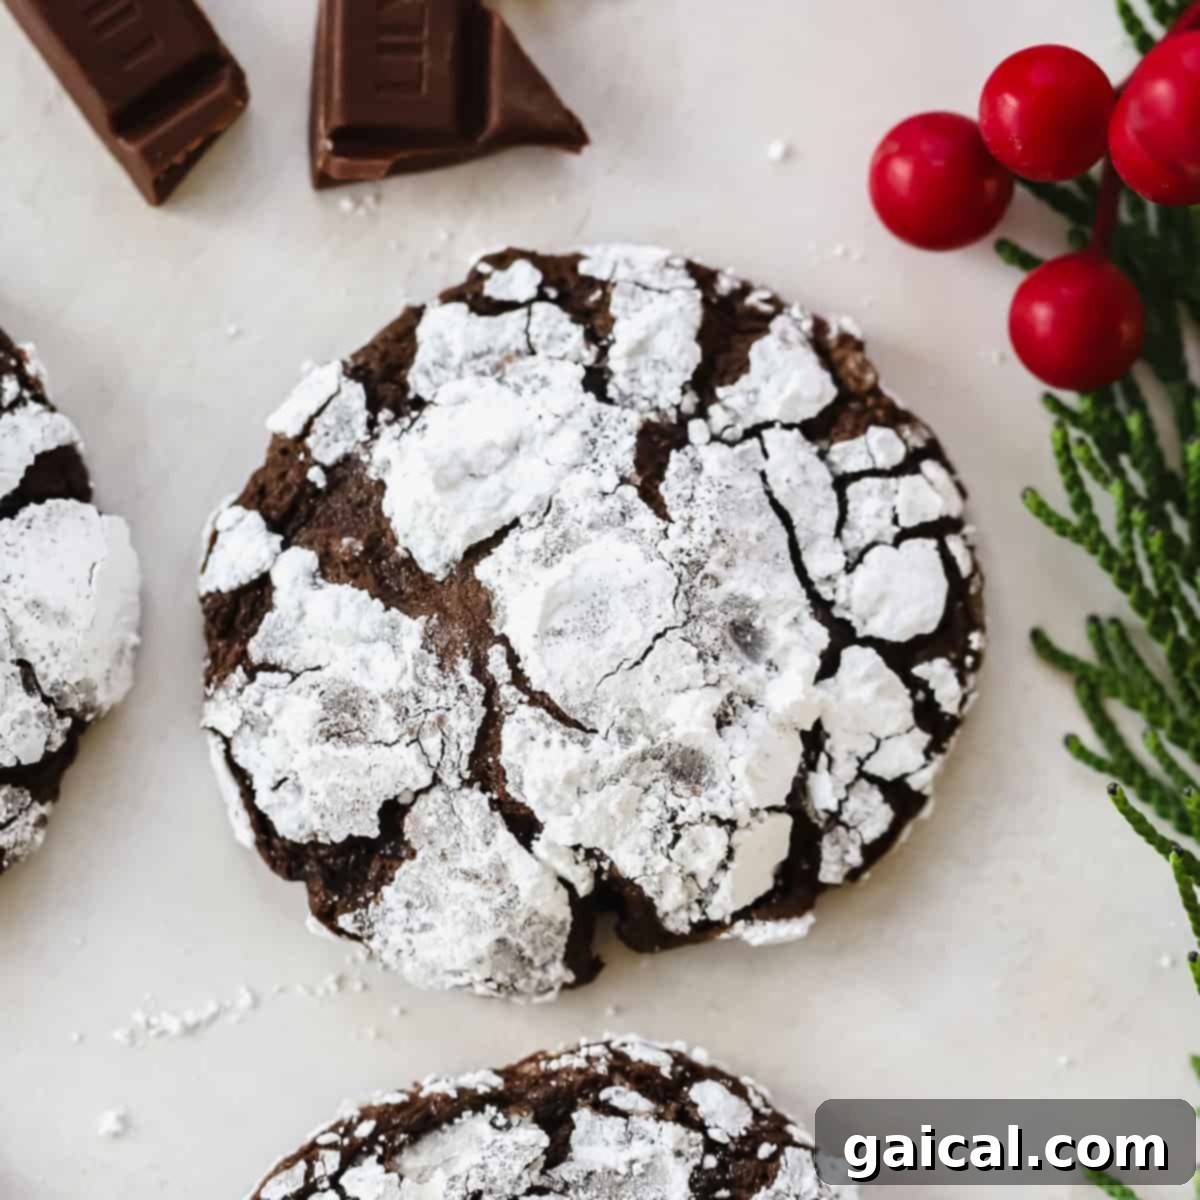
There’s a special kind of magic that fills the air during the holiday season, and for many, that magic is intertwined with the irresistible aroma of freshly baked cookies. Among the countless festive treats, Chocolate Crinkle Cookies stand out as an absolute classic. These delightful chocolate Christmas cookies are a testament to simple indulgence – rich, intensely chocolatey, and wonderfully chewy on the inside, all wrapped in a delicate crackled coating of sweet powdered sugar on the outside. They don’t just taste amazing; their charming, snowy appearance makes them a festive centerpiece, perfect for cookie exchanges, holiday parties, or a cozy evening by the fire. Get ready to bake a batch of these enchanting holiday favorites that are sure to become a beloved tradition in your home.
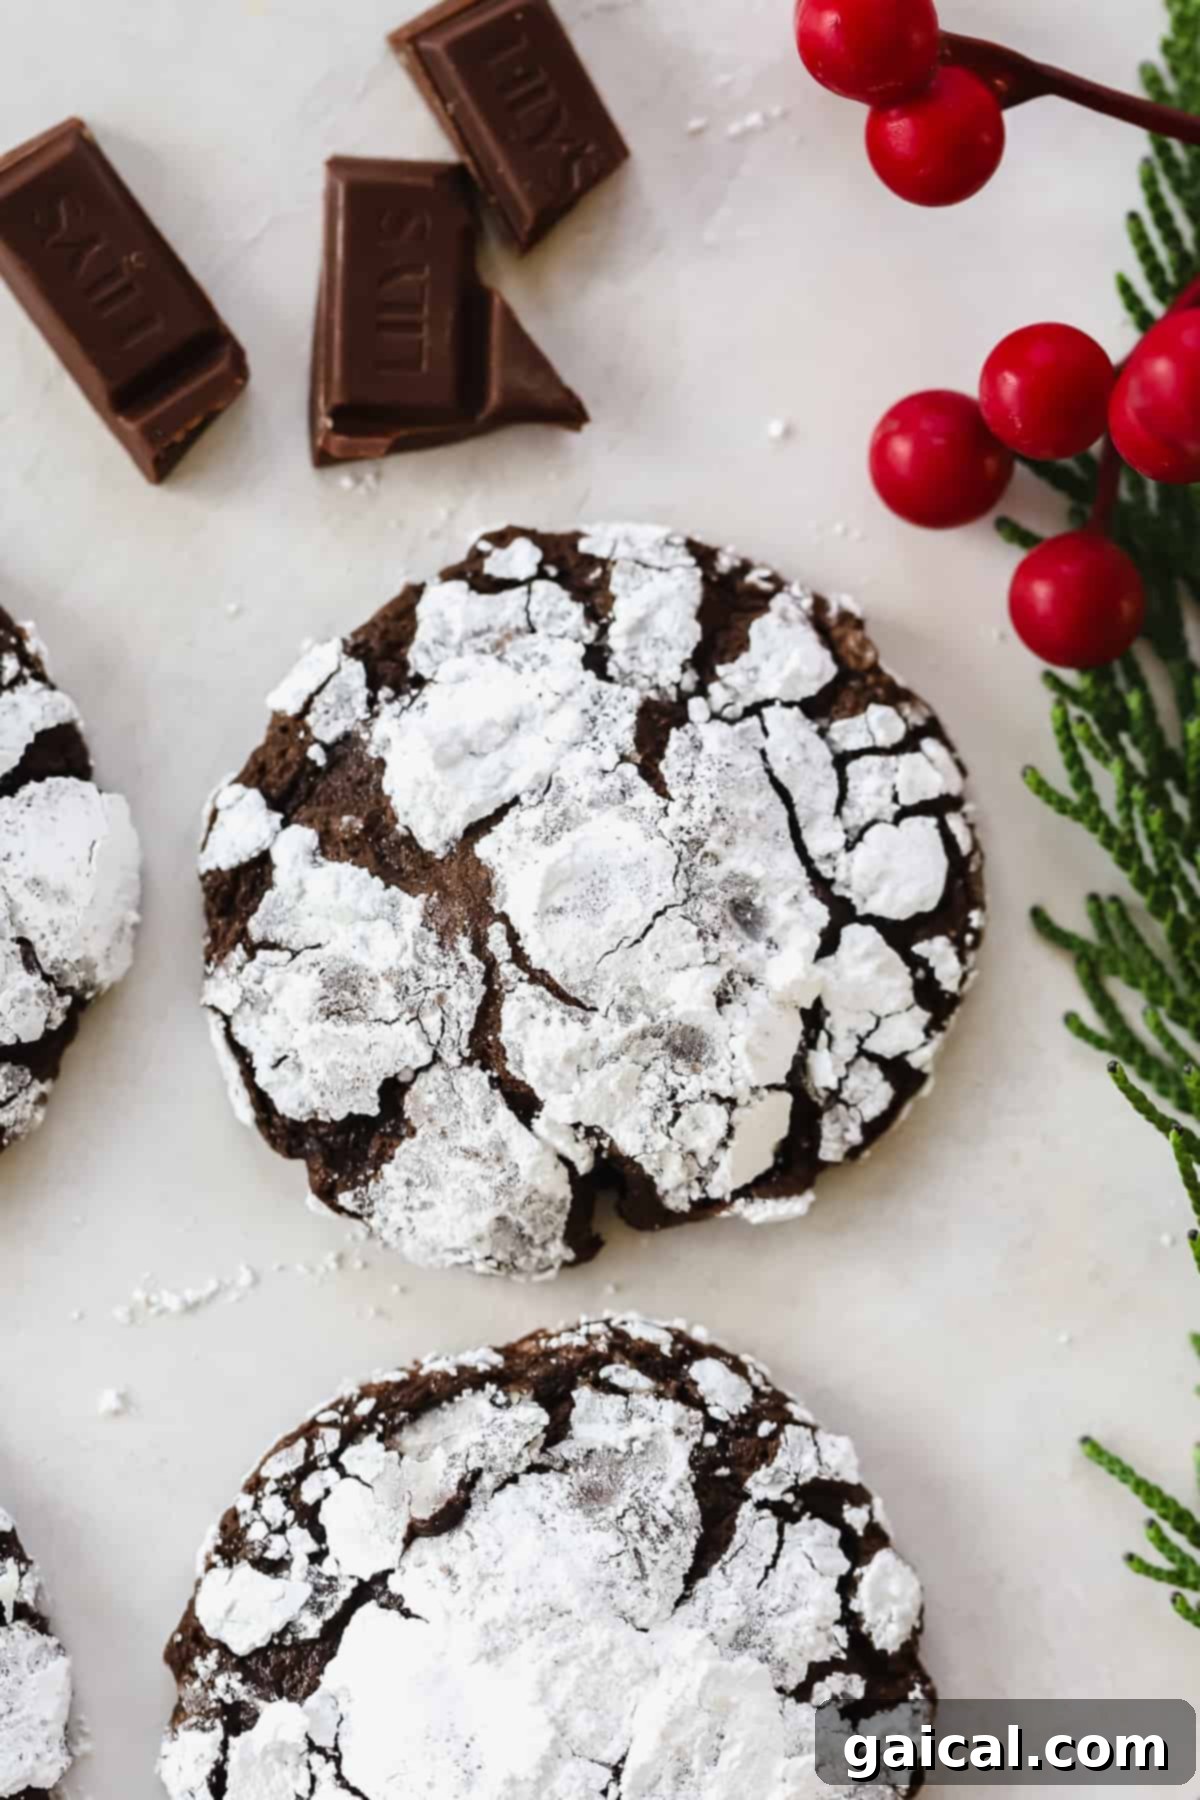
Mastering Chewy Chocolate Crinkle Cookies for the Holidays
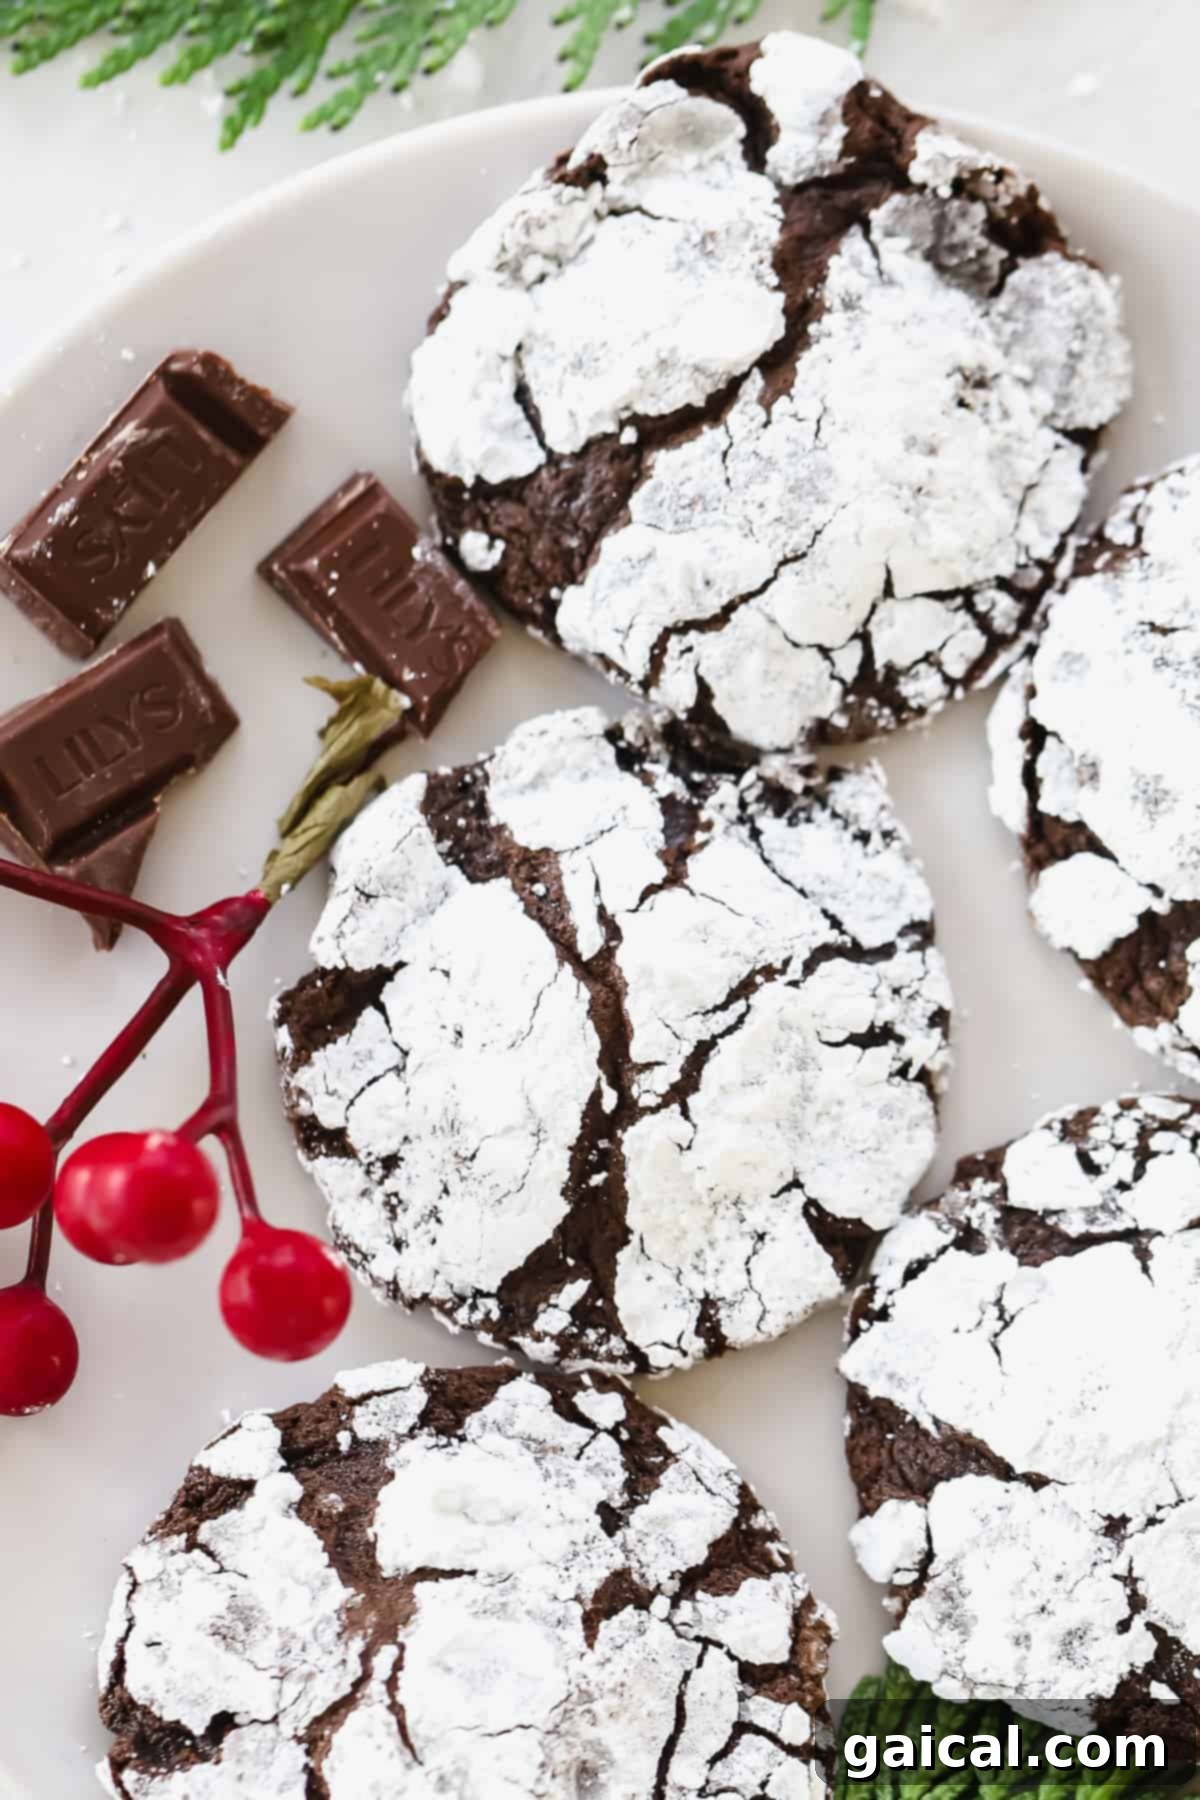
As the holiday season swings into full gear, our kitchens transform into bustling bakeries, and if you’re participating in a cookie exchange or simply want to impress your loved ones, these Chocolate Crinkle Cookies are an absolute must-bake. We pride ourselves on creating the ultimate chewy crinkle cookie experience, ensuring each bite is a burst of rich chocolate flavor. Our recipe elevates this beloved classic by incorporating not one, but three distinct types of chocolate: robust dark chocolate for depth, decadent milk chocolate chunks for sweet pockets, and rich cocoa powder for an intensified chocolate base. The final flourish, a generous dusting of powdered sugar, creates that iconic “crinkled” effect, making them as visually appealing as they are irresistibly delicious.
These cookies aren’t just for Christmas; they’re perfect for any occasion where you crave a deeply satisfying chocolate treat. Their unique texture—soft, fudgy, and incredibly chewy—sets them apart, while the delicate crackle of the powdered sugar adds a delightful contrast. Forget dry, crumbly cookies; this recipe promises an ooey-gooey interior that will keep you coming back for more.
Why These Chocolate Crinkle Cookies Will Become Your New Favorite
Decadent & Rich: If you’re searching for a truly luxurious holiday dessert that satisfies even the most intense chocolate cravings, look no further! This recipe features a harmonious blend of dark chocolate and cocoa powder, creating an exceptionally deep and complex chocolate flavor that’s both bold and comforting. Each bite is an experience in pure indulgence, making these cookies a standout treat.
Perfectly Chewy Texture: The secret to their incredible chewiness lies in our strategic use of both melted dark chocolate and generous milk chocolate chunks within the dough. This combination ensures a moist, fudgy center that melts in your mouth, perfectly contrasting with the delicate crunch of the powdered sugar coating. They are guaranteed to be “ooey-gooey” in the best possible way, staying soft for days.
Visually Stunning: Beyond their amazing taste, these cookies are a feast for the eyes. The stark contrast between the dark, rich chocolate cookie and the bright white powdered sugar creates a beautiful “crinkled” pattern that is unmistakably festive and charming. They’re effortlessly elegant and always impress, making them ideal for holiday platters, gifts, or simply brightening your dessert table.
A Classic with a Twist: While Chocolate Crinkle Cookies are a beloved holiday staple, our recipe elevates them with a triple chocolate profile, ensuring maximum flavor impact. It’s a familiar comfort food reimagined to deliver an even more delightful experience, making it a recipe you’ll turn to year after year.
Great for Sharing & Gifting: Their impressive appearance and exquisite taste make them an excellent choice for holiday cookie exchanges, hostess gifts, or simply sharing with friends and family. They travel well and are always a welcome sight during celebratory gatherings.
Essential Ingredients for Your Chocolate Crinkle Cookies
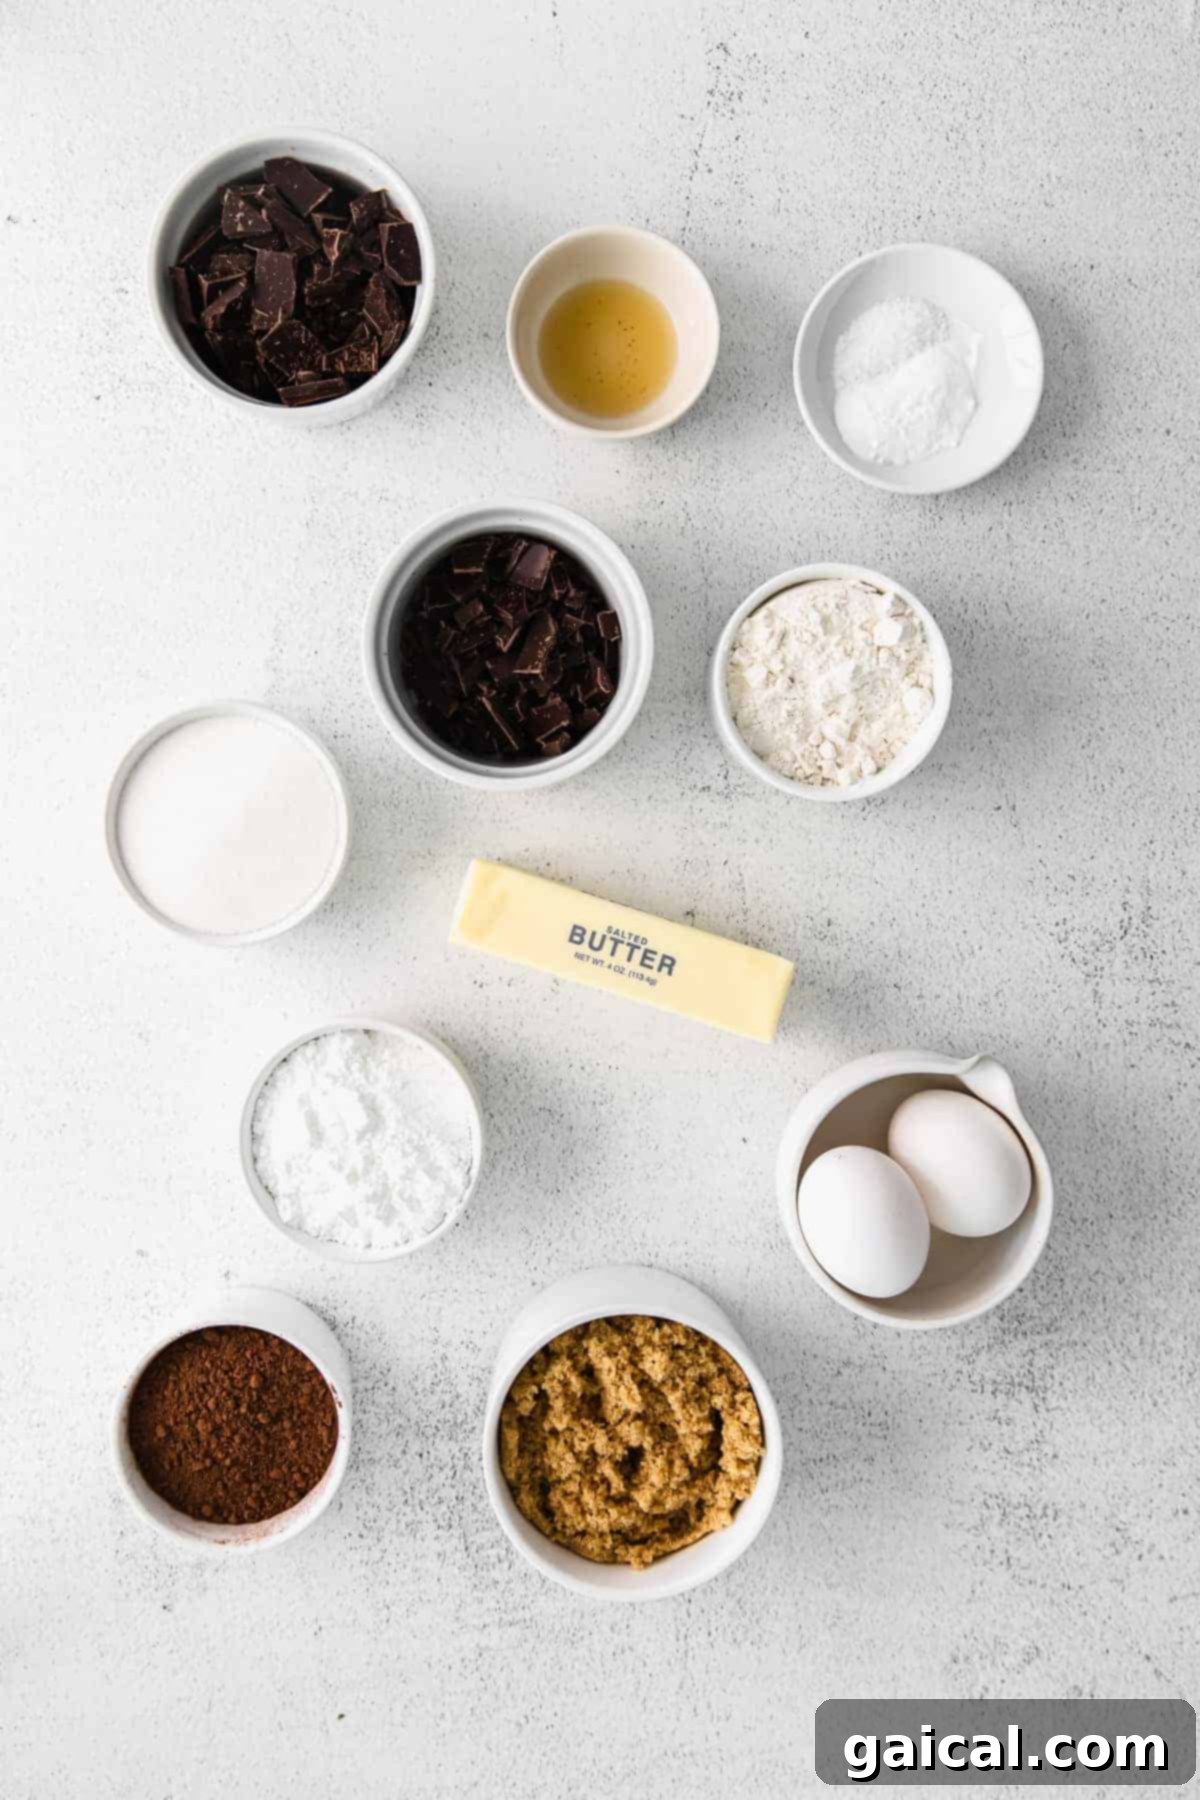
Crafting the perfect batch of chewy chocolate crinkle cookies starts with selecting the right ingredients. Each component plays a vital role in achieving that signature rich flavor and irresistible texture. Here’s a detailed look at what you’ll need:
- Dark Chocolate: This is a cornerstone for the deep chocolate flavor and fudgy texture. You’ll melt a portion of dark chocolate into the batter, which contributes significantly to the cookie’s chewiness and overall richness, much like in a classic brownie. We recommend a high-quality dark chocolate (around 70-72% cocoa solids) for the best depth of flavor.
- Cocoa Powder: Beyond the melted dark chocolate, unsweetened cocoa powder intensifies the chocolate experience, making these cookies extra rich and deeply colored. It complements the dark chocolate beautifully without adding excessive sweetness.
- All-Purpose Flour: The structural backbone of our cookies. We’re keeping it simple with standard all-purpose flour, which provides the right balance for a soft yet chewy bite.
- Baking Soda: This acts as our leavening agent, working with other ingredients to give the cookies a slight lift and contribute to their soft, tender texture. It helps create a beautiful dome before the crinkles appear.
- Salt: A crucial flavor enhancer in any sweet recipe, salt balances the sweetness of the sugars and, more importantly, amplifies the complex notes of the chocolate, making the flavor truly pop. Don’t skip it!
- Milk Chocolate Chunks: For delightful bursts of sweet, gooey chocolate in every bite, we fold in chopped milk chocolate chunks into the dough. As they bake, these chunks melt slightly, creating pockets of creamy indulgence. Using a good quality chocolate bar, chopped roughly, works wonders.
- Unsalted Butter: Butter provides essential moisture, richness, and helps create that tender, melt-in-your-mouth quality. Using softened unsalted butter allows for better creaming with the sugars.
- Large Eggs: Eggs serve as the primary binder in our cookie dough, holding everything together. They also contribute to the moisture content and overall chewiness of the cookies, creating a soft, tender crumb. Ensure they are at room temperature for optimal mixing.
- Vanilla Extract: A touch of vanilla extract brightens and rounds out the chocolate flavors, adding a warm, aromatic depth that elevates the entire cookie. Pure vanilla extract is always recommended for the best results.
- Powdered Sugar: This is the key ingredient for the signature crinkled appearance. Before baking, each cookie dough ball is generously rolled in powdered sugar. As the cookie expands, the sugar coating cracks, creating those beautiful, snowy fissures.
- Granulated Sugar: While powdered sugar creates the crinkles, rolling the dough in granulated sugar first is a clever trick. The granulated sugar acts as a protective layer, preventing the powdered sugar from completely melting and being absorbed into the cookie during baking, ensuring those vibrant white cracks remain prominent.
Can I make these gluten-free?
While some bakers have success swapping all-purpose flour for a 1:1 gluten-free all-purpose flour blend, we have not specifically tested this recipe with gluten-free alternatives. The precise balance of ingredients, especially the flour’s protein structure, is crucial for the chewy texture and proper crinkle effect. Therefore, we cannot guarantee the same results or texture with a gluten-free flour blend.
Can I use different flour?
For the optimal texture and rise of these chewy chocolate crinkle cookies, we strongly recommend sticking to all-purpose flour as specified in the recipe. Other flours, such as whole wheat flour, almond flour, or oat flour, have different absorption rates and protein structures, which can drastically alter the consistency, spread, and overall outcome of the cookies. We have not tested alternative flours and cannot advise on substitutions.
Can I make these egg-free?
Eggs play a critical role in binding the ingredients, providing moisture, and contributing to the chewy texture of these cookies. Unfortunately, we do not recommend making these cookies egg-free, as it would significantly impact the structure and consistency, and we have not tested any reliable egg substitutes that would yield comparable results.
The Golden Rule: The #1 Tip for Perfect Crinkle Cookies
Have you ever baked crinkle cookies only to find them spreading too much, turning out flat, or lacking that distinctive, beautiful crinkled finish? The most common culprit, and our absolute golden rule for success, is simple: do not skip chilling your cookie dough! This step is non-negotiable and utterly crucial for achieving those desirable results. Chilling the dough does several critical things:
- Prevents Spreading: Cold butter in the dough takes longer to melt in the oven, allowing the cookies to set and rise slightly before spreading. This keeps your cookies thicker and prevents them from becoming thin and brittle.
- Intensifies Flavor: As the dough chills, the flavors have time to meld and deepen. The chocolate becomes more pronounced, and the overall taste is richer and more complex.
- Hydrates Flour: The liquids in the dough fully hydrate the flour during chilling. This results in a more tender and chewy cookie, preventing dryness.
- Ensures Crinkles: A firm, cold dough holds its shape better, which is essential for the powdered sugar coating to adhere properly and crack beautifully as the cookies bake and expand.
We recommend chilling your cookie dough for a minimum of 3 hours. For the absolute best results, and to truly achieve that perfect texture and crinkle, chilling the dough overnight is highly preferred. Plan ahead, and you’ll be rewarded with bakery-quality chocolate crinkle cookies that are both stunning and delicious.
Discover More of Our Favorite…
Irresistible & Healthier Christmas Cookies

The holiday season is synonymous with baking, and if you’re looking for delightful treats that cater to various preferences, our collection of 50 Healthy Christmas Cookies has something for everyone! From indulgent yet mindful options like Paleo Hot Cocoa Cookies with Vanilla Bean Frosting to elegantly simple Gluten-Free Almond Biscotti, we’ve got your Christmas cookie cravings covered. Explore our recipes to find new favorites and healthier twists on classic holiday confections.
The Secret to Their Incredible Chewy Texture
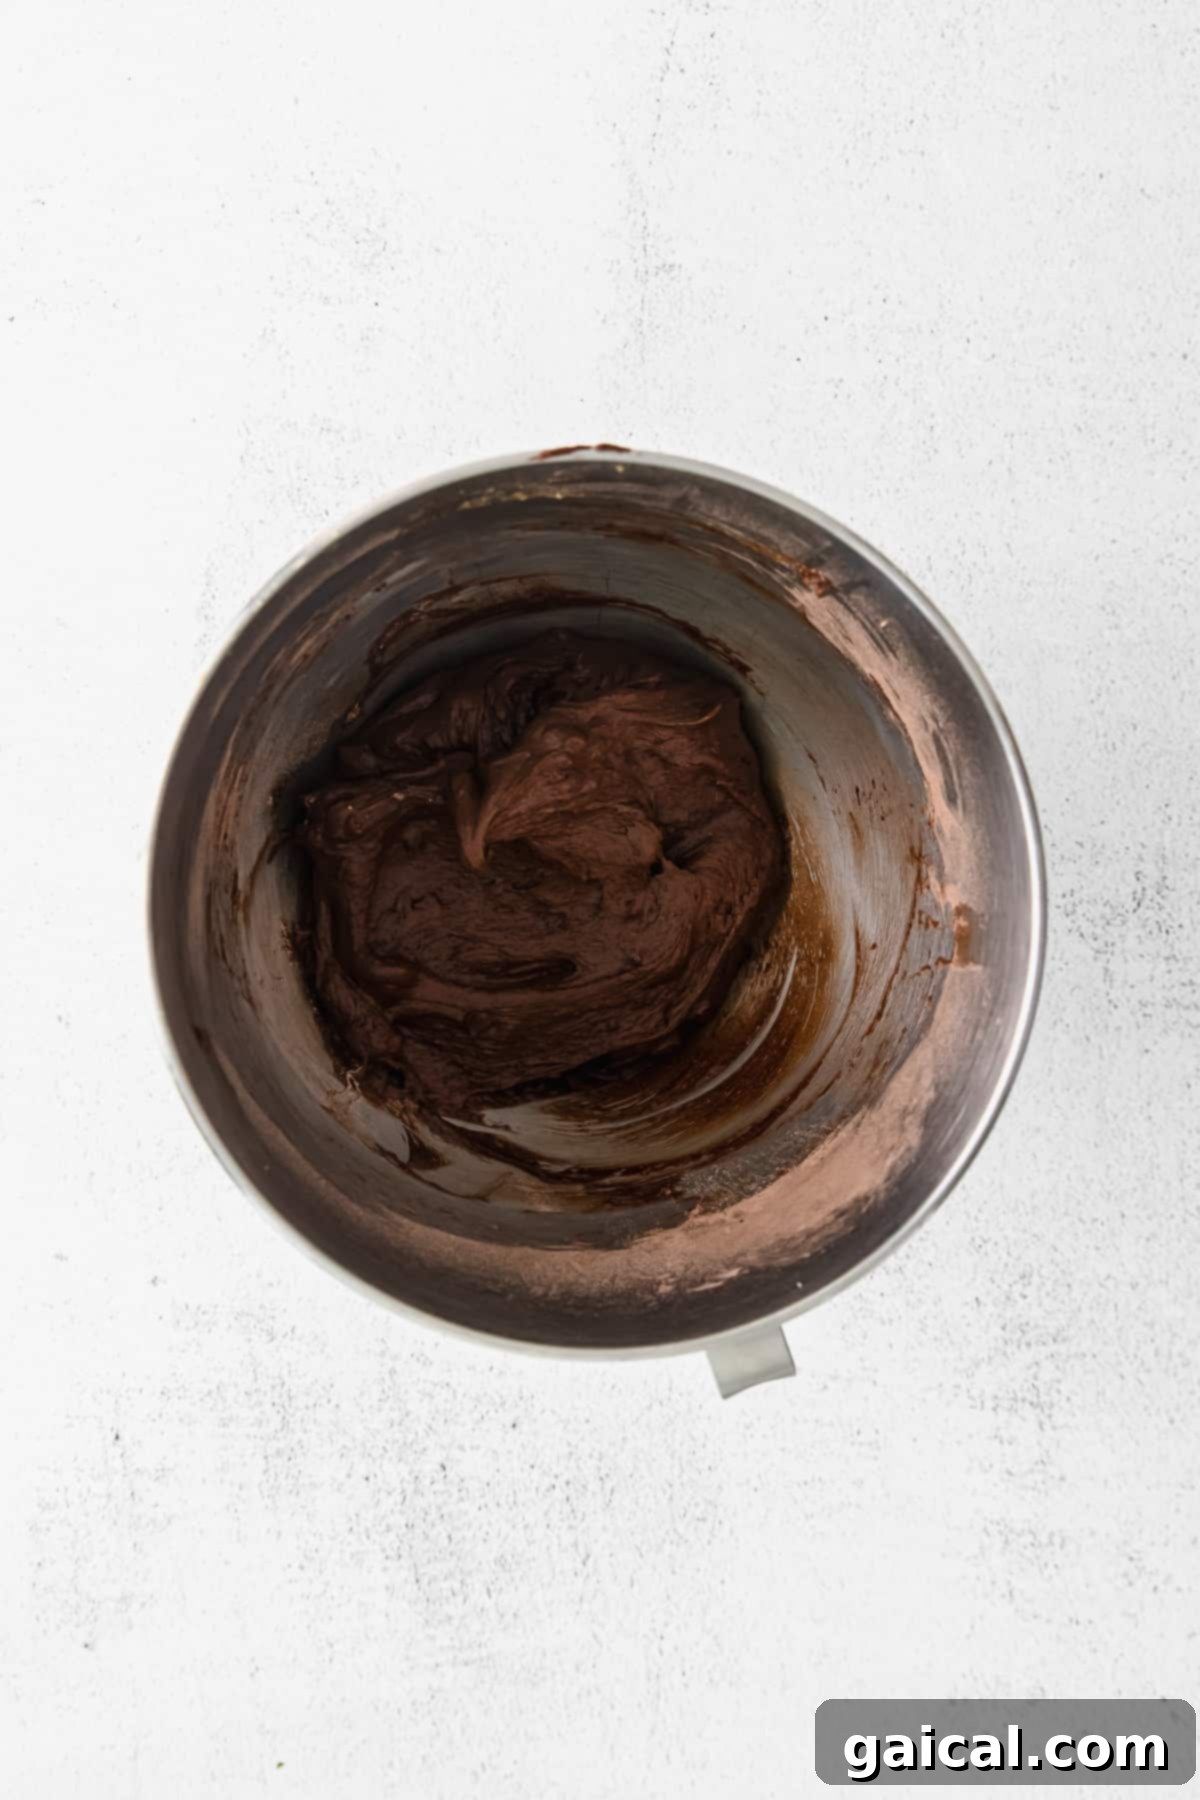
The hallmark of a truly great chocolate crinkle cookie, besides its festive appearance, is its delightfully chewy and fudgy interior. So, what’s the secret behind this irresistible texture? Much like our famously fudgy brownies, the key lies in the inclusion of a significant amount of melted chocolate directly into the cookie dough. When dark chocolate is melted and incorporated, it acts as a binding agent and adds a richness that other fats alone cannot achieve. This melted chocolate, combined with the right balance of butter, sugar, and eggs, creates a dense, moist, and wonderfully pliable dough. This density translates into a cookie that remains soft and chewy even after cooling, giving it that luxurious “ooey-gooey” quality that is so highly sought after. The brown sugar also plays a role, contributing to moisture and a chewier consistency compared to granulated sugar alone.
Seriously, Do I Have to Chill the Dough? (Yes, and Here’s Why!)
To reiterate with utmost importance: YES! You absolutely, unequivocally must chill this cookie dough. This step is critical and cannot be skipped if you desire perfectly shaped, crinkled, and chewy cookies. Neglecting to chill the dough is the single biggest reason why crinkle cookies spread excessively, become thin and crispy, and lose their beautiful powdered sugar coating and distinct crinkled appearance. When the dough is warm, the butter melts too quickly in the oven, causing the cookies to flatten out rapidly. Chilling the dough allows the fats to solidify, ensuring the cookies maintain their structure and rise properly before spreading. Furthermore, the chilling period allows the flour to fully hydrate, leading to a more tender and flavorful cookie. For ideal results, we strongly recommend chilling the dough for at least 3 hours, but an overnight chill in the refrigerator will yield the most spectacular and consistently perfect cookies. Trust us, the wait is worth it!
Short on Time? Quick Chilling Solutions
We understand that sometimes you’re in a hurry and can’t wait for an overnight chill. If you find yourself in a pinch and need to speed up the process for your chocolate crinkle cookie dough, you can place the covered dough in the freezer for about 30 minutes. This rapid chill will help firm up the butter and prevent immediate spreading. However, it’s important to note that while this method can save time, it won’t allow for the full hydration of the flour or the complete development of flavors that a longer refrigeration period provides. For the absolute best texture, flavor, and crinkle definition, we still highly recommend refrigerating the cookie dough for at least 3 hours or, ideally, overnight. Patience truly is a virtue in baking!
The Trick to Pristine Crinkles: Granulated Sugar First
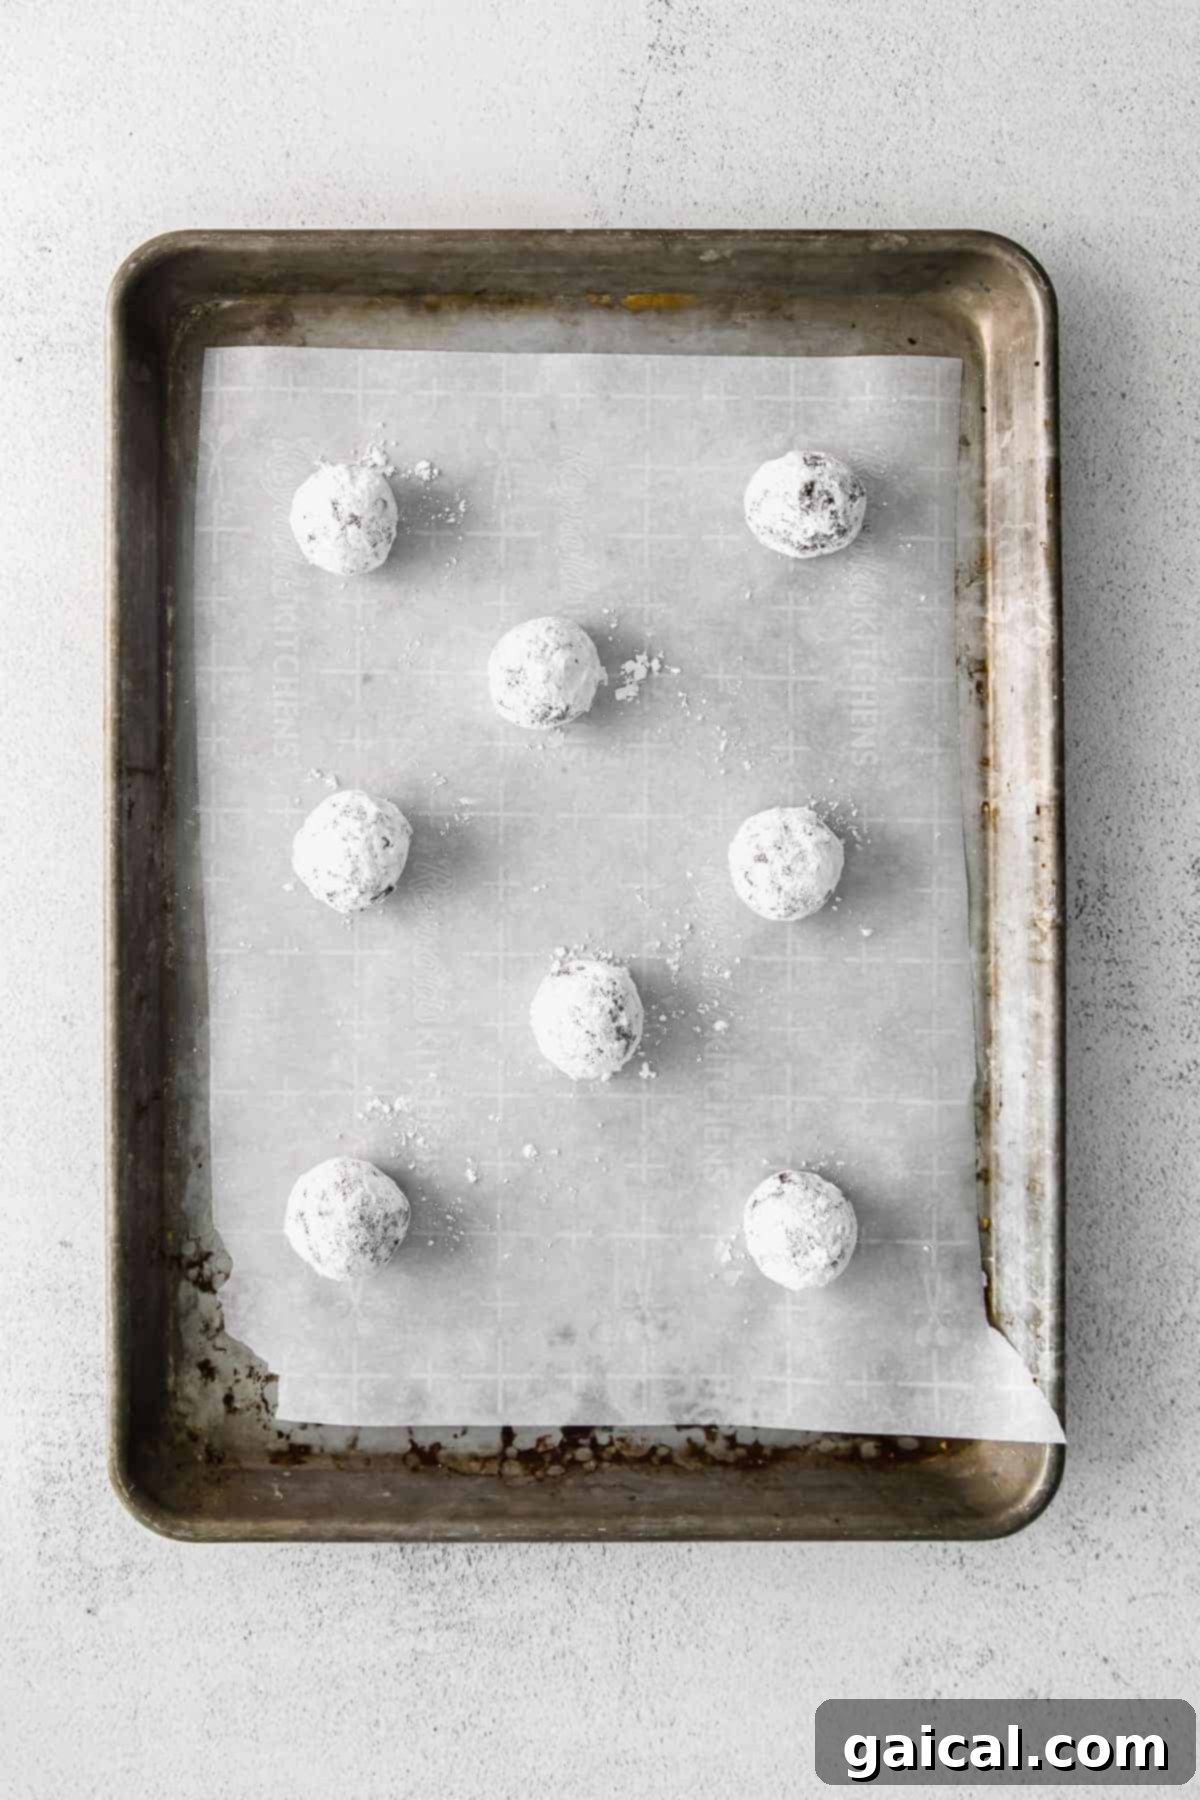
Many first-time crinkle cookie bakers might wonder why this recipe calls for rolling the cookie dough in granulated sugar *before* rolling it in powdered sugar. This isn’t just an extra step; it’s a clever, essential trick for achieving those perfectly crisp, white crinkles that define these cookies. Here’s the science: When cookies bake, they spread and release moisture. Powdered sugar, when exposed directly to the warm, moist dough and oven heat, tends to melt and get absorbed into the cookie, losing its distinctive white coating. The layer of granulated sugar acts as a protective barrier. Its larger crystals create a rougher surface that the powdered sugar can cling to, and it also insulates the delicate powdered sugar from the direct heat and moisture of the baking dough. This dual-layer coating ensures that the powdered sugar stays on the surface, maintains its bright white color, and cracks beautifully as the cookies expand, creating that iconic festive look. Do not, under any circumstances, skip this crucial step!
Storing Your Delicious Chocolate Crinkle Cookies
To keep your chocolate crinkle cookies fresh, chewy, and delicious for as long as possible, proper storage is key. Once your cookies have completely cooled on a wire rack – this is important to prevent condensation and sogginess – arrange them in an airtight container. If you’re layering them, place a piece of parchment paper between each layer to prevent sticking and preserve their delicate powdered sugar coating. Store the container in a cool, dark place, such as a pantry or on the countertop away from direct sunlight. Stored this way, your cookies will remain wonderfully fresh and chewy for up to 3-5 days. If you find the powdered sugar coating has slightly diminished over time, a light re-dusting just before serving can revive their festive appearance.
Freezing Baked Crinkle Cookies & Dough for Later Enjoyment
Chocolate Crinkle Cookies are excellent candidates for freezing, whether baked or as raw dough, allowing you to enjoy them long after the holiday season or prepare ahead for future events. Here’s how:
Freezing Baked Cookies:
Allow your baked crinkle cookies to cool completely on a wire rack. Once fully cooled, transfer them in a single layer onto a baking sheet and freeze for about 30 minutes until they are partially frozen and firm. This flash-freezing prevents them from sticking together. Once firm, transfer the cookies into a freezer-safe gallon-size bag or an airtight container, layering with parchment paper if necessary. They will keep well in the freezer for up to 3 months. When ready to enjoy, simply thaw them at room temperature for an hour or two. A quick dusting of fresh powdered sugar can refresh their appearance before serving.
Freezing Cookie Dough:
If you prefer to bake fresh later, you can freeze the raw cookie dough. After chilling the dough as instructed, roll the dough into individual balls and coat them in both granulated and powdered sugar as usual. Place the coated dough balls on a parchment-lined baking sheet and freeze until solid, about 1-2 hours. Once firm, transfer the frozen dough balls to a freezer-safe bag or container, separating layers with parchment paper. Freeze for up to 3 months. When you’re ready to bake, you can bake them directly from frozen. Simply add an extra 2-4 minutes to the baking time, or until the edges are set and the tops are crinkled.
Explore More of Our Favorite…
More Festive Christmas Cookie Recipes
The joy of holiday baking extends beyond just one cookie! If you’ve fallen in love with these chocolate crinkles and are looking for more delicious cookie recipes to fill your holiday platters and warm your home, we have a fantastic selection that’s perfect for the season. Each recipe is crafted to bring joy and deliciousness to your festive celebrations:
- Chewy Ginger Cookies: A spiced classic that perfectly captures the essence of winter holidays, with a delightful chewiness and warm ginger notes.
- Almond Flour Sugar Cookies: A healthier, gluten-free twist on the traditional sugar cookie, perfect for cutting into festive shapes and decorating.
- Classic Snickerdoodles: These soft, tangy, and cinnamon-sugar coated cookies are a timeless favorite that everyone loves.
- White Chocolate Cranberry Oatmeal Cookies: A delightful combination of hearty oats, sweet white chocolate, and tart cranberries, offering a wonderful texture and festive flavor profile.
Each of these recipes is designed to be approachable and rewarding, ensuring your holiday baking is both fun and delicious. Happy baking!
Rating: 5 out of 5 stars (from 1 vote)
Chewy Chocolate Crinkle Cookies Recipe
Lee Funke
3 hrs 30 mins
10 mins
3 hrs 40 mins
24 cookies
Print Recipe
Ingredients
Dry Ingredients
- 4 oz. dark chocolate, chopped into pieces and divided (we used Ghirardelli Intense Dark 72%)
- ½ cup cocoa powder (50g)
- ½ cup all-purpose flour (70g)
- 1 teaspoon baking soda
- ½ teaspoon salt
- 2 oz. milk chocolate, chopped into pieces (e.g., Lindt chocolate bar)
- 1 cup (200g) brown sugar
Wet Ingredients
- 1/2 cup unsalted butter, softened and separated (1/2 cup = 1 stick or 113g)
- 2 large eggs, room temperature
- 1 teaspoon vanilla extract
Coating Ingredients
- ½ cup powdered sugar
- ½ cup granulated sugar
Instructions
- First, combine 3 oz. of the chopped dark chocolate pieces (reserve the remaining 1 oz. for later) and 2 tablespoons of softened butter in either a double boiler or a microwave-safe bowl. Gently melt the chocolate until it becomes glossy and smooth. Set this mixture aside to cool slightly.
- In a separate medium-sized bowl, whisk together the dry ingredients: all-purpose flour, cocoa powder, baking soda, and salt. Ensure all ingredients are well combined and there are no lumps.
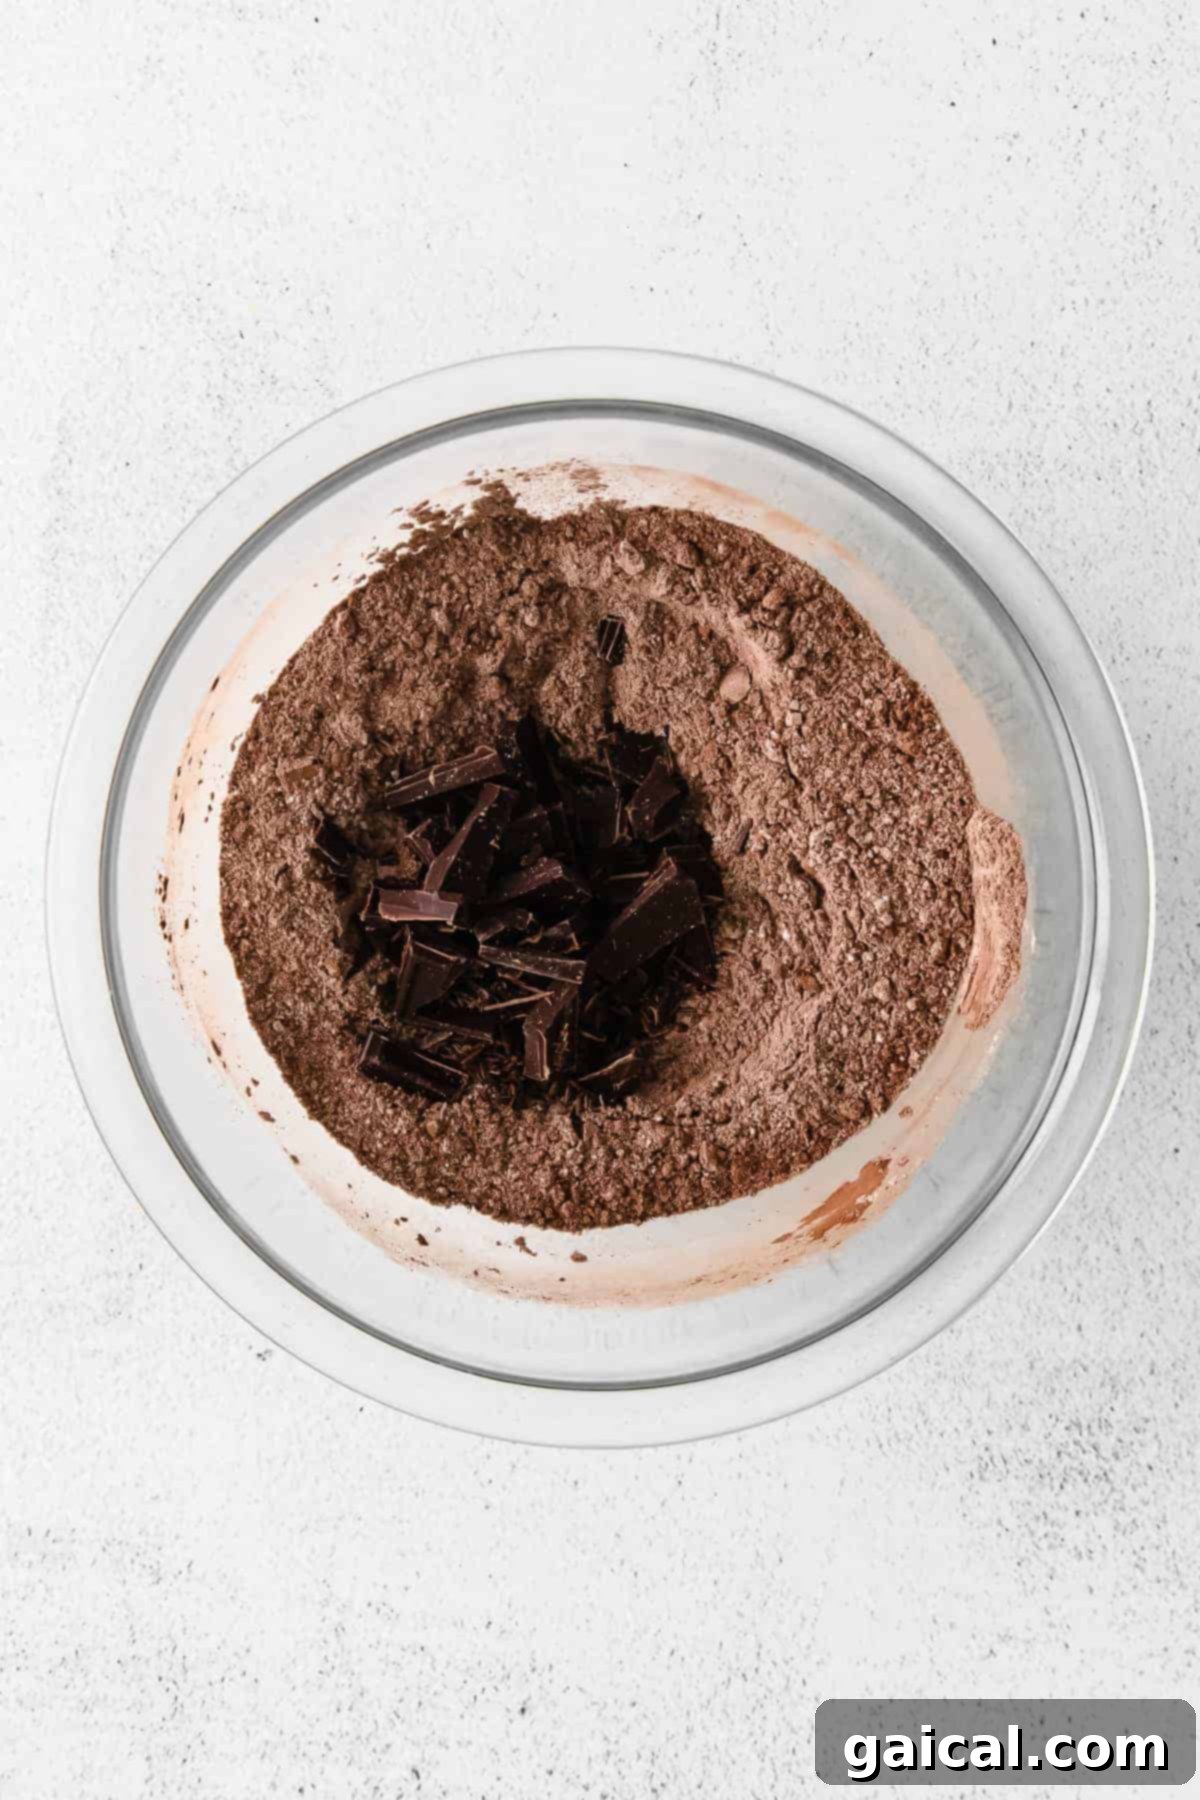
- Add the remaining 1 oz. of chopped dark chocolate pieces and all of the chopped milk chocolate pieces to the flour mixture. Toss them lightly to coat with the flour. This helps prevent them from sinking to the bottom of the dough. Set this bowl aside.
- In the bowl of a stand mixer fitted with the paddle attachment, combine the remaining softened butter and brown sugar. Beat on medium-high speed for 3-5 minutes. Continue beating until the mixture lightens in color, becomes creamy, and fluffy. Remember to scrape down the sides of the bowl periodically to ensure even mixing.
- While the butter and sugar are creaming, gently whisk the room-temperature eggs and vanilla extract together in a separate small bowl until the yolks and whites are fully combined.
- Slowly add the egg and vanilla mixture to the creamed butter and sugar in the stand mixer. Continue beating until the egg is fully incorporated and the entire mixture is light and fluffy.
- Reduce the mixer speed to low. Gradually add the dry ingredient mixture (flour, cocoa, baking soda, salt, and chocolate chunks) to the wet ingredients. Mix until just combined, being careful not to overmix. Scrape the bottom of the mixing bowl to ensure there are no hidden flour clumps.
- Finally, pour the slightly cooled melted chocolate mixture into the cookie dough. Mix on low speed until the melted chocolate is fully incorporated and evenly distributed throughout the dough, creating a uniformly rich chocolate dough.
- Transfer the finished cookie dough into an airtight container. Refrigerate the dough for a minimum of 2 hours. For superior texture, flavor development, and the best crinkle effect, chilling the dough overnight is highly recommended.
- Once ready to bake, remove the chilled cookie dough from the refrigerator and allow it to sit at room temperature for about 10 minutes to soften slightly, making it easier to scoop and roll.
- Preheat your oven to 350ºF (175ºC). Line a baking sheet with parchment paper to prevent sticking.
- While the dough softens, prepare your coating stations: place the granulated sugar in one shallow bowl and the powdered sugar in a separate shallow bowl.
- Using a tablespoon-sized cookie scoop, portion out the dough. Roll each scoop into a smooth ball between your palms.
- First, roll each dough ball generously in the granulated sugar, ensuring it’s completely coated. Then, transfer the sugar-coated ball to the powdered sugar bowl and roll it thoroughly until completely covered in a thick layer of powdered sugar.
- Place the double-coated dough balls onto the prepared baking sheet, ensuring they are spaced far enough apart (about 2 inches) as these cookies will spread a little during baking. Repeat until all the dough has been rolled and placed on the baking sheet.
- Bake in the preheated oven for 9-11 minutes. The cookies are done when the edges are set, the centers still look slightly soft, and prominent cracks have formed on the powdered sugar coating. Do not overbake to ensure they remain chewy.
- Remove the cookies from the oven and immediately transfer them to a wire cooling rack to cool completely. Enjoy your perfectly chewy and crinkled chocolate cookies!
Tips & Notes
Melting Chocolate Instructions
- In the microwave: Add the chopped dark chocolate and 2 tablespoons of butter to a microwave-safe bowl. Heat on high for 30 seconds, then remove and stir. Repeat this process in 15-second intervals, stirring thoroughly after each, until the chocolate is fully melted and glossy. Be careful not to overheat.
- In a double boiler: Place the chopped dark chocolate and 2 tablespoons of butter in the top bowl of a double boiler. Fill the bottom pan with about 1 cup of water, ensuring the top bowl does not touch the water. Heat over medium-low heat, stirring the chocolate periodically until it has melted and become glossy and smooth.
Other Essential Notes
- Mise en Place is Key: Before you begin, measure out all your ingredients. This ensures a smooth baking process and prevents you from realizing you’re missing something mid-recipe.
- Accurate Flour Measurement: For consistent results, we recommend weighing your flour using a kitchen scale (70g for ½ cup). If measuring by volume, spoon the flour into your measuring cup and then level it off to avoid packing it, which can lead to dry cookies.
- Creaming Butter and Sugar: Don’t rush this step. Be sure to beat the butter and sugars long enough (3-5 minutes) until the mixture is visibly lighter in color and fluffy. This incorporates air, which contributes to the cookies’ texture.
- The Importance of Chilling: As emphasized, do not skip refrigerating the cookie dough. This step is twofold: it hardens the dough to prevent excessive spreading in the oven, and it allows the flour to fully hydrate, resulting in moist, chewy cookies with a developed flavor.
- Pinch-Time Freezing: If time is truly of the essence, you can place the dough in the freezer for 30 minutes. However, for the best outcome in terms of texture and crinkle definition, we still highly recommend refrigerating the dough for at least 3 hours or, ideally, overnight.
Watch the Recipe
While the original video player is not included, you can find many helpful video tutorials online demonstrating the process of making Chocolate Crinkle Cookies. Look for videos that emphasize dough chilling and the double-sugar coating technique for best results.
Nutrition Information (per serving)
Calories: 167 kcal
Carbohydrates: 25 g
Protein: 2 g
Fat: 7 g
Fiber: 1 g
Sugar: 19 g
Nutrition information is automatically calculated and should only be used as an approximation. Actual nutritional values may vary based on ingredients used and preparation methods.
🍪
Love these cookies? Leave a comment below!
Don’t forget to tag your beautiful creations on social media with the hashtag #fitfoodiefinds – we’d absolutely love to see your delicious results!