
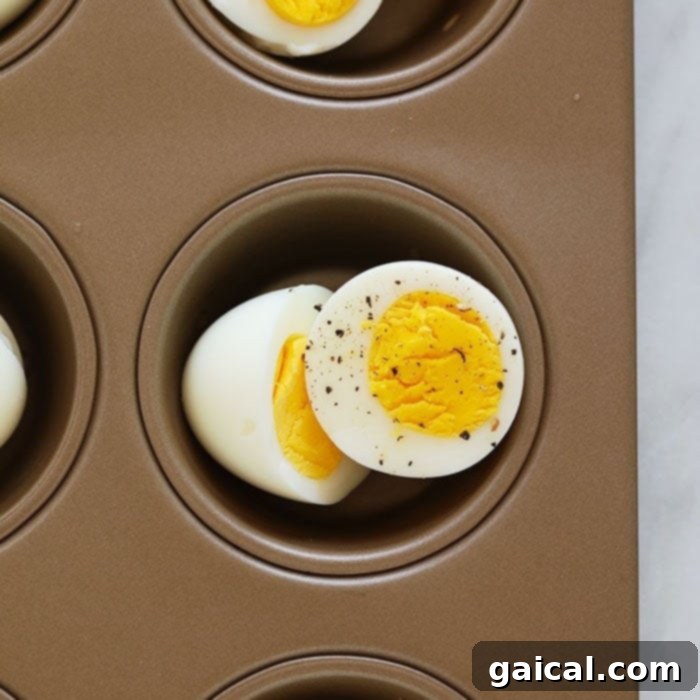
Are you a fan of perfectly cooked hard-boiled eggs? We certainly are! While there are many popular methods for preparing this versatile protein, we’re here to share a game-changer: making hard-boiled eggs in the oven. This ingenious technique, often referred to as baked hard-boiled eggs, simplifies meal prep and guarantees consistent results every time.
Imagine effortlessly preparing a dozen (or more!) hard-boiled eggs in one go, ready to transform into quick breakfasts, nutrient-packed egg salads, or wholesome snacks throughout your busy week. Say goodbye to the fuss of boiling water, cracked shells, and constant monitoring. Let’s delve into everything you need to know about baking hard-boiled eggs for maximum convenience and deliciousness.
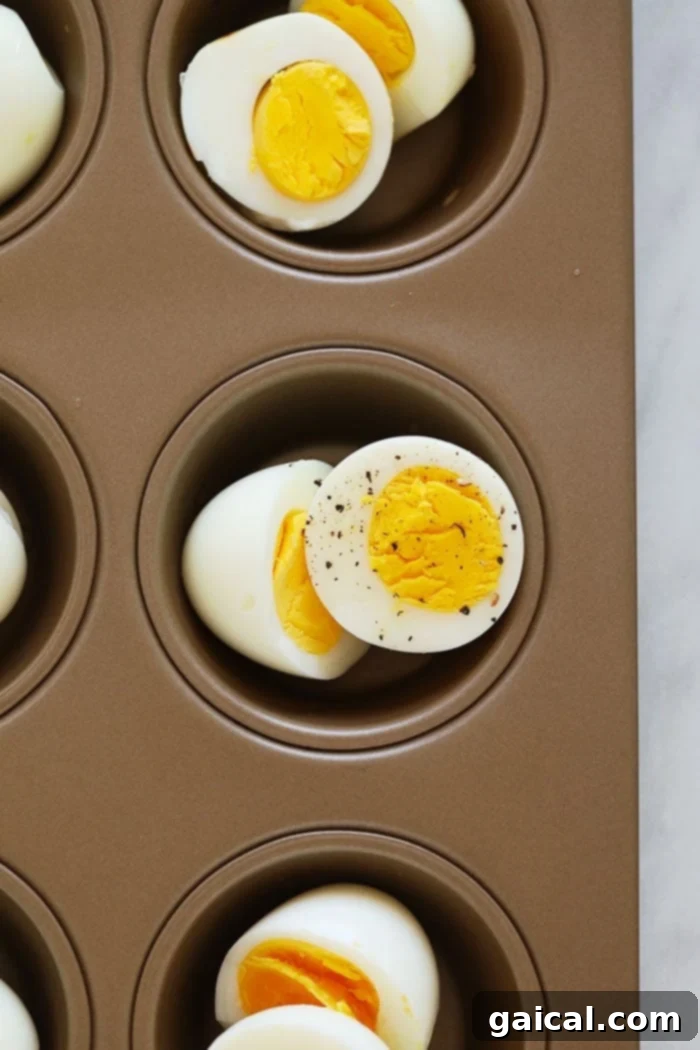
Eggs: A Nutritional Powerhouse & Culinary Delight
At our core, we champion eggs for their incredible versatility and nutritional benefits. They are a staple in countless healthy diets and for good reason! Eggs are:
- An excellent source of high-quality protein: Essential for muscle repair, growth, and satiety.
- Rich in essential vitamins and minerals: Including Vitamin D, B vitamins, choline, and selenium.
- Absolutely delicious: Their rich flavor and creamy texture make them a satisfying addition to any meal.
- Incredibly versatile: Easy to incorporate into meals for breakfast, lunch, dinner, or a quick snack.
We’ve explored numerous ways to prepare eggs, from traditional baked eggs in the oven to modern techniques like Instant Pot hard-boiled eggs and even cheesy sous vide egg bites. Each method offers unique advantages, but for consistently perfect, hands-off hard-boiled eggs, the oven truly shines.
Baked Hard-Boiled Eggs: Unparalleled Ease and Convenience
Today, our focus is squarely on the simplicity and effectiveness of making hard-boiled eggs in the oven. You might be wondering, “Why bother with the oven when I can just boil them on the stovetop or use my Instant Pot?” The answer lies in a few compelling benefits that make this method a favorite for busy individuals and meal preppers alike:
- Foolproof Results: This method is incredibly forgiving, virtually eliminating the risk of cracked shells, green yolks, or undercooked whites. You’ll achieve perfectly cooked eggs every time.
- Completely Hands-Off: Once the eggs are in the oven, your work is done. There’s no need to monitor water levels, adjust heat, or worry about overflowing pots. This frees up your time to focus on other tasks.
- Ideal for Batch Prep: Whether you need a few eggs or a large quantity for healthy egg salad, deviled eggs, or a week’s worth of snacks, the oven allows you to bake 12 eggs per muffin tin (or more if your oven accommodates multiple tins!) simultaneously. It’s the ultimate efficiency hack for meal prepping.
We’ve meticulously tested various bake times to ensure you can achieve your desired yolk consistency, from slightly jammy to fully firm. This guide will help you customize your baked hard-boiled eggs to your exact preference.
Your Top Questions About Baked Hard-Boiled Eggs, Answered
We often get asked about the specifics of baking hard-boiled eggs, so let’s address some common queries to help you master this technique.
What is the ideal oven temperature for hard-boiled eggs?
For perfectly baked hard-boiled eggs, your oven should be preheated to 325ºF (160ºC). This moderate temperature allows the eggs to cook gently and evenly, preventing rubbery whites or discolored yolks. It’s crucial to place the eggs into a preheated oven to ensure consistent cooking from the start.
What are the best uses for hard-boiled eggs?
Hard-boiled eggs are incredibly versatile! They make a fantastic, protein-rich breakfast on the go or an easy, satisfying snack any time of day. Beyond that, they are a star ingredient in countless recipes:
- Classic Egg Salad: A timeless favorite for sandwiches or wraps.
- Deviled Eggs: The ultimate party appetizer.
- Salad Toppings: Elevate any green salad, especially a Cobb salad, with sliced or chopped hard-boiled eggs.
- Avocado Toast: Add a layer of protein and texture to your morning toast.
- Noodle Dishes: A sliced hard-boiled egg is a traditional and delicious topping for ramen or other noodle bowls.
- Protein Boxes: Combine with cheese, fruit, and nuts for a balanced and portable meal.
- Curries & Stews: Whole hard-boiled eggs can be added to many savory dishes for extra substance.
Having a batch of baked hard-boiled eggs on hand makes it incredibly easy to incorporate healthy protein into your daily meals.
How long can hard-boiled eggs be stored in the refrigerator?
Meal prepping hard-boiled eggs is one of their greatest advantages. You can store them in the refrigerator for up to one week. Whether you prefer to keep them with their shells on or peel them beforehand is a matter of personal preference. If storing peeled eggs, place them in an airtight container (or even in stasher bags or meal prep containers filled with a little water to prevent drying) to maintain freshness and prevent odor transfer. Always ensure the eggs are completely cooled before storing. For more detailed tips on egg storage, resources like Incredible Egg offer great advice!
How to Make Hard-Boiled Eggs in the Oven: The Easy Method
Making hard-boiled eggs in the oven is truly as simple as 1-2-3. You only need a few basic items:
- Large Eggs: Straight from the refrigerator.
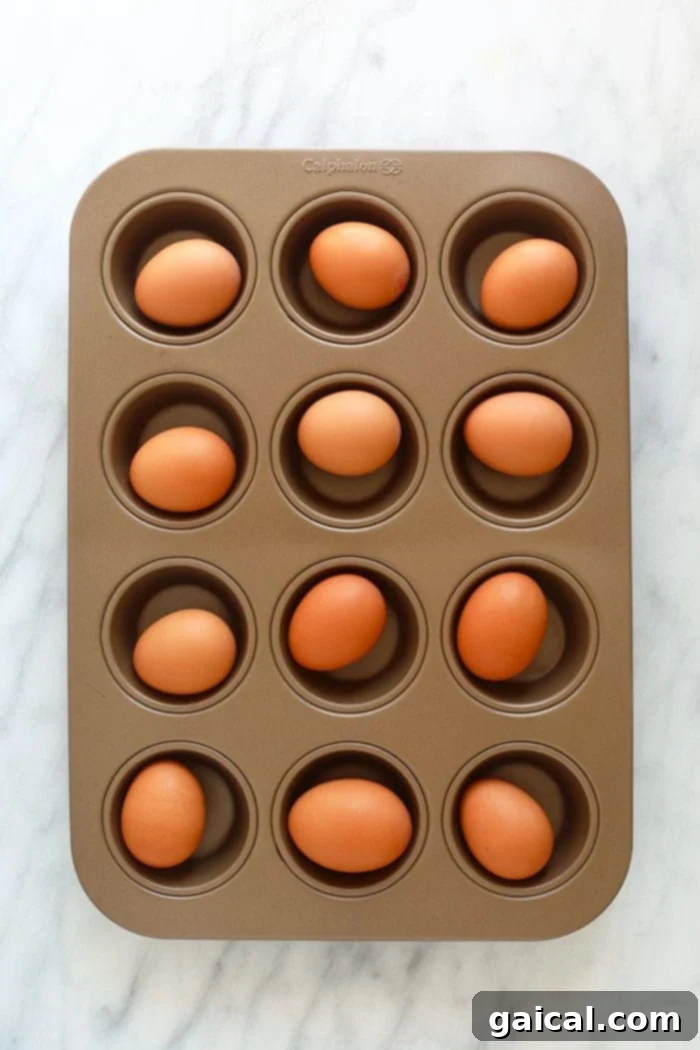
- A Muffin Tin: This is our preferred vessel, as it cradles each egg securely, preventing them from rolling around or cracking against each other.
- A Large Bowl: For the crucial ice bath.
- Ice and Water: To halt the cooking process effectively.
If you don’t have a muffin tin, a regular baking sheet or even a cake pan can work, though the muffin tin provides the best stability. The key is to prevent the eggs from moving too much during baking.
The Simple Process:
- Preheat Your Oven: Set your oven to 325ºF (160ºC). A consistently heated oven is vital for even cooking.
- Arrange the Eggs: Carefully place chilled large eggs into each cup of a muffin tin. You can make as many as your tin allows, typically 6 or 12. Using cold eggs directly from the fridge is essential for optimal results and consistent cooking times.
- Bake to Perfection: Place the muffin tin in the preheated oven and bake for 25-32 minutes, depending on your desired yolk consistency (more on this below!).
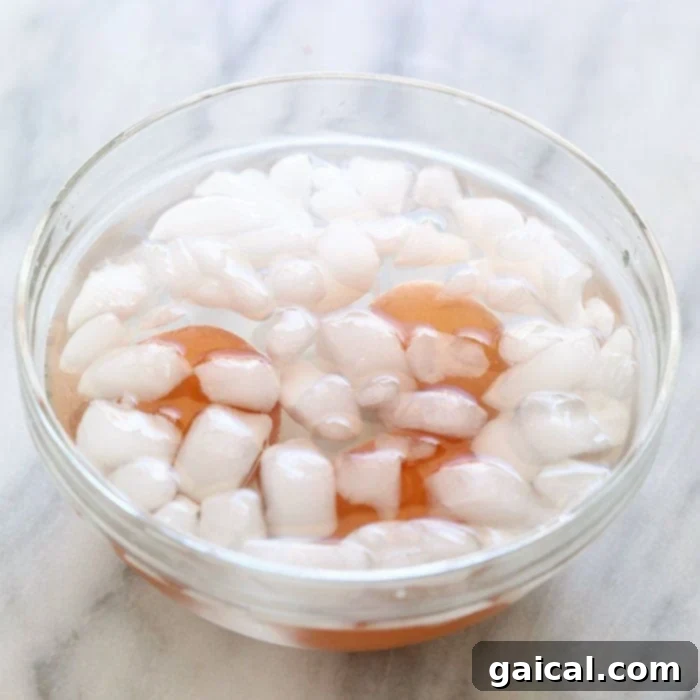
- Prepare an Ice Bath: While the eggs are baking, fill a large bowl with cold water and plenty of ice cubes. This ice bath is a critical step, as it immediately stops the cooking process once the eggs are removed from the oven.
- Chill Immediately: As soon as the baking time is complete, carefully remove the muffin tin from the oven. Using tongs or a slotted spoon, transfer the hot eggs directly into the prepared ice water bath. Let them chill for at least 10 minutes (preferably 15 minutes) to cool completely. This rapid cooling helps prevent the greenish ring around the yolk and makes peeling significantly easier.
- Store or Enjoy: Once thoroughly chilled, remove the eggs from the ice bath. You can either peel them immediately or store them unpeeled in an airtight container in the refrigerator for up to one week.
Achieving Your Perfect Yolk Consistency
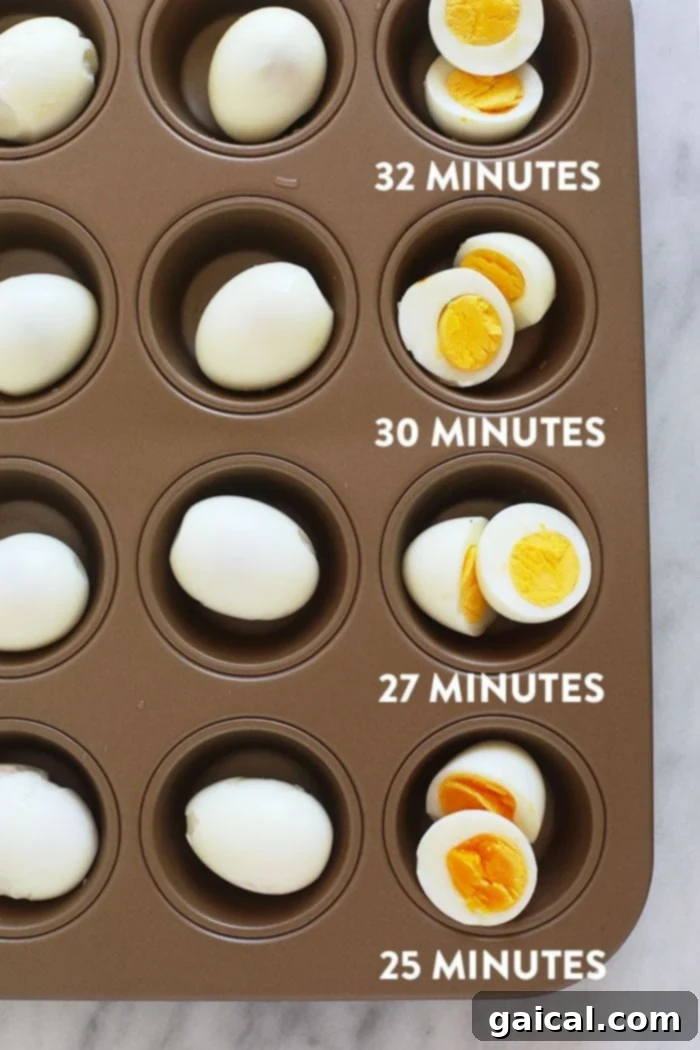
Whether you prefer a slightly jammy yolk or a completely firm, chalky texture, the oven method allows for precise control. We’ve tested the following timings to help you achieve your ideal hard-boiled egg:
25 Minutes: This timing yields a soft, beautifully jammy yolk with a vibrant, deep orange color. While absolutely delicious, eggs cooked for 25 minutes can be a little harder to peel. Ensure they get a good, long soak in the ice bath to assist with this. If you appreciate a hard-boiled egg that still has a hint of moisture and a delicate shine from the yolk, 25 minutes is your sweet spot.
27 Minutes: At 27 minutes, you’ll achieve a perfectly cooked, moist yellow yolk that is fully set. These eggs are still wonderfully creamy without being runny. Similar to the 25-minute eggs, they might require a bit more patience during peeling, so a thorough ice bath is crucial. For an egg yolk that is fully cooked but retains a delightful, moist texture, 27 minutes is an excellent choice.
30 Minutes: Baking for 30 minutes results in a fully cooked yolk with no discernible moisture, yet it remains tender, not dry. A significant bonus of this cooking time is that the eggs tend to be much easier to peel. The egg white will have firmed up a bit more, and the shell separates from the egg with far less effort. If you desire a completely cooked egg with zero chance of any liquid yolk, 30 minutes is the optimal time for you.
32 Minutes: For those who prefer their hard-boiled eggs absolutely firm with no hint of a wet yolk, 32 minutes is the perfect duration. These eggs have a chalky, crumbly consistency that many find ideal for mashing into egg salad or deviled eggs. A major advantage of baking a hard-boiled egg for 32 minutes is the remarkably easy peel. We consistently found that the shells of 32-minute eggs came off with the least resistance compared to all other timings.
Hard-Boiled Egg Tips & Tricks for Success
Whether you’re a novice in the kitchen or a seasoned home cook, there’s always a new trick to learn about making the perfect hard-boiled eggs. These tips will help you achieve consistent, easy-to-peel results every time you bake eggs in the oven.
Always Set a Timer
Precision is paramount when cooking eggs, especially for hard-boiling. Regardless of whether you’re baking them in the oven, simmering them on the stovetop, or using an Instant Pot, keeping accurate track of the cooking duration is the key to achieving your desired yolk consistency. Remember, eggs continue to cook with residual heat after they’re removed from the oven. To prevent overcooking and that dreaded greenish-gray ring around the yolk, immediately transfer them to an ice bath.
The Ice Bath is Non-Negotiable
The ice bath serves two critical purposes: it immediately stops the cooking process, and it significantly aids in the peeling process. The rapid change in temperature causes the egg whites to contract, creating a tiny gap between the egg and the shell, which makes peeling a breeze. To prepare, simply fill a large bowl with plenty of ice (about 1/2 to 1 cup per dozen eggs) and then add cold water. Place your hot, freshly baked eggs into this bath as soon as they come out of the oven and let them chill for at least 10-15 minutes.
Make Peeling Effortless
The most common complaint about hard-boiled eggs is how frustrating they can be to peel. While the ice bath is your primary tool, here are a few additional techniques to ensure a smooth peeling experience:
- Tap and Roll: Gently tap the wider end of the egg on a hard surface to crack the shell, then lightly roll the egg between your palms to create an extensive network of cracks.
- Peel Under Running Water: If you’re still struggling, try peeling the egg under a slow trickle of cold water. The water can help loosen the shell and wash away small pieces, making it easier to remove stubborn bits.
- Use Slightly Older Eggs: While we recommend using cold eggs for baking, slightly older eggs (not freshly laid) tend to peel more easily than very fresh ones due to changes in their pH balance.
Delicious Ways to Enjoy Your Hard-Boiled Eggs
Once you’ve mastered oven-baked hard-boiled eggs, a world of culinary possibilities opens up. They are a fantastic addition to various meals and snacks. Here are some of our favorite ways to enjoy them:
- Healthy Egg Salad: Mix chopped hard-boiled eggs with Greek yogurt or light mayonnaise, mustard, celery, and herbs for a lighter, flavorful egg salad. Try our Healthy Egg Salad recipe!
- Tuna Egg Salad: Combine the protein power of tuna with hard-boiled eggs for a super satisfying meal. Explore our Tuna Egg Salad.
- Baked Potato Salad: Elevate your potato salad with the creamy texture and rich flavor of hard-boiled eggs. Check out our Healthy Baked Potato Salad.
- On Avocado Toast: Slice or mash hard-boiled eggs on top of your avocado toast for an extra boost of protein and healthy fats.
- Quick Snack with Hummus: Enjoy them plain or with a dollop of hummus for a balanced, energizing snack.
- Protein Power Bowl: Add sliced hard-boiled eggs to your grain bowls or salads for a complete and nutritious meal.
- Deviled Eggs: The classic party appetizer is always a hit, especially with beautifully baked eggs.
- Breakfast Bento Box: Pair with fresh fruit, nuts, and a slice of whole-grain bread for a convenient and healthy breakfast.
Proper Storage for Freshness
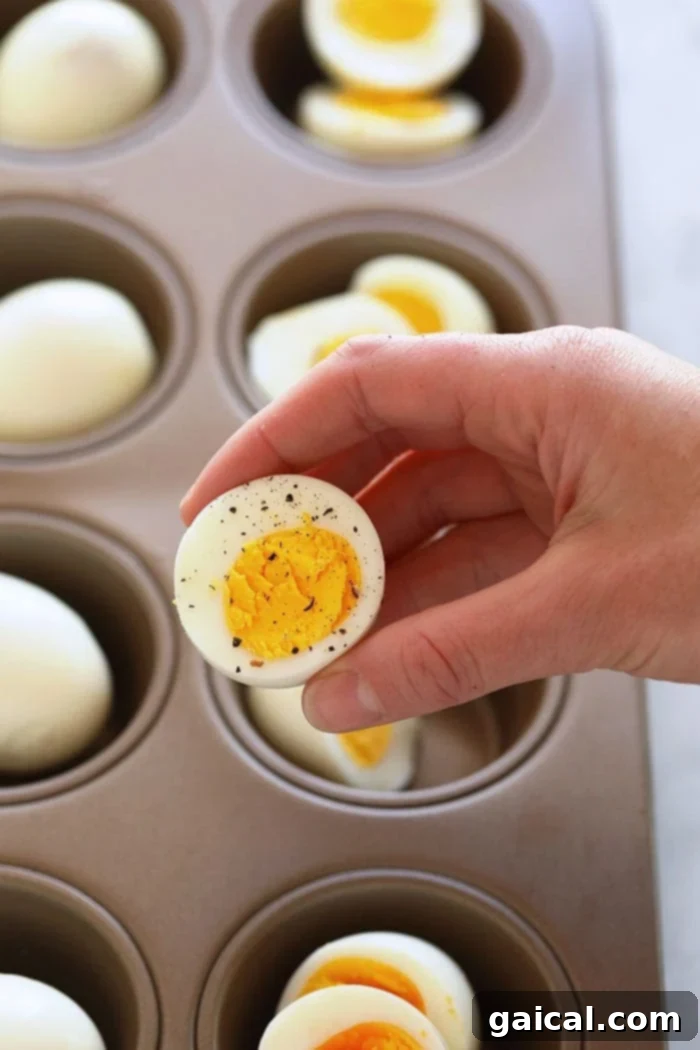
To maximize the shelf life and freshness of your oven-baked hard-boiled eggs, proper storage is key. You can store them peeled or unpeeled, depending on your preference and planned use. If you choose to peel them immediately, place them in an airtight container in the refrigerator. If storing unpeeled, an egg carton or airtight container works well. Due to the natural sulfur compounds, hard-boiled eggs can sometimes emit a slight “eggy” odor, so an airtight container is always recommended to prevent this smell from affecting other foods in your fridge. Stored correctly, hard-boiled eggs will remain fresh and delicious for up to one week in the refrigerator.
More of our Favorite Egg Recipes…
More Egg Recipes & Inspiration
- How to Bake Eggs In the Oven (Different Style)
- Instant Pot Egg Bites
- Cheesy Sous Vide Egg Cups
- Egg in a Frame
- 4 Healthy Egg Cup Recipes
Easy Hard-Boiled Eggs (Baked in Oven)
Making hard-boiled eggs in the oven is a foolproof, hands-off method for perfect results every time, ideal for meal prep!
By: Linley Hanson
Cook: 25-32 mins
Total: 30-37 mins
Servings: 12 eggs
Ingredients
- 12 large eggs, chilled (or however many you want to make!)
- 4 cups ice
- 8 cups water
Instructions
- First, preheat your oven to 325ºF (160ºC).
- Place 12 large eggs (straight out of the fridge) into a muffin tin. You can use two muffin tins if making more than 6-8 eggs to ensure they don’t touch and cook evenly.
- Bake at 325ºF for your desired duration:
- 25 minutes: Soft, jammy consistency, often harder to peel.
- 27 minutes: Moist, fully cooked yolk, still a bit challenging to peel.
- 30 minutes: Fully cooked yolk, easier to peel.
- 32 minutes: Hard, chalky consistency, easiest to peel.
- While your eggs are baking, prepare your ice water bath. Fill a large bowl with about 8 cups of cold water and then add 4 cups of ice.
- Once your eggs are done baking, remove the muffin tin from the oven and immediately transfer the hot eggs into the ice water bath. Let them chill for at least 10 minutes (preferably 15 minutes). This step is crucial for stopping the cooking process and making the eggs easier to peel, while also preventing the yolk from developing a green ring.
- After chilling, remove the eggs from the ice bath. You can either store them unpeeled in the fridge for up to one week or peel and enjoy them immediately.
- Store peeled hard-boiled eggs in an airtight container in the fridge for up to 3-5 days. Unpeeled eggs last up to a week.
Watch Our Video
For a visual guide on how to perfectly bake hard-boiled eggs in the oven, watch our instructional video!
Nutrition
Calories: 78 kcal, Carbohydrates: 0 g, Protein: 6 g, Fat: 5 g, Fiber: 0 g, Sugar: 0 g
Nutrition information is automatically calculated, so should only be used as an approximation.
Love this recipe? Leave a comment below!
Don’t forget to tag your posts on social media with the hashtag #fitfoodiefinds, we’d love to see what you’re up to!