
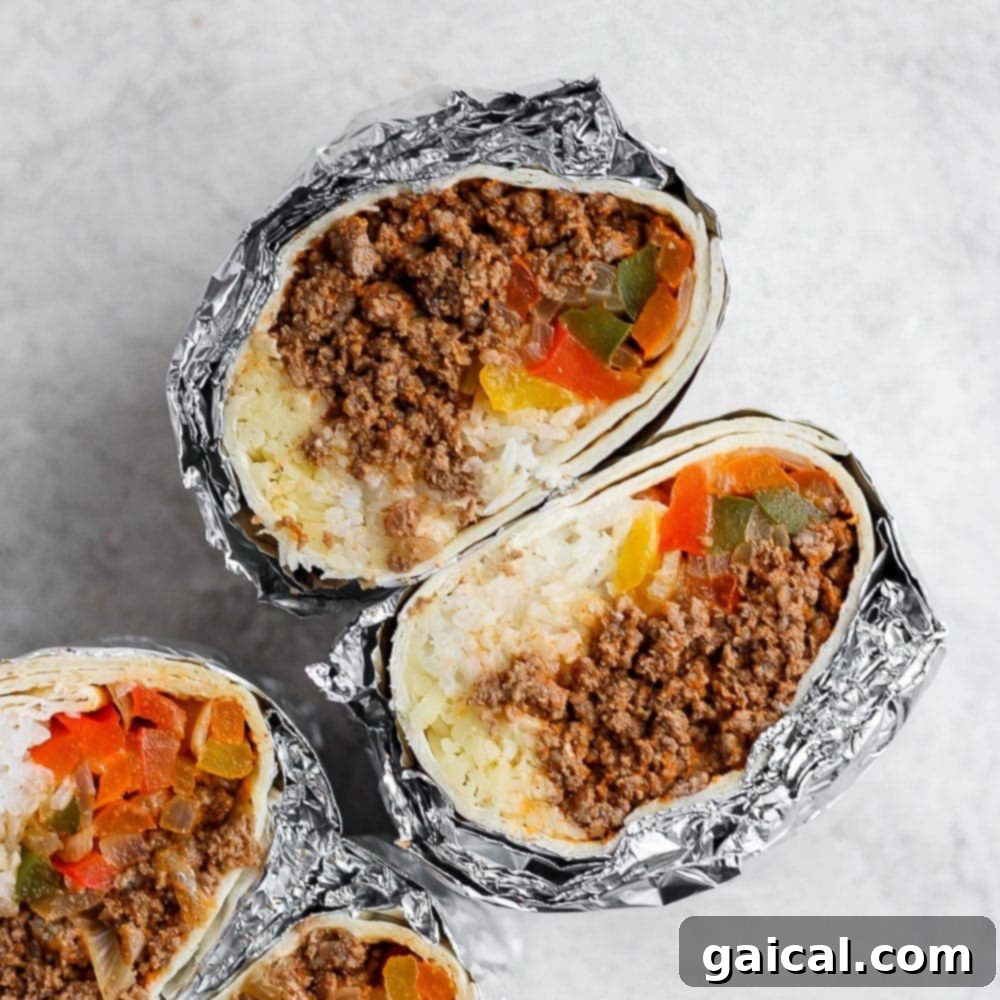
Homemade Make-Ahead Freezer Burritos: Your Ultimate Meal Prep Solution
Tired of scrambling for lunch ideas every morning? These **homemade frozen burritos** are your culinary lifesaver! Perfectly crafted for convenience and flavor, they offer a delicious solution for busy weekdays. Forget store-bought alternatives; our recipe empowers you to create healthier, more satisfying meals right in your own kitchen.
Embrace the power of **meal prep** with these incredible **make-ahead burritos**. They’re not just a meal; they’re a time-saving strategy, ensuring you always have a wholesome and delicious option ready when hunger strikes. For more fantastic freezer-friendly ideas, explore our other popular creations like Fajita Breakfast Burritos and Make-Ahead Breakfast Burritos.
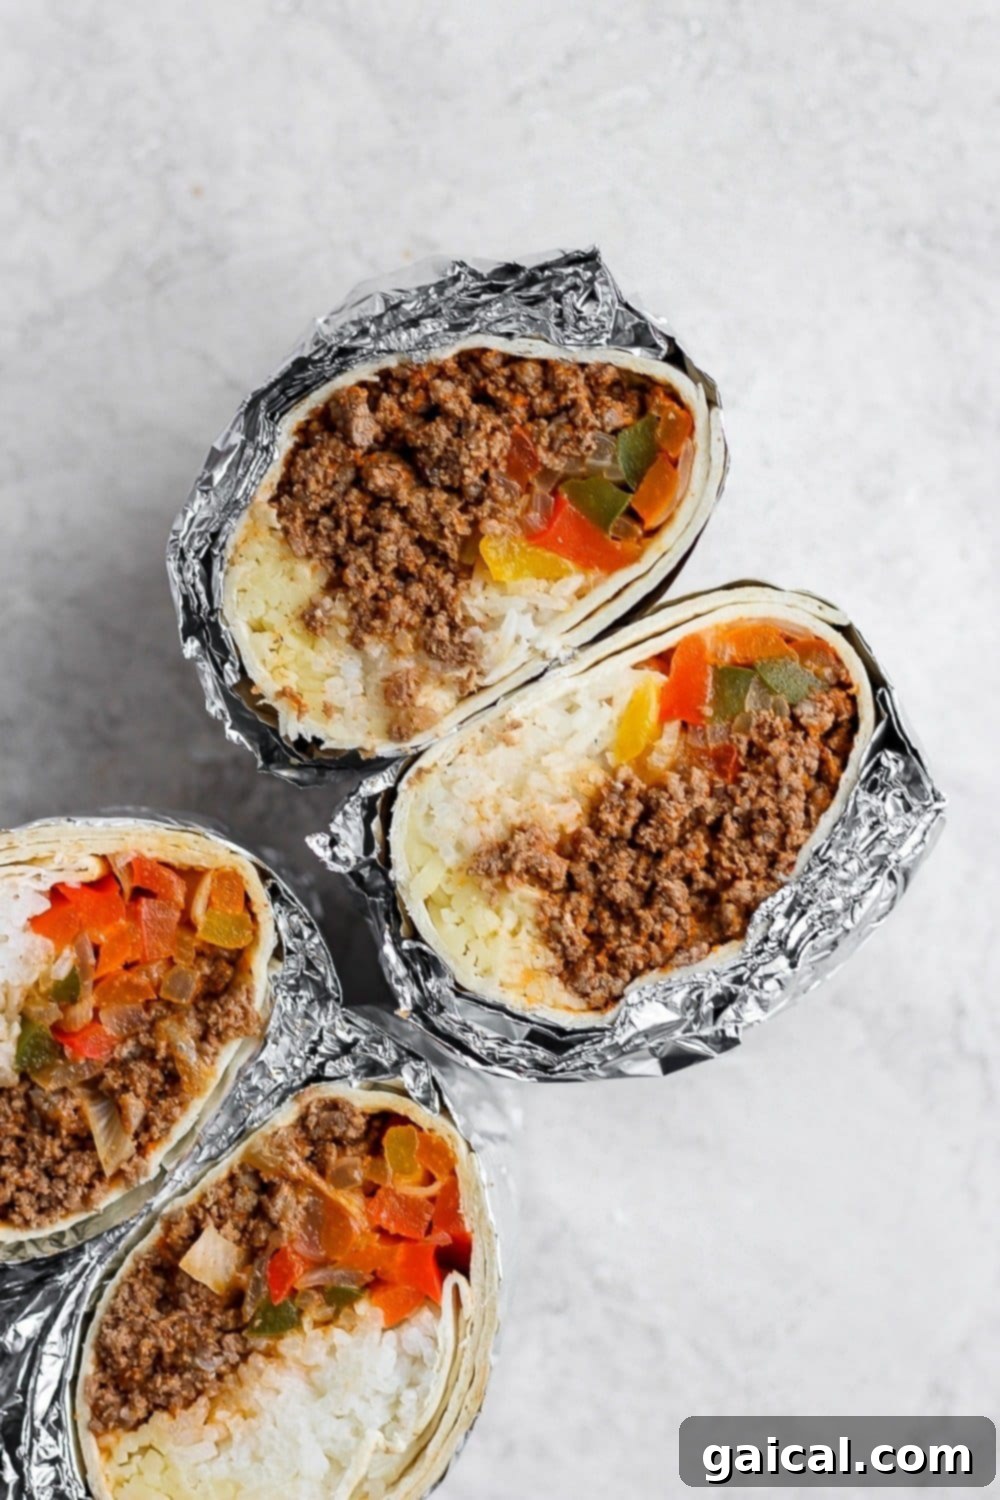
Imagine dedicating just one hour of your day to create 16 wholesome and flavorful **homemade frozen burritos**. This recipe features tender ground beef, an abundance of vibrant roasted vegetables, and fluffy white rice, all wrapped in a soft flour tortilla. This isn’t just a recipe; it’s the ultimate hack for **lunch meal prep**, promising stress-free mornings and satisfying midday meals.
Amazing Lunch Meal Prep: Conquer Your Weekdays
There’s nothing quite as frustrating as waking up to the dreaded “what to pack for lunch” dilemma. That’s precisely why we champion make-ahead meals like these burritos. They transform your mealtime routine, making it effortless to grab a nutritious and delicious lunch for work, school, or even quick dinners at home. The beauty of these burritos lies in their freezer-friendly nature; they’re simple to prepare in batches and equally simple to thaw and reheat, providing consistent, healthy options throughout your busy week.
Beyond convenience, incorporating homemade freezer burritos into your routine offers numerous benefits. You gain full control over the ingredients, ensuring quality and catering to specific dietary needs. This approach also significantly reduces food waste, as you’re using fresh ingredients efficiently and preserving meals for future consumption. Plus, it’s a fantastic way to save money by avoiding expensive takeout or pre-packaged meals.
If you love the idea of freezer-friendly meals, you’ll also appreciate these other recipes perfect for batch cooking and freezing:
- Beef Chili Recipe (freeze in individual portions for ultimate convenience!)
- Crockpot Lasagna (a classic comfort food that freezes beautifully)
- Instant Pot Sweet Potato Curry (a flavorful, plant-based option for quick thawing)
Are Frozen Burritos Unhealthy? The Homemade Advantage
The question often arises: are frozen burritos unhealthy? While many commercially available frozen burritos can be loaded with excessive sodium, unhealthy fats, and preservatives, making your own **make-ahead freezer burritos** at home tells a different story entirely. When you take charge of the ingredients, you empower yourself to create a meal that is not only delicious but also significantly healthier.
By preparing burritos from scratch, you can consciously select lean protein sources, pack them full of fresh vegetables, and control the amount of cheese and seasonings. This level of customization allows you to reduce sodium intake, avoid artificial additives, and tailor the nutritional profile to your preferences. Whether you’re aiming for high protein, lower fat, or more fiber, homemade burritos provide the flexibility to meet your health goals without compromising on taste or convenience. It’s a smart, simple way to ensure your grab-and-go meals are genuinely good for you.
Crafting Your Perfect Ground Beef Burritos: A Step-by-Step Guide
Creating these flavorful **ground beef burritos** is a straightforward process, broken down into manageable steps that maximize efficiency. We’ll start with the veggies, move to the rice, and finally prepare the seasoned ground beef, all designed to come together seamlessly for your meal prep session.
Step 1: The Flavorful Foundation – All the Veggies
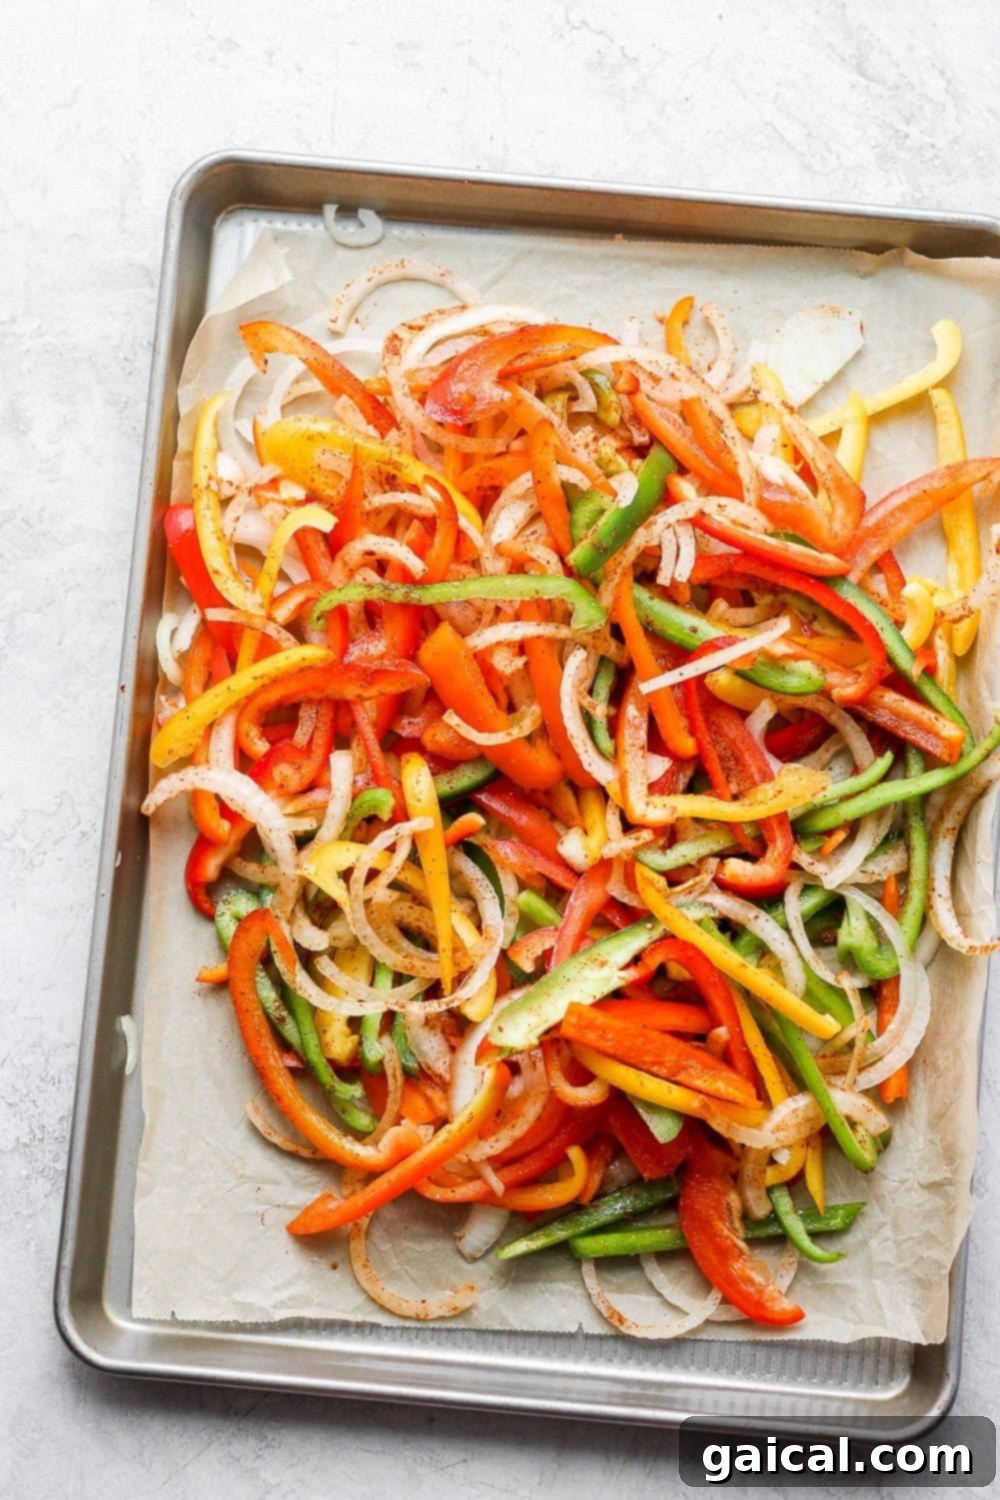
The vibrant and delicious vegetables in these burritos draw inspiration from classic fajitas – think about those irresistible sautéed peppers and onions you get at your favorite Mexican restaurant! For this recipe, we keep things simple yet incredibly flavorful with bell peppers and onions, enhancing them with a generous dash of taco seasoning. This method not only infuses great taste but also creates a beautiful mosaic of colors within your burrito.
Feel free to get creative with your choice of bell peppers; we opted for a colorful medley of three different shades along with a large yellow onion, but any combination will work wonderfully. The key here is to thinly slice them for even cooking and optimal texture.
Method: Roasting for Superior Flavor and Convenience
Instead of the traditional pan-frying, we’ve chosen to roast our vegetables on a baking sheet. This method is a game-changer for several reasons:
- Hands-Free Cooking: Once the veggies are in the oven, you’re free to prepare the other components of your burritos on the stovetop, saving you precious time and effort.
- Enhanced Flavor: Roasting caramelizes the natural sugars in the vegetables, bringing out a depth of flavor that pan-frying can’t quite match. The edges get slightly charred and smoky, adding a delightful complexity.
- Perfect Texture: Roasted vegetables tend to have a tender-crisp texture that holds up well in a burrito, even after freezing and reheating.
To prepare, simply toss your thinly sliced bell peppers and onions with olive oil and **taco seasoning**. Spread them evenly on a baking sheet and roast at 375ºF (190ºC) for 20-25 minutes, or until they become tender and slightly translucent. Set them aside to cool slightly before assembling your burritos.
For even more vegetable variety, consider adding other quick-roasting or sautéing options like corn, black beans (pre-cooked and rinsed), zucchini, or mushrooms. This is your chance to really boost the nutritional content and customize the flavors!
Step 2: The Hearty Base – Fluffy Rice
With your aromatic vegetables roasting in the oven, it’s the perfect time to get your rice cooking. While we’ve opted for classic white rice in this recipe for its mild flavor and quick cooking time, feel free to personalize your burritos by choosing any grain you prefer. The beauty of homemade meal prep is its adaptability!
Here are some fantastic grain options to consider, each offering a unique texture and nutritional profile:
- White Rice: A neutral base that absorbs flavors beautifully. Our stovetop method yields perfectly fluffy results.
- Brown Rice: Offers a nuttier flavor and more fiber. Try our cilantro lime brown rice for an extra zesty kick!
- Quinoa: A complete protein and gluten-free option, adding a light, fluffy texture.
- Cauliflower Rice: For a low-carb or vegetable-boosted alternative, cauliflower rice is an excellent choice.
- None at all!: If you prefer a meat-and-veggie-only burrito, simply omit the grain entirely.
Method: Achieving Perfect Rice
We’ll be preparing our rice on the stovetop, a reliable method for consistently fluffy results. Combine 1 cup of long-grain white rice with 2.25 cups of water in a small pot. Bring it to a rolling boil over medium-high heat. Once boiling, immediately reduce the heat to low, cover the pot tightly, and let it simmer for approximately 15-20 minutes. The rice is done when all the water has been absorbed and the grains are tender. Resist the urge to lift the lid during cooking! Once cooked, remove from heat and let it rest, covered, for another 5 minutes before fluffing with a fork. This resting period allows the steam to redistribute, resulting in individual, tender grains.
Alternatively, if you’re a fan of kitchen gadgets, you can easily cook any of these grains in an Instant Pot or a dedicated rice cooker, following the manufacturer’s instructions. Consider adding a pinch of salt or a splash of lime juice to your rice for an extra layer of flavor that complements the burrito fillings.
Step 3: The Savory Centerpiece – Perfectly Seasoned Ground Beef
While your vegetables are roasting to perfection and your rice is gently simmering, it’s the ideal moment to prepare the star of our burrito filling: the savory ground beef. We’ve taken a “sneaky” shortcut here, adapting our incredibly popular ground beef taco meat recipe because it’s simply that good! This ensures your burrito meat is packed with flavor, requiring minimal effort.
You only need a few key ingredients to transform a pound of high-quality ground beef into the ultimate taco or **burrito meat** that will make your freezer burritos irresistible. Quality beef forms the foundation, ensuring a rich and satisfying texture.
Here’s what you’ll need for our signature seasoned beef:
- Ground Beef: We recommend 2 lbs of 85% lean ground beef for the best balance of flavor and texture, ensuring it’s not too greasy but still juicy.
- Tomato Paste: A secret ingredient that adds a concentrated umami depth and helps create a rich, slightly thickened sauce for the meat.
- Taco Seasoning: The flavor powerhouse! We highly recommend using our homemade taco seasoning for superior taste and control over ingredients, but your favorite store-bought brand will also work.
- Water: To help the seasoning blend and create a moist, flavorful sauce.
Method: Quick and Easy Stovetop Preparation
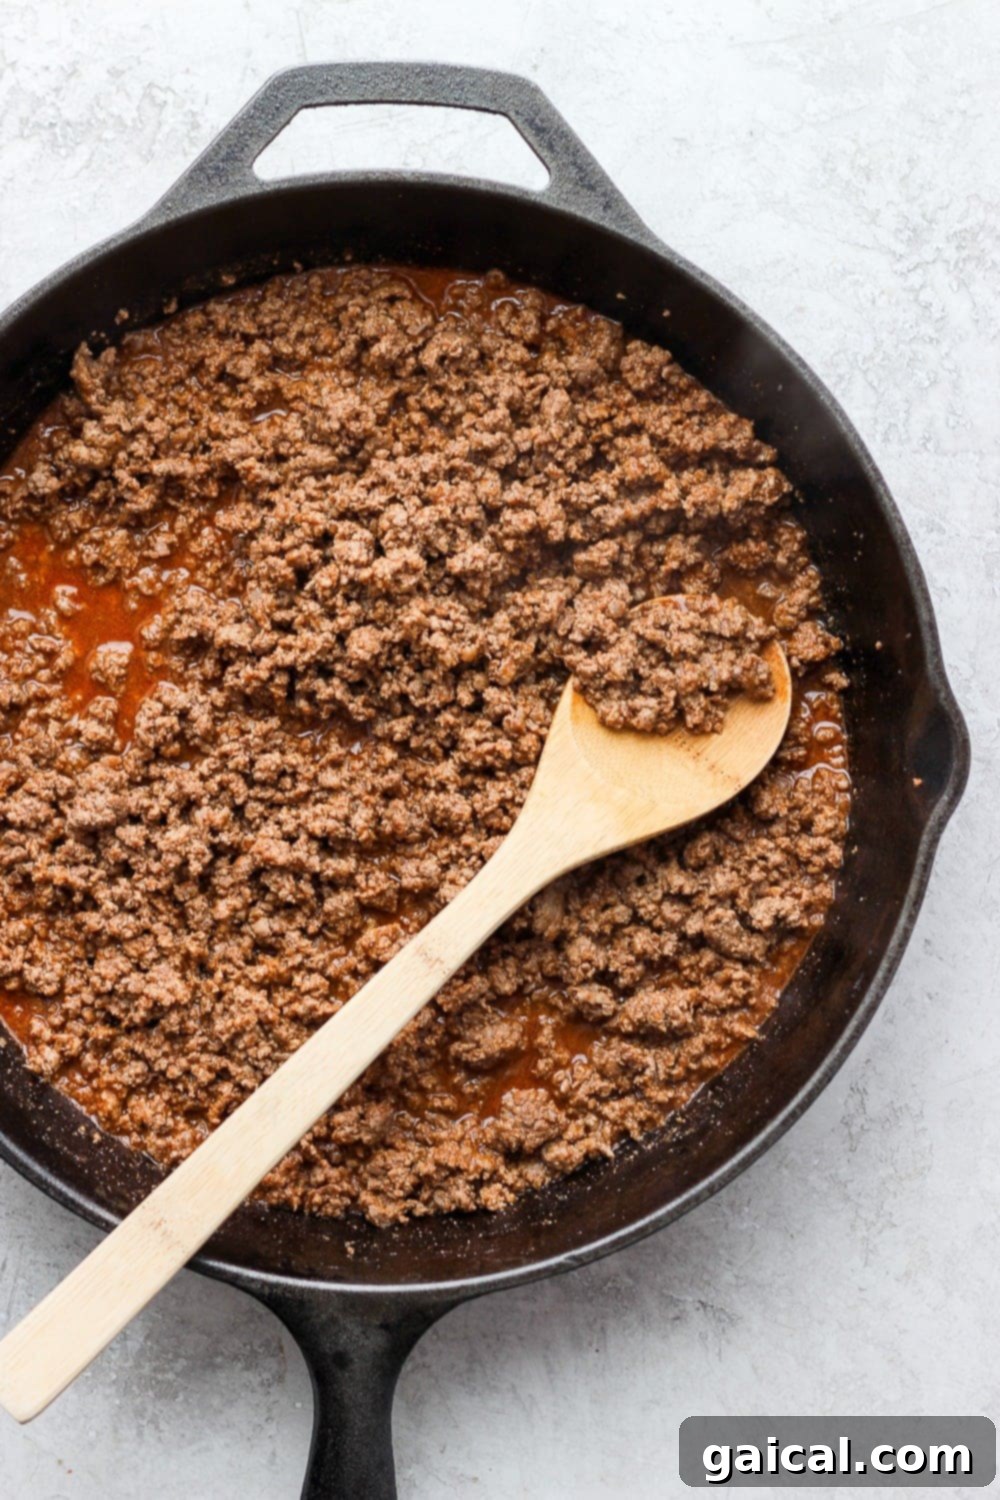
The easiest and most efficient way to prepare the ground beef is on the stovetop. Heat a large nonstick skillet over medium-high heat. Add the ground beef and break it apart with a spoon. Sauté for 7-10 minutes, stirring occasionally, until it’s almost fully browned. This quick browning develops deep flavor.
Once browned, drain any excess fat from the skillet to keep your burritos from becoming greasy. Then, stir in the tomato paste, taco seasoning, and water. Continue to cook for a few more minutes, stirring frequently, until the liquid reduces and the meat is beautifully coated in a rich, savory sauce. This should take less than 10 minutes from start to finish for the seasoning process.
Set the seasoned ground beef aside to cool slightly while you prepare for assembly. This cooling step is important for preventing your tortillas from tearing and ensuring even distribution of heat when freezing.
Ingredient Customization: While ground beef is a classic choice, feel free to experiment with ground turkey, ground chicken, or even a plant-based ground substitute for different dietary preferences. Adjust seasoning as needed!
Mastering the Art: How to Wrap a Burrito for Freezing
Successfully wrapping a burrito is crucial, especially when preparing them for the freezer. A well-wrapped burrito prevents fillings from escaping, helps maintain its shape during freezing and reheating, and ultimately contributes to a more enjoyable eating experience. The key elements are choosing the right tortilla and employing a tight, systematic folding technique.
Our **biggest tortilla tip** for **freezer burritos** is unwavering: use large flour tortillas! While corn and whole wheat tortillas have their place, they typically don’t hold up as well as flour tortillas after freezing and thawing. Flour tortillas are more pliable, less prone to tearing, and retain their soft texture better, making them ideal for this purpose. Ensure your tortillas are fresh and flexible; if they’re a bit stiff, a quick warm-up in the microwave (10-15 seconds) or on a dry skillet can make them much easier to work with.
Follow these steps for a perfectly wrapped burrito:
- Arrange Your Workstation: Lay out a clean, flat surface. Have all your cooled fillings (ground beef, roasted veggies, rice, cheese) easily accessible.
- Position the Tortilla: Place a large flour tortilla flat on your surface.
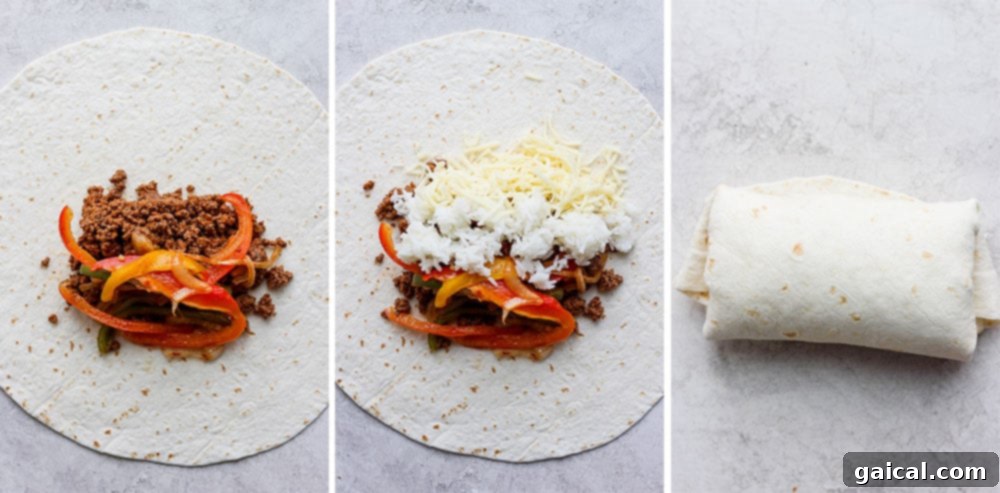
- Add the Fillings: Spoon your ingredients into the center of the tortilla, forming a compact, elongated mound. Don’t overfill! Leave about 1.5 to 2 inches clear at the top and bottom, and adequate space on the sides for folding. Ensure the fillings are relatively compact and not spread too thin.
- Fold the Bottom Edge: Take the bottom edge of the tortilla and fold it tightly over the fillings, tucking it snugly underneath them. This creates the initial secure base.
- Fold in the Sides: Next, fold the left and right sides of the tortilla inwards towards the center. Aim to create a neat, almost envelope-like shape that completely encloses the sides of the filling. This is critical for preventing leakage.
- Roll Tightly: While maintaining the folded sides, begin rolling the burrito upwards from the bottom. Use gentle but firm pressure to keep the roll tight and compact. Continue rolling until you reach the top edge, ensuring no gaps or loose spots.
The result should be a firm, neatly cylindrical burrito that feels substantial and ready for its next step. A tightly wrapped burrito is a happy **freezer burrito**!
The Ultimate Guide: How to Freeze Burritos Safely and Effectively
Freezing your homemade burritos correctly is just as important as preparing them. Proper freezing techniques ensure they maintain their quality, taste, and texture, preventing issues like freezer burn and sogginess. Follow these steps meticulously to guarantee your **freezer burritos** remain delicious for months.
- Cool Completely: This is a non-negotiable step. Allow your freshly made burritos to cool down to room temperature completely before wrapping and freezing. Placing warm burritos directly into the freezer can introduce excess moisture, leading to ice crystals and dreaded freezer burn, which compromises flavor and texture. This can take an hour or two.
- Tight Wrapping is Key: Once cool, tightly wrap each individual burrito with a piece of tin foil. The goal is to create an airtight seal. Ensure there are no gaps or exposed areas where air can reach the burrito. While some prefer an initial layer of plastic wrap, we find that a snug tin foil wrap is usually sufficient and effective in preventing freezer burn.
- Remove Air for Protection: As you wrap with tin foil, gently press out as much air as possible from between the burrito and the foil. Air is the enemy of frozen food, contributing to freezer burn and oxidation. A tight wrap with minimal air contact will best preserve the freshness and flavor of your burritos.
- Label for Convenience: Before freezing, use a permanent marker (like a Sharpie) to clearly write the name of the burrito (e.g., “Beef & Veggie Burrito”) and a “best-by” date on the tin foil. We recommend consuming them within 3 months of preparation for optimal quality. This labeling step saves you from guessing games later on!
- Organize in the Freezer: Arrange the wrapped burritos in a single layer in your freezer until they are solid. Once frozen solid, you can transfer them to a large freezer-safe bag or container to save space, but avoid stacking them too tightly initially. This helps them freeze evenly.
By following these steps, your **homemade frozen burritos** will be perfectly preserved and ready to enjoy whenever you need a quick, wholesome meal. They become a true staple in your **meal prep** arsenal!
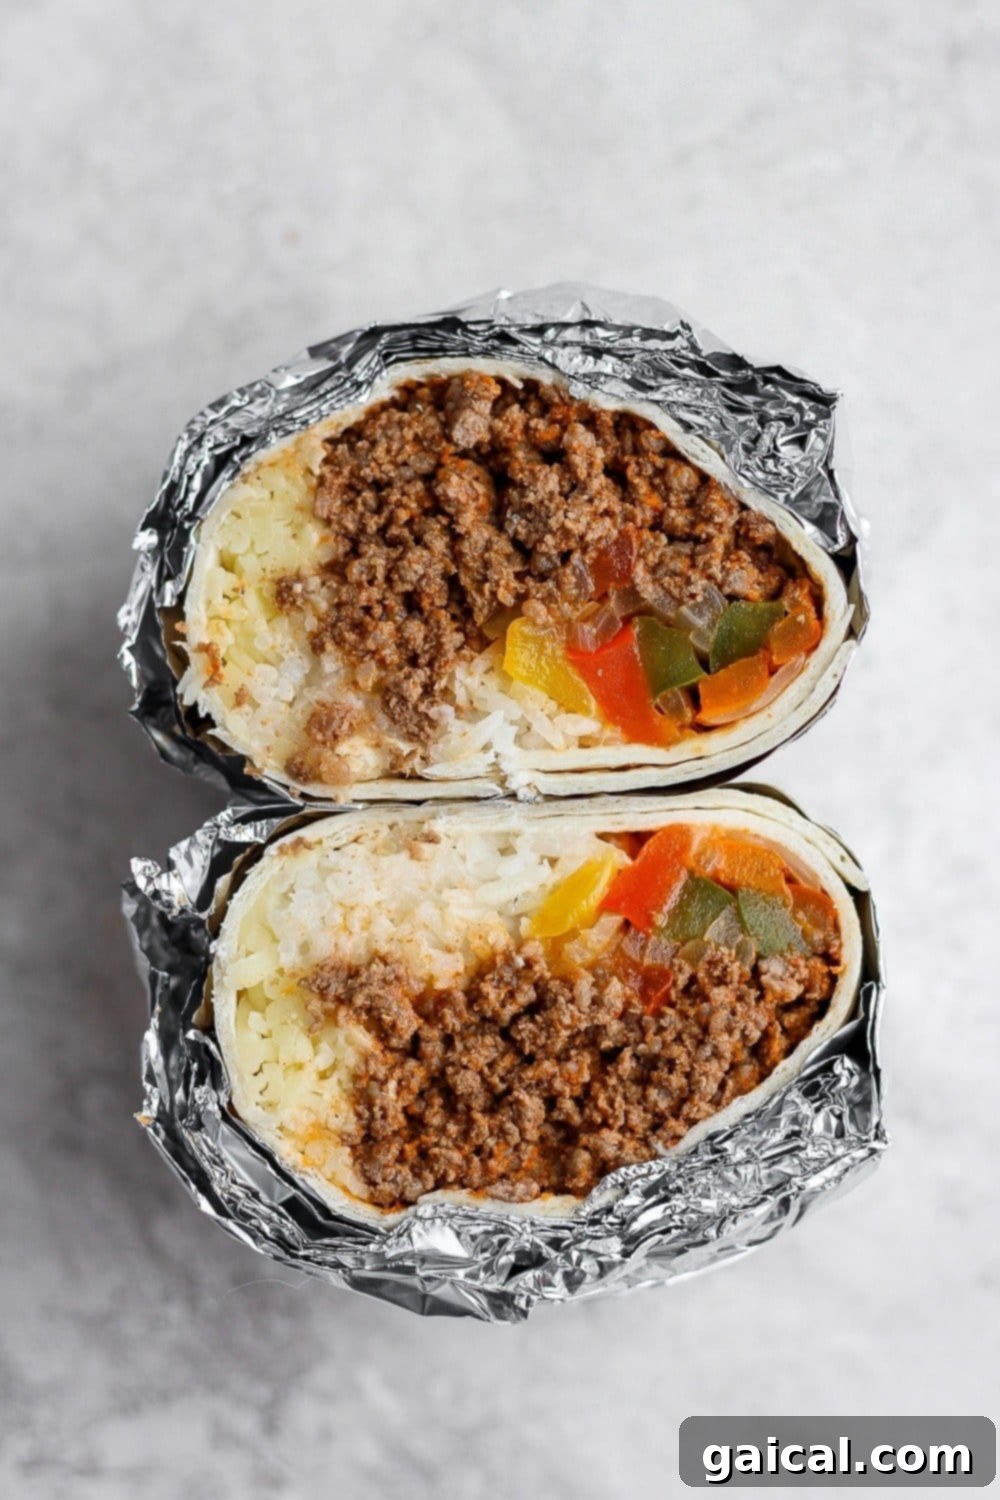
Effortless Enjoyment: How to Reheat a Frozen Burrito
One of the greatest advantages of **make-ahead freezer burritos** is the ease with which they can be transformed from a frozen block into a hot, delicious meal. Knowing the best reheating methods ensures your burrito retains its texture and flavor, tasting almost as good as fresh. The key is to heat it thoroughly without drying it out.
How long do you cook frozen burritos?
The reheating time for frozen burritos varies depending on the method you choose. Here are the most common and effective ways to reheat your **frozen burritos**:
Microwave Method (Quickest Option):
This is the fastest way to get your burrito hot and ready. First, unwrap the frozen burrito completely from its tin foil. Place it on a microwave-safe plate. Begin by defrosting it in the microwave on a medium power setting for 2-3 minutes to thaw it partially. After this initial defrost, microwave on high for an additional 1-2 minutes, or until the center is piping hot. The exact time may vary based on your microwave’s wattage and the burrito’s size. Check the internal temperature to ensure it’s safely heated.
Oven Method (For Best Texture):
If you have a bit more time, the oven method is excellent for achieving a beautifully even heat and a slightly crispy tortilla, especially around the edges. This is where the tin foil truly comes in handy! Preheat your oven to 350ºF (175ºC). Place the frozen burrito(s) directly into the preheated oven, still fully wrapped in tin foil. Baking them in foil helps to steam the tortilla and fillings, preventing them from drying out. Bake for 30-40 minutes, or until the burritos are thoroughly thawed and heated through to the center. For a slightly crispier exterior, you can unwrap the burrito for the last 5-10 minutes of baking.
Air Fryer Method (Crispy Perfection):
For a deliciously crispy exterior and a quick reheat, the air fryer is a fantastic option. First, unwrap the burrito completely from tin foil. Place it in the air fryer basket. Cook at 350°F (175°C) for 15-20 minutes, flipping halfway through, or until the burrito is heated through and the tortilla is golden and crispy. This method is great for single servings.
No matter the method, always ensure the burrito is heated to an internal temperature of 165°F (74°C) for food safety. Once reheated, you can serve your burrito as is or add your favorite fresh toppings like salsa, guacamole, sour cream, or extra cheese for an even more satisfying meal.
Expand Your Meal Prep with More Freezer Burritos!
If you’ve fallen in love with the convenience and deliciousness of these ground beef burritos, you’re in luck! The world of **freezer burritos** is vast and exciting, offering endless possibilities for nutritious and quick meals. Explore these other popular variations to keep your meal prep exciting and your fridge stocked with diverse flavors:
- Fajita Breakfast Burritos: Start your day right with these vibrant burritos packed with eggs, peppers, onions, and your favorite breakfast protein.
- Make-Ahead Breakfast Burritos: A classic breakfast option that’s perfect for busy mornings, featuring sausage, eggs, cheese, and sometimes potatoes.
- Vegetarian Black Bean Breakfast Burritos: A hearty and satisfying plant-based alternative, loaded with black beans, eggs, and flavorful spices.
These recipes demonstrate the versatility of burritos as a meal prep solution, proving that healthy, homemade meals can always be within reach!
Make Ahead Freezer Burritos
These homemade frozen burritos are so easy to make and a lifesaver when you don’t know what to pack for lunch!
Ingredients
Veggies
- 5 bell peppers, any color, thinly sliced
- 1 large yellow onion, thinly sliced
- 2 tablespoons olive oil
- 2 tablespoons taco seasoning
Rice
- 1 cup long-grain white rice
- 2.25 cups water
Beef
- 2 lbs. 85% ground beef
- 2 tablespoons tomato paste
- 5 tablespoons taco seasoning
- ¾ cup water
Other
- 8 oz. shredded white cheddar cheese
- 16 large flour tortillas
Instructions
Veggies
-
First, preheat oven to 375ºF (190°C).
-
Then, prepare bell peppers and onion by thinly slicing.
-
Place veggies on a large baking sheet and drizzle with olive oil.
-
Then, season with taco seasoning and toss to coat evenly.
-
Bake at 375ºF (190°C) for 20-25 minutes or until onions become translucent and peppers are tender.
-
Set aside to cool slightly.
Rice
-
Place 1 cup of white rice and 2.25 cups of water into a small pot.
-
Bring to a boil over medium/high heat.
-
Once boiling, reduce heat to low and cover tightly. Let simmer for around 15-20 minutes or until all water absorbs. Remove from heat and let stand, covered, for 5 minutes before fluffing with a fork.
Beef
-
While the veggies are cooking, heat a large nonstick skillet over medium/high heat.
-
Then, add in ground beef and sauté for 7-10 minutes or until almost fully browned. Drain any excess fat.
-
Add in tomato paste, taco seasoning, and water and continue cooking for a few more minutes until liquid reduces and the beef is well coated.
-
Set aside to cool slightly.
Beef Burritos Assembly & Freezing
-
Prepare beef burritos by laying out all 16 large flour tortillas on a clean surface.
-
Then, evenly distribute the cooled beef, roasted veggies, and cooked rice among the tortillas.
-
Finally, sprinkle a handful of shredded white cheddar cheese over the fillings on each tortilla.
-
Tightly wrap each burrito by first folding the bottom edge over the filling and tucking, then folding in the sides, and finally rolling it up firmly from the bottom to create a secure, compact burrito.
-
Once cooled, wrap each individual burrito tightly in a piece of tin foil, removing as much air as possible to prevent freezer burn. Label with contents and date.
-
Store in the freezer for up to 3 months for optimal freshness and quality.
Nutrition
Carbohydrates: 36 g,
Protein: 19 g,
Fat: 18 g,
Fiber: 3 g,
Sugar: 3 g
Nutrition information is automatically calculated, so should only be used as an approximation.
Don’t forget to tag your posts on social media with the hashtag #fitfoodiefinds, we’d love to see what you’re up to!